Dräger Polytron 8100 User manual

WARNING
Strictly follow the Instructions for Use.
The user must fully understand and strictly observe the
instructions. Use the product only for the purposes specified
in the Intended use section of this document.
!
Dräger Polytron 8100
Instructions for Use
i
en Instructions for Use
5
de Gebrauchsanweisung
46
fr Notice d’utilisation
88
es Instrucciones de uso
128
ru
170
zh 安装说明
212


1
5
4
3
2
5
1
4
3
10
7
8
9
2
6
3
4
5
2
1
3
9
5
2
1
14
13
3
4
5
6
7
8
14
2
11
12
15
AB C
D
E

1
2
3
4
1
2
1
2
3
4
1
2
VDC
+
-
mA
VDC
+
-
mA
FG
IH
J K
L
t [s]
1,1
[mA]
0,7
5
3
t [s]
T 1
4
20
[mA]
T 2
3
SAMPLE

Dräger Polytron 8100 5
Contents
1 For your safety.........................................................7
1.1 General safety statements.........................................7
1.2 Definitions of alert icons.............................................7
2 Description ...............................................................8
2.1 Product overview .......................................................8
2.2 Intended use..............................................................8
2.3 Intended operating area and conditions.....................8
2.4 Design........................................................................8
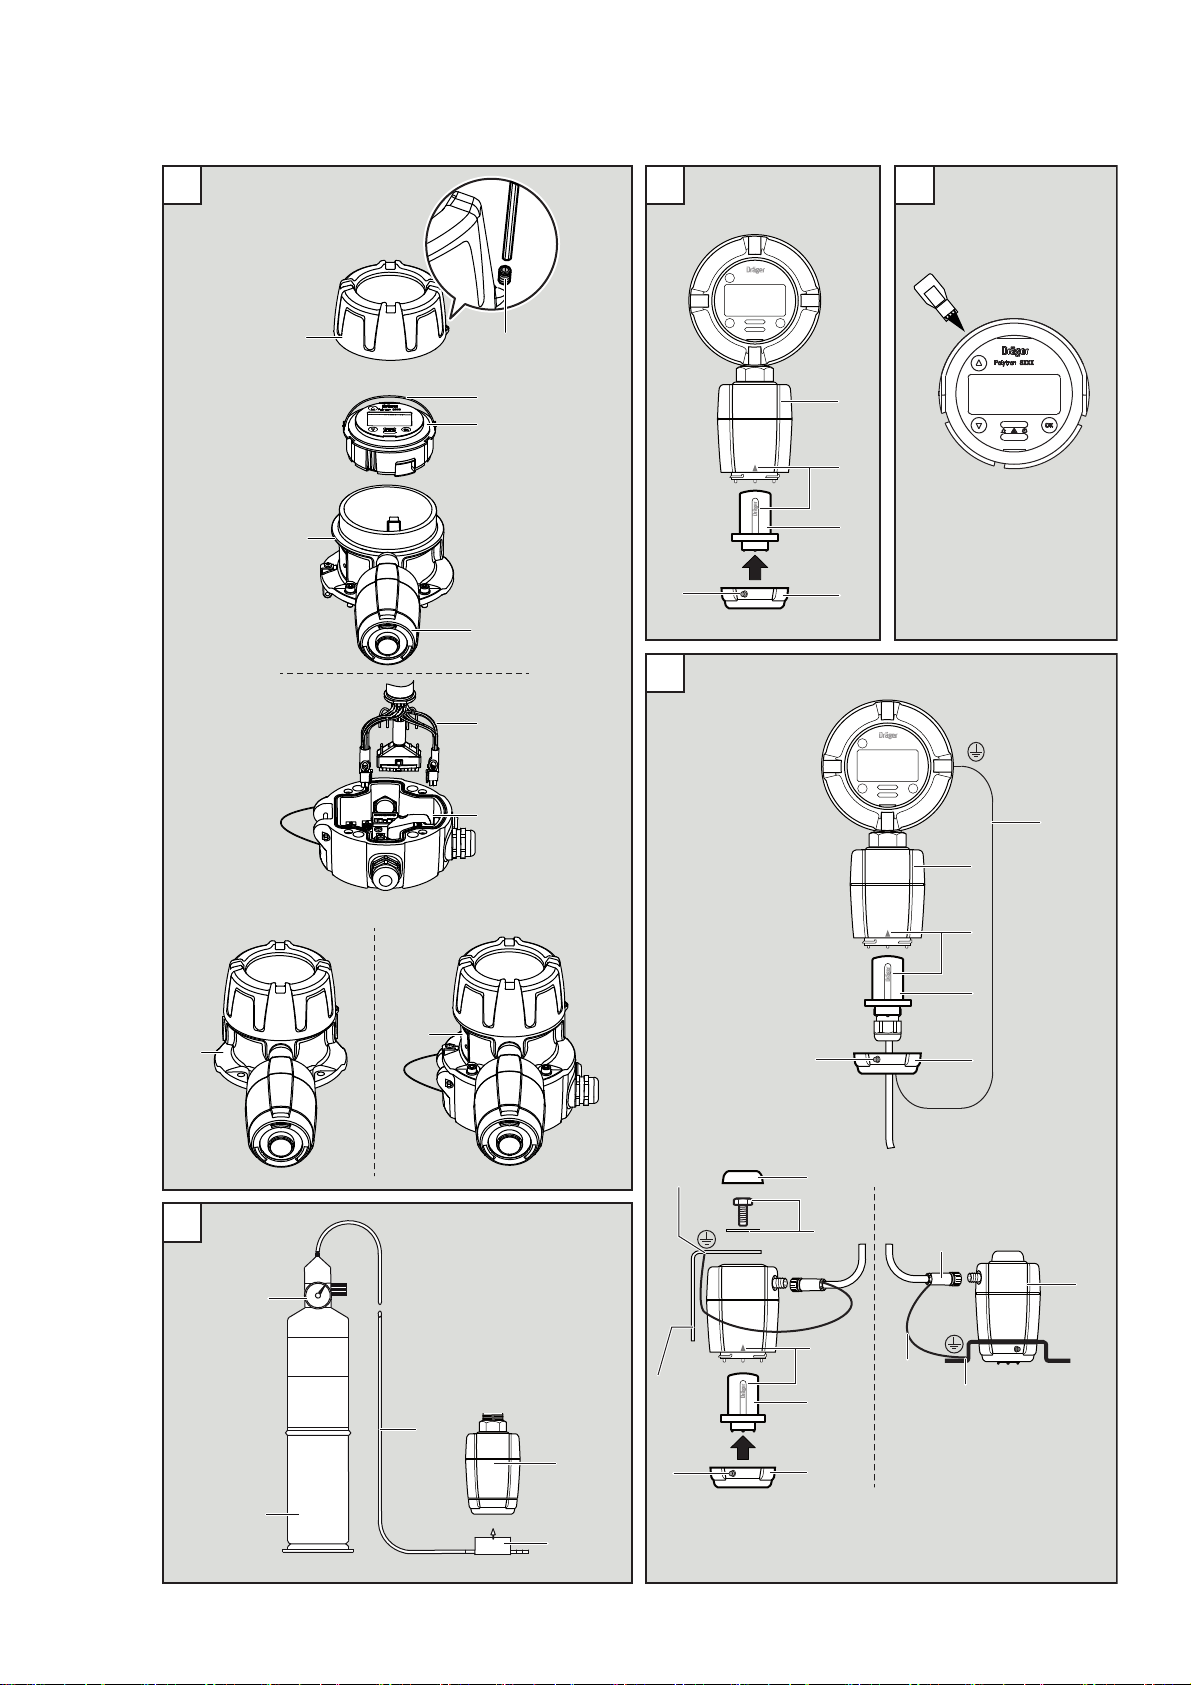
3 Installation................................................................9
3.1 General information for installation ............................9
3.2 Installation restrictions ...............................................9
3.3 Impedance of signal loop.........................................10
3.4 Mechanical installation.............................................10
3.5 Electrical installation without Docking Station..........10
3.5.1 Electrical connection for 4-20 mA/HART interface...10
3.5.2 Electrical connection for fieldbus interface...............10
3.5.3 Relay option.............................................................11
3.6 Electrical installation with Docking Station...............11
3.6.1 Field wiring...............................................................11
3.7 Installing sensor.......................................................12
3.8 Installation of EC sensing head remote...................12
3.8.1 Wall or pipe mounting kit..........................................12
3.8.2 Installing sensor.......................................................12
3.9 Connecting the EC sensing head remote to ...............
Polytron 8100 .......................................................................12
3.10 Connecting the instrument to a controller
from Dräger..............................................................12
3.11 Connecting the instrument to a PC..........................12
3.12 Dräger PolySoft PC software (optional)...................12
3.13 Installing software dongles.......................................13
4 Operation................................................................13
4.1 Normal operation .....................................................13
4.1.1 Analog signals..........................................................13
4.2 The display and LEDs..............................................14
4.2.1 Measuring mode ......................................................14
4.2.2 Special states...........................................................14
4.2.3 The LED symbols.....................................................14
4.2.4 Status indicators in the display ................................14
4.3 Activating the Info mode ..........................................15
4.4 Activating the Quick Menu.......................................15
4.5 Menu navigation.......................................................15
4.5.1 Password .................................................................16
4.5.2 Graphic symbols ......................................................16
4.5.3 Changing parameter values or statuses ..................16
4.5.4 Exiting the menu ......................................................16
5 Menu........................................................................16
5.1 Menu overview.........................................................17
5.2 Information instrument .............................................18
5.2.1 Warning messages ..................................................18
5.2.2 Fault messages........................................................18
5.2.3 Installed modules.....................................................18
5.3 Information sensor ...................................................18
5.3.1 Display last calibration date.....................................18
5.3.2 Display next calibration due date.............................18
5.3.3 Vitality ......................................................................18
5.3.4 Sensor temperature .................................................18
5.4 Information data-logger........................................... 18
5.4.1 Display the data-logger status................................. 18
5.4.2 Display graph .......................................................... 18
5.5 Calibration............................................................... 18
5.5.1 Zero calibration ....................................................... 18
5.5.2 Span calibration ...................................................... 18
5.5.3 Auto calibration ....................................................... 18
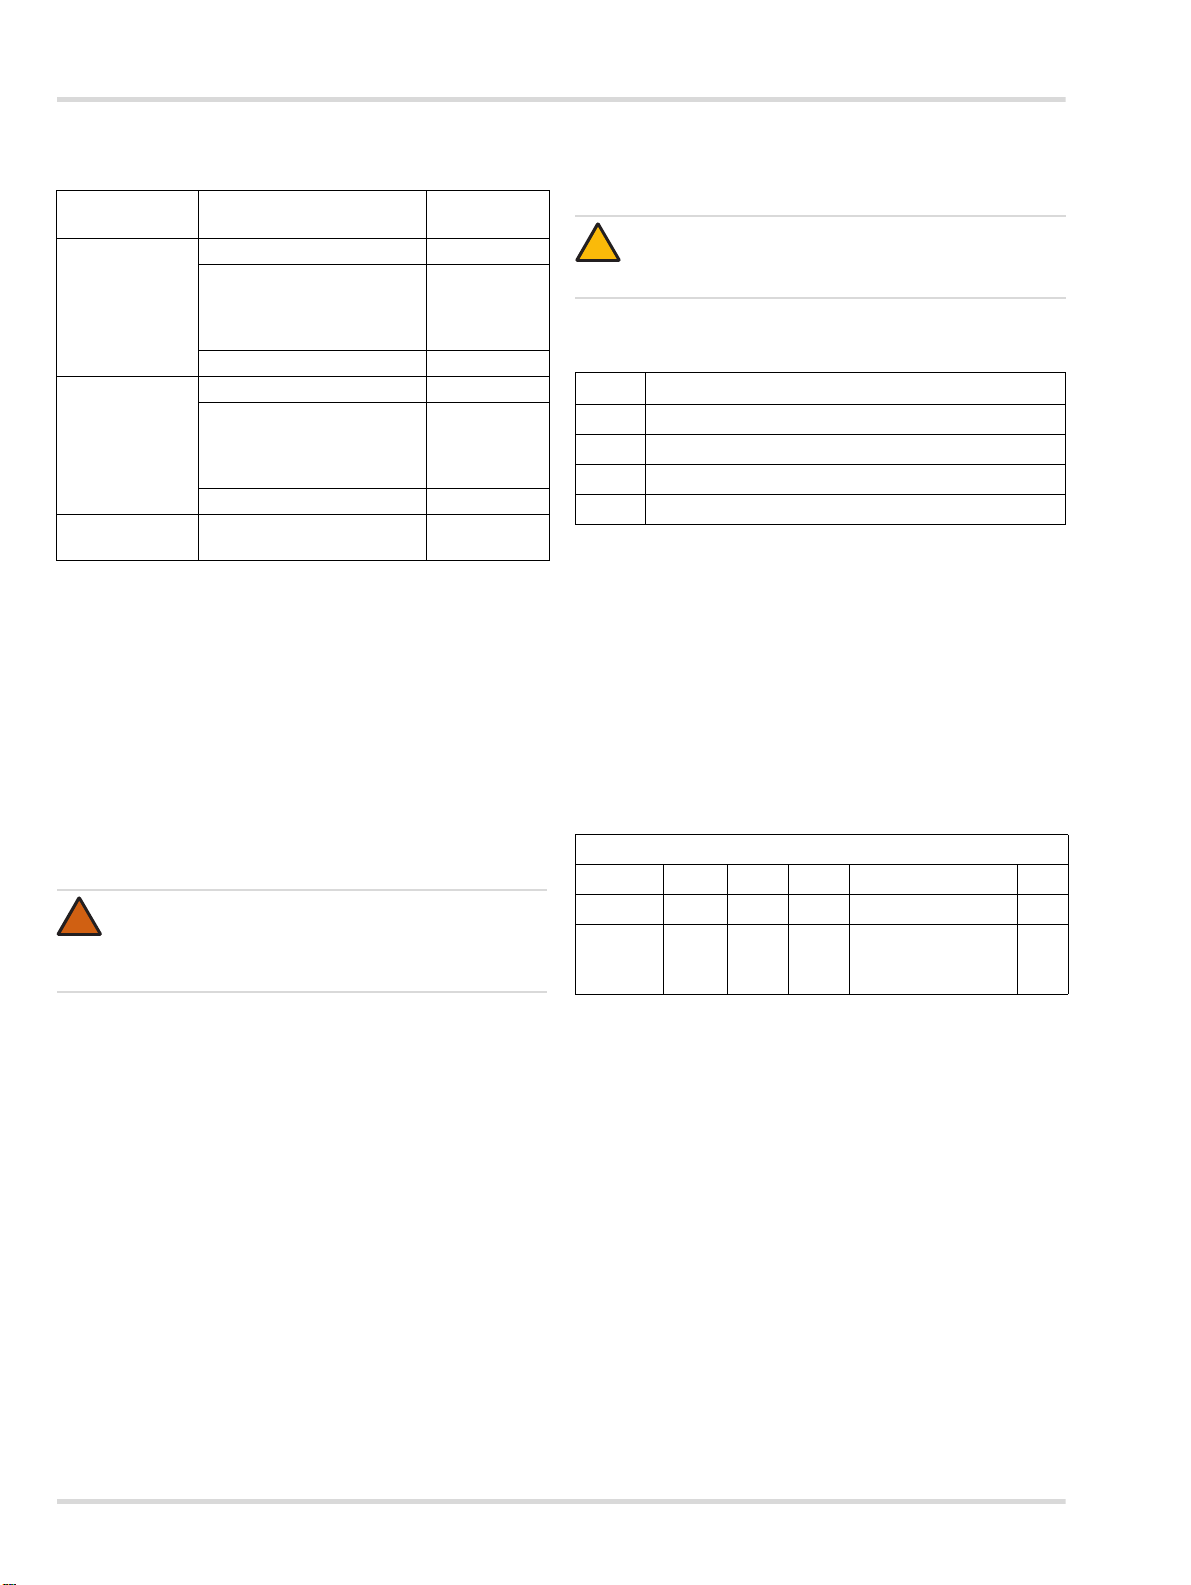
5.6 Settings SIL activation............................................. 19
5.7 Combinations of acknowledgments, latching and
the corresponding relay/ LED status....................... 19
5.7.1 Acknowledgments and latching............................... 19
5.7.2 LED status:.............................................................. 19
5.7.3 Combinations with corresponding LED and
relay status:............................................................. 20
5.8 Settings instrument ................................................. 21
5.8.1 Alarm settings ......................................................... 21
5.8.2 Passwords............................................................... 22
5.8.3 Date and time.......................................................... 22
5.8.4 Language................................................................ 22
5.8.5 Function key............................................................ 23
5.8.6 Device initialization.................................................. 23
5.8.7 Bump test................................................................ 23
5.8.8 Software dongle ...................................................... 23
5.8.9 Display settings....................................................... 23
5.9 Settings communication.......................................... 24
5.9.1 HART interface........................................................ 24
5.9.2 Analog interface ...................................................... 24
5.9.3 Modbus ................................................................... 26
5.9.4 Profibus address ..................................................... 26
5.10 Settings sensor ....................................................... 27
5.10.1 Sensor change........................................................ 27
5.10.2 Auto CAL................................................................. 27
5.10.3 Sensor test.............................................................. 27
5.10.4 Sensor lock ............................................................. 27
5.10.5 Sensor type............................................................. 27
5.10.6 Gas settings ............................................................ 28
5.10.7 Reset sensor........................................................... 28
5.10.8 Calibration interval .................................................. 28
5.10.9 Set sensor test ........................................................ 28
5.10.10Fast response ......................................................... 28
5.10.11Display capture ....................................................... 28
5.11 Data-logger ............................................................. 29
5.11.1 Data-logger on or off ............................................... 29
5.11.2 Set data-logger........................................................ 29
5.11.3 Clear data-logger .................................................... 29
6 Maintenance .......................................................... 30
6.1 Maintenance intervals ............................................. 30
6.1.1 During commissioning............................................. 30
6.1.2 Every 6 months....................................................... 30
6.1.3 Change sensor on demand..................................... 30
6.2 Calibration............................................................... 30
6.2.1 Zero Calibration....................................................... 31
6.2.2 Span calibration ...................................................... 31
6.2.3 Auto Calibration....................................................... 32
6.3 Troubleshooting ...................................................... 33
6.3.1 Fault reference........................................................ 33

6Dräger Polytron 8100
6.3.2 Warning reference...................................................34
6.4 Replacing the sensor...............................................35
7 Factory default settings........................................36
7.1 Settings which can be changed via the menu .........36
7.2 Fixed settings ..........................................................37
8 Sensor principle ....................................................37
9 Disposing the instrument .....................................37
10 Technical data........................................................38
10.1 Approvals.................................................................38
10.1.1 ATEX, IECEx, UL, CSA...........................................38
10.1.2 DIN EN 50104 for DrägerSensor O2 (6809720)......38
10.1.3 DIN EN 50104 for DrägerSensor O2LS (6809630) .41
10.2 Marking....................................................................43
10.3 Signal transmission to central controller..................43
10.3.1 Analog signal...........................................................43
10.4 Power supply and relays .........................................43
10.5 Fieldbus specifications ............................................44
10.6 Physical specifications.............................................44
10.7 Environmental parameters ......................................44
10.8 Environmental influences ........................................44
10.9 Tightening torque for instrument threads.................44
10.10 Tightening torque and size for field wiring terminals44
11 Accessories and spare parts................................45
11.1 Docking Station .......................................................45
11.2 Accessories .............................................................45
11.3 Spare parts..............................................................45

For your safety
Dräger Polytron 8100 7
1 For your safety
1.1 General safety statements
Before using this product, carefully read the Instructions for
Use (IfU) of the instrument and the relevant sensor.
Strictly follow the Instructions for Use. The user must fully
understand and strictly observe the instructions. Use the
product only for the purposes and under the conditions
specified in this document.
Do not dispose of the Instructions for Use. Ensure that they
are retained and appropriately used by the product user.
Only fully trained and competent users are permitted to use
this product.
Comply with all local and national laws, rules and
regulations associated with this product.
Only trained and competent personnel are permitted to
inspect, repair and maintain the product as detailed in
these Instructions for Use. Further maintenance work that
is not detailed in these Instructions for Use must only be
carried out by Dräger or personnel qualified by Dräger.
Dräger recommends a Dräger service contract for all
maintenance activities.
Maintenance must be performed as described, see
Section 6 on Page 30.
Use only genuine Dräger spare parts and accessories.
Otherwise the proper functioning of the product may be
impaired.
The flameproof / explosion proof joints are not in
accordance with the relevant minimum or maximum values
of EN/IEC 60079-1. The joints are not intended to be re-
worked by the user..
Only operate the product within the framework of a risk-
based alarm signaling concept.
Safe connection of electrical devices
Before connecting this instrument to electrical devices not
mentioned in the IfU consult the manufacturer or an expert.
Using the product in areas subject to explosion hazards:
Instruments or components for use in explosion-hazard
areas which have been tested and approved according to
national, European or international Explosion Protection
Regulations may only be used under the conditions
specified in the approval and with consideration of the
relevant legal regulations.
The instruments or components may not be modified in any
manner. The use of faulty or incomplete parts is forbidden.
The appropriate regulations must be observed at all times
when carrying out repairs on these instruments or
components.
As long as no EC-Type Examination Certificate per
Annex II, clauses 1.5.5, 1.5.6 and 1.5.7 of Directive 2014/
34/EU exists, the measuring function of the gas detection
transmitter is not covered. This note does not apply to the
transmitter measuring oxygen inertisation because the EC-
Type Examination Certificate is available.
1.2 Definitions of alert icons
The following alert icons are used in this document to provide
and highlight areas of the associated text that require a greater
awareness by the user. A definition of the meaning of each
icon is as follows:
WARNING
Do not open when energized - risk of Ignition of
Hazardous Atmospheres.
WARNING
Substitution of components may impair Intrinsic
Safety.
!
!
DANGER
Indicates an imminently hazardous situation which, if
not avoided, will result in death or serious injury.
WARNING
Indicates a potentially hazardous situation which, if not
avoided, could result in death or serious injury.
CAUTION
Indicates a potentially hazardous situation which, if not
avoided, could result in physical injury, or damage to
the product or environment.
It may also be used to alert against unsafe practices.
NOTICE
Indicates additional information on how to use the
product.
!
!
!
i
i

8Dräger Polytron 8100
Description
2 Description
2.1 Product overview
Refer to figure A on the fold-out page.
1 Enclosure lid
2 Set screw (2 mm Allen screw)
3 Handle
4 PCB unit (and optional relay)
5 Enclosure bottom
6 Sensor
7 Feed-through cable
8 Docking station
9 Explosion proof instrument
10 Explosion proof instrument with increased safety wiring
compartment (Docking Station)
2.2 Intended use
The Dräger Polytron 8100 is an explosion proof instrument for
continuous monitoring of toxic gases or oxygen in the ambient
air. The instrument is housed in a rugged stainless steel or
aluminum enclosure for indoor and outdoor applications. The
instrument can be connected through a sealed conduit or
approved cable gland to a Dräger monitoring system or a
Programmable Logic Controller (PLC). With the optional alarm
relay configuration, the instrument can be operated as a stand-
alone unit. The instrument is designed to be installed in
permanent locations and is approved for use in hazardous,
classified areas, see Section 10.1 on Page 38. With the
optionally integrated relay module, the instrument can be
operated without a central controller (with additional local
alarm signaling).
For a safe operation in accordance with BVS 13 ATEX G001 X,
the connection to a central controller is necessary. This also
applies if all relays are connected because the fault relay is not
activated during maintenance. In any case, the analog output
must be monitored because it might indicate a special status
by a current between 0 and 3.5 mA. Additionally Dräger
Polytron 8100 is available with fieldbus interfaces. Using the
fieldbus interface no relays are available. The fieldbus
interface is not in accordance with the BVS 13 ATEX G 001 X.
2.3 Intended operating area and conditions
Hazardous areas classified by zones:
The device is intended to be used only in hazardous areas
classified Zone 1 or Zone 2, within a temperature range as
marked on the device, where gases of explosion Groups IIA,
IIB or IIC and temperature class T4 or T6 (depending on the
maximum ambient temperature) or dusts of Groups IIIA, IIIB or
IIIC may be present.
Hazardous areas classified by divisions:
The device is intended to be used only in hazardous areas
Class I or II, Div. 1 or Div. 2, within a temperature range as
marked on the device, where gases or dusts of Groups A, B,
C, D or E, F, G and temperature class T4 or T6 (depending on
the maximum ambient temperature) may be present.
2.4 Design
The instrument is powered by 10 to 30 VDC (see Section 10.4
on Page 43). Gas concentrations, status messages, and menu
choices are displayed on a backlit graphic LC-display and 3
colored LEDs. The measured gas concentration is converted
to a 4 to 20 mA analog (per NAMUR recommendation NE43)
or a digital HART output signal. The instrument can be
operated as current source or sink. Optionally the instrument
can be equipped with a fieldbus interface allowing the
integration in an asset management system. Using the
fieldbus interface no relays are available. The fieldbus
interface is not in accordance with the BVS 13 ATEX G 001 X
Navigation through the menu is done by taping a magnetic
wand on the glass at the appropriate indicator.
The instrument can be configured, calibrated and maintained
non-intrusively without declassifying the area.
NOTICE
For further information regarding the usage of the
fieldbus interface (Modbus RTU, Profibus PA or
Foundation Fieldbus H1) consult:
- Technical Modbus Handbook,
- Technical Profibus Handbook or
- Technical Fieldbus Handbook
i
i

Installation
Dräger Polytron 8100 9
3 Installation
3.1 General information for installation
To ensure overall system performance and effectiveness, the
selection of an installation site for the instrument is one of the
most important factors. Strict compliance where possible and
considerable thought must be given to every detail of
installation, particularly:
the local, state, national codes and regulations that govern
the installation of gas monitoring equipment.
the electrical codes that govern the routing and connection
of electrical power and signal cables to gas monitoring
equipment.
for non-conduit installations, an approved cable gland must
be used, see Section 10.1 on Page 38 (e.g. Hawke A501/
421/A/¾” NPT or equivalent). It might be necessary to
connect the shield of the cable to the cable gland and to the
controller in order to improve RFI immunity.
the full range of environmental conditions to which the
instruments will be exposed to.
the physical data of the gas or vapor to be detected.
the specifics of the application, (e.g. possible leaks, air
movement/draft, etc.).
the degree of accessibility required for maintenance
purposes.
the types of optional and accessory equipment that will be
used with the system.
any other limiting factors or regulations that would affect
system performance or installations.
the flameproof / explosion proof enclosure provides three
¾" NPT openings, which can be used for field wiring, direct
attachment of a sensor or wiring of a remote sensor.
unused openings must be closed with a plug. For correct
tightening torques of conduit hubs, cable glands, plugs and
sensor see Section 10.9 on Page 44.
secondary circuit intended to be supplied from an isolating
source (N/A for relay circuits).
the optional increased safety terminal box provides up to
four 20 mm openings, which can be used for field wiring or
wiring of a remote sensor. The permissible cable diameter
range is 7 to 12 mm.
In case of optional increased safety terminal box, securely
screw the transmitter onto the docking station using 4
screws with a tightening torque of 8Nm.
when installed at locations exceeding ambient
temperatures of 55 °C, use only appropriate wiring,
specified for at least 25 °C above the maximum ambient
temperature.
strip wire insulation by 5 to 7 mm.
connect the wires as indicated in wiring figure Section 3 on
Page 9 (also showing grounding conductor terminal).
the wiring for the optional relay module must be selected
and fused according to the rated voltages, currents and
environmental conditions.
if stranded conductors are used, a ferrule must be used.
For further information regarding the fieldbus interface
installation consult the corresponding Technical Handbook.
3.2 Installation restrictions
The instrument must have between 10 to 30 VDC at the
instrument. This ultimately determines the distance the
instrument can be mounted from the controller or power
supply. The instrument accepts wire sizes of 12 to 24 AWG
(0.2 to 2.5 mm²). Use at least a three-conductor, shielded
cable.
The instrument must not be exposed to radiant heat that
will cause the temperature to rise beyond the limits stated
in see Section 10.7 on Page 44. The use of a reflecting
shield is recommended.
The enclosure is weatherproof within environmental
parameters and suitable for outdoor installation. The use of
the optional splash guard (6812510) is recommended to
protect the sensor from water and dust.
Each instrument must be installed and operated in an
environment that conforms to the specifications, see
Section 10 on Page 38.
To ensure proper operation of the instrument, the
impedance of the 4 to 20 mA signal loop must not exceed
500 Ohms. Depending on the operating voltage and
according to the application (e.g. HART operation), certain
minimum impedances must be observed (see Section 3.3
on Page 10). The conductors for the power supply must
have an adequately low resistance to ensure the correct
supply voltage at the instrument.
Recommended orientation: Sensor orientation downwards
as shown in Section 3.7 on Page 12.
NOTICE
The instrument may be equipped with a dust plug at
the conduit entry. This plug is not explosion proof nor
meant to be watertight, and must be removed before
connecting the instrument to a sealed conduit or
installation of a flameproof cable gland.
CAUTION
Not tested in oxygen enriched atmospheres
(>21% O2). High off-scale readings may indicate an
explosive concentration.
WARNING
Danger of explosions. Not to be used in oxygen
enriched atmospheres. None of the Polytron 8100
instruments are certified and approved to be operated
in oxygen enriched atmospheres.
i
i
!
!

10 Dräger Polytron 8100
Installation
3.3 Impedance of signal loop
3.4 Mechanical installation
Use the drilling template for mounting on a flat surface.
The mounting surface should be even.
Dräger recommends using M6, 1/4” bolts with hex socket
caps.
The instrument must be accessible for maintenance (e.g.
calibration).
The future use of accessories and maintenance equipment
must be kept in mind.
The access of the gas or vapor to the sensor must not be
obstructed.
3.5 Electrical installation without Docking
Station
Refer to the appropriate figure on the fold-out page and
proceed with the desired point.
3.5.1 Electrical connection for 4-20 mA/HART interface
Refer to figure A on the fold-out page.
1. Loosen set-screw and unscrew lid from instrument.
2. Lift the handle and pull-out the PCB unit with the main
electronics.
3. Turn PCB unit over and pull off the 5-pin connector.
4. Connect the three wires for power and signal to the
appropriate terminal as indicated in the following wiring
table and figure F or G.
5. Fasten terminal screws with the correct torque according to
the table tightening torque and wire size for field wiring
terminal, see Section 10.10 on Page 44.
6. If operated as a stand alone instrument, wire pin 3 to pin4.
7. Plug connector back into socket and tighten screws.
8. The cable shielding should only be connected at the
controller
9. Place PCB unit back into the enclosure.
10.Screw the lid back on, until it is seated (see Section 10.9
on Page 44), and tighten set-screw.
3.5.2 Electrical connection for fieldbus interface
Refer to figure A on the fold-out page.
1. Loosen set-screw and un-screw lid from instrument.
2. Lift the handle and pull-out the PCB unit with the main
electronics.
3. Turn PCB unit over and pull off the 2-pin and 4-pin
connector.
4. Connect the two wires for power and the four wires for
signal to the appropriate terminals as indicated in the
following wiring table and figure H or I.
Operating mode Impedance range of the
signal loop Supply
voltage range
Operation
without HART
communication
0 to 230 at 10 V DC
Rising linearly with the
supply voltage from:
0 to 230 at 10 V to
0 to 500 at 16 V 10 to 18 V DC
0 to 500 18 to 30 V DC
Operation with
HART
communication
(HART mode)
230 to 270 at 13 V DC
Rising linearly with the
supply voltage from:
230 to 270 at 11 V to
230 to 500 at 16 V 11 to 16 V DC
230 to 500 18 to 30 V DC
HART Multidrop
operation 230 to 500 10 to 30 V DC
WARNING
Only for conduit installations: To reduce the risk of
Ignition of Hazardous Atmospheres, the conduit must
be sealed within 18" of the enclosure.
!
CAUTION
Ensure wiring for relays and connections for sensor
are made before applying power.
Figure Connection diagram for
G Operation as a current source
F Operation as a current sink
I Profibus PA und Foundation Fieldbus H1
H Modbus RTU
5-pin connector (voltage supply and current interface
Pin 1 2 3 4 5
Mark PWR+ PWR- PWR- 4-20 mA PE
Function V+ V- V- 4 to 20 mA signal
(Operation as
source or sink)
PE
!

Installation
Dräger Polytron 8100 11
5. Fasten terminal screws with the correct torque according to
the table tightening torque and wire size for field wiring
terminal, see Section 10.10 on Page 44.
6. Plug connector back into socket and tighten screws.
7. Place PCB unit back into the enclosure.
8. Screw the lid back on, until it is seated (see Section 10.9
on Page 44) and tighten set-screw.
3.5.3 Relay option
If the relay option has been installed, the wires for the alarm
devices will be connected to the 9-pin connector. A piece of
wire insulation (heat shrink tube) and rubber boot are supplied
for extra protection for relay wires.
1. Turn PCB unit over and pull off the 9-pin connector.
2. Cut the heat shrink tube as needed and slide over the relay
wires before insertion into the 9-pin connector.
3. Position the heat shrink tube at the edge of wire insulation
and use a heat gun to shrink the tubing securely onto wire
insulation.
4. Slide rubber boot over the wires.
5. Connect the wires for alarm 1 (pre alarm), alarm 2 (main
alarm) and fault alarm to the terminals, as indicated in the
following wiring table.
6. Fasten terminal screws with the correct torque according to
the table tightening torque and wire size for field wiring
terminals, see Section 10.10 on Page 44.
With factory default settings and during normal operation,
the relays are energized. This provides “fail-safe”
operation. The terminal designators indicated in the
following wiring table are shown as factory default and
normal operation mode, see Section 7 on Page 36.
7. Plug connector back into socket and tighten screws.
8. Put rubber boot over connector.
NO = Normally open, NC = Normally closed, C = Common
3.6 Electrical installation with Docking
Station
Installing this configuration is a two-step process.
First, the Docking Station is mounted and connected to the
field wires. Second, the main instrument enclosure with the
electronics and sensor is attached to the Docking Station.
The Docking Station can be pre-mounted, wired and sealed
with the supplied cover. Once the site is ready for
commissioning, the instrument is then hooked up to the
Docking Station and taken into operation; avoiding that the
instrument is damaged during the construction phase.
The connection between the Docking Station and the main
instrument is realized via a ‘feedthrough’. Depending on the
instrument selected, there are 2 types of feed-through.
feedthrough 3 wires for power (part number 4544182)
feedthrough 9 wire for power and relay (part number
4544169)
3.6.1 Field wiring
For field wiring of Docking Station refer to Instructions for use
9033242.
2-pin connector (voltage supply)
Pin 1 2
Mark PWR+ PWR-
Function V+ V-
4-pin connector fieldbus connections
Pin 1 2 3 4
Mark DATA- A DATA- B GND SHIELD
Functio
nSIGNAL
LINE A SIGNAL
LINE B GROUND SHIELD
NOTICE
Using the fieldbus interface no relays are available.
The fieldbus interface is not in accordance with the
BVS 13 ATEX G 001 X.
WARNING
At voltages >30 VAC or >42.4 V DC, the relay cables
must be enclosed in protective tubing, or double-
insulated cables must be used.
i
i
!
NOTICE
To ensure that a fault is recognized - without having to
look at the instrument - an alarm device must be
connected to the fault relay.
9-Pin connector (relays)
Fault relay A2 relay A1 relay
Pin 123456789
Mark FLT
NO FLT
CFLT
NC A2
NO A2
CA2
NC A1
NO A1
CA1
NC
i
i

12 Dräger Polytron 8100
Installation
3.7 Installing sensor
Refer to figure B on the fold-out page.
1. Loosen set-screw (2), 2mm Allen screw.
2. Unscrew bayonet ring (3) and remove blank.
3. Remove sensor from packaging.
4. Insert sensor (4) into the opening.
The Dräger logo on the sensor must point to the mark on
the sensing head housing (5).
5. Lock sensor with bayonet ring.
6. Tighten set-screw (2).
Mandatory for Zone 22 installations.
3.8 Installation of EC sensing head remote
3.8.1 Wall or pipe mounting kit
Refer to figure D on the fold-out page.
1. Install wall or pole mount set (8) as specified in the
assembly instructions.
2. Screw the EC sensing head to the wall or pole mount
bracket (8) using screw and washer (6).
3. Select the appropriate protection cap (7) and place it on the
screw.
3.8.2 Installing sensor
1. Loosen set-screw (2), 2 mm Allen screw.
2. Unscrew bayonet ring (3) and remove blank.
3. Remove sensor from packaging.
4. Insert sensor (4) into the opening.
The Dräger logo on the sensor must point to the mark on
the sensing head housing (5).
5. Lock sensor with bayonet ring.
6. Tighten set-screw (2). Mandatory for Zone 22 installations.
3.9 Connecting the EC sensing head remote
to Polytron 8100
Refer to figure D on the fold-out page.
1. Connect remote cable plug (11), to the EC sensing head
remote (12) and lock.
2. Attach the shield wire (13) to the grounding point (14) of the
bracket (M5 thread).
3. Loosen set-screw (2), 2 mm Allen screw.
4. Unscrew bayonet ring (3) and remove blank. Either
bayonet ring can be used: black or silver.
5. Insert the remote adapter (9) in the opening.
The Dräger logo on the sensor adapter must point to the
mark on the sensing head housing (5).
6. Lock sensor adapter with bayonet ring (3).
7. Attach the shield wire (15) to the ground lug of the
enclosure.
8. Tighten set-screw (2). Mandatory for Zone 22 installations.
3.10 Connecting the instrument to a controller
from Dräger
For hook-up information, please refer to the Instructions for
Use which was included with the Dräger controller (Connecting
the Dräger Regard is only possible using a 4-20mA interface.)
Electrical connections at the controller
Connect the shield of the wires to the instrument earth ground
of the controller (e.g. chassis, ground busbar, etc.).
3.11 Connecting the instrument to a PC
The separately available Polytron IRDA interface connection
kit (4544197) is intended for use with the Polytron 8xx0 and
enables communication between the Polytron 8xx0 and a PC
using the Dräger PolySoft software.
3.12 Dräger PolySoft PC software (optional)
The PolySoft PC software is used to display instrument
information, edit configuration settings and download the
instrument data logger and event logger.
CAUTION
Observe the general installation information, see
Section 3 on Page 9.
Multiple EC sensing heads remote must not be daisy-
chained.
NOTICE
The mount kit (part number. 45 44 213) is required to
mount the EC sensor on a wall or pipe.
The sensing head should be mounted at a low-
vibration location at even temperature near a potential
leakage point (avoid direct sunlight).
!
i
i
NOTICE
The EC sensing head remote is automatically
recognized by the instrument.
NOTICE
The PolySoft PC software is not within the scope of the
EC type Examination.
CAUTION
After modifying parameters with the PolySoft PC
software or another software, verify all parameters by
downloading from the instrument or by checking them
on the Polytron 8xx0.
i
i
i
i
!

Operation
Dräger Polytron 8100 13
3.13 Installing software dongles
The following software dongles are available for the
Polytron 8100:
To install a software dongle:
Refer to figure A on the fold-out page.
1. Switch off power to the instrument or declassify the area
according to the local regulations.
2. Loosen set-screw and unscrew lid from instrument.
3. Lift the handle and pull-out the PCB unit with the main
electronics.
4. Insert the dongle in the slot with the Dräger logo facing
upwards. Refer to figure C on the fold-out page.
5. Place PCB unit back into the enclosure.
6. Screw the lid back on, until it is seated (see Section 10.9
on Page 44), and tighten set-screw.
7. Switch power back on.
4 Operation
4.1 Normal operation
1. Switch power supply on.
The instrument will go through a start-up sequence (LCD / LED
test, software version, and initialization) and start the warm-up
period. The display shows that the sensor will be ready for
measurement in hh:mm:ss (countdown) and the instrument
transmits the maintenance signal, see Section 10.3 on
Page 43. The fault relay is activated.
After the warm-up period, the instrument goes into normal
operation. The display shows the current gas concentration,
the selected gas and the units of measurement. The green
LED is lit.
4.1.1 Analog signals
The current output of the instrument during normal operation is
between 4 and 20 mA and is proportional to the detected gas
concentration.
Polytron 8xx0 uses different current values to indicate various
modes of operation. The factory default settings are user
adjustable for application specific requirements, see Section 7
on Page 36. This follows the NAMUR recommendation NE43.
Sensor test dongle
83 17 619 Activates the sensor self-test
(only for certain sensors)
Diagnostic dongle
83 17 860 Activates the sensor self-test, the
display of the sensor vitality and the
sensor diagnostic functions
(only for certain sensors and functions)
WARNING
Before leaving the instrument for normal operation,
check the configuration and calibration for the proper
settings.
NOTICE
The correct date and time settings are important for
many functions see Section 5.8.3 on Page 22.
!
i
i

14 Dräger Polytron 8100
Operation
4.2 The display and LEDs
4.2.1 Measuring mode
4.2.2 Special states
If the instrument is in a special state, a proper measurement
can no longer be guaranteed.
This is the case:
1 when the gas concentration exeeds the measuring range,
2 when a fault occurs.
3 during calibrations,
4 during bump tests,
5 the warm-up phase and
6 maintenance,
4.2.3 The LED symbols
To configure the alarm settings and for information regarding
the alarm LED status depending on the alarm configuration
refer to 5.7 on Page 19.
4.2.4 Status indicators in the display
The following status indicators may appear on the right side of
the display.
Display example Description
In normal operation, the
display shows the measured
gas concentration, the
selected gas and the unit of
measurement.
Exceeding the alarm
thresholds. Example shows
pre alarm A1.
Display example Description
Exceeding measuring range.
Fault indication (see 6.3.1 on
Page 33).
The current output of the
analog interface is set to fault
current and the fault relay is
asserted (if relay option is
installed).
For calibration, warm-up
phase, bump test and
maintenance the
symbol is displayed on the
rightsideofthedisplay.Onthe
left side corresponding
information is given.
CO ppm
0
CO A1
33
CO ppm
CO ppm
Symbol LED Description
red Alarm triggered
yellow Fault
green Power ON
Warning message available – to display warnings, see
Section 5.2.1 on Page 18.
Error message available – to display errors, see
Section 5.2.2 on Page 18.
Maintenance signal is transmitted, see Section 5.9.2 on
Page 24.
Measuring range of analog interface exceeded
Measurement less than range of analog interface
Analog interface is set to a fixed value (e.g. Multidrop HART
communication) and is not transmitting any measurement
signal.
"Preventive" maintenance: The sensor is ready for operation.
"Preventive" maintenance: The sensor is ready for operation
but is close to the end of its life cycle.
"Preventive" maintenance: The sensor is still ready for
operation but should be changed as soon as possible.
The data-logger is active in Roll mode.
To activate/deactivate, see Section 5.11.2 on Page 29.
The data-logger is active in Stack mode.
To activate/deactivate, see Section 5.11.2 on Page 29.
SIL
SIL is activated (refer to the Polytron 8xx0 Safety Manual
part number 9033307).

Operation
Dräger Polytron 8100 15
4.3 Activating the Info mode
No password required.
The Info mode is used to show instrument relevant information.
This will not interrupt the normal operation of the instrument.
Tap and hold [UP] for more than 3 seconds.
The instrument information is shown on several screens.
No changes can be made.
Tap [UP] / [DOWN] to switch between the screens.
The Info mode can be exited at any time by tapping [OK].
If no key is tapped within 30 seconds, the instrument will
automatically return to normal operation.
Example of the Info mode
Depending on sensor the screens may vary:
1. Screen - Instrument information:
Date and Time
Software version
Part number of the instrument electronics
Serial number of the instrument electronics
Instrument code
2. Screen - Sensor information:
Installed sensor
Part number of the sensor
Serial number of the sensor
Software version
Software revision
3. Screen - Sensor configuration:
Selected gas
Maximum measuring range and units for the sensor
Measuring range and units for the analog interface. Only
shown if the 4 to 20 mA interface is enabled.
A1 Alarm set point and units
A2 Alarm set point and units
4.4 Activating the Quick Menu
No password required.
Tap and hold [DOWN] for 1 to 2 seconds.
The selected information about status or instrument
settings can be retrieved (e.g. warning messages, error
messages, installed modules and calibration data, time/
concentration graph, see Section 5.8.5 on Page 23.
No changes can be made.
4.5 Menu navigation
A001.eps
07.11.2003 12:34
SW Version
: XX
Part No.
: 8317778
Serial No.
: ARUA0001
DeviceCode: 00006317
Instrument Info
1/3
A002.eps
2/3
Sensorname: O
2
Part No.
: 6809630
Serial No.
: XXXXXXX
EEPROM Typ
: 1
EEPROM Vers.: 1
Sensor Info
Scrolls upwards
Sets values
Scrolls downwards
Sets values
Confirms entry
Selects menus and functions
NOTICE
The instrument is designed for the magnetic wand
(part number 4544101: blue body, white logo) to be
used with the enclosure lid in place. If the enclosure lid
is not in place, the magnetic wand may activate two or
more buttons at once (cross-talk).
A003.eps
3/3
Gasname : O
2
Range : 25.00 Vo
4–20 SP : 25.00 Vo
Alarm A1 : 19.00 Vo
Alarm A2 : 23.00 Vo
Sensor Config.
i
i

16 Dräger Polytron 8100
Menu
4.5.1 Password
A password consists of a 4-digit alphanumeric value.
From normal operation, tap and hold [DOWN] for more
than 3 seconds.
The message “Enter the password” will be displayed.
Confirm with [OK].
The screen to enter the password will be displayed with the
first digit on the left blinking.
Tap [UP] / [DOWN] to increment or decrement this digit,
then tap [OK].
The second digit will blink; set the correct value by tapping
[UP] / [DOWN], then tap [OK].
Repeat the process for the other two digits.
Tap [OK] when the full password is displayed.
If the displayed value matches the set password, access will
be given to the menu. If an incorrect password is entered, the
instrument will indicate “wrong password” and show the
dashes and blinking digit again, see Section 5.8.2 on Page 22.
Factory default passwords:
Calibration menu: _ _ _ 1
Calibration and Settings menu: _ _ _ 2
4.5.2 Graphic symbols
Graphic symbols facilitate navigation in the various menus.
4.5.3 Changing parameter values or statuses
Select the menu item to be accessed by tapping [UP] /
[DOWN].
When the intended menu item is displayed, tap [OK].
The current value or status will be displayed.
[UP] / [DOWN] allow adjusting the value of a numerical
parameter or scrolling through preset choices.
Once the display shows the intended value or choice, tap
[OK] to validate the new parameter and return to the main
menu.
When exiting via “Back to menu” or “Previous”, all
changes will be discarded.
4.5.4 Exiting the menu
Tap [UP] to “Back to measurement” and tap [OK].
5Menu
The menu is grouped into three main segments.
Information
Specific data about the instrument, the sensor and the
measured gas are summarized in this menu. The menu can be
accessed without a password.
No changes can be made.
Calibration
Calibration of the instrument must be performed at regular
intervals as detailed in the sensor data sheet.
Settings
This sub-menu contains all functions to configure the
instrument to the application specific requirements.
Combined with the text »Back«,»Menu«, etc., exit
the menu or go back one step.
Closed folder
More functions or sub-menus are available.
Opened folder
The available functions and sub-menus are shown.
Function
When activated, functions can be executed in one or
more steps.
Selection activated
For functions that can be selected and activated,
the activation is executed by tapping [OK].
List above closed / complete
Therearenoother functions, menusorsub-menuslisted
above.
List can be scrolled upwards
There are more functions, menus or sub-menus
listed above.
List below closed / complete
Therearenoother functions, menusorsub-menuslisted
below.
List can be scrolled downwards
There are more functions, menus or sub-menus
listed below.
Next
Perform context-related action.
Number / total number of steps (screens) within
the function.
Entry
Enter data with [UP] / [DOWN].
3/3
2/2

Menu
Dräger Polytron 8100 17
5.1 Menu overview
Back to
measuring
Information page 18 Instrument page 18 Warnings page 18
Sensor page 18 Fault page 18
Calibration page 18 Datalogger page 18 Device flags page 18
Modules page 18
Settings page 21
Last cal. date page 18
Next cal. date page 18
Vitality page 18 Alarm on/off page 21
Zero calibration page 31 Sensor temp. page 18 Relay A1 page 21
Span calibration page 31 Relay A2 page 21
Auto Calibration page 32 Logger status page 18 Alarm A1 page 22
Graph page 18 Alarm A2 page 22
SIL activation page 19 Fault warm-up page 22
Instrument page 21 Alarm & relays page 21 Set alarm A1 page 22
Communication page 24 Passwords page 22 Set alarm A2 page 22
Sensor page 27 Date and time page 22 Set fault page 22
Datalogger page 29 Language page 22
Function key page 23 Calibration PWD page 36
Device init page 23 Settings PWD page 36
Datalogr. on/off page 29 SW dongle page 23
Data logger page 29 Bump test page 23 Display contrast page 23
Clear datalogger page 29 Display page 23 Display mode page 23
Display test page 23
Sample time page 29
Peak/Average page 29 Polling address page 24
Trigger on/off page 29 Unique identifier page 24
Trigger value page 29 Tag page 24
Stack/Roll page 29 Dräger REGARD page 24
HART interface page 24
Analog interface page 24 Fault current page 24
Modbus page 24 Warning page 24
Profibus address page 26 Warning interval page 25
Warning current page 25
Sensor change page 27 Maint. signal page 25
Auto calibration page 27 Maint. current page 25
Sensortest page 27 Beamblock on/off 1) page 25
Sensor lock page 27 Beambl. current 1) page 25
Gas settings page 28 Beamblock limit page 25
Init. channel page 28 Analog Offset page 25
Calibration interval page 28 Analog span page 25
Set sensortest page 28 Set current page 25
Display capture page 28 Set concentr. page 26
Set fault page 26
Set warning page 26
Set mainten. page 26
Set beamblock 1) page 26
1) Parameter not used by Dräger Polytron 8100. Modbus address page 26
Modbus baudrate page 26
Modbus parity page 26

18 Dräger Polytron 8100
Menu
5.2 Information instrument
5.2.1 Warning messages
This function displays warning messages in plain text and the
corresponding number see Section 6.3.2 on Page 34. The [ ! ]
symbol is displayed if there are warning messages available.
1. Select Information > Instrument > Warnings and
confirm.
If there are several warning messages available, there is
an indicator in the upper right-hand corner of the display,
e.g. 1/3 = Screen 1 of 3.
5.2.2 Fault messages
This function displays fault messages in plain text and the
corresponding number see Section 6.3.1 on Page 33. The [ X ]
symbol is displayed if there are fault messages available.
1. Select Information > Instrument > Faults and confirm.
2. If there are several fault messages available, there is an
indicator in the upper right-hand corner of the display e.g.
1/2 = Screen 1 of 2.
5.2.3 Installed modules
This function displays an overview of the installed hardware
modules.
1. Select Information > Instrument > Modules and confirm.
The list contains modules. The installed modules are
identified by the symbol. The symbol means that the
module is not installed.
2. Highlight a module and access detailed information with
[OK].
5.3 Information sensor
This function contains information on calibration dates.
5.3.1 Display last calibration date
1. Select Information > Sensor > Last cal. date and
confirm. The calibration date, unit, gas and concentration
of the last calibration are displayed.
5.3.2 Display next calibration due date
1. Select Information > Sensor > Next cal. date and
confirm.
5.3.3 Vitality
1. Select Information > Sensor > Vitality and confirm. The
sensor vitality is displayed in %.
5.3.4 Sensor temperature
1. Select Information > Sensor > Sensor temp. and
confirm. The current and the highest sensor temperature is
displayed.
5.4 Information data-logger
These functions contain information about the data-logger.
5.4.1 Display the data-logger status
1. Select Information > Data logger > Logger status and
confirm.
2. To change the status see Section 5.11 on Page 29.
5.4.2 Display graph
Display the history of the past 15-minutes on a time/
concentration graph.
1. Select Information > Data logger > Graph and confirm.
5.5 Calibration
5.5.1 Zero calibration
Allows adjusting the zero reference point of the sensor, see
Section 6.2.1 on Page 31.
5.5.2 Span calibration
Allows adjusting the sensitivity to match the known
concentration of an applied calibration gas, see Section 6.2.2
on Page 31.
5.5.3 Auto calibration
Automated sequence reducing the number of steps during
calibration; see Section 6.2.3 on Page 32.

Menu
Dräger Polytron 8100 19
5.6 Settings SIL activation
This function protects the instrument against unauthorized
changes. Changing the configuration (e.g., changing the
measuring range from 100 %LEL to 50 %LEL) will force the
user to confirm all safety-relevant parameters before the
instrument returns to normal operation.
1. Select Settings > Instrument > SIL activation. The
sensor test dongle or sensor diagnostic dongle must be
connected for SIL 2 activation and operation.
2. Select Enable or Disable and confirm.
5.7 Combinations of acknowledgments,
latching and the corresponding relay/
LED status
This section gives explanation of combining latching,
acknowledgment and pre-acknowledgment of alarms and the
corresponding LED status.
5.7.1 Acknowledgments and latching
Latching means that once the alarm level is reached, the
instrument will trigger the alarm. It will remain in alarm status
even if the gas concentration subsequently does not meet the
alarm condition any more. To clear a latching alarm it has to be
acknowledged with [OK].
In non-latching mode, the alarm status clears if the gas
concentration does not meet the alarm condition anymore.
Acknowledgeable means that alarm relay and LED can be
reset before alarm condition clears.
Pre-acknowledgeable means that the alarm status is
acknowledgeable before the alarm condition clears.
However, the alarm relay and LED stay active until the
alarm condition clears.
Non-acknowledgeable means that alarm relay and LED
can not be reset until the alarm condition clears.
5.7.2 LED status:
When the first alarm (pre alarm) has been triggered the red
LED flashes in single mode.
When the second alarm (main alarm) has been triggered
the red LED flashes in double mode.
With the non-relay version the red LED flashes to inform
visually and no relay is energized. To energize the A1 or A2
relay the optional relay board must be installed.
For LED flashing patterns depending on combinations of
acknowledgements and latching, see 5.7.3 on Page 20.
NOTICE
SIL lock is only available for certain sensors (refer to
the Polytron 8xx0 Safety Manual part number
9033307).
SIL lock can only be activated if the sensor test is
activated see Section 5.10.9 on Page 28.
NOTICE
When SIL is activated, the instrument displays all
safety-relevant parameters and settings before
returning to normal operation. Carefully review all
parameters and settings and confirm.
i
i
i
i

20 Dräger Polytron 8100
Menu
5.7.3 Combinations with corresponding LED and relay status:
Combination(s) Diagram Relay (if a realy board is installed), LED, and symbol status
Case: Alarm is acknowledged before the alarm condition cleared.
Latching
Acknowledgeable 1 Alarm condition is present.
Relay (b) is energized and symbol (b) is active.
LED (c) starts flashing.
2 Alarm condition is acknowledged (d) but is still present.
Relay (b) and symbol (b) are reset.
LED (c) is lit continously to indicate the present alarm condition.
3 Alarm condition clears.
LED (c) is off.
Non-latching
Acknowledgeable
Case: Alarm is acknowledged after the alarm condition cleared.
Latching
Acknowledgeable 1 Alarm condition is present.
Relay (b) is energized and symbol (b) is active.
LED (c) starts flashing.
2 Alarm condition clears.
Relay (b) stays energized and symbol (b) stays active.
LED (c) keeps flashing.
3 Alarm is acknowledged (d)
Relay (b) and symbol (b) are reset
LED (c) is off.
Latching
Pre-acknowledgeable
Latching
Non-acknowledgeable
Case: Alarm is acknowledged before the alarm condition cleared.
Latching
Pre-acknowledgeable 1 Alarm condition is present.
Relay (b) is energized and symbol (b) is active.
LED (c) starts flashing
2 Alarm is about to be acknowledged (d), but acknowledging is not
possible.
Relay (b) stays energized and symbol (b) stays active.
LED (c) is continuously lit.
3 Alarm condition cleared.
Relay (b) and symbol (b) are reset without acknowledging.
LED (c) is off without acknowledging.
Non-latching
Pre-acknowledgeable
Case: Alarm is not acknowledged.
Non-latching
Non-acknowledgeable 1 Alarm condition is present.
Relay (b) is energized and symbol (b) is active.
LED (c) starts flashing.
2 Alarm condition cleared.
Relay (b) and symbol (b) are reset without acknowledging.
LED (c) is off without acknowledging.
Non-latching
Acknowledgable,
123
a
b
c
d
123
a
b
c
d
123
a
b
c
d
12
a
b
c
d
Other manuals for Polytron 8100
1
Table of contents
Languages:
Other Dräger Accessories manuals

Dräger
Dräger Polytron 8200 User manual

Dräger
Dräger X-pid 800 Series User manual

Dräger
Dräger 68 09 381 User manual

Dräger
Dräger PID 5000 User manual

Dräger
Dräger caleo Configuration guide

Dräger
Dräger Isolette 8000 plus User manual

Dräger
Dräger X-am 3500 User manual

Dräger
Dräger PEX 3000 User manual

Dräger
Dräger DragerSensor IR User manual

Dräger
Dräger Incubator 8000 IC Parts list manual