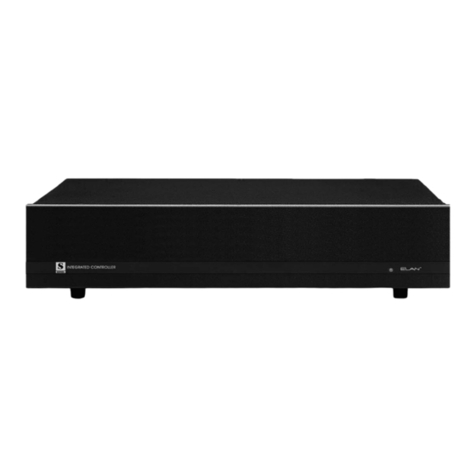
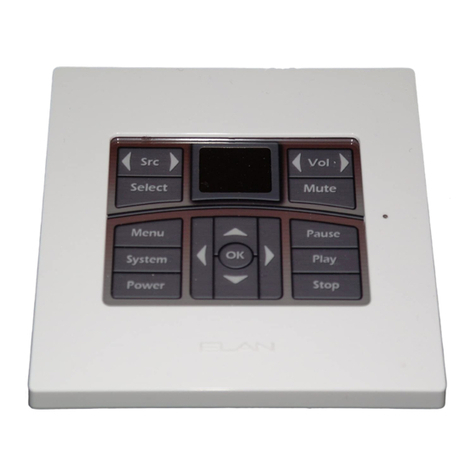
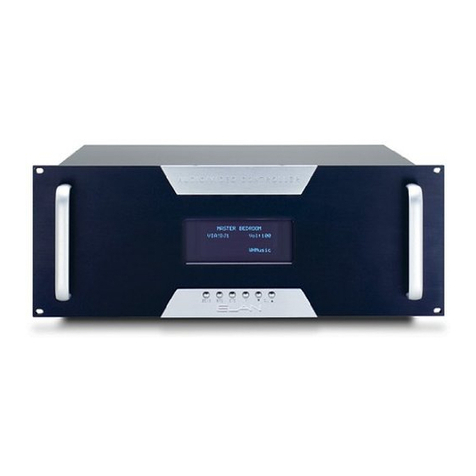
Elan S128P User manual

S128P.indd 1 1/15/2009 1:06:26 PM

S128P.indd 2 1/15/2009 1:06:27 PM

ELAN HOME SYSTEMS INSTALLATION MANUAL
© ELAN Home Systems 2009 • All rights reserved. Page 1
S128P
Preface
Purpose of This Manual
This manual provides step-by-step installation instructions and connection examples, along with basic user infor-
mation for installation and ongoing use of the S128P Multi-Room Controller. This manual is written for the installer
of this equipment.
Organization
The following information is contained in this manual:
Safety Information Provides a comprehensive list of safety practices and procedures allowing for
the safe installation and operation of ELAN Home Systems’ S128P Multi-Room A/V
Controller.
S128P Introduction Provides an introduction to ELAN Home Systems’ S128P Multi-
Room A/V Controller, along with system features to include Front and
Rear panel controls, indicators and connections, along with a short description
of each.
S128P System Design
Overview
Provides a system design application overview of the S128P
Multi-Room A/V Controller for use in audio, video and automation applications.
S128P Connections Provides a description of S128P Multi-Room A/V Controller system connections to
connections made with an ELAN System Precision Panel (SPP) and direct connections
from the S128P to all other components.
Troubleshooting Provides troubleshooting tables to help fix common discrepancies that may
be associated with the S128P Multi-Room A/V Controller.
Specifications Appendix A provides equipment specifications for the S128P
Multi-Room A/V Controller.
Programming Appendix B provides a basic overview of steps necessary to download programming infor-
mation from VIA!®TOOLS or ELAN®TOOLS Setup software to the S128P
RS-232 Protocol Appendix C contains all information necessary to create RS-232 command
structures when controlling the S128P with a third-party RS-232 control device.
Rack Mounting Appendix D provides specifications for rack mounting the S128P
Multi-Room A/V Controller.
S128P.indd 1 1/15/2009 1:06:27 PM

ELAN HOME SYSTEMS
Page 2 © ELAN Home Systems 2009 • All rights reserved.
S128P INSTALLATION MANUAL
Safety Information
RISK OF ELECTRIC SHOCK
DO NOT OPEN!
WARNING
CAUTION: TO REDUCE THE RISK OF ELECTRIC SHOCK, DO NOT
REMOVE COVER (OR BACK). NO USER SERVICEABLE PARTS INSIDE.
REFER SERVICING TO QUALIFIED SERVICE PERSONNEL.
WARNING: TO REDUCE THE RISK OF FIRE OR SHOCK,
DO NOT EXPOSE THIS APPLIANCE TO RAIN OR MOISTURE.
The lightning flash with arrowhead symbol within an equilateral triangle is intended to
alert the user to the presence of uninsulated "dangerous voltage" within the product's
enclosure that may be of sufficient magnitude to constitute a risk of electric shock to persons.
The exclamation point within an equilateral triangle is intended to alert the user to the presence
of important operating and maintenance (servicing) instruction in the literature accompanying
the appliance.
CAUTION
CAUTION: RISK OF EXPLOSION IF BATTERY IS REPLACED BY AN
INCORRECT TYPE. DISPOSE OF USED BATTERIES ACCORDING TO
THE INSTRUCTIONS.
IMPORTANT SAFETY INFORMATION
Read Information—All the safety and operating information should be read before the appliance is operated.
Follow Information—All operating and use information should be followed.
Retain Information—The safety and operating information should be retained for future reference.
Heed Warnings—All warnings on the appliance and in the operating instructions should be heeded.
Wall Mounting—Mounting of this appliance should be done only by an authorized installer.
Ventilation—The appliances should be situated so that their location or position does not interfere with their proper
ventilation. These appliances should never be placed near or over a radiator or heat register.
-These appliances should not be placed in a built-in installation such as a bookcase or cabinet that may impede the flow of air
through the ventilation openings.
Non-Use Periods—Appliances that are left unattended and unused for long periods of time should be de-energized.
Grounding or Polarization—Do not defeat the safety purpose of the polarized or grounding-type plug. A polarized
plug has two blades with one blade wider than the other blade. A grounding type plug has two blades and a third
grounding prong. The polarized wide blade and the third prong are provided for your safety. If the provided plug does
not fit your outlet, consult an electrician for replacement of the obsolete outlet.
Power Cord Protection—Protect the power cord from being walked on or pinched particularly at plugs, convenience
receptacles and the point where they exit from the apparatus.
Water—Do not use the apparatus near water.
S128P.indd 2 1/15/2009 1:06:28 PM

ELAN HOME SYSTEMS INSTALLATION MANUAL
© ELAN Home Systems 2009 • All rights reserved. Page 3
S128P
Cleaning—Unplug the apparatus from the power outlet before cleaning. Use only a dry cloth to clean the apparatus.
Power Lines—An outdoor antenna should be located away from power lines. When installing an outside antenna
system, extreme care should be taken to avoid touching power lines or circuits, as contact with them may be fatal.
Object and Liquid Entry—Never insert objects of any kind through the openings of these appliances, as they may
touch dangerous voltage points or short-out parts that could result in a fire or electric shock. Care should be taken so
that objects do not fall and liquids are not spilled into the appliance through openings in the enclosure.
Servicing—Do not attempt to service these appliances yourself, as opening or removing covers may expose you to
dangerous voltage or other hazards. Refer all servicing to qualified service personnel.
Damage Requiring Service—These appliances should be serviced by qualified service personnel when:
• A power supply connection or a plug has been damaged or
• If liquid has been spilled into the appliance or objects have fallen into the appliance or
• The appliance has been exposed to water or moisture or
• The appliance does not appear to operate normally or exhibits a marked change in performance or
• The appliance has been dropped or the enclosure damaged.
Replacement Parts—When replacement parts are required, be sure the service technician has used replacement
parts specified by the manufacturer or that have the same characteristics as the original part. Unauthorized substitutions
may result in fire, electric shock, or other hazards. The Master Control Unit battery should be replaced only after
turning the power off and only by an authorized installer.
Safety Check—Upon completion of any service or repairs to this audio product, ask the service technician to perform
safety checks to determine that the audio product is in proper operating condition.
Lightning Storms—Unplug this apparatus during lightning storms or when unused for long periods of time.
Attachments and Accessories—Use only attachments/accessories specified by the manufacturer.
Cart, Stand, Tripod, Bracket or Table—Use only with a cart, stand, tripod, bracket or table specified
by the manufacturer, or sold with the apparatus. When a cart is used, use caution when moving the
cart/apparatus combination to avoid injury from tip over.
Disconnect Device—Where the mains plug or an appliance coupler is used as the disconnect
device, the disconnect device shall remain operable.
NOTE:
This equipment has been tested and found to comply with the limits for a Class B digital device, pursuant to
part 15 of the FCC Rules. These limits are designed to provide reasonable protection against harmful interference in a
residential installation. This equipment generates, uses and can radiate radio frequency energy and, if not in-stalled
and used in accordance with the instructions, may cause harmful interference to radio communications. However,
there is no guarantee that interference will not occur in a particular installation. If this equipment does cause harmful
interference to radio or television reception, which can be determined by turning the equipment off and on, the user is
encouraged to try to correct the interference by one or more of the following measures:
• Reorient or relocate the receiving antenna.
• Increase the separation between the equipment and receiver.
• Connect the equipment into an outlet on a circuit different from that to which the receiver is connected.
• Consult the dealer or an experienced radio/TV technician for help.
CAUTION:
Changes or modifications not expressly approved by Elan Home Systems could void the user’s authority
to operate the equipment
S128P.indd 3 1/15/2009 1:06:29 PM

ELAN HOME SYSTEMS
Page 4 © ELAN Home Systems 2009 • All rights reserved.
S128P INSTALLATION MANUAL
S128P.indd 4 1/15/2009 1:06:29 PM

ELAN HOME SYSTEMS INSTALLATION MANUAL
© ELAN Home Systems 2009 • All rights reserved. Page 5
S128P
Purpose of This Manual ...................................................................................................................... 1
Organization .......................................................................................................................................... 1
Safety Information ............................................................................................................................... 2
Chapter 1: Introduction
The ELAN Story .................................................................................................................................... 9
S128P Features .................................................................................................................................. 10
System S128P Functions & Indicators .......................................................................................... 12
Front Panel ........................................................................................................................................ 12
S128P Front Panel Table ..................................................................................................................... 13
Rear Panel ......................................................................................................................................... 14
S128P Rear Panel Table ..................................................................................................................... 14
Chapter 2: S128P System Design Overview
Introduction ......................................................................................................................................... 16
Pre-Wire ............................................................................................................................................ 16
Applications ........................................................................................................................................ 18
Zone/Sub-Zone Definitions ................................................................................................................ 18
Stereo Zones .................................................................................................................................... 19
Stereo Zone w/ Fixed Sub-Zone .......................................................................................................... 20
Stereo Zone w/ Fixed/Variable Sub-Zone .............................................................................................. 21
Stereo Zone w/ Mono Sub-Zone .......................................................................................................... 23
Chapter 3:S128P Connections
SPP System Precision Panel ........................................................................................................... 25
Connections When Using an ELAN SPP Precision Panel-Rear ................................................ 26
VIA! Touch Panel Connections ........................................................................................................... 27
Olé Film Interactive Touchpads .......................................................................................................... 29
“A” Punchdown Locations .................................................................................................................. 29
“B” Punchdown Locations-16V ........................................................................................................... 30
“B” Punchdown Locations-12V ........................................................................................................... 31
“C” Punchdown Locations ................................................................................................................. 32
Z•Pad Connections ........................................................................................................................... 33
“C” Punchdown Locations .......................................................................................................... 33
IR Receiver Connections ................................................................................................................... 33
Sense Input Connections ................................................................................................................... 34
Programmable Trigger Connections ................................................................................................... 34
LINK IN/LINK OUT Connections ......................................................................................................... 35
External Power Connections .............................................................................................................. 36
RS-485 Expansion Connections ......................................................................................................... 36
Switches ........................................................................................................................................... 37
INT 12V-EXT 16V Switch ..................................................................................................................... 37
ZNET/VNET Switch ........................................................................................................................... 37
SS/SC4-NO SS/SC4 Switch ................................................................................................................ 38
Connections When Using an ELAN SPP Precision Panel-Front ............................................... 39
VIA!NET Connection .......................................................................................................................... 39
EXT IR Connections .......................................................................................................................... 39
Sense Input Connections .................................................................................................................. 39
SS/SC4 Connection ........................................................................................................................... 40
ZONE 1-8 Connections ...................................................................................................................... 40
Triggers Connections ......................................................................................................................... 41
Power Connections ........................................................................................................................... 42
S128P.indd 5 1/15/2009 1:06:29 PM

ELAN HOME SYSTEMS
Page 6 © ELAN Home Systems 2009 • All rights reserved.
S128P INSTALLATION MANUAL
S128P Connections When NOT Using an ELAN SPP Precision Panel..................................... 43
Sense Input Connections ................................................................................................................... 43
VIA! Touch Panel Connections ........................................................................................................... 44
Olé Touchpad Connections ................................................................................................................ 45
Keypad Connections ......................................................................................................................... 45
Local Source Connections ................................................................................................................ 46
External IR Connections .................................................................................................................... 46
VSE2 Electronic Volume Control Connections ..................................................................................... 47
C2 Communications Controller Connections ...................................................................................... 48
Source IR Output Connections .......................................................................................................... 49
ALL IR OUT Port Connections ........................................................................................................... 49
Unit Trigger Output Connections .................................................................................................. 50
Zone Trigger Output Connections ................................................................................................. 50
Audio/Video Connections .............................................................................................................. 51
Loop Output Connections ................................................................................................................. 51
ZONE OUTPUTS ............................................................................................................................ 52
Variable Output Connections .............................................................................................................. 52
Fixed Output Connections ................................................................................................................. 53
Fixed/Variable Output Connections ..................................................................................................... 54
ELAN RS-232 Ports ........................................................................................................................... 55
SC-4 RS-232 System Controller ........................................................................................................... 55
SS1 System Station ........................................................................................................................... 55
PV12 Precision Video Panel .......................................................................................................................... 56
Advanced Video Switching-Composite Video ..................................................................................... 56
V8 Video Controller ............................................................................................................................ 65
VIA!®Quad Video Controller ................................................................................................................ 66
Advanced Video Switching-Component Video ............................................................................. 67
V85 Component Video Controller ....................................................................................................... 67
System Expansion ............................................................................................................................. 68
Unit I.D. DIP Switches ....................................................................................................................... 68
Multi-Chassis Connections ................................................................................................................ 69
IR/RS-485/RS-232 ............................................................................................................................. 69
Multi-Chassis C2 Connections ........................................................................................................... 70
Multi-Chassis Audio/Video Connections ............................................................................................ 71
Chapter 4: Operations and Settings
ELAN Keypad DIP Switch Setting's ................................................................................................... 72
Chapter 5: Troubleshooting ............................................................................................................. 73
Appendix A: Specifications .............................................................................................................. 82
Appendix B: Programming ............................................................................................................... 84
VIA!TOOLS or ELANTOOLS Downloading to S128P ............................................................................ 84
S128P IR Codes ................................................................................................................................ 84
Appendix C: RS-232 Serial Control Commands .......................................................................... 90
General Information ........................................................................................................................... 90
S128P Communication Port Settings .................................................................................................. 90
RS-232 Commands ........................................................................................................................... 91
S128P.indd 6 1/15/2009 1:06:29 PM

ELAN HOME SYSTEMS INSTALLATION MANUAL
© ELAN Home Systems 2009 • All rights reserved. Page 7
S128P
Appendix D: Rack Mounting .......................................................................................................... 110
Warranty ................................................................................................................................ Back Page
S128P.indd 7 1/15/2009 1:06:29 PM

ELAN HOME SYSTEMS
Page 8 © ELAN Home Systems 2009 • All rights reserved.
S128P INSTALLATION MANUAL
Items in package:
S128P Multi-Room A/V Controller•
Rack Mount Brackets•
Power Cord•
Installation Manual•
S128P.indd 8 1/15/2009 1:06:31 PM

ELAN HOME SYSTEMS INSTALLATION MANUAL
© ELAN Home Systems 2009 • All rights reserved. Page 9
S128P
Chapter 1: Introduction
The S128P is the culmination of fourteen years of ELAN experience in the design and perfection of multi-source/
multi-zone controllers. Incorporating the features and reliability that has made ELAN the fastest-growing manufac-
turer of multi-room A/V products, the S128P is ELAN's most powerful and flexible multi-source/multi-zone control-
ler to date. The S128P is a twelve-source eight-zone preamp controller with on-board video switching. Up to four
S128Ps can be linked for a total of thirty-two zones. The S128P can be controlled by IR or Serial commands, and
works with ELAN VIA!® Touch Panels, Olé™ Film Interactive Touchpads, keypads, and/or IR receivers, as well as
interfacing with the VIA!®SR1 Sense/Relay Module, and SS1 System Station.
This unit has been designed with ultimate flexibility in mind. Multiple control methods combine with expandability to
offer the perfect solution for larger audio/video and automation control systems. Local source inputs allow devices
located in a specific zone to be heard in and controlled from that zone, while advanced trigger options allow flexible
automation opportunities.
The S128P can switch Composite video, Component video, or both, simultaneously. High Definition video sourc-
es, like HDTV and Progressive Scan DVD players, can now be routed throughout the home as well as traditional
Composite video sources like VCRs and CCTV cameras.
The S128P is loaded with all the features a custom installer looks for in a high-end multi-room controller, including
audio/video signal sensing and system-status feedback, 12 source-specific IR ports, 2 IR 'All' ports, an External IR
Input, 6 Sense inputs, 8 Trigger outputs plus a Unit Trigger output, a Music-On-Hold output, Page/Doorbell audio
and Trigger jacks for easy integration with ELAN's C2 Communications Controller, and Serial In/Out ports for RS-232
control of the S128P. The SPP Precision Panel makes all system connections quick, neat and reliable!
The ELAN Story
Located in Lexington, KY, USA, ELAN Home Systems has designed innovative multi-room audio/video systems
since 1989. ELAN systems were the first to integrate music, intercom and TV distribution features that used the
homeowner’s stereos, televisions and telephones to create the whole-house entertainment experience. These
systems allow people to move from room to room, controlling centrally located equipment with ease.
ELAN’s product line includes:
• Power Amplifiers
• Multi-Zone Pre-Amps
• Intelligent Keypads
• In-Wall LCD Color Touch Panels
• Wireless LCD Color Touch Panels
• Film Interactive Touchpads
• In-Wall and In-Ceiling Speakers
• Outdoor Speakers
• System Controllers
• Volume Controls
• Telephone-Based Intercom Controllers
• Video Switchers
• Digital Music and DVD Management Systems
• Satellite Radios
• Accessories for Home Systems Installation
S128P.indd 9 1/15/2009 1:06:31 PM

ELAN HOME SYSTEMS
Page 10 © ELAN Home Systems 2009 • All rights reserved.
S128P INSTALLATION MANUAL
S128P Features
•More Sources
• 12 Audio Inputs
Connect up to 12 audio or A/V components!
• 16 Video Inputs/16 Video Outputs
• Switch independently or in synchronization w/ audio.
• Switch Composite video, Component video,
High Definition video or a combination.
• 8 Local Source Inputs
Connect a ‘private’ local source from each zone and
control it with that zone’s keypad or touch panel.
• 32 Zone Capability
Link up to 4 S128Ps to independently control up to 8, 16, 24, or 32 zones.
•Buffered Loop Outputs
Easily share sources w/ Home Theaters, etc.
• Variable & Fixed Zone Preamp Outputs
Each zone has both Variable and Fixed outputs for flexible system configuration.
• Independent Bass, Treble, Page
Volume, & Max Volume for Each Zone
Customize the sound for each zone.
• Volume and EQ Memory Retention
Keep custom settings for each zone.
• Dynamic Range Compression
Dynamic Range Compression (DRC) makes loud
audio passages quieter and quiet passages louder.
Ideal for night-time listening and Classical music.
Available independently for each zone.
• Audio & Video Source-Sensing for
System Feedback
Advanced signal sensing for source and zone
status feedback and automated sequences.
• +/- 6dB Source-Leveling
Optimize the input level of each source (including
Local source) for smooth source switching. One dB
steps for fine-tuning.
S128P.indd 10 1/15/2009 1:06:31 PM

ELAN HOME SYSTEMS INSTALLATION MANUAL
© ELAN Home Systems 2009 • All rights reserved. Page 11
S128P
• Advanced IR Routing
• 12 Source-specific IR Output ports
• 2 IR ‘ALL’ Output ports
• 1 External IR IN port can be routed out any
or all IR Output ports
• Blue Vacuum Fluorescent Front Panel Display
• Shows zones/sources selected, EQ, Do-Not Disturb/
Whole-House Music settings, etc.
• Display timeout & configurable Brightness
• Full ELAN Control Capability
• Use with any ELAN keypad or touch panel!
• IR or RS-232 Control
• Uses VIA!TOOLS or ELANTOOLS setup software for all programming!
• Do-Not-Disturb
Temporarily disable Page, Doorbell, WHM, and
Groups in any zone.
• Whole-House Music
Play one source throughout the house with the touch of a button.
• Groups
Link zones into one of four Groups per chassis!
• Six Sense Inputs
Trigger complex IR sequences and automated
functions using VIA! Touch Panels!
• Eight Zone-Specific Triggers/One
Unit Trigger
Turn on a specific amp channel when a zone is activated or turn on the whole amp!
• Rear Panel Expansion Ports
Easily route IR and RS-485 data between multiple S128Ps.
• Rack-Mount Brackets Included
Allows S128Ps to be rack mounted
• Available in 240 Volt
For export: Models S128P240 and S128PR240
• ETL®Listed and CE®Approved
S128P.indd 11 1/15/2009 1:06:31 PM

ELAN HOME SYSTEMS
Page 12 © ELAN Home Systems 2009 • All rights reserved.
S128P INSTALLATION MANUAL
System 12 Functions & Indicators
Front Panel
2
1 3
4 5 6 7
8
A
B
C
D
E
F
8
Figure 1-1: S128P Front Panel Controls & Display
S128P.indd 12 1/15/2009 1:06:31 PM

ELAN HOME SYSTEMS INSTALLATION MANUAL
© ELAN Home Systems 2009 • All rights reserved. Page 13
S128P
Item Function
1
Zone Selected
Displays which zone is currently selected
2
Source Selection
Displays source currently selected in a zone
3
DND
DND displayed if selected zone is in Do-Not-Disturb
4
Group Status
Displays if a zone is currently in Group Mode
5
Page/Doorbell
Displays Paging and Doorbell activity
6
WHM
WHM is displayed if the selected zone is in Whole-House Music mode
7
Volume Status
Displays a Zone’s Volume settings
8
Power LED
Displays Power status
Item Function
A
ZONE
Press to select a zone to be controlled
• System Off-Press and hold ZONE button for 1.25 seconds
B
SRC (Source)
Press to select a source to play in the selected zone
• Zone Off-Press and hold SRC button for 1.25 seconds
C
DND (Do-Not-Disturb)
Press to enable/disable Do-Not-Disturb for the selected zone
• Diagnostics-Press and hold DND button for 2.5 seconds
D
WHM (Whole House Music)
Press to enable/disable Whole-House Music
E
V Up (Volume Adjust)
This button increases volume in selected zone
F
V Down (Volume Adjust)
This button reduces volume in selected zone
Table 1-1: S128P Front Panel Controls & Display
S128P.indd 13 1/15/2009 1:06:36 PM

ELAN HOME SYSTEMS
Page 14 © ELAN Home Systems 2009 • All rights reserved.
S128P INSTALLATION MANUAL
Rear Panel
12 3 4 5 6
7
8
9
10 11 12 13 14 15 16 17 18 19 20 21 22 23 24
Figure 1-2: S128P Rear Panel Connections
S128P.indd 14 1/15/2009 1:06:37 PM

ELAN HOME SYSTEMS INSTALLATION MANUAL
© ELAN Home Systems 2009 • All rights reserved. Page 15
S128P
Item# Function Item# Function
1
Source Audio Inputs
Connect source audio
13
Page Input
Connect PG/DB Output from C2
Communications Controller
2
Source Video Inputs
Connect source Composite video
14
MOH Output
Connect to C2 MOH
(Music On Hold) Input
3
Source Video Loop Outputs
Use for shared video components
or linked chassis
15
Page Output
Connect to additional S128Ps
4
Source Audio Loop Outputs
Used for shared audio sources or
linked chassis
16
IR/RS-232 Expansion Out
Connect to SS1 or
additional S128Ps
5
Zone Video Outputs
Connect to TVs, VIA! Touch
Panels, etc.
17
IR/RS-485 Expansion In
Connect Expansion Port Out to
Expansion Port In if using
multiple S128Ps
6
Zone Audio Outputs
Connect to system Amplifier.
Fixed and Variable Outputs available
18
Page Trigger In/Out
PG Trigger In from C2
PG Trigger Out to additional S128Ps
7
Local Source Inputs
Connect remotely located
“Local” sources
19
Sense Trigger Inputs
Connect ELAN™SENSE Sensors
for automated functions
8
ELAN RS-232 Input
Connect a SS1 System Station
or SC1. Also for downloading
VIA!TOOLS or ELANTOOLS program files
20
IR All Out
Connect IR to system sources that
do not require source-specific IR
9
AC Power
Connect to AC Power
21
Source IR Emitter Outputs
Source-specific IR Outputs
10
Unit ID Dipswitches
Configure Unit identity 1-4
22
External IR Input
Connect non-system keypads or IR
receivers to control system sources
11
ELAN RS-232 Output
Connect to additional S128P Chassis
23
Chassis Trigger Output
Sends a 12 VDC Trigger whenever
any zone of chassis is active
12
Zone Keypad Inputs
Connect ELAN Keypads, VIA!s,
or IR Receivers
24
Zone Trigger Outputs
Sends a 12 VDC Trigger when a
specific zone is active
Table 1-2: S128P Rear Panel Connections
S128P.indd 15 1/15/2009 1:06:42 PM

ELAN HOME SYSTEMS
Page 16 © ELAN Home Systems 2009 • All rights reserved.
S128P INSTALLATION MANUAL
Chapter 2. System Design & Applications
System Design
The first step to a good design is to map the system. It is advisable to mark up a copy of the house floor plan
with speaker, keypad, touch panel, volume control, and equipment locations etc. Make sure that all locations are
decided upon before pre-wiring commences so that all necessary wiring and installation hardware is in place. This
unit will be interfacing with other components such as amplifiers, source components, communications controllers,
serial controllers, and user interfaces, so it is essential that ALL system components are accounted for prior to the
pre-wire stage.
Secondly, make a detailed list of all components. Include source equipment, keypads, touch panels, volume con-
trols, amplifiers, communications gear and the S128P itself. Be sure to include necessary electrical boxes, struc-
tured wiring enclosures, telephone lines, rough-in brackets, patch cords, power supplies, etc.
TM
S128P
External Amplifier
C2
A/V Sources
SPP
(side view)
Sensors
External IR
Receivers
SS1
Keypads
AUDIO SENSOR
SPK SPK SPK SPK
Olé
Touchpads
FrontRear
Triggered
Devices
Figure 2-1: System Design
Pre-Wire
This section will explain the specifics of pre-wiring for an S128P system. Care should be taken at this stage to
ensure a properly operational system. Most system wiring is “home-run” from the device being installed (a keypad,
for example) back to the equipment location, or “head-end”. Make sure to plan for the future when pre-wiring! It is
often advantageous to pull coax along with Cat-5 to facilitate an upgrade from keypads to VIA! Touch Panels.
S128P.indd 16 1/15/2009 1:06:43 PM

ELAN HOME SYSTEMS INSTALLATION MANUAL
© ELAN Home Systems 2009 • All rights reserved. Page 17
S128P
VIA! Touch Panels
• Cat-5
• 16-18 AWG 2 conductor wire (on runs greater than 110 ft.)
• RG-6 or RG-59 coaxial cable
ELAN Keypads
• Cat-5
IR Receivers
• Cat-5
Volume Controls
• Cat-5
• 16-18 AWG speaker wire
Use stranded, twisted pair speaker wire between amplifiers and volume controls, and between
volume controls and speakers. Use Cat-5 to power electronic volume controls and for volume control
override when used with a C2 Communications Controller.
Speakers
• 16-18 AWG speaker wire
Use stranded, twisted pair speaker wire between amplifiers and speakers.
Local Source/LSWP
• Cat-5
Local Sources connect to the S128P using an LSWP Local Source Wall Plate with Cat-5 (see page 47).
Remotely Located Sources
• Cat-5
• RG6 or RG59 coax (if necessary)
Remotely located sources connect to the S128P
using an ELAN RSWP with Cat-5.
C2 Communications Controller
• Cat-5
When using an ELAN C2 Communications Controller, run Cat-5 for telephones. Run Cat-5
for Door Stations. See the C2 manual for details. Note that only two wires are used to connect
between the C2 and the door station. The remaining wires of the Cat-5 are used for the DSC3’s
camera functions (the camera does not interact with the C2).
Serial Devices
• Cat-5 or Serial Cable
Run Cat-5 or serial cables between RS-232
controllers and the S128P.
Sense Inputs
•Cat-5 (3 conductors used)
Use Cat-5 to extend sensor leads, if necessary.
System Video
• RG-6 coax for RF or base-band video.
• RG-59 coax for base-band video only.
Use coaxial cable to distribute video to TVs and VIA! Touch Panels throughout the house.
System Audio
• RCA Interconnect Cables
S128P.indd 17 1/15/2009 1:06:43 PM

ELAN HOME SYSTEMS
Page 18 © ELAN Home Systems 2009 • All rights reserved.
S128P INSTALLATION MANUAL
Applications
This section describes typical applications using the S128P in audio/video/automation installations. These are all
basic in nature and should be used for guideline purposes only. Each application can be augmented as needed for
individual circumstances.
Zone/Sub-Zone Definitions
A zone is defined as an area within a system that has independent source selection ability. A zone may be one
room, or several combined areas. A sub-zone is a part of a zone - it shares source selection - but is not indepen-
dent. Typically, sub-zones use volume controls for volume up/down.
Zone 1 Zone 2 Zone 3 Zone 4
8-ZONE SYSTEM EXAMPLE
Zone 5 Zone 8Zone 7Zone 6
4 Stereo Zones, 2 Stereo Zones with Mono Sub-Zones, 2 Mono Zones. Total 16 amp channels used.
TM
TM
TM
S128P
D660
LEXINGTON, KY USA • MADE IN CHINA
POWER
120VAC 60Hz
440W
SPEAKER OUTPUTS 1 – 12
TRIGGER INPUTS
1
_
2
3
_
4
5
_
6
7
_
8
9
_
10
11
_
12
IN
OUT
BUS INPUT
LOOP OUTPUT
L R
IN
OUT
L R
AUDIO
SENSE
ON
OFF
SPEAKER INPUTS (CLASS 2 WIRING) - 40 W PER CHANNEL AT 8 OHMS
1
+
-
2
-
+ 3
+
-
4
-
+ 5
+
-
6
-
+ 7
+
-
8
-
+ 9
+
-
10
-
+ 11
+
-
12
-
+
1 2
1 2
IN
OUT
L R
3 4
1 2 3 4
LEVEL LEVELLEVEL LEVEL
3 4
IN
OUT
L R
5 6
5 6
IN
OUT
L R
7 8
5 6 7 8
LEVEL LEVELLEVEL LEVEL
7 8
IN
OUT
L R
9 10
9 10
IN
OUT
L R
11 12
9 10 11 12
LEVEL LEVELLEVEL LEVEL
11 12
L
R
1
2
BUSL
R
3
4
BUSL
R
5
6
BUSL
R
7
8
BUSL
R
9
10
BUSL
R
11
12
BUSBUS
T4.0AL
TYPE FUSE
R
SYSTEM
TRIGGER
A12
Figure 2-2: 8-Zone System
S128P.indd 18 1/15/2009 1:06:45 PM
Table of contents
Other Elan Controllers manuals