manuals.online logo
Brands
  1. Home
  2. •
  3. Brands
  4. •
  5. Englefield
  6. •
  7. Bathroom Fixture
  8. •
  9. Englefield Tapware Studio II Slide Shower 22980A-CP User manual

Englefield Tapware Studio II Slide Shower 22980A-CP User manual

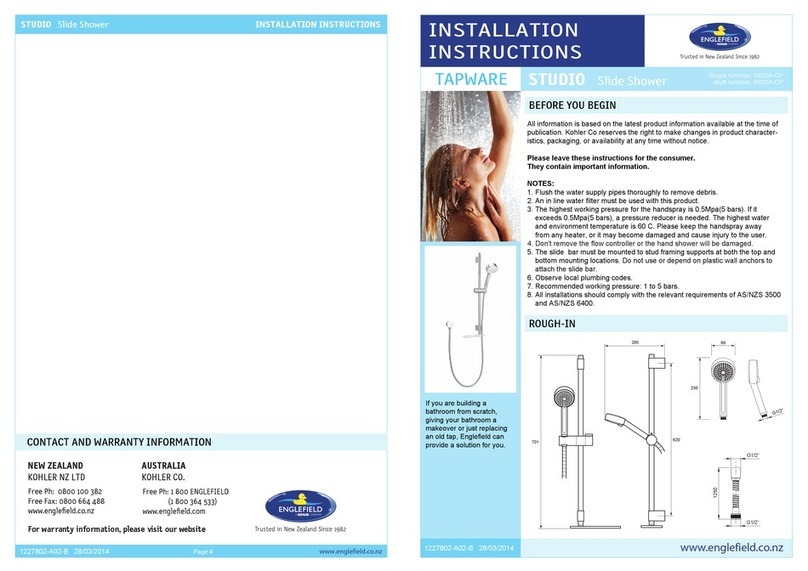
BEFORE YOU BEGIN
1397399-AN2-A 06/07/2019
INSTALLATION
INSTRUCTIONS
TAPWARE
ENGLEFIELD
STUDIO II SLIDE SHOWER
All information is based on the latest product information available at the time
of publication. Englefield reserves the right to make changes in product charac-
teristics, packaging, or availability at any time without notice.
Please leave this installation instructions guide for the consumer.
It contain important information.
NOTES:
ROUGH-IN DIMENSIONS
CONTACT AND WARRANTY INFORMATION
SPARE PARTS LIST
NEW ZEALAND
KOHLER NZ LTD
Free Ph: 0800 100 382
Free Fax: 0800 664 488
www.englefield.co.nz
AUSTRALIA
KOHLER AUSTRALIA
Free Ph: 1 800 ENGLEFIELD
(1 800 364 533)
www.englefield.com
For warranty information, please visit our website
Page 41397399-AN2-A 06/07/2019 ENGLEFIELD
INSTALLATION INSTRUCTIONSSTUDIO II SLIDE SHOWER
22980A-CP
22981A-CP
29689A-CP
1. Flush the water supply pipes thoroughly to remove debris.
2. An in-line filter must be used with this product.
3. The working pressure of hand shower is between 100 kPa and 500 kPa.
If it exceeds 500 kPa, a pressure limiting valve must be fitted.
4. The operating temperature of hand shower is from 10˚C to 70˚C. NZ
building code G12 requires that maximum hot water temperature at any
sanitary fixture used for personal hygiene shall not exceed either 45˚C or
55˚C. If so, a tempering valve must be installed.
5. This shower is intended for high/mains pressure installations. It may not
be suitable for use with gravity-fed water heaters, low and unequal pres-
sure supplies.
6.All installations should comply with local plumbing codes and the relevant
requirements of AS/NZS 3500 and AS/NZS 6400.
700
Max 620
G 1/2”B
G 1/2”B
225
Ø 50
Ø 90
1524
G 1/2”
* All measurements shown are in milimetres
Elbow
1358461-CP
Cap
1239238
Soap dish
1239246
Clamp bracket
1239242
Shower hose
1241297
Hose washer
1239241
Mounting bracket kit
1239236
Taper block
1239247
Hand shower
(single mode)
1397397
Hand shower
(multi modes)
1397398
6
11
4
13
8
1
10
5
3
8
9
2
12
Wall fixing holes distance: max. 620 mm
7
9
13
CLEANING INSTRUCTIONS
INSTALLATION CHECKOUT
How to Install the Slide Rail and Soap Dish
INSTALLATION
1397399-AN2-A 06/07/2019 Page 2 ENGLEFIELD 1397399-AN2-A 06/07/2019 Page 3 ENGLEFIELD
STUDIO II SLIDE SHOWER INSTALLATION INSTRUCTIONS
How to Install the Elbow and Hand Shower
STUDIO II SLIDE SHOWER INSTALLATION INSTRUCTIONS
1). Determine a suitable position on the finished wall for the slide rail, avoiding cables and pipes
concealed in the wall.
Note: The slide rail must be fixed to timber studs or nogs in the wall.
2). Mark the position of top & bottom wall fixing holes on the finished wall (Max. 620 mm apart).
3). Fix top & bottom brackets (2) & (4) to the finished wall with the anchors (1) and screws (3).
Note: Ensure the hole in the top bracket for bracket cover (5) faces up and the hole in the bottom
bracket for bracket cover (6) faces down.
4). Move the hand shower holder (7) to the centre of the rail.
5). Slide the bracket covers (5) & (6) to the rail and adjust the position of them at each end by loosen-
ing the screws (8) inside the bracket covers.
Note: Ensure the distance between them (Max. 620mm apart) is same as one between the
two wall fixing holes.
6). Mount the rail onto the brackets (2) & (4) and fix both covers in place by using cover screws (9).
7). Insert the endcap (10) into the top of the slide rail.
8). Insert the soap dish (12) with plastic insert (11) into the bottom end of the slide rail and fix in place
using screw (13).
Note: Be careful not to overtighten.
Note: To perform installation the installer must provide a
G1/2”B water supply nipple (14). The distance
from the end of the nipple to the finished wall
surface should be between 10mm and 15 mm
and be perpendicular to the finished wall.
1). Apply thread tape or sealant to the water supply
nipple.
2). Fit the O-ring (15) into groove in the base of elbow
(16) and then screw it onto the water supply nipple
clockwise until the back surface of the elbow touches
the wall.
Note: Ensure the outlet of the elbow faces down.
3). Insert the rubber filter washers (17) in both ends of
shower hose (18). Connect and hand tighten the
shower hose to the hand shower(19) and the elbow
(16). Make sure hose goes through the soapdish
(12).
4). Attach hand shower onto the hand shower holder(7).
1). Ensure that all connections are tight.
2). Turn on the main water supply and check for leaks. Repair as needed.
3). Disconnect the hand shower from the shower hose and then turn on the shower mixer for mini-
num one minute to flush any residual debris from the line.
4). Check and clean filter washers as necessary. Reinstall the shower hose back to the hand shower
and the elbow.
5). Adjust the height of hand shower by twisting the bracket lever & sliding it up or down.
Clean all finishes with mild soap and warm water. Wipe entire surface completely dry with a clean
soft cloth. Many cleaners may contain such chemicals as ammonia, chlorine, toilet chemials etc,
which could adversely affect the finish and are not recommended for cleaning.
Do not use abrasive cleaners or solvents on Englefield fittings.
10~15mm
Max
ø 32mm
14 16
15
17
18
12
17
19


This manual suits for next models

1

Other Englefield Bathroom Fixture manuals

Englefield VALENCIA Slim Vanity User manual

Englefield

Englefield VALENCIA Slim Vanity User manual

Englefield 31258A User manual

Englefield

Englefield 31258A User manual

Englefield VALENCIA ELITE User manual

Englefield

Englefield VALENCIA ELITE User manual

Englefield PREMIUM BATH SCREEN User manual

Englefield

Englefield PREMIUM BATH SCREEN User manual

Englefield MILANO Square User manual

Englefield

Englefield MILANO Square User manual

Englefield VALENCIA SLIM VANITY User manual

Englefield

Englefield VALENCIA SLIM VANITY User manual

Englefield VALENCIA ELITE User manual

Englefield

Englefield VALENCIA ELITE User manual

Englefield STUDIO II 22982A-CP User manual

Englefield

Englefield STUDIO II 22982A-CP User manual

Englefield 5625A User manual

Englefield

Englefield 5625A User manual

Englefield MILANO Alcove User manual

Englefield

Englefield MILANO Alcove User manual

Englefield VALENCIA ELITE User manual

Englefield

Englefield VALENCIA ELITE User manual

Englefield STANDARD BATH SCREEN User manual

Englefield

Englefield STANDARD BATH SCREEN User manual

Englefield STUDIO 5624A User manual

Englefield

Englefield STUDIO 5624A User manual

Englefield 1830 User manual

Englefield

Englefield 1830 User manual

Englefield PREMIUM BATHSCREEN User manual

Englefield

Englefield PREMIUM BATHSCREEN User manual

Englefield TAPWARE STUDIO 5622A-CP User manual

Englefield

Englefield TAPWARE STUDIO 5622A-CP User manual

Popular Bathroom Fixture manuals by other brands

Insignia 1800 Series installation manual

Insignia

Insignia 1800 Series installation manual

Noro Angdusch Sand manual

Noro

Noro Angdusch Sand manual

Sanela SLP 31RZ 01315 Instructions for use

Sanela

Sanela SLP 31RZ 01315 Instructions for use

Lakes LK861 Installation & maintenance instructions

Lakes

Lakes LK861 Installation & maintenance instructions

ProFlo PFHS65 manual

ProFlo

ProFlo PFHS65 manual

Kohler K-1018 installation guide

Kohler

Kohler K-1018 installation guide

Kinedo Horizon installation instructions

Kinedo

Kinedo Horizon installation instructions

Sanela SLZA 29T Instructions for use

Sanela

Sanela SLZA 29T Instructions for use

Kermi Decor V Series Instructions for installation and use

Kermi

Kermi Decor V Series Instructions for installation and use

Bradley 400 Series Installation

Bradley

Bradley 400 Series Installation

INR MARK 800 00 Series quick start guide

INR

INR MARK 800 00 Series quick start guide

CRAFFT G-8231 installation instructions

CRAFFT

CRAFFT G-8231 installation instructions

BELLOSTA Via Montenapoleone B3-176 Installation instruction

BELLOSTA

BELLOSTA Via Montenapoleone B3-176 Installation instruction

Multi VZ3PS Assembly instructions

Multi

Multi VZ3PS Assembly instructions

Dundalk LeisureCraft Sunlight 510S Parts Identification & Assembly Instructions

Dundalk LeisureCraft

Dundalk LeisureCraft Sunlight 510S Parts Identification & Assembly Instructions

Hans Grohe Croma 160 27450000 quick start guide

Hans Grohe

Hans Grohe Croma 160 27450000 quick start guide

Anzzi STARLET SP-AZ036 install guide

Anzzi

Anzzi STARLET SP-AZ036 install guide

Insignia INS8059.1L installation manual

Insignia

Insignia INS8059.1L installation manual

manuals.online logo
manuals.online logoBrands
  • About & Mission
  • Contact us
  • Privacy Policy
  • Terms and Conditions

Copyright 2025 Manuals.Online. All Rights Reserved.