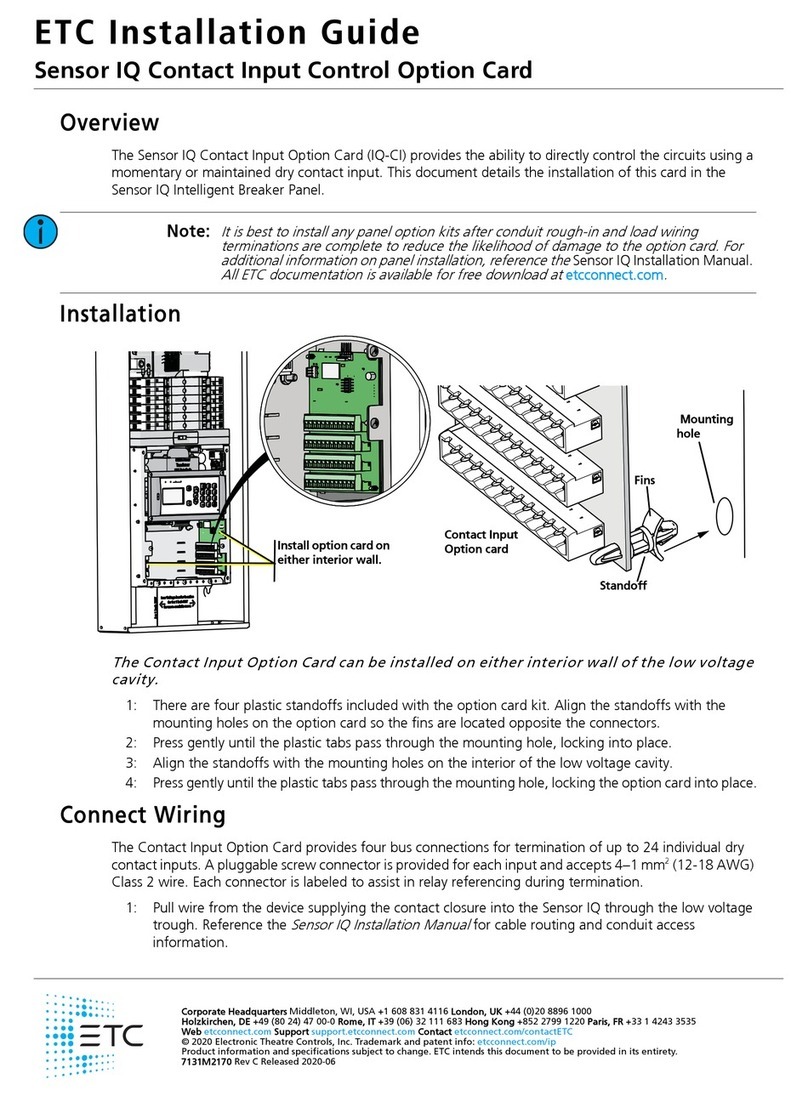
6 Irideon WLZ User Manual
Install the voltage barrier in the back
box with the provided bolt (see
images at right, showing a 4in back
box). The voltage barrier blocks two
or more through holes in the back of
the junction box, depending on how
it is oriented, plus the center conduit
knockout in the back of the junction
box and the center knockouts on two
sides of the junction box. The blocked
holes and knockouts are marked with
"X" in the illustration to the right.
Connect Canopy Wiring
(DMX Variant)
Cable preparation instructions for
DMX termination are included in the
termination kits, and are also available for download at etcconnect.com.
1. Remove the adhesive tape or fasteners securing the mounting plate to
the luminaire to free the mounting plate from the canopy enclosure.
WARNING: RISK OF ELECTRIC SHOCK! Install the cover plate
as directed below for installations where the interior of the
canopy enclosure could be exposed after installation with
only the mounting plate. For example, install the cover plate
when installing to a surface-mount back box.
AVERTISSEMENT : Installez la plaque de protection comme
indiqué ci-dessous pour les installations où l'intérieur de la
rosace de plafond pourrait être exposé après l'installation
avec uniquement la plaque de montage. Par exemple,
installez la plaque de protection lors de l'installation sur un
boîtier arrière à montage en surface.
2. Are you flush-mounting the luminaire or surface-mounting the
luminaire?
• Flush-mounting: Continue to step 3.
•
Cover plate (if needed
for surface-mounting)
Mounting plate
Surface-mounting:
Position the cover
plate on top of the
mounting plate
before wiring the
luminaire. The cover
plate is required when the interior of the canopy enclosure could
be exposed after installation with only the mounting plate (the
mounting surface is smaller than the canopy enclosure).
