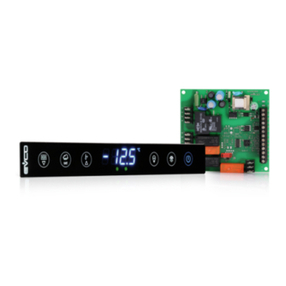
Evco EVX225 User manual

EVCO S.p.A. • Code 104X225E104 • page 1/5
EVX225 Digital controllers for double room refrigerated cabinets version 1.0
Hereafter, with the word “switch on” means the passage from stand-
by status to on status; the word “switch off” means the passage from on
status to stand-by status.
When the power is switched back on, the instrument displays the
status that it was in at the time it was disconnected.
4.2 Switching on/off of the instrument (switching on/
off room 1 and room 2)
• make sure that the keyboard is not locked and that no other opera-
tion is in progress
•press and hold down the ON/STAND-BY key for 1 s: the
on/stand-by LED will switch off/on.
4.3 Switching on/off room 1/room 2
To switch on/off room 1 operate as follows:
• make sure that the keyboard is not locked and that no other opera-
tion is in progress
• press and hold the UP and ON/STAND-BY key for 1 s: the display
will show 3 s “On1” or “OFF1”.
To switch on/off room 2 operate as follows:
• make sure that the keyboard is not locked and that no other opera-
tion is in progress
• press and hold the DOWN and ON/STAND-BY key for 1 s: the
display will show 3 s “On2” or “OFF2”.
4.4 The display
If the instrument is switched on, during normal operation, the display
will show the temperature established with parameter P5:
• if P5 = 0, the display will show the room 1 temperature
EN ENGLISH
1 IMPORTANT
1.1 Important
Carefully read these instructions before installing and using the product. Pay close attention to the notes on installation and electrical wiring
connections; save these instructions together with the instrument for future reference.
The instrument must be disposed of in accordance with local laws on the collection of electrical and electronic equipment.
3 DIMENSIONS AND INSTALLATION
3.1 Dimensions
The dimensions are expressed in mm (in).
• if P5 = 1, the display will show the room 2 temperature
except during defrosting, when the instrument will show the tem-
perature established with parameter d6.
If the instrument is switched off, the display will be switched off.
4.5 Room 1 temperature display
• make sure that the keyboard is not locked and that no other opera-
tion is in progress
• press down the DOWN key for 1 sec: the display will show the first
label available
• press and release the UP key or the DOWN key to select “Pb1”
• press and release the SET key.
To exit the procedure:
• press and release the SET key and then do not operate for 60 sec
• press and release the UP or DOWN key until the display shows the
room 1 temperature and then do not operate for 60 sec.
Alternatively:
• press and release the ON/STAND-BY key.
4.6 Room 2 temperature display
• make sure that the keyboard is not locked and that no other opera-
tion is in progress
• press down the DOWN key for 1 sec: the display will show the first
label available
• press and release the UP key or the DOWN key to select “Pb2”
• press and release the SET key.
To exit the procedure:
• press and release the SET key and then do not operate for 60 sec
• press and release the UP or DOWN key until the display shows the
room 1 temperature and then do not operate for 60 sec.
Alternatively:
• press and release the ON/STAND-BY key.
4.7 Condenser temperature display
• make sure that the keyboard is not locked and that no other opera-
tion is in progress
• press down the DOWN key for 1 sec: the display will show the first
label available
• press and release the UP key or the DOWN key to select “Pb3”
• press and release the SET key.
To exit the procedure:
• press and release the SET key and then do not operate for 60 sec
• press and release the UP or DOWN key until the display shows the
room 1 temperature and then do not operate for 60 sec.
Alternatively:
• press and release the ON/STAND-BY key.
If the condenser probe is absent (parameter P4 = 0), the label “Pb3”
will not be displayed.
4.8 Manual activation of defrosting
• make sure that the keyboard is not locked and that no other opera-
tion is in progress
• press and hold down the DEFROST key for 4 sec.
4.9 Switching on/off of the cabinet light (provided that
parameter u11 is set to 0)
• make sure that no other procedure is in progress
• press and release the AUXILIARY key: the LED light will switch
on/off.
See also parameter u2.
4.10 Switching on the demisting heater (provided that
parameter u11 is set to 1)
• ensure that the instrument is switched on and that no other proce-
dure is in progress.
• press the AUXILIARY key for 2 s: the multifunction LED will light up
and the heater will be switched on, both for the amount of time
established with parameter u6.
Manually switching off the demisting heater is not permitted (that is,
before the time established with parameter u6 expires).
4.11
Manually switch on/off of the auxiliary output
(provided parameter u11 is set to 2)
• ensure that the keyboard is not locked and that no other procedure
is in progress
• press and release the AUXILIARY key.
See also parameter u2.
4.12 Locking/unlocking the keyboard
To lock the keyboard:
• make sure that no other procedure is in progress
• press and hold down the SET and ON/STAND-BY keys for 1 sec:
the display will show the message “Loc” for 1 sec.
If the keyboard is locked, the following are not permitted:
• switch on/off of the instrument
• switch on/off room 1
• display of the room 1 temperature (via the procedure indicated in
paragraph 4.5)
• display of the room 2 temperature (via the procedure indicated in
paragraph 4.6)
• display of the condenser temperature (via the procedure indicated
in paragraph 4.7)
• manual activation of defrosting
• manual switch on/off of the auxiliary output
• changing the working setpoints (with the procedures described in
5.1 and 5.2)
• display of compressor operation hours
• cancellation of compressor operation hours
The operations cause the display of the label “Loc” per 1 sec.
2 INTRODUCTION
2.1 Introduction
EVX225 is a digital controller for the operation of double room refrig-
erated cabinets.
The controller is equipped with:
• 3 measure inputs (room 1 probe, room 2 probe and condenser
probe) for NTC probes
• 2 digital inputs (high pressure switch and low pressure switch)
•5 digital outputs (relays) for operation of the compressor
(30 A @ 250 VAC), the room 1 valve, the room 2 valve, the evapora-
tor fan and a fifth use (which can be set as cabinet light, demister
heater, auxiliary output, alarm output or condenser fan); defrosting
occours stopping the compressor, has effect on both the rooms and
at the same time.
The model looks in open frame board; the user interface consists of a
4 digit custom display (with decimal point and functional icons) and
by six buttons (SET, UP, DOWN, DEFROST, AUXILIARY and
ON/STAND-BY).
Installation is by back panel, using M3 studs.
Using the EVKEY programming key (to be ordered separately) it is
possible to carry out the uploading and downloading of the configu-
ration parameters; it is also possible to connect the controller to the set-
up software system Parameters Manager and to the supervision system
RICS (through a serial interface, via TTL, with MODBUS communica-
tions protocol).
3.2 Installation
Back panel installation using M3 studs.
3.3 Installation notes
• make sure that the working conditions (operating tempera-
ture, humidity, etc.) fall within the limits inidcated in the tech-
nical specifications
• do not install the device near heat sources (heaters, hot air
ducts, ect.), near devices with strong magneti (large diffusors
etc.) and places subject to direct sunlight, rain, humidity,
excessive dust, mechanical vibrations or shaking
• in accordance with laws on safety, protection against possi-
ble contact with electrical parts must be ensured via the cor-
rect installation of the instrument; all the parts that ensure
such protection must be secured in such a way that they
cannot be removed without the using a special tool.
4 USER INTERFACE
4.1 Preliminary signals
The user interface consists of a custom 4 digit display (with decimal
point and function icons) and six keys (SET, UP, DOWN, DEFROST,
AUXILIARY and ON/STAND-BY).
Operating statuses:
• “on” status (the instrument is powered and on: the regulators can be
switched on)
• “stand-by” status (the instrument is powered but is switched off via
software: the regulators are switched off; the possibility to manually
switch on/switch off the cabinet light or auxiliary output depends
on parameter u2)
• “off” status (the instrument is not powered).

EVCO S.p.A. • Code 104X225E104 • page 2/5
To unlock the keyboard:
• press and hold down the DOWN and ON/STAND-BY keys for 1
sec: the display will show the message “UnL” for 1 sec.
4.13 Silencing the buzzer
• ensure that no other procedure in is progress
• press a key (the first pressing of the key will not cause the effect asso-
ciated with that key).
If parameter u11 is set to 3 and parameter u4 is set to 1, pressing the
key will also disactivate the alarm output.
If parameter u9 is set to 0, the buzzer will not be activated.
5 SETTINGS
5.1 Setting the first working setpoint (room 1)
• ensure that the keyboard is not locked and that no other procedure
is in progress
• press and release the SET key: the room 1 LED will flash
• press and release the UP or DOWN key within 15 sec; see also
parameters r1, r2 and r3
• do not operate for 15 sec: the room 1 LED will switch off and then
the instrument will exit the procedure.
The first working setpoint can also be set via parameter SP1.
5.2 Setting the second working setpoint (room 2)
• press and release the SET key during the modification of the first
working setpoint: the room 2 LED will flash
• press and release the UP or DOWN key within 15 sec; see also
parameters r7, r8 and r9
• press and release the SET key or do not operate for 15 sec: the room
2 LED will switch off and then the instrument will exit the procedure.
The second working setpoint can also be set via parameter SP2.
5.3 Setting the configuration parameters
To begin the procedure:
• ensure that no other procedure is in progress
• hold down the UP and DOWN keys for 4 sec: the display will show
“PA”
• press and release the SET key
• press and release the UP or DOWN key within 15 sec to set “-19”
• press and release the SET key or do not operate for 15 sec
• hold down the UP and DOWN keys for 4 sec: the display will show
“SP”.
To select a parameter:
• press and release the UP or DOWN key.
To change a parameter:
• press and release the SET key.
• press and release the UP or DOWN key within 15 sec.
• press and release the SET key or do not operate for 15 sec.
To exit the procedure:
• hold down the UP and DOWN keys for 4 sec and do not operate
for 60 sec (any changes will be saved).
After changing the parameters, suspend power supply flow
to the instrument.
5.4 Restoring the manufacturer’s settings
To begin the procedure:
• make sure that no other procedure is in progress.
• hold down the UP and DOWN key for 4 sec: the display will show
“PA”
• press and release the SET key
• press and release the UP or DOWN key within 15 sec to set “149”
• press and release the SET key or do not operate for 15 sec
• hold down the UP and DOWN keys for 4 sec: the display will show
“dEF”
• press and release the SET key
• press and release the UP or DOWN key within 15 sec to set “1”
• press and release the SET key or do not operate for 15 sec: the
display will show “dEF” flashing for 4 sec, after which the instru-
ment will exit the procedure.
• suspend the power supply to the instrument.
To exit the procedure before the operation is complete:
• hold down the UP and DOWN keys for 4 sec during the procedure
(that is, before setting “1”: the settings wil not be restored).
Make sure that the manufacturer’s settings are appropriate
(see chapter 11).
6 CALCULATING COMPRESSOR OPERATION HOURS
6.1 Preliminary notes
The instrument is able to store up to 9,999 hours of compressor op-
eration, after which the number “9999” starts flashing.
6.2 Display of compressor operation hours
• make sure that the keyboard is not locked and that no other opera-
tion is in progress
• press and hold down the DOWN key for 1 sec: the display will show
the first available label
• press and release the UP or down DOWN key to select “CH”
• press and release the SET key.
To exit the procedure:
• press and release the SET key or do not operate for 60 sec
• press and release the UP or down DOWN key until the display
shows the temperature estabilshed with parameter P5 or do not
operate for 60 sec.
Alternatively:
• press and release the ON/STAND-BY key.
6.3 Cancelling compressor operation hours
• make sure that the keyboard is not locked and that no other proce-
dure is in progress
• press and hold down the DOWN key for 1 sec: the display will show
the first available label
• press and release the UP or DOWN key to select “rCH”
• press and release the SET key
• press and release the UP or DOWN key within 15 sec to set “149”
• press and release the SET key or do not operate for 15 sec: the
display will show a flashing “- - - -” for 4 sec then the instrument will
exit the procedure.
7 WARNING LIGHTS AND DIRECTIONS
7.1 Warning lights
LED MEANING
compressor LED light
if the LED is on, then the compressor is on (one room at
least asks for cooling)
if the LED is flashing:
• compressor protection operation in progress:
- parameters C0, C1, C2
defrost LED
If it is on:
• defrosting is in progress
if it is flashing:
• dripping in progress:
- parameter d7
evaporator fan LED light
If it is on, the evaporator fan is on
If it is flashing, the evaporator fan is disactivated
- parameter F3
cabinet light LED
If it is on, the cabinet light has been switched on (provided
that parameter u11 is set to 0)
multifunction LED light
If it is on:
• the demisting heater is switched on (provided that pa-
rameter u11 is set to 1)
• the auxiliary output has been switched on
(provided that
parameter
u11
is set to 2)
• the condenser fan will be switched on (provided that
parameter u11 is set to 6)
if it is flashing:
• a delay in switching off the condenser fan is in progress:
- parameter F12 (provided that parameter u11 is set to 6)
room 1 LED
if the LED is on, then the room 1 valve is on
if the LED is flashing:
• the first working setpoint is in the process of being
changed (via the procedure described in paragraph 5.1)
if the LED is flashing 1 s every 4 s:
• room 1 has been switched off
room 2 LED
if the LED is on, then the room 2 valve is on
if the LED is flashing:
• the second working setpoint is in the process of being
changed (via the procedure described in paragraph 5.2)
if the LED is flashing 1 s every 4 s:
• room 2 has been switched off
maintenance LED
if on, compressor maintenance is required:
- parameter C10
alarms LED
if on, an alarm or error is in progress
°CCelsius grade LED
if on, the temperatures will be displayed using the Celsius
grade unit of measurement:
- parameter P2
°FFahrenheit grade LED
if on, the temperatures will be displayed using the Fahren-
heit grade unit of measurement:
- parameter P2
on/stand-by LED
if on, the instrument is in stand-by mode
7.2 Signal Descriptions/Explanations
CODE MEANING
Loc the keyboard is locked:
- see paragraph 4.12
the working setpoints are blocked:
- parameters r3 and r9
8 ALARMS
8.1 Alarms
CODE MEANING
AL1 First minimum alarm temperatures (room 1)
Solutions:
• check the room 1 temperature
• refer to:
- parameters A1 and A2
Main consequences:
• the alarm output will be activated (provided that param-
eter u11 is set to 3)
AH1 First maximum temperature alarm (room 1)
Solutions:
• check the room 1 temperature
• refer to:
- parameters A4 and A5
Main consequences:
• the alarm output will be activated (provided that param-
eter u11 is set to 3)
AL2 Second minimum alarm temperatures (room 2)
Solutions:
• check the room 2 temperature
• refer to:
- parameters A11 and A12
Main consequences:
• the alarm output will be activated (provided that param-
eter u11 is set to 3)
AH2 Second maximum temperature alarm (room 2)
Solutions:
• check the room 2 temperature
• refer to:
- parameters A14 and A15
Main consequences:
• the alarm output will be activated (provided that param-
eter u11 is set to 3)
HP High pressure switch input alarm
Solutions:
• verify the cause of the input activation
• see parameters i0, i1 and i2
Main consequences:
• the effect established with parameter i0
•the alarm output will be activated (provided that param-
eter u11 is set to 3)
LP Low pressure switch input alarm
Solutions:
• verify the cause of the input activation
• see parameters i5, i6 and i7
Main consequences:
• the effect established with parameter i5
•the alarm output will be activated (provided that param-
eter u11 is set to 3)
COH Condenser overheated alarm
Solutions:
• check the condenser temperature
• parameter C6 is seen
Main consequences:
•the alarm output will be activated (provided that param-
eter u11 is set to 3)
• if parameter u11 is set to 6, the condenser fan will be
switched on
CSd Compressor blocked alarm
Solutions:
• check the condenser temperature
• parameter C7 seen
• switch off and re-start the instrument: if when the instru-
ment is switched back on, the temperature of the con-
denser is still higher than that established in parameter
C7, disconnect the power supply and clean the con-
denser
Main consequences:
• the compresser and the evaporator fan will be switched
off
• the alarm output will be activated (provided that param-
eter u11 is set to 3)
When the problem that caused the alarm disappears, the instrument
returns to normal function, with the exception of the compressor
blocked by condenser temperature alarm (code “CSd”) which requires
the switching off of the instrument or the temporary suspension of the
power supply.
9 ERRORS
9.1 Errors
CODE MEANING
Pr1 Room 1 probe error
Solutions:
• verify that the probe is a type NTC
• verify that the probe is intact
• verify the instrument-probe connection
• check the room 1 temperature
Main consequences:
• room 1 valve activity will depend on parameters C4 and
C5
• the defrost will not be activated
• the alarm output will be activated (provided that param-
eter u11 is set to 3)
Pr2 Room 2 probe error
Solutions:
• room 2 valve activity will depend on parameters C4 and
C5
Main consequences:
• the same as the preceeding case
Pr3 Condenser probe error
Solutions:
• the same as the preceeding case but with respect to the
condenser probe
Main consequences:
• condenser overheated alarm (code “COH”) will never
be activated
• compressor blocked by condenser temperature alarm
(code “CSd”) will never be activated
• the alarm output will be activated (provided that param-
eter u11 is set to 3)
PT • 08/12
EVCO S.p.A. • Code 104X225E104 • page 3/5
• if parameter u11 is set to 6, the condenser fan will oper-
ate in parallel with the condenser
When the problem that caused the alarm disappears, the instrument
returns to normal operation.
10 TECHNICAL DATA
10.1 Technical data
Case: open frame board.
Frontal protection degree: IP 00.
Connections: 6.3 mm faston connectors (0.248 in, power and
outputs), screw terminal board (inputs), 6-poles connector (serial port).
Operating temperature: from 0 to 55 °C (from 32 to 131 °F, 10 ...
90% relative humidity without condensaton).
Power supply: 230 VCA, 50/60 Hz or 115 VCA, 50/60 Hz.
Alarm buzzers: incorporated.
Measure inputs: 3 (room 1 probe, room 2 probe and condenser
probe) for NTC probe.
Digital inputs: 2 (high pressure switch and low pressure switch) for
normally open/normally closed contact (free contact, 5 V 1 mA).
Measurement field: from -40 to 105 °C (from -40 to 220 °F).
Resolution: 0.1 °C/1 °C/1 °F.
Digital outputs: 5 relays:
•compressor relay: 30 A res. @ 250
VCA (normally open contact)
•evaporator fan relay: 8 A res. @ 250
VCA (exchange contact)
•room 1 valve relay: 8 A res. @ 250
VCA (normally open contact)
•room 2 valve relay: from 8 A res. @
250 VCA (normally open contact)
•fifth output relay: from 5 A res. @
250 VCA (normally open contact).
The maximum load current allowed is 16 A.
Serial port: port for communicating with the programming key, the
set-up software system or the supervision system (through a serial in-
terface, via TTL, with a MODBUS communications protocol).
11 WORKING SETPOINT AND CONFIGURATION PARAMETERS
11.1 Working setpoint
MIN. MAX. U.M. DEFAULT
r1 r2 °C/°F (1) 10.0
r7 r8 °C/°F (1) 2.0
11.2 Configuration parameters
PAR. MIN. MAX. U.M. DEFAULT
SP1 r1 r2 °C/°F (1) 10.0
SP2 r7 r8 °C/°F (1) 2.0
PAR. MIN. MAX. U.M. DEFAULT
CA1 -25.0 25.0 °C/°F (1) 0.0
CA2 -25.0 25.0 °C/°F (1) 0.0
CA3 -25.0 25.0 °C/°F (1) 0.0
P1 0 1 - - - - 1
P2 0 1 - - - - 0
P4 0 1 - - - - 1
P5 0 1 - - - - 0
P8 0 250 ds 5
PAR. MIN. MAX. U.M. DEFAULT
r0 0.1 15.0 °C/°F (1) 4.0
r1 -99.0 r2 °C/°F (1) -50.0
r2 r1 99.0 °C/°F (1) 50.0
r3 0 1 - - - - 0
r6 0.1 15.0 °C/°F (1) 4.0
r7 -99.0 r8 °C/°F (1) -50.0
r8 r7 99.0 °C/°F (1) 50.0
r9 0 1 - - - - 0
PAR. MIN. MAX. U.M. DEFAULT
C0 0 240 min 0
C1 0 240 min 5
C2 0 240 min 3
C3 0 240 sec 0
C4 0 240 min 10
C5 0 240 min 10
C6 0.0 199.0 °C/°F (1) 80.0
C7 0.0 199.0 °C/°F (1) 90.0
C8 0 15 min 1
C10 0 9.999 hr 0
PAR. MIN. MAX. U.M. DEFAULT
d0 0 99 hr 4
d3 0 99 min 20
d4 0 1 - - - - 0
d5 0 99 min 0
d6 0 1 - - - - 1
d7 0 15 min 2
d8 0 1 - - - - 0
PAR. MIN. MAX. U.M. DEFAULT
A1 -99.0 99.0 °C/°F (1) -10.0
A2 0 2 - - - - 1
A4 -99.0 99.0 °C/°F (1) 10.0
A5 0 2 - - - - 1
A6 0 240 min 120
WORKING SETPOINT
first working setpoint (room 1); see also r0
second working setpoint (room 2); see also r6
WORKING SETPOINT
first working setpoint (room 1); see also r0
second working setpoint (room 2); see also r6
MEASUREMENT INPUTS
offset room 1 probe
offset room 2 probe
offset condenser probe
Celsius degree decimal point (for size displayed during normal operation)
1 = YES
temperature unit of measurement (2)
0=°C
1=°F
enabling of condenser probe
1 = YES
temperature shown during the normal operation
0 = room 1 temperature
1 = room 2 temperature
delay in display of variations in temperature detected by the probes
MAIN REGULATOR
first working setpoint differential (room 1)
minimum first working setpoint (room 1)
maximum first working setpoint (room 1)
locking of first working setpoint calibration (using the procedure described in paragraph 5.1)
1 = YES
second working setpoint differential (room 2)
minimum second working setpoint (room 2)
maximum second working setpoint (room 2)
locking of second working setpoint calibration (using the procedure described in paragraph 5.2)
1 = YES
COMPRESSROR PROTECTION SYSTEM
delay in switching on of compressor after the insturment switches on (3)
minimum time between two consecutive compressor start-ups; also delay in compressor start-up after conclusion of room 1 (or room 2) probe error (code “Pr1”) (4) (5)
minimum duration of compressor switch off time (4)
minimum duration of compressor switch on time
duration of room 1 valve (and room 2 valve) switch off during room 1 (or room 2) probe error (code “Pr1”); see also C5
duration of room 1 valve (and room 2 valve) switch on during room 1 (or room 2) probe error (code “Pr1”); see also C4
condenser temperature is higher than that at which the condenser overheating alarm is activated (code “COH”) (6)
condenser temperature is higher than the limit at which the compressor blocked alarm is activated (code “CSd”)
compressor alarm delay locked (code “CSd”) (7)
number of operating hours is higher than the limit at which the need for maintenance is signaled.
0 = function absent
DEFROSTING (it has effect on both the rooms and at the same time)
defrost interval (8)
0 = interval defrosting will never be activated
defrosting duration
0 = defrosting will not be activated
defrosting when instrument is switched on (3)
1 = YES
if d4 = 0, minimum time between switching on of instrument and activation of defrosting (3)
if d4 = 1, delay in activation of defrosting after instrument is switched on (3)
temperature displayed during defrosting
0 = room 1 (or room 2) temperature
1 = if at the time of defrosting activation, the room 1 (or room 2) temperature is lower than the “first working setpoint + r0” (or “second working
setpoint + r6)”, at most “first working setpoint + r0” (or “second working setpoint + r6”); if at the time of defrosting activation, the room 1 (or room
2) temperature is higher than the “first working setpoint + r0” (or “second working setpoint + r6”), at most the room 1 (or room 2) temperature
when defrosting is activated
(9)
dripping duration (during dripping the compressor will remain switched off)
defrosting activation methods
0=AT INTERVALS - defrosting will be activated once the instrument has altogether been running for time d0
1=AT INTERVALS - defrosting will be activated once the compressor has altogether been switched on for time d0
TEMPERATURE ALARMS
temperature below that at which the first minimum temperature alarm is activated (room 1, code “AL1”); see also A2 and A19
type of minimum first temperature alarm (code “AL1”)
0 = alarm absent
1 = relative to working setpoint (that is “first working setpoint - A1”; consider A1 without sign)
2 = absolute (that is A1)
temperature higher than that at which the first maximum temperature alarm is activated (room 1, code “AH1”); see also A5 and A19
type of maximum first temperature alarm (code “AH1”)
0 = alarm absent
1 = relative to working setpoint (that is “first working setpoint + A4”; consider A4 without sign))
2 = absolute (that is A4)
delay in first maximum temperature alarm (room 1, code “AH1”) after the instrument is switched on (3)

EVCO S.p.A. • Code 104X225E104 • page 4/5
A7 0 240 min 15
A8 0 240 min 15
A11 -99.0 99.0 °C/°F (1) -10.0
A12 0 2 - - - - 1
A14 -99.0 99.0 °C/°F (1) 10.0
A15 0 2 - - - - 1
A16 0 240 min 120
A17 0 240 min 15
A18 0 240 min 15
A19 0.1 15.0 °C/°F (1) 2.0
PAR. MIN. MAX. U.M. DEFAULT
F0 0 2 - - - - 1
F2 0 2 - - - - 0
F3 0 15 min 2
F9 0 240 sec 0
F11 0.0 99.0 °C/°F (1) 15.0
F12 0 240 sec 30
PAR. MIN. MAX. U.M. DEFAULT
i0 0 1 - - - - 1
i1 0 1 - - - - 0
i2 -1 240 s 5
i5 0 1 - - - - 1
i6 0 1 - - - - 0
i7 -1 240 s 5
PAR. MIN. MAX. U.M. DEFAULT
u2 0 1 - - - - 0
u4 0 1 - - - - 1
u6 1 120 min 5
u9 0 1 - - - - 1
u11 0 6 - - - - 0
PAR. MIN. MAX. U.M. DEFAULT
LA 1 247 - - - - 247
Lb 0 3 - - - - 2
LP 0 2 - - - - 2
(1) the unit of measurement depends on P2
(2) properly set the parameters corresponding to the regulators after modifying parameter P2
(3) the parameter has effect even after an interruption in the power supply that occurs while the instrument is switched on
(4) the time established with the parameter is counted even when the instrument is switched off
(5) if parameter C1 is set to 0, the delay after the end of the room 1 and room 2 probe error will be 2 min
(6) the parameter differential is 2.0 °C/4 °F
(7) if when the instrument is switched on, the condenser temperature is already above that established in parameter C7, then parameter C8 will not have effect
(8) the instrument stores the defroster interval count every 30 min; the modification of parameter d0 takes effect following the end of the preceeding interval or following the activation of manual defrosting.
(9) the display returns to normal operation when, at the end of evaporator fan disactivation, the room 1 (or the room 2) temperature falls below that at which the display was initally blocked (or if a temperature alarm
is signaled)
(10) during defrosting and dripping and when the evaporator fan is stopped, the temperature alarms are absent, provided that these were signaled after the activation of defrosting
(11) if parameter P4 is set to 0, the condenser fan will function in parallel with the compressor
(12) to avoid damaging the unit connected to the instrument, change the parameter setting when the instrument is switched off
(13) if parameter u2 is set to 0, switching off the instrument may cause the cabinet light and/or the auxiliary output to switch off (the next time the instrument is switched on the unit connected will remain switched off);
if parameter u2 is set to 1, switching off the instrument will not cause the cabinet light and/or the auxiliary output to switch off (the next time the instrument is switched on the unit connected will remain switched
on).
first temperature alarm delay (room 1, code “AL1” and code “AH1”)
delay in first maximum temperature alarm (room 1, code “AH1”) following the conclusion of evaporator fan disactivation (10)
temperature below that at which the second minimum temperature alarm is activated (room 2, code “AL2”); see also A12 and A19
type of minimum second temperature alarm (code “AL2”)
0 = alarm absent
1 = relative to working setpoint (that is “second working setpoint - A11”; consider A11 without sign)
2 = absolute (that is A11)
temperature higher than that at which the second maximum temperature alarm is activated (room 2, code “AH2”); see also A15 and A19
type of maximum second temperature alarm (code “AH2”)
0 = alarm absent
1 = relative to working setpoint (that is “second working setpoint + A14”; consider A14 without sign))
2 = absolute (that is A14)
delay in second maximum temperature alarm (room 2, code “AH2”) after the instrument is switched on (3)
second temperature alarm delay (room 2, code “AL2” and code “AH2”)
delay in second maximum temperature alarm (room 2, code “AH2”) following the conclusion of evaporator fan disactivation (10)
differential of parameters A1, A4, A11 and A14
EVAPORTOR FAN
evaporator fan activity during normal operation
0 = switched off
1 = switched on
2 = in parallel with the compressor; see also F9
evaporator fan activity during defrosting and dripping
0 = switched off
1 = switched on (setting parameter d7 to 0 is recommended)
2 = dependent on F0
maximum duration of evaporator fan disactivation; (during evaporator fan desactivation the compressor can be switched on and the evaporator fan will remain switched
off)
delay in the switching off of evaporator fan following the switching off of the compressor (only if F0 = 2)
condenser temperature above that at which the condenser fan is switched on (“F11 + 2.0 °C/4 °F, only if u11 = 6 and provided the compressor is switched on); see also
F12 (11)
delay in switching off of the condenser fan following the switching off of the condenser (only if u11 = 6); see also F11
DIGITAL INPUTS
effect caused by the activation of the high pressure switch
0 = no effect
1 = the compressor and the evaporator fan will be switched off and the condenser fan (only if u11 = 6) will be switched on, once time i2 has passed the display will show
the flashing code “HP” and the buzzer will be activated (until the input is disactivated)
type of high pressure switch input contact
0 = normally open (active input with closed contact)
1 = normally closed (active input with open contact)
high pressure switch input alarm delay (code “HP”)
-1= the alarm will not be signaled
effect caused by the activation of the low pressure switch
0 = no effect
1 = the compressor and the evaporator fan will be switched off, once time i7 has passed the display will show the flashing code “LP” and the buzzer will be activated (until
the input is disactivated)
type of low pressure switch input contact
0 = normally open (active input with closed contact)
1 = normally closed (active input with open contact)
low pressure switch input alarm delay (code “LP”)
-1= the alarm will not be signaled
DIGITAL OUTPUTS
enabling of manual switch on/switch off of the cabinet light or the auxiliary output when the instrument is switched off
(only if u11 = 0 or 2) (13)
1 = YES
enabling of alarm output disactivation with the silencing of the buzzer (only if u11 = 3)
1 = YES
operating time of demistor heater (only if u11 = 1)
enabling of buzzer
1 = YES
operation controlled by fifth output (12)
0=CABINET LIGHT - in this case the AUXILIARY key and parameter u2 will be activated
1=DEMISTER HEATER - in this case the AUXILIARY key and parameter u6 will be activated
2=AUXILIARY OUTPUT - in this case the AUXILIARY key and parameters u2 will be activated
3=ALARM OUTPUTS - in this case parameter u4 will be activated
4 = reserved
5 = reserved
6=CONDENSER FAN - in this case parameters P4, F11 and F12 will be activated
SERIAL NETWORK (MODBUS)
instrument address
baud rate (0 = 2,400 baud, 1 = 4,800 baud, 2 = 9,600 baud, 3 = 19,200 baud)
parity (0 = none, 1 = odd, 2 = even)

EVCO S.p.A. This document belongs to EVCO; unless you are authorized by EVCO, you can not publish this document.
Via Mezzaterra 6, 32036 Sedico Belluno ITALY EVCO does not take any responsibility about features, technical data and possible mistakes related in this document.
Phone +39-0437-852468 • Fax +39-0437-83648 EVCO does not take any responsibility about damages coming by the non-observance of additional information.
[email protected] • www.evco.it EVCO reserves the right to make any change without prior notice and at any time without prejudice the basic safety and operating features.
EVCO S.p.A. • Code 104X225E104 • page 5/5
12 ELECTRIC CONNECTION
12.1 Preliminary notes
With reference to the electrical wiring diagrams:
• the unit connected to and operated by the fifth outpt depends on parameter u11
• the serial port is the port for communicating with the programming key, the set-up software system and the supervision system (through a serial interface, via TTL, with MODBUS communications protocol); the port
must not be used for these purposes simultaneously.
12.2 Electrical wiring
12.3 Electrical wiring warnings
• do not use electric or pneumatic screwers on the terminal blocks
• if the instrument was brought from a cold place to a hot one, humidity may condense inside the instrument; wait approximately one hour before switching on the power
• make sure that the power supply voltage, frequency, and the electric operating power of the instrument are compatible with the those of the local power voltage
• disconnect the power before performing any type of maintenance operation
• do not use the instrument as a safety device
• for information about the instrument and repairs contact a member of the EVCO sales network.

Table of contents
Other Evco Controllers manuals

Evco
Evco EV3 MVC Series Instructions for use

Evco
Evco EV3 WEB User guide

Evco
Evco EV3 CHIL User guide

Evco
Evco Vcolor 379 User guide

Evco
Evco C-PRO CLIMA SYSTEMA User guide

Evco
Evco EV9376 User manual

Evco
Evco EV3 CHIL User manual

Evco
Evco EVFTFT219 User manual

Evco
Evco EVJ825P9VX3 User guide

Evco
Evco EV3B71 User manual

Evco
Evco Vcolor 318 M User guide

Evco
Evco c-pro 3 nano CHILL User manual

Evco
Evco EVJ 800 series User guide

Evco
Evco Vcolor 348 Series User guide

Evco
Evco Vcolor 229 M Series User manual

Evco
Evco EV3B94 User manual

Evco
Evco EV3143 User manual

Evco
Evco C-pro 3 giga User manual

Evco
Evco EV3401 User manual

Evco
Evco EV3 200 WEB User manual