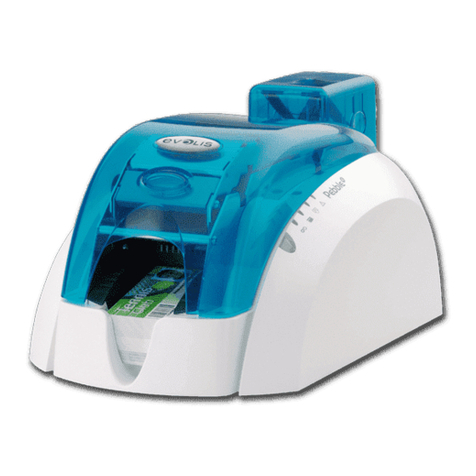
Evolis New Pebble User manual

Table of contents
Chapter I – Setting Up Page 3
Introduction Page 3
1. Unpacking my printer Page 3
2. Description of the printer and its functions Page 4
3. Installing my printer Page 5
a. Installation of the interface and the supply cable Page 5
b. Installation of the ribbon Page 6
c. Loading the cards Page 7
Chapter II –Printing Page 9
1. Installing my printer driver Page 9
2. Configuring the printing settings Page 10
3. My first cards Page 12
Chapter III –Cleaning Page 15
1. Automatic printer cleaning Page 15
2. Cleaning of the print head Page 17
3. Maintening the cleaning roller Page 18
Chapter IV –Assistance Page 19
1. Printer Control Panel Page 19
2. Troubleshooting Page 20
3. Customer Assistance Page 23
Chapter V –Specifications Page 24
Chapter VI –Evolis Warranty Page 25
1. Extent of the warranty Page 25
2. After sales service in the warranty period Page 26
3. After sales service outside the warranty period Page 26
Chapter VII –Supplies Page 27
Appendix A –Magnetic Encoding Page 29
Appendix B –Smart Card Contact Station Page 33
1
English
Français
Français English

2
Français
FrançaisFrançais English

Introduction
We congratulate you on having made the New Pebble printer your choice !
The New Pebble printer is the ideal solution for all your printing of plastic cards in fields as
extensive and varied as identification, access control, management of visitors, members, etc.
This product, comes with a wide range of assistance services, from the Evolis company and its
partners, specially selected to help you in an efficient and professional manner.
1. Unpacking my printer
Verify whether the following parts have been supplied with your printer :
Power supply and power supply cable
Printer interface cable
User’s guide
Evolis CD Software
Cleaning Case
3
English
Français
Français English
1.
Chapter 1
IMPORTANT !
The printer must be placed on a level surface, in a dust free
environment. It is essential to be able to access the printer from all
sides for its installation.
Setting up

Description of the printer : Functions
Thermal print head For printing cards.
Ribbon Spindles For installing the ribbon in the printer.
Card Output Hopper Collects the cards ejected from the printer.
Control Panel Shows the printer activity.
Cleaning Roller Removes any dust before printing the card.
Card Feeder Holds the cards to be printed.
Identification label Gives the printer model and serial number.
Electrical connector For connecting the printer to the power supply.
Switch On/Off switch.
Parallel Port Enables data to be received and sent “from”and “to”the
computer.
USB Port (optional) Enables data to be received and sent “from”and “to”the
computer.
Cover lever Allows the printer cover to be opened and closed.
Printer control Panel
There is a Control Panel on the upper part of the printer.
Four warning lights are associated with symbols showing the activity during printing.
These lights show :
4
Français
FrançaisFrançais English
2. Description of the printer and its functions
Switch on, No Push
data reception card button
Ribbon Cleaning
end signal

3. Installing my printer
a) Installation of the interface and supply cables:
5
English
Français
Français English
IMPORTANT !
To disconnect this product, pull the plug out of the socket, which
should remain easily accessible.
This product must be connected to an electrical installation correct-
ly protected and equipped with a protective earth.
Ensure that the printer
switch is in position 0
(switched off).
OR
1. Connect the supplied parallel
cable to your printer and fix
it by folding down the two
metal clips on the printer
onto the cable connector as
shown.
2. If you have a printer with a
USB port, connect the
supplied USB cable to your
printer as shown.
USB Port optional
3. Connect the other end of the
cable to the appropriate port
of your computer.
4. Connect the power cable to
the supply then plug in the
power cable connector to
the printer. Then connect the
end of the power cable to an
earthed mains power point.

b) Installation of the ribbon
WARNING
The ribbon must be correctly installed for the printer to function.
Only use Evolis printer ribbons. Evolis accepts no responsibility if the
printer is damaged following the use of an unapproved ribbon.
The ribbon is automatically positioned each time the cover is clo-
sed.
1. Open the printer cover by
pressing on the opening
lever, then pivoting it.
2. Remove the two ribbon
spindles that are in the
printer.
4. Replace the spindles with ribbon
in the printer as shown.
5. Close the printer cover.
3. Insert the two spindles in
the ribbon cores as
shown.
6
Français
FrançaisFrançais English

7
English
Français
Français English
c) Loading the cards
IMPORTANT !
Advice about selecting cards :
• Only use the types of card appearing in the Specifications page of
this manual
• Do not touch the printable surface of the cards ; the print quality
depends upon this
• Do not use damaged or folded cards or ones with an embossed
texture.
• Always store the blank cards in a clean, dust free location
Card thickness :
•The Evolis printer accepts cards from 0.25mm (10mil) to 1mm
(40mil) thick.
1. Push and maintain down
the lever as shown. Then
insert 100 cards max.
(0.76mm –30mil) in the
feeder.
2. Ensure that the stack of cards
is correctly aligned with the
edge of the feeder.
3. Move up or down the handle as
shown to adjust the card thick-
ness (the factory setting for card
thickness is 0.76mm –30mil).

8
Français
FrançaisFrançais English

1. Installing my printer driver
Before using your New Pebble printer, you must install its printer driver.
Reminder : Evolis Pebble driver and printers operate under Windows 95/98/2000, Me, NT 4.0 and Xp.
Printer driver installation procedure
1. Start Windows, ensuring that no other Windows application is running.
2. Place the CD in the CD Rom drive of your computer. The program runs automatically.
3. Click on the option Pebble Printer driver installation from the menu. The installation of the
driver runs automatically.
However, if the installation program does not run automatically, proceed as follows :
1. Start Windows, ensuring that no other application is running.
2. Insert the Starter CD in the CD ROM drive
3. Click on Start in the Windows, select Settings then Printers.
4. Double-click on the Add Printer icon.
5. Click on Next until the list of makers is displayed.
6. Click on Have Disk then on Install from…
Select the drive letter corresponding to your CD ROM drive
Click on Browse.
7. In the tree diagram of the CD ROM drive, double-click on the Drivers directory
8. Double-click on the directory corresponding to your Windows environment.
9. Select the file “evolis.inf ”.
10. Click on OK. The name of the printer manager appears.
11. Continue the installation by following the instructions displayed on the screen.
Note that the installation of a printer driver under NT may be subject to authorisation by the
administrator as a function of "login system"
9
English
Français
Français English
2.
Chapter 2
NOTE !
The Evolis CD Software includes a utility which automates the installation
of the printer driver. This utility installs the driver that is suitable for your
configuration, in the Windows operating language.
Printing
2. Configuring the printing settings
Your printer has numerous setting functions in the print manager.
These printing settings are accessible :
•from Start in the Windows bar, Settings then Printers
1. Select Evolis Pebble
2. In File, in the bar of the Windows window menus, select Properties (for Windows
95/98/2000) or Default Document (for Windows NT 4.0).
•From your Windows software.
In File, from the menu bar of your application, select Print or Printing Configuration.
Note that the procedures vary according to the type of software used and the Operating System
(95/98 /2000 or NT)
Default Evolis Pebble printer
To select the New Pebble printer as the default, proceed as follows :
1. Click on Start, in the Windows bar, select Settings then Printers.
2. Click on the New Pebble Printer icon then point to File in the menu bar.
3. Select Set as Default and close the window.
Evolis Pebble Properties
Different dialog boxes allow you :
•to carry out adjustments such as orientation and print quality.
•to manage the different printing and use modes of the appropriate ribbons.
•to select the printer port.
•to activate the various printer control and maintenance functions.
10
Français
FrançaisFrançais English
IMPORTANT !
Before using the printer, check that it is selected as the default
printer.

On line help
A help file guides you in the use of each of the print management settings according to the various
printing modes and criteria entered. In order to familiarize yourself with these various settings, we
recommend that you consult this help before making any changes.
"Characteristics" Dialog Box
This dialog box enables the selection of :
1. the type of ribbon
2. the orientation of the printing (Portrait or
Landscape)
3. the number of copies of the card
"Graphic" Dialog Box
In "5 Panel ribbon" mode enables the management of :
1. the use of the black panel when "5 Panel ribbon" has
been previously selected as the ribbon type
2. the removal of the gloss panel of a colour ribbon as
a function of a deliberate choice or of a type of card
requiring a covering reserve.
More options enables some print settings with a "5 Panel
ribbon" film ribbon to be influenced
11
English
Français
Français English

12
Français
FrançaisFrançais English
1See paragraph 2 of this chapter
"Tools" Dialog Box
This dialog box allows support and 1st level maintenance for
your printer. We recommend that you print a "Test Card" at
the first use and keep it. This card records the information
likely to be required at the time of an after sales service call.
"General" Dialog Box
This dialog box is a Windows information window. It enables a test page to be printed for the sole
purpose of checking the communication between the computer and the printer.
"Details" Dialog Box
This dialog box is a Windows control window enabling the printer port to be selected and to check
the use of the appropriate printer driver. The displayed settings must only be changed by an expe-
rienced person.
"Color Management" Dialog Box
This dialog box enables the printing to be associated with a defined colour management profile.
3. My first cards
A large number of Windows applications allow document printing (Word –Access –Excel, for
example). In order to familiarize you with the page setup of a card and the printer settings for it,
we offer you the following example.
Under Microsoft”Word
After having previously registered the Evolis printer as
the default
1. Run Word and in File click on Page Setup.
2. The dialog box offers :
•"Paper Format " select Card
•"Orientation" select Landscape

3. The "Margins" dialog box offers
"printing margins" •Select 0 cm
Your Word window should now appear like this
You are ready to personalize your card by introdu-
cing the various composition elements :
•Logo and Illustration
•Identity photo
•Permanent texts and Variables (Identity)
•Etc..
Example :
Note that this example does not claim to
introduce the operator to the Word
application. Its only objective is to establish a
relationship between the graphics of a card
and the New Pebble Printer management
settings necessary for printing it.
13
English
Français
Français English

New Pebble Card Printer Driver Settings
To access the settings from the Word window :
1. In the menu bar point to File and select
"Print"
2. The dialog box shows you that the Evolis
printer is selected. Then click on
Properties.
3. The dialog box of the Evolis Pebble driver
opens2. Do not forget to refer to the help
for each dialogue box
The print settings for this graphic example are :
1. "Characteristics" Dialog Box select :
•5 Panel ribbon
•Landscape orientation
•Copy (number)
2. "Graphic" Dialog Box select :
•Black Panel : "Only the Black Characters"
•Varnish panel : "Full varnish"
3. Click on Apply, if you change a setting, then on OK to successively close each dialog box.
4. On returning to the main window click on OK to start printing.
14
Français
FrançaisFrançais English
2Go over paragraph 2 again if necessary

Protect the validity of your Guarantee!
Not observing the cleaning procedures contained in this chapter can invalidate your printer’s gua-
rantee. The Evolis company accepts no responsibility if the printer is used in an unauthorised clea-
ning condition.
The following cleaning articles are available from Evolis :
❖Pre-saturated cleaning cards with 99% isopropyl alcohol
❖Cleaning swabs with 99% isopropyl alcohol base
❖Pre-saturated cleaning cloths
1. Automatic Printer Cleaning
The New Pebble printer is fitted with an AutoClean alarm system, which is activated every inserted
1000 cards.
When the printer requires cleaning, the warning light switches on, as follows :
This simple cleaning system requires the use of specially pre-saturated cleaning cards specially desi-
gned for the printer. A cleaning kit with samples of these cards is delivered with your package.
Repeatedly running the card through inside the printer cleans the card transport rollers, the dust
removing roller and the print head.
15
English
Français
Français English
3.
Chapter 3
IMPORTANT !
The printer will continue to function even though the automatic
cleaning alarm is activated.
Cleaning

3. Remove the ribbon from the printer then close the cover.
Press the control panel push button for a few seconds.
The automatic cleaning starts.
16
Français
FrançaisFrançais English
WARNING !
After a cleaning cycle, wait 2 minutes for the cleaning fluid to evaporate
completely before using the printer.
NOTE !
It is also possible to start an automatic cleaning sequence without waiting
for the printer light signal. This is done by pressing on the Control Panel
push button for a few seconds. In this case, first repeat operations 1, 2 and
3 quoted above.
To start auto-cleaning the printer:
1. Remove the cards
from the feeder.
2. Take a pre-saturated
cleaning card and
place it in the feeder.

2. Print head maintenance
17
English
Français
Français English
WARNING !
The print head is a fragile component of your printer. To avoid
damaging it, never put the print head in contact with pointed
and/or metal objects. Also avoid touching the print head surface
with the fingers. Changed print quality or even permanent de-
gradation of the print head could result.
IMPORTANT !
Before cleaning the print head, unplug the printer from the power
supply.
WARNING !
After a cleaning cycle, wait 2 minutes for the cleaning fluid to
evaporate completely before using the printer.
The print head is cleaned during the automatic cleaning of your printer (see previous section).
However, in order to preserve the original print quality and to reduce problems caused by an excess
of ink on the print head surface, it is recommended that you clean it regularly (about every 1000
cards) using the swab supplied with your printer.
To carry out print head maintenance :
1. Open the printer
cover and locate
the print head.
2. Take the swab
from the Cleaning
Case supplied with
your printer.
3. Gently rub the swab from left
to right on the print head for a
few seconds.

3. Maintaining the cleaning roller
Your New Pebble printer has a cleaning roller. Its adhesive surface retains the dust when cards are
running through.
Although the cleaning of this roller is carried out during the automatic cleaning of the printer, it is
nevertheless recommended that you clean it regularly and simply with a cloth supplied with the
cleaning case in order to ensure that the card surface is perfectly clean.
To carry out the maintenance of the cleaning roller :
18
Français
FrançaisFrançais English
1. Open the printer cover.
2. Locate the roller and remove it from the printer
3. Clean the roller with a cloth from your cleaning case.
Remove all the dust by rubbing lightly with the cloth
over the whole surface of the roller. Wait for 2 minutes
for the cleaning fluid to evaporate completely. If neces-
sary, the cleaning roller can be cleaned under (cold) run-
ning water then dried with a fluff-free cloth or with a
neutral gas dust-removing spray
4. Once dry replace the roller in
the printer then close the
cover.

For the best possible satisfaction of customer requirements, Evolis provides a complete range of
technical assistance services.
(See section 3 –Customer Assistance)
1. Printer Control Panel
Refer to the following conditions to determine the status or the current activity of your printer.
The control panel warning lights are shown in one of the following conditions:
19
English
Français
Français English
4.
Chapter 4
•NO CARD or INTERNAL PRINTER PROBLEM
also enables:
•The printing of a test card
(see this Chapter)
•The running of an AUTOMATIC CLEANING cycle
(See Chapter 3 –Cleaning)
The push button returns the control panel to its original status after processing the following
situations:
PRINTER READY PROCESSING
END OF RIBBON NO CARD
INTERNAL PRINTER PROBLEM AUTO-CLEANING
SWITCHED ON SWITCHED OFF
FLASHING
Assistance

20
Français
FrançaisFrançais English
2. Troubleshooting
The information below will help you to resolve possible problems that occur when you are using
your printer. If, in spite of this information, you are not able to resolve the problem, contact your
Evolis retailer or an approved Evolis service provider.
❍Nothing prints
1. Check the power supply
Ensure that:
•The power supply cable is correctly connected to the printer and to a mains plug which is
functioning.
•The printer is switched on (position 1). The green control panel warning light must be on.
2. Check the card feeder and the card in the printer
•Check the presence of cards in the feeder.
•Check that no jamming has occurred.
•See page 22 of this chapter for how to cure jamming.
3. Check the ribbon
•Check that the ribbon has been correctly installed and that the printer cover is properly clo-
sed.
4. Print a test card
•Ensure that there is a ribbon in the printer.
•Switch off the printer.
•Press the control panel push button
•Switch on the printer again, whilst holding the pressure on the push button
•The green warning light comes on
•Release the button as soon as the green warning light flashes
•If the test card prints, the problem is not in the printer.
5. Check the printer interface cable
•Check the connection to the computer and to the printer.
•Test with another cable of the same type.
6. Check the printer driver
•Check the presence of the New Pebble Printer driver in the Windows settings
7. Check the computer printing settings
•Ensure that the New Pebble printer is selected as default printer.
•See “Configuring the printing settings ”of the Printing chapter page 10.
8. Check the network configuration
If your printer is connected to a network, check that it is correctly configured in the network
environment. See the documentation relative to your network for more information.
Table of contents
Other Evolis Printer manuals

Evolis
Evolis PRIMACY 2 User manual

Evolis
Evolis AGILIA User manual

Evolis
Evolis QUANTUM User manual

Evolis
Evolis DUPLIPASS User manual

Evolis
Evolis Avansia User manual

Evolis
Evolis TattooRW User manual

Evolis
Evolis Tattoo User manual

Evolis
Evolis KU10E User manual

Evolis
Evolis Dualys User manual

Evolis
Evolis KC PRIME User manual

Evolis
Evolis KC MAX User manual

Evolis
Evolis Primacy User manual

Evolis
Evolis PRIMACY 2 User manual

Evolis
Evolis Dualys 3 User manual

Evolis
Evolis Badgy User manual

Evolis
Evolis Primacy User manual

Evolis
Evolis Tattoo 2 User manual

Evolis
Evolis EDIKIO FLEX User manual

Evolis
Evolis EDIKIO ACCESS User manual

Evolis
Evolis tattoo rw User manual