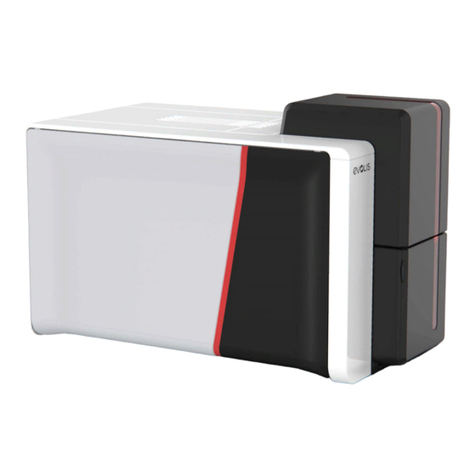
Evolis Securion User manual

USER GUIDE
Evolis Card Printer © 2009. All rights reserved. November 2009.
Ref. KU08E B0

Copyright
Evolis Card Printer © November 2009. All rights reserved.
Copyright notice
Users must observe the copyright regulations applicable in their country. This manual must not be photocopied, translated, reproduced
or transmitted, in whole or in part, for any reason and by any electronic or mechanical means whatsoever without the express written
consent of the Evolis Card Printer company.
All the information contained in this document is subject to change without prior notice.
Evolis Card Printer cannot be held liable for any errors that may be found in this manual, or for any loss or damage arising accidentally or
as a result of dissemination or use of this manual.
Trademarks
is a trademark of Evolis Card Printer. All other trademarks belong to their respective holders.
Warranty
Refer to the warranty notice supplied with your printer for warranty terms and conditions and limitations.
Environmental information – recycling of end-of-life products
The manufacture of the equipment that you have purchased required the extraction and use of natural resources. It may contain
materials that are hazardous to health and the environment.
To prevent the dispersal of such materials into our environment and reduce the pressure on our natural resources, we recommend that
you use existing collection systems. These systems will appropriately re-use or recycle most of the materials in your end-of-life equipment.
The crossed-out dustbin symbol on your device is a reminder to use these systems.
If you need further information on collection, re-use and recycling systems, contact your local or regional waste management body.
www.evolis.com or by emailing the following address:
1

About your new printer
Thank you for choosing an Evolis printer.
Using your new printer, you will be able to create a wide variety of high-quality cards and badges which can be printed in various
thicknesses, colours and styles. This printer uses consumables and accessories available from Evolis. For further details, visit our website at
www.evolis.com.
Warranty registration
Please register on line at www.evolis.com to receive our special offers and general information.
Once on the website, click on Drivers and Support
printer.
Getting started
The purpose of this user guide is to guide you, step by step, through your printer and how it works. Take some time to read it in order to
better understand your printer and its features, and to save time during installation and use.
Contents
The bookmarks found top left of your screen can be used to navigate between the various sections in this user guide.
Icons
The following icons are used in this manual to highlight important information:
Information providing further details or depth about certain points in the main text.
Indicates that failing to take the recommended action is liable to damage your printer.
This symbol indicates that a video showing the procedure is available on the www.evolis.com website.
2

Getting started
1-1 Unpacking
Your printer is supplied with several accessories that we ask you to look at closely.
This list may vary depending on your location.
The printer is shipped in special packaging designed to prevent any damage in transit. If you notice any visible damage, do not hesitate
to contact the shipper and immediately inform your Evolis dealer, who will tell you the procedure to follow.
Evolis takes great care over the quality of its packaging and we ask that you keep this packaging somewhere clean and dry.
You will be asked for the full original packaging (outer box, inner wedges and protective bags) in the event that
the printer is returned. If the printer is returned without its original packaging and components are damaged in
transit, these components will no longer be covered by the warranty. You will be charged for new packaging
for shipping the printer back to you.
Accessories supplied with your printer:
OPower supply unit - VP ELECTRONIQUE Type PAC150M or PROTEK POWER Type PUP150N-14.
OMains power cable.
OUSB cable.
OInstallation and documentation CD-ROM.
OStarter cleaning kit.
OQuick installation guide.
OWarranty notice.
OCompliance statement documentation.
If any of these components is missing, please contact your Evolis dealer.
Use only the power supply unit supplied with your Evolis printer.
VP ELECTRONIQUE Type PAC150M or PROTEK POWER Type PUP150N-14.
Use only the USB cable supplied with your Evolis printer.
The Evolis printer must be placed in a dry location, protected from dust and draughts but well-ventilated. Take
1
3

1-2 Description of the printer and its functions
1
4
1- 100-card input feeder
2- Encoding and printing area
3- Card turnover area
4- Defective card reject hopper
5- Card lamination module
6- 100-card capacity output hopper
7- 4-button control panel and 2-line LCD
display
8- LED indicator showing printer activity
9- Centralised cover lock to secure all
internal components
10 - Power supply socket
11 - Computer USB socket
12 - RJ45 Ethernet socket
13 - DB9 connector(s) (option)
14 - Power supply switch
15 - Position for Kensington®lock
16 - Serial number label
17 - 300-dpi colour thermal print head
18 - Cleaning roller
19 - Card thickness adjustment gauge
20 - Magnetic encoding head option
21 - Smartcard contact station
22 - Antenna for contactless card
encoding (RFID)

1-3 Installation
1-3a CONNECTING THE PRINTER
³Connection to the power supply
The printer must be connected to a properly protected and earthed electrical installation.
FI: Laite on liitettävä suojamaadoitus koskettimilla varustettuun pistorasiaan.
NO: Apparatet må tilkoples jordet stikkontakt.
SE: Apparaten skall anslutas till jordat uttag.
This is a Class A device. Operation of this equipment in a residential area may cause interference to radio communications.
Should this occur, the user may be asked to take appropriate measures.
Connect the power cable to the power supply unit, then plug the power
cable connector into the printer.
Next, plug the end of the power cable into an earthed power socket.
Power up the printer by switching the switch to ON.
The display on the control panel lights up and the message
the screen displays ‘READY’ and the LED is a steady green light. Should
this not be the case, then either installation has not been carried out
correctly or the printer is not working properly. Check the installation.
Before attempting any maintenance, always ensure that the power switch is in the OFF position and that the
power cable is unplugged. For your personal safety, ensure that both the switch and cable remain easy to
access, especially in the event of an emergency.
To save energy, the printer will automatically switch itself to standby mode after 10 minutes of inactivity.
³Connecting the USB cable
Under no circumstances should you connect the USB data cable before installation of the printer driver is
complete.
Refer to the section on printer driver installation for further details, and follow the instructions carefully.
1
5
1-3b RIBBONS
Evolis original ribbons optimise your printer’s operation and avoid causing damage to it. The use of ribbons from other suppliers is liable to
damage your printer and voids the manufacturer’s warranty for the printer.
For optimum print quality, Evolis recommends that the printer is fully cleaned every time the ribbon is changed. See the Servicing and
Maintenance section of this manual.
³Fitting the ribbon
Ensure that the appropriate ribbon type is selected in the print driver.
The Securion printer accepts two types of ribbon:
O
O
For optimum print and lamination quality, Evolis recommends that the printer is fully cleaned every time the
ribbon is changed. This is left to the judgement of users, who will nonetheless take care to comply with the
mandatory cleaning cycles in order to keep the equipment in full working condition (see the Maintenance
section). Validity of the manufacturer’s warranty is dependent on adherence to cleaning cycles.
1
6

Monochrome or colour ribbon
Open the printer cover.
Press down on the latch to unlock the print head bracket and tilt it to the right until it reaches the vertical position.
Fit the new ribbon in the position shown.
Lower the print head bracket and lock it in position.
Close the printer cover again.
1
7

module. Follow the safety instructions.
Open the printer cover.
1
8

Insert the cartridge into the lamination module, pushing it until it locks into place with a click once it comes to stop in
the holder.
Release the cartridge from the lamination module.
¡
¢Close the printer cover again.
1
9
¢
¡

1-3c CARDS
Use only the card types recommended by Evolis.
Do not touch the printable surface of the cards in order to preserve print quality.
Keep your cards protected from dust.
The printer accepts PVC and PET cards between 0.25 mm and 1 mm thick. For optimum quality, the cards used must meet the
ISO 7810 standard. There are several types:
OBlank cards
OMagnetic strip cards
OContact smartcards
OContactless smartcards
OMagnetic strip smartcards
Be extremely careful to ensure that magnetic strip cards and contact smartcards are properly positioned in the input feeder. The encoding
option will fail if cards are not inserted in the right direction.
The usual procedure is for cards to be laminated after printing. This process requires cards to be heated to high temperatures, and they
Evolis recommends the use of cards specially designed for lamination purposes.
For more information, please contact your Evolis dealer who will advise on your choices.
1
10

³Loading the cards
Open the printer cover.
Remove the card feeder as shown.
Insert the cards in the feeder as indicated, with the side to be printed facing down.
Adjust the gauge setting to match the thickness of your cards (see section 3.3.3 for more information).
Replace the card feeder as shown.
Close the printer cover again.
1
11

³Removing printed cards
Once the print and/or encoding cycle is complete, cards are delivered into the output hopper found on the left of the device. This has a
capacity of 100 x 0.76 mm (30 mil) cards.
Users can select from three methods to collect cards from the output hopper:
OFront side of card visible – First card at bottom of stack
ORear side of card visible – First card at top of stack
OCards ejected in their position on exit from the lamination area
The method is set via the Properties menu in the print driver.
Please see the Print driver Properties section for more information.
1
12

³Adjusting card thickness
The printer is equipped with a manual card thickness adjustment mechanism which can be reached either through the card input feeder
or through the inside of the printing module when the print head bracket is open. The printer accepts cards between 0.25 mm and 1 mm
thick. The factory setting for card thickness is 0.76 mm.
Adjusting card thickness through the feeder cage:
Open the printer cover.
Remove the card feeder from the printer as shown.
Adjust the thickness of the cards used by moving the lever from right to left to the desired card thickness.
Put the feeder back into the printer by pressing on the upper section of the feeder until it clicks.
Close the printer cover again.
1
13

Adjusting card thickness from inside of the printer:
Open the printing module cover.
Press down on the latch to unlock the print head bracket and tilt it to the right until it reaches the vertical position.
If necessary, remove any ribbon inside the printer.
1
14

Then adjust the thickness of the cards used by moving the lever from right to left to the desired card thickness.
Replace the ribbon in the printer, then close the print head bracket.
Close the printer cover again.
1
15

³Reject hopper management
Your printer is equipped with a reject hopper, the purpose of which is to separate correctly customised cards from incorrect
cards.
Incorrect cards are automatically stored in a reject hopper with a capacity of 15 cards.
The reject hopper needs to be emptied regularly to avoid halting jobs in progress. This operation is carried out in two stages:
Removal of the cards
Resetting the rejected card counter to zero (so that the printer knows how full the reject hopper is)
To empty the hopper and reset the counter, please proceed as follows:
Open the printer cover.
Close the printer cover.
Press any key on the control panel to enter the menu.
Select the CONFIGOK, then scroll down to select REJECT HOPPEROK.
Select the ResetOK.
Exit the menu.
Evolis advises you to empty the reject hopper regularly, such as whenever the ribbon is changed or during
routine maintenance.
1
16

Printing
The information about the procedures described in this section refers to a Windows XP environment.
2-1 Installing the print driver
factor having a negative impact on the quality of card customisation. It is therefore essential to proceed in stages, changing settings only
when you are completely sure. Evolis offers the option to revert to the factory settings at any time if the adjustments made do not give
the expected results.
Your printer is delivered with a CD containing the print drivers for Windows and Macintosh platforms.
To install a print driver, insert the CD into your computer and select the print driver menu. A program will guide you through the entire
installation process.
Do not connect your USB cable to your computer until prompted to do so by the installation program.
For the connection procedure, see the section on Connecting the Printer.
Follow the installation procedure scrupulously. Some versions of Windows and Macintosh require the user to
have administrator rights to install the driver.
2
17

2-2 Managing the print settings
Before using your printer, it is essential to check and/or change the default print driver settings:
ORibbon type
OCard type
O
O…
list of consumables.
dealer for any advice and assistance needed before making any changes.
These print settings are accessible:
OFrom the Start button found bottom-left on the Windows task bar, select Printers and faxes.
OSelect your printer and double click.
OFrom the Printer menu, select Properties.
O
O“Graphics” and “Tools”.
2
18

³“Graphics” tab
OThe ribbon type
OFront/back printing
OCard collection method
OCard orientation, portrait or landscape
ONumber of copies
³“Lamination” tab
O
OChanging lamination settings
O
2
19
Other manuals for Securion
1
Table of contents
Other Evolis Printer manuals

Evolis
Evolis Avansia User manual

Evolis
Evolis Dualys User manual

Evolis
Evolis BadgePass NXT5000 User manual

Evolis
Evolis Primacy User manual

Evolis
Evolis QUANTUM User manual

Evolis
Evolis Zenius User manual

Evolis
Evolis Pebble User manual

Evolis
Evolis Unitech Securion User manual

Evolis
Evolis Securion User manual

Evolis
Evolis TattooRW User manual

Evolis
Evolis Pebble User manual

Evolis
Evolis PRIMACY 2 User manual

Evolis
Evolis Dualys User manual

Evolis
Evolis The Tattoo Rewrite User manual

Evolis
Evolis KC MAX User manual

Evolis
Evolis Badgy User manual

Evolis
Evolis Dualys User manual

Evolis
Evolis Dualys User manual

Evolis
Evolis PRIMACY 2 User manual

Evolis
Evolis AGILIA User manual