Quick Installation Guide
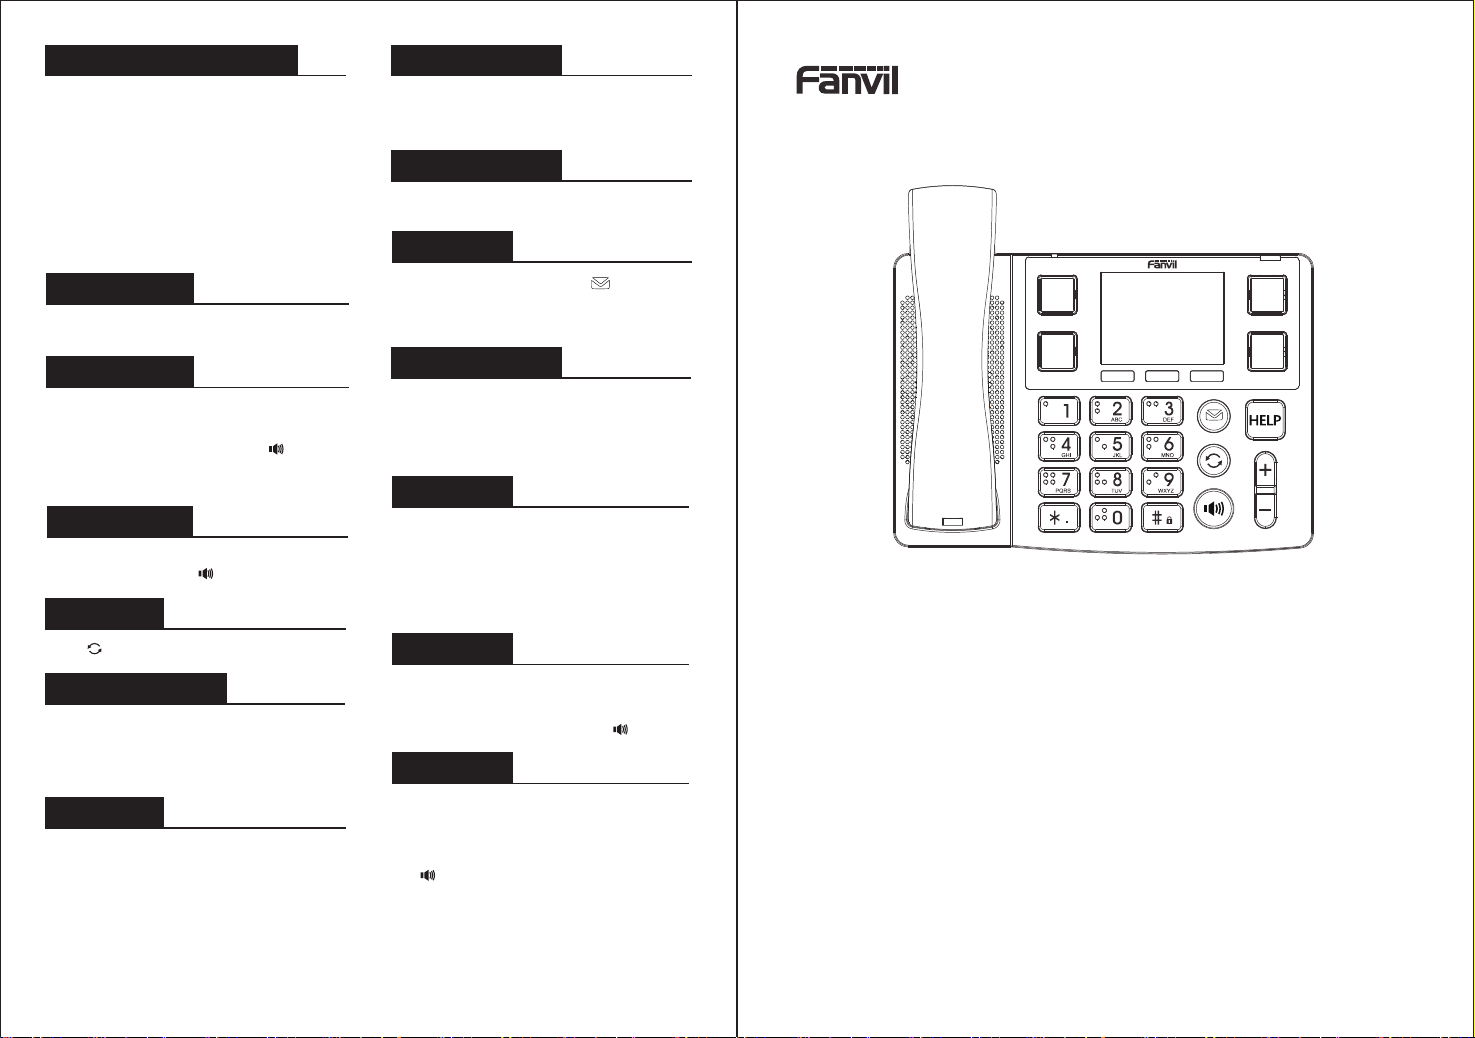
X305
V0.2
- 4 -
Fanvil Technology Co., Ltd
www.fanvil.com
Programmable keys
1. You can configure shortcuts for the programmable keys.
2. Enter #*107 to go to the menu page > Basic > Keyboard,
select among the configurable items, and select your
desired type and value, press OK key.
Making a call
Accepting a call
1. Pre-dialing: enter the phone number and pick up the handset.
2. Direct dialing: lift the handset and enter the phone number.
3. Handsfree: enter phone number and press or vice versa.
4. Specify contact dialing:Press the specified Image DSS Key
to select the contact.
1. Using the handset: pick up the handset.
2. Using the handsfree: press .
Language setting
1. Enter #*107 to go to the menu page > Basic > Language.
2. Select the desired language and press OK soft key.
Call forward
1. Enter #*107 to go to the menu page > Features > Call Forward.
2. Select the line, the type of forward, enter the destination
number and status, and press OK soft key.
Redial
1. Press key, redial a call number.
Putting a call on hold
1. Press Hold soft key, caller is put on hold.
2. To retrieve the call press Resume soft key.
Note: with more than one active call, select desired call with
the navigator key and use the corresponding soft key to hold
or resume.
Do not disturb
Voice mail
1. To access your voice mailbox, press or Enter #*107 to
go to the menu page > Message > Voice Message, number of
messages will be indicated if provided by your server or pbx.
Select the line and press Play to call .
1. Or Enter #*107 to go to the menu page > Features > DND,
and select the Mode and Type, and press OK key.
Bluetooth
1. Enter #*107 to go to Menu > Basic > Bluetooth.
2. Press OK to enter the Bluetooth enabling screen.
After enabling the screen, press Scan to display the list of
scanned Bluetooth devices. (Press "More" to select softkey
functions, Return, Down, Scan and Link)
WiFi
1. Enter #*107 to go to Menu > Basic >WLAN.
2. Press "OK" to enter the wireless network opening screen,
and then press "Scan".The list of scanned radios is displayed.
(Select "Return", "Scan", "Down" and "OK" through "More").
3. Access an available network, select a wireless network,
(Select "Down", "Connect", "Unlink","Return","Detail" and
input method through "More").
Phonebook
Call list
Access Phonebook:
Add new entry:
1. Press the CallLog softkey or enter #*107 to go to the menu >
CallLog >Local Call Logs.
2. Scroll through the list through the ∧ / ∨ soft key.
3. To dial an entry, pickup handset or press .
1. Press Contact soft key or Enter #*107 to go to the menu page
> Contact > Local Contacts.
2. Select All Contacts or other group.
3. To dial an entry, press Dial soft key or pickup handset or
press .
1. Input the IP address in the web browser. Select
Phonebook > Contacts > Add new contact .
2. Enter the Name, Phone, and Ring of the new contact.
Fanvil Technology Co., Ltd
Website: www.fanvil.com
Tel: +86-755-2640-2199 Fax: +86-755-2640-2618
Add: 10/F Block A, Dualshine Global Science Innovation Center,
Honglang North 2nd Road, Bao'an District, Shenzhen, China
HELP key configuration
1. Get the IP address from the phone: Press and hold # to enter
the status bar to view the IP address
2. Login: Input the IP address in the web browser. The PC and
phone should be in the same IP address segment
(The default username and password are both ‘admin’.)
3. Configuration: Select Function Key > 433, set the type to
Dial number or Ring, then click Binding. You need to press
the KT20(transmitter module need buy separately) during
the configuration process. Then the phone and the
transmitter will be automatically connected, and the Addr ID
of the transmitter will be automatically matched on the web page.
4. Enter the number you want to call as the value and click Apply.
5.Press the KT20 and the X305 will ring or dial automatically.


