manuals.online logo
Brands
  1. Home
  2. •
  3. Brands
  4. •
  5. Fermax
  6. •
  7. Control Unit
  8. •
  9. Fermax DUOX User manual

Fermax DUOX User manual

Cod. 970064 V12_17
SÓLO placa
Pulsadores
Pushbutton
panel ONLY
Entrar en configuración:
4 pulsaciones cortas
consecutivas en S 1
Configuración Número de Placa
Placa en reposo
0
1
2
Tipo Placa
Configuration
Standby panel
Configuration:
4 short consecutive
presses in S 1
0...9
[0]
Panel Number
Tiempo apertura
1...99"
[3]
Door opening time
Tiempo apertura
Door opening time
Tiempo zaguán
1...99"
[6]
Exit button time
SUB-BLOQUE
SUB-BLOCK
Número Bloque
0...99
[0]
Block Number
Número Sub-Bloque
0...99
[0]
Sub-Block Number
BLOQUE
BLOCK
Número Bloque
0...99
[0]
Block Number
E. GENERAL
GENERAL E.
Panel Type
0 - 1 - 2
[1]
Volumen monitorización
Confirmation phone
volume
0...9
[5]
0...250"
[0] no activo
Tiempo sensor
puerta
Sensor time
not active
Reset modo conserje
Reset Guard Unit
mode
0 - 1
[0] no
1 si /yes
S 1 S 1 S 1
S 1
S 1
S 1
S 1
S 1 S 1
S 1 S 1
FIN Configuración
END Configuration
S 1
1. Se accede a la configuración, pulsando 4 veces consecutivas SW1. El amplificador reproduce el
mensaje «CONFIGURACIÓN» y empezará el proceso. Ver diagrama. Para salir del proceso de
configuración se puede presionar SW1 durante 5 segundos o se sale de manera automática,
tras un periodo de 30 segundos de inactividad.
2. Al pulsar SW1, se avanza por los diferentes parámetros y se reproduce por voz: parámetro y
valor configurado actualmente. Cuando termina la reproducción del mensaje se puede
presionar cualquier pulsador de llamada para modificar el valor, (se escucha un BIP por cada
pulsación y se incrementa el valor). Terminada la introducción se puede escuchar la
reproducción del nuevo valor, si se deja pasar un tiempo de 5 segundos sin pulsar nada.
Cuando el valor del parámetro llega al valor máximo posible, se escucha un BOOP y se sitúa el
valor en el mínimo posible de ese parámetro.
3. Si se presiona el pulsador de llamada durante 5 segundos, suena un BOOP y el parámetro si es
de elección de un número, se sitúa en su valor mínimo y si es de un tipo de valor, se resetea al
valor por defecto.
1. Access configuration by pressing SW1 4 times. The amplifier sounds the message
"CONFIGURATION" and starts the process. See diagram. In order to exit the configuration process
you can press and hold SW1 for 5 seconds otherwise it will exit automatically after 30 seconds
ofinactivity.
2. By pressing SW1, you advance through the different parameters and it speaks: currently
configured parameter and value. After the message has sounded, you can press any call
button to change the value, (you will hear a BEEP for each press and the value will increase).
After it is entered, you will hear the new value played after 5 seconds of not pressing anything.
When the parameter’s value reaches the highest possible value, you will hear a BOOP and the
value goes to the minimum for that parameter.
3. If the call button is pressed for 5 seconds, a BOOP sounds and the parameter, if a number, is set
to its minimum level and if another value, is reset to the default value.
ON
DL2
B
D
A
C
E
F
LED
DL2
PL
Nº
SB
BK
EG
Nº
TYPE
BK
-
+
-
+
-
+
MIC
SPK
AV TRES CRUCES, 133
46017 VALENCIA - SPAIN
FERMAX ELECTRONICA, SAU
NO
NC C
EXIT
AMPLIFIER
AMPLIFICADOR
DUOX
PACK EXTENSION
LANGUAGE
IDIOMA
18Vdc
S 1 PROG
CN9 TAMPER
CN1
ONE
P2 +
B
B
+12
C
NCNO
-
BS
S
P1
BUS
GND
CN3CN2
TO
ONE
VERSION :
S 1
CN9
CN1
S 1
Selección del idioma de los
mensajes de voz por medio del
Sintetizador.
Language selection of the voice
messages through the Synthesizer.
Idiomas disponibles: Español, Inglés, Francés, Alemán, Italiano y Portugués.
Languages available: Spanish, English, French, German, Italian and Portuguese.
ANEXO:CONFIGURACIÓNASISTIDAPORVOZENPLACAS PULSADORES
ANNEX:ASSISTEDCONFIGURATIONBYVOICE IN PUSHBUTTONSPANELS
AUDIO
Este producto está protegido con las siguientes patentes y modelos de utilidad:
This product is protected with the following patents and utility models:
PATENTES / PATENTS MODELOS DE UTILIDAD / UTILITY MODELS
US 9215410, US 9762852, BE1023440 ES1187384U, ES1141495U, FR3038192, DE202016000632U1, CN205987229(U)
Seulement pour
platine á bouttons
poussoirs
Nur Türstationen
mit Tasten
Pour configuration
4 courtes pressions
sur "S 1"
Configuration Nº de la Platine
Platine en repos
0
1
2
Type de Platine
Konfiguration
Türstation in
Ruhestellung
Zum Konfigurieren
4 Mal "S 1" kurz
Drücken
0...9
[0]
Nummer derTürstation
1...99"
[3]
Temps d'overture
de porte
Türöffnrungszeit
Temporisation du BP
de sortie
1...99"
[6]
Türöffnrungszeit
Ausungstaste
PLATINE PALIÈRE
UNTERBLOCK
Nº de Hall
0...99
[0]
Blocknummer
Nº de la Platine Palière
0...99
[0]
Unterblock-nummer
HALL
BLOCK
Nº de Hall
0...99
[0]
Blocknummer
E. GÉNÉRALE
HAUPTEINGANG
Türstation Typ
0 - 1 - 2
[1]
Volume de la tonalité
d'appui
Lautstärke
Betetigustan
0...9
[5]
0...250"
[0] non activé
Temporisation du
sensor
Sensorszeit
nich aktiv
Remise à zero de la
conciergerie
Reset Portierzentrale
Modus
0 - 1
[0] no / nein
1 oui / ja
S 1 S 1 S 1
S 1
S 1
S 1
S 1
S 1 S 1
S 1 S 1 S 1
FIN de la configuration
Abschluß Konfiguration
1. L'on accède à la configuration en appuyant 4 fois de suite sur SW1. L'amplificateur lit le message
« CONFIGURATION » ; le processus commence. Voir le schéma. Afin de quitter le processus de
configuration, il est possible d'appuyer sur SW1 pendant 5 secondes. Sinon, on quitte
automatiquement le mode configuration au bout de 30 secondes d'inactivité.
2. En appuyant sur SW1, on se déplace parmi les différents paramètres. Le message vocal suivant
est lu : paramètre et valeur actuellement configurés. Lorsque la lecture du message est
terminée, il est possible d'appuyer sur l'un des boutons-poussoirs d'appel afin de modifier la
valeur (un BIP est émis à chaque pression et la valeur augmente). Une fois la saisie terminée,
il est possible d'écouter la nouvelle valeur. Pour ce faire, il faut laisser s'écouler 5 secondes
sans ne rien toucher. Lorsque la valeur du paramètre atteint la valeur maximale autorisée, un
BOOP est émis. La valeur repasse alors à la valeur minimale autorisée pour ce paramètre.
3. Si l'on appuie sur le bouton-poussoir d'appel pendant 5 secondes, un BOOP est émis. Le
paramètre, s'il s'agit d'un numéro, prend la valeur minimale. S'il s'agit d'un autre type de valeur,
le paramètre récupère la valeur par défaut.
1. Durch 4-maliges Drücken von SW1 gelangt man in den Konfigurationsmodus. Der Verstärker
gibt die Meldung "KONFIGURATION" aus und der Vorgang wird gestartet. Siehe Diagramm. Um
den Konfigurationsmodus zu verlassen, 5 Sekunden lang SW1 drücken. Nach Ablauf von 30
Sekunden ohne Eingabe, wird der Modus automatisch verlassen.
2. Durch Drücken von SW1 kann man durch die Parameter navigieren und es erfolgt folgende
Sprachmeldung: Aktuell konfigurierter Parameter und Wert. Nach erfolgter Sprachmeldung
kann eine beliebige Ruftaste gedrückt werden, um den Wert zu ändern (beim Drücken erfolgt
ein Piepton und zeigt dadurch die Erhöhung des Werts an). Nach Beendigung der Eingabe
erfolgt die Wiedergabe des neuen Werts, nachdem man 5 Sekunden lang keine Taste drückt.
Wenn der Parameterwert den Maximalwert erreicht, ertönt der Signalton BOOP und der Wert
beginnt wieder beim Minimalwert für diesen Parameter.
3. Wenn die Ruftaste 5 Sekunden lang gedrückt wird, ertönt der Signalton BOOP und der Parameter
wird wieder auf den Minimalwert (bei numerischen Werten) oder die Standardeinstellung (bei
anderen Werten) zurückgestellt.
ON
DL2
B
D
A
C
E
F
LED
DL2
PL
Nº
SB
BK
EG
Nº
TYPE
BK
-
+
-
+
-
+
MIC
SPK
AV TRES CRUCES, 133
46017 VALENCIA - SPAIN
FERMAX ELECTRONICA, SAU
NO
NC C
EXIT
AMPLIFIER
AMPLIFICADOR
DUOX
PACK EXTENSION
LANGUAGE
IDIOMA
18Vdc
S 1 PROG
CN9 TAMPER
CN1
ONE
P2 +
B
B
+12
C
NCNO
-
BS
S
P1
BUS
GND
CN3CN2
TO
ONE
VERSION :
S 1
CN9
CN1
S 1
Sélection de la langue des
messages vocaux à l'aide du
synthétiseur.
Sprachwahl der Sprachmeldungen
mittels des Synthesizers.
Langues disponibles : espagnol, anglais, français, allemand, italien et portuguais.
Verfügbare Sprachen: Spanisch, Englisch, Französisch, Deutsch, Italienisch und Portugiesisch.
Ce produit est protégé par les brevets et modèles d'utilité suivants :
Dieses Produkt ist durch die folgenden Patente und Gebrauchsmuster geschützt:
BREVETS / PATENTE MODÈLES UTILITAIRES / NUTZMODELLE
US 9215410, US 9762852, BE1023440 ES1187384U, ES1141495U, FR3038192, DE202016000632U1, CN205987229(U)
AUDIO ANNEXE : CONFIGURATIONAVECASSISTANCE VOCALE SUR LES PLATINES À BOUTONS-POUSSOIRS
ANHANG:SPRACHGEESTÜTZTEKONFIGURATIONAN TÜRSTATIONEN MITRUFTASTEN
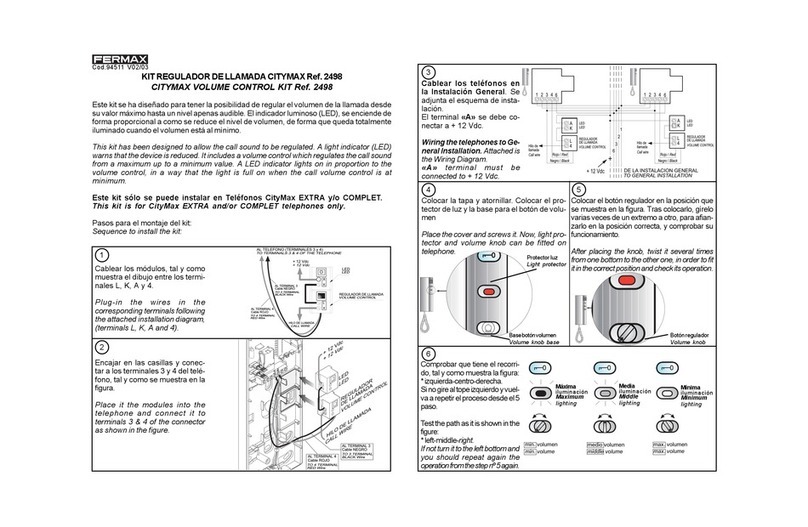
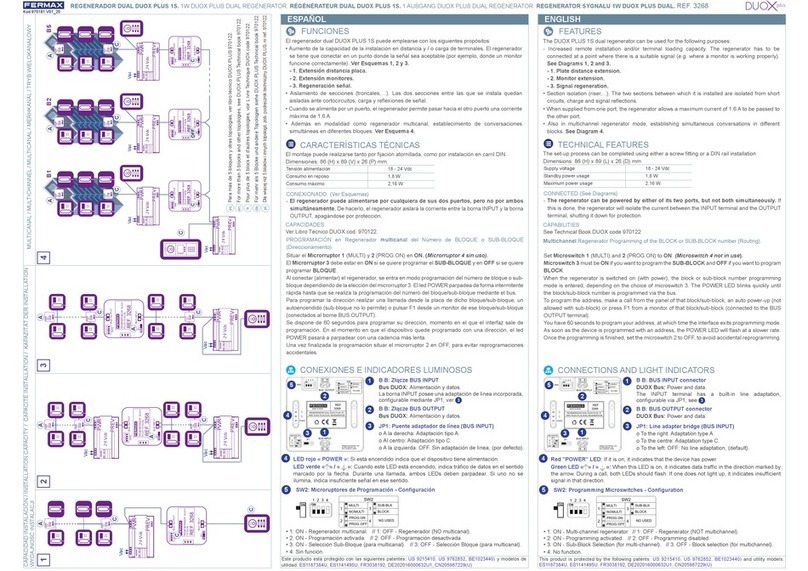
Other manuals for DUOX

13

Other Fermax Control Unit manuals

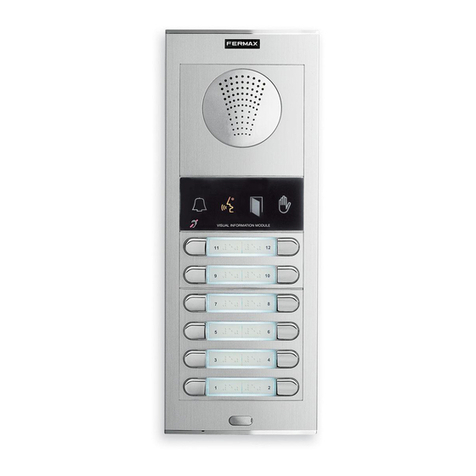
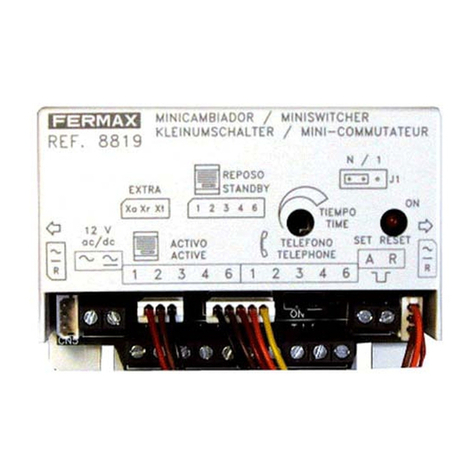
Fermax 8819 User manual

Fermax

Fermax 8819 User manual

Fermax 2460 Product guide

Fermax

Fermax 2460 Product guide

Fermax MEET 1490 User guide

Fermax

Fermax MEET 1490 User guide

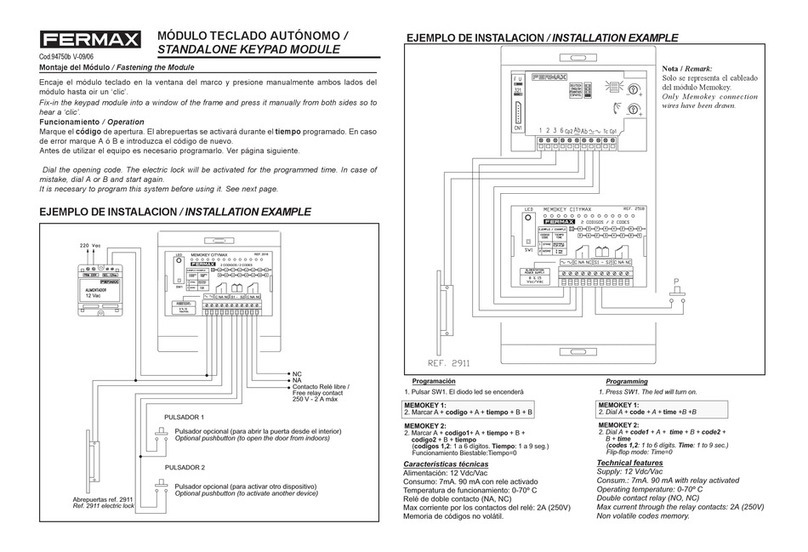
Fermax 2911 User manual

Fermax

Fermax 2911 User manual

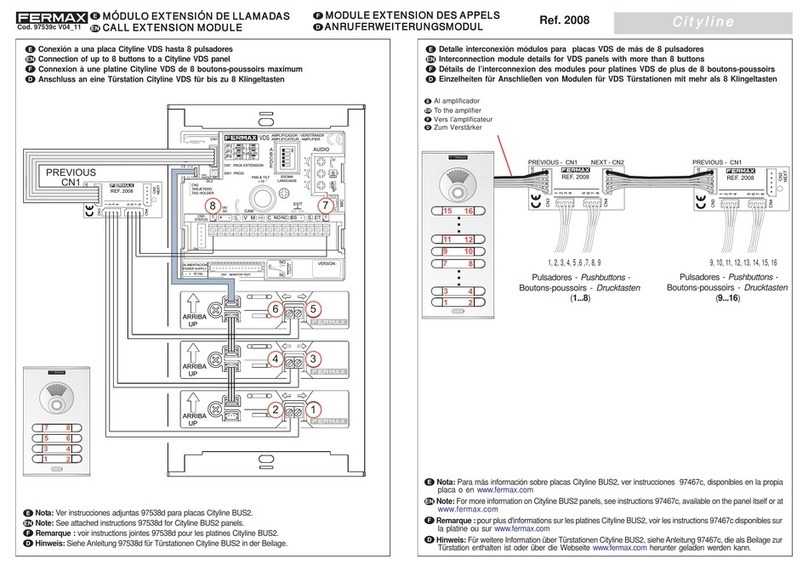
Fermax 2008 User manual

Fermax

Fermax 2008 User manual

Fermax 4 + n User guide

Fermax

Fermax 4 + n User guide

Fermax LOFT BUS2 User manual

Fermax

Fermax LOFT BUS2 User manual

Fermax 2440 User manual

Fermax

Fermax 2440 User manual

Fermax 5293 User guide

Fermax

Fermax 5293 User guide

Fermax AMPLIFIER MODULE CITYMAX User manual

Fermax

Fermax AMPLIFIER MODULE CITYMAX User manual

Fermax CITYLINE 4+n User manual

Fermax

Fermax CITYLINE 4+n User manual

Fermax 2441 User manual

Fermax

Fermax 2441 User manual

Fermax 2426 User manual

Fermax

Fermax 2426 User manual

Fermax DUOX PLUS 1S User manual

Fermax

Fermax DUOX PLUS 1S User manual

Fermax LYNX SKYLINE Instruction manual

Fermax

Fermax LYNX SKYLINE Instruction manual

Fermax OneToOne W/LOOP MODULE User guide

Fermax

Fermax OneToOne W/LOOP MODULE User guide

Fermax CITYMAX 2498 User manual

Fermax

Fermax CITYMAX 2498 User manual

Fermax SKYLINE LYNX DUOX User guide

Fermax

Fermax SKYLINE LYNX DUOX User guide

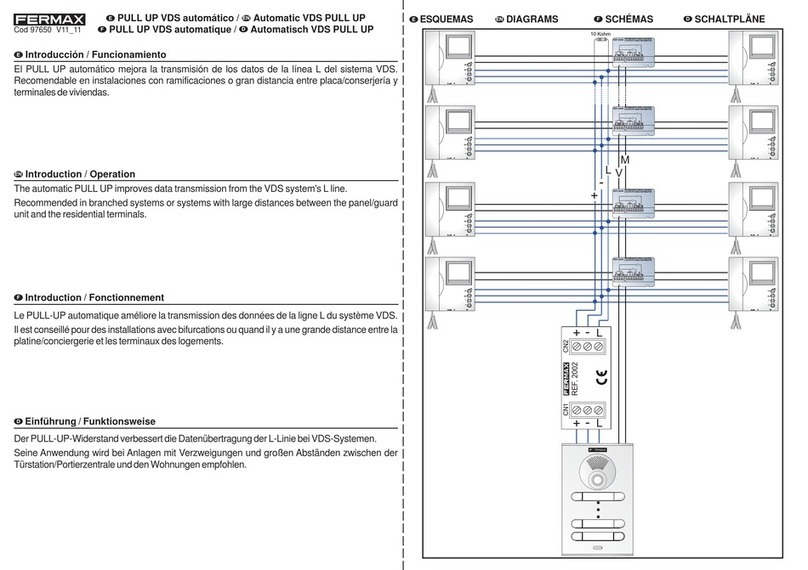
Fermax VDS PULL UP Quick start guide

Fermax

Fermax VDS PULL UP Quick start guide

Fermax OneToOne User guide

Fermax

Fermax OneToOne User guide

Fermax 6030 User manual

Fermax

Fermax 6030 User manual

Popular Control Unit manuals by other brands

EOS InfraStyle Installation Instructions for retailers

EOS

EOS InfraStyle Installation Instructions for retailers

Zennio KLIC-DI user manual

Zennio

Zennio KLIC-DI user manual

Fluke 700PCK instruction sheet

Fluke

Fluke 700PCK instruction sheet

HomeMatic HmIP-MOD-HO Installation and operating manual

HomeMatic

HomeMatic HmIP-MOD-HO Installation and operating manual

Applied Wireless 580230 user manual

Applied Wireless

Applied Wireless 580230 user manual

Allen-Bradley FLEX Ex 1797-OB4D installation instructions

Allen-Bradley

Allen-Bradley FLEX Ex 1797-OB4D installation instructions

Mitsubishi MELSEC-L Series user manual

Mitsubishi

Mitsubishi MELSEC-L Series user manual

Advanjet HV-9500 Series Maintenance and Repair

Advanjet

Advanjet HV-9500 Series Maintenance and Repair

Bosch BEA 030 Original instructions

Bosch

Bosch BEA 030 Original instructions

Siemens SIMATIC S7 3964 Connection manual

Siemens

Siemens SIMATIC S7 3964 Connection manual

Emerson Rosemount Analytical NGA2000 CLD instruction manual

Emerson

Emerson Rosemount Analytical NGA2000 CLD instruction manual

Victaulic 809N installation instructions

Victaulic

Victaulic 809N installation instructions

Eaton xComfort Room-Manager Assembly instructions

Eaton

Eaton xComfort Room-Manager Assembly instructions

CAME 3199ZBX6 quick start guide

CAME

CAME 3199ZBX6 quick start guide

EKE-Electronics EKE-Trainnet AIM2505A Technical manual

EKE-Electronics

EKE-Electronics EKE-Trainnet AIM2505A Technical manual

Beckhoff CX2550 Series manual

Beckhoff

Beckhoff CX2550 Series manual

Pickering 40-575 user manual

Pickering

Pickering 40-575 user manual

Concurrent Technologies RCIM Series user guide

Concurrent Technologies

Concurrent Technologies RCIM Series user guide

manuals.online logo
manuals.online logoBrands
  • About & Mission
  • Contact us
  • Privacy Policy
  • Terms and Conditions

Copyright 2025 Manuals.Online. All Rights Reserved.