manuals.online logo
Brands
  1. Home
  2. •
  3. Brands
  4. •
  5. Fermax
  6. •
  7. Control Unit
  8. •
  9. Fermax LYNX SKYLINE Instruction manual

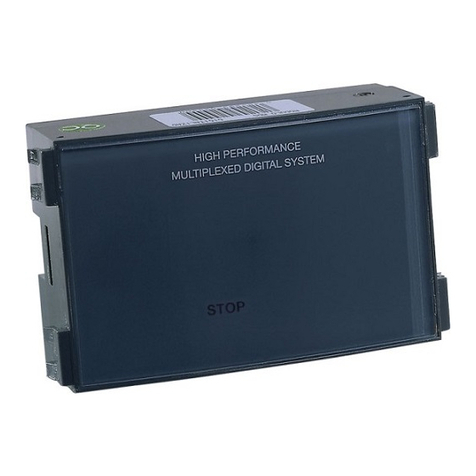
Fermax LYNX SKYLINE Instruction manual

DESCRIPTION OF THE LYNX MODULE
QUICK START MANUAL FOR THE LYNX SKYLINE MODULE
1. Insert the modules in the SKYLINE frame as
seen in the image (the amplifier on top, the
Lynx Display next to the amplifier and then
the remaining modules.
2. Use the included cables to wire the system
(see examples below).
1. TFT screen
2. "Left arrow" key
3. "Bell" key
4. "Right arrow" key
5. CN1 connector (to the amplifier)
6. CN2 connector (from the amplifier)
7. CN3 connector (to the keypad)
Indicate if the panel will be installed as a
general entrance or as an entrance to a
specific block.
Options
-Block entrance
-General entrance
(*) Only if TYPE=Block Entrance
Indicate the block number, according to the
installation´s overall characteristics
Options
-Between 00 and 99
(*) Only if TYPE=General Entrance
Indicate if this is a general entrance to the
development or a specific section
options
-The complete development
- Several Blocks
Indicate the panel number according to the
installation´s overall characteristics
Options
-Between 00 and 99
(*) Only if it has been
established
BLOCK# = Several blocks
Indicate the text that will appear in the
panel display when in standby and user
mode.
Use the numeric keypad to write up to 16
characters.
TECLA PULSACION
1ª 2ª 3ª 4ª 5ª
11
2AB C 2
3DE F 3
4GH I 4
5JK L 5
6MN O 6
7PQ R S 7
8TU V 8
9WX Y Z 9
00
AFUNCIÓN SEGUN PARAMETRO A PROGRAMAR
BFUNCIÓN SEGUN PARÁMETRO A PROGRAMAR
Indicate if you want to disable the
alphanumeric keypad, if so you can call the
apartments via a search with the "arrow"
keys.
Use this option if you want to restore the
panel to its programming factory settings.
The panel will disconnect and reconnect
automatically within 30 to 60 seconds
with the IP 10.200.100.0 (General
Entrance and Panel 0).
Select the type of confirmation ring tone on
the panel.
Options
You can select from 5 different ring tones,
along with 5 other pre-recorded ones.
Set the audio level
according to the
location´s acoustic
conditions.
Use the number
indicated to raise/
lower the volume and
"B" to confirm.
L indicates the current
level (from 1 to 7). Indicate if if you want the picture taken by
its camera to appear on the display .
Options
- Always
- Disabled
- Until answered
Indicate if you want only the information
from users on a filtered list of a maximum
of 200 users to appear.
Options
- Enabled
- Disabled
1. From the information screen press "A" on the keypad.
The screen will display an invitation to enter the
ACCESS CODE.
2. Enter AB21AB.
If the system is configured to use 4 or 5 digit access
codes, the code to enter is AB21 and AB21A
respectively.
After performing this properly, the symbol of an open
chain appears.
3.EntertheINSTALLER CODE.
This code is 19025 by default.
If it has been changed and you do not remember the new
code, you can restore the default value via the procedure
indicated in the Programming Manual for LYNX PANELS
Cod. 970020.
4. After this step, the CONFIGURATION MENU appears,
from which you can choose the desired option by
pressing the corresponding number via the keypad.
EXAMPLES OF PRE-WIRING
WITHPROXIMITY
READER
PROGRAMMING ACCESS
The general procedure consists in using the numeric keypad to select the desired option.
Following the indications, use the "right and left" arrows keys to move through the successive
fields, press "B" to confirm and return to the previous step, or press "A" to delete.
WITHOUTPROXIMITY
READER
This table shows the way to select the letter associated to each
of the number keys on the keypad.
You can also enter a space with the "bell" key.
You can go from upper to lower case via the "right arrow" key.
COD. 970019I V12_16
KEY PRESS
1st 2nd 4th 5th
FUNCTIONRELATIVETOTHEPARAMETERTOPROGRAM
3rd
It allows you to add, edit and delete the
users’ filter list (if the option has been
enabled).
(*) Only if BLOCK# = Some blocks
Select the blocks that may be called from
here, G. E.
CÓDIGO
VERSIÓN
UP
ADJ.
SENSOR
CN3
MÓDULO DIRECTORIO LYNX
LYNXDISPLAY MODULE
MODULE AFFICHEUR LYNX
LYNXNAMENSVERZEICHNISMODUL
CN2
DESCRIPTIONCONNECTOR
AMP-VIDEOCN1
CN3
AMP-KEYPAD
KEYPAD
CN1 CN2
CN1
MÓDULO TECLADO
KEYPAD MODULE
MODULE CLAVIER
TASTATURMODUL
CN2
OUTPUT
UP
INPUT
CÓDIGO
R
E
P
M
A
-
12 V c RL2RL1
ADDRESS:
TYPE:
BS
LYNX
AMPLIFICATEUR - VERSTÄRKER
AMPLIFICADOR - AMPLIFIER
CNC
NO NO NC
C
-SP
+
T
+AB-
DISPLAY READER KEYPAD
RESET FBOOT
BOTTOM CONNECTORS PANEL
PROG
MIC
VIDEO KEYPAD
FBOOT
RESET
FINGERPRINT
READER
TAMPER
CI95294-REV2-21506
CN7
CN3 CN2
CN5
S
-
BS
NC
NO
C
NC
NO
C
-
+
987
654
321
AB
0
CÓDIGO
VERSIÓN
UP
ADJ.
SENSOR
CN3
MÓDULO DIRECTORIO LYNX
LYNXDISPLAY MODULE
MODULE AFFICHEUR LYNX
LYNXNAMENSVERZEICHNISMODUL
CN2
DESCRIPTIONCONNECTOR
AMP-VIDEOCN1
CN3
AMP-KEYPAD
KEYPAD
CN1 CN2
CN1
MÓDULO TECLADO
KEYPAD MODULE
MODULE CLAVIER
TASTATURMODUL
CN2
OUTPUT
UP
INPUT
CÓDIGO
R
E
P
M
A
-
12 V c RL2RL1
ADDRESS:
TYPE:
BS
LYNX
AMPLIFICATEUR - VERSTÄRKER
AMPLIFICADOR - AMPLIFIER
CNC
NO NO NC
C
-SP
+
T
+AB-
DISPLAY READER KEYPAD
RESET FBOOT
BOTTOM CONNECTORS PANEL
PROG
MIC
VIDEO KEYPAD
FBOOT
RESET
FINGERPRINT
READER
TAMPER
CI95294-REV2-21506
CN7
CN3 CN2
CN5
S
-
BS
NC
NO
C
NC
NO
C
-
+
1 2
CK
DT G
RB
Data /C lock
-
+
PROX.MDS-AC+ONON
WIEGAND-26OFFON
STAND ALONEON
OFF
SW2
OFF OFF
SW1SW2
CN3
KEYBOARD
CN2
A
12V
B
S-
Sa Sb
CNC
NO
MÓDULO PROXIMIDAD
PROXIMITY MODULE
REF: 7440
21
1
7
4
3
2
6
5
8
PROXIMITY ACCESS CONTROL
+
-
987
654
321
AB
0
1
2
3
4
5
6
7
Indicate under what conditions you want to
automatically turn the TFT screen on.
Options
-Pressed key or movement sensor
- Allways on
- Pressed Key
Indicate how you want the user name´s
information displayed on the screen.
Options
- 4 names per screen
- 1 name per screen
Indicate how you want the surrounding
temperature displayed on the screen (on
panels with this function.
Options
- Temperature ºC
- Temperature ºF
Adjust the TFT display brightness relative
to the area´s lighting conditions.
- Use "1" and "3" to increase orreduce
brightness.
- Press "B" to exit.
Use the «arrow2 keys to move down the
different fields to set the current date and
confirm with "B".
Set date and time
Relay Settings
Use the "arrow" keys to move down the different
fields to set the current time and confirm with "B".
Select the desired date format.
Options
- MM/DD/YYYY
- DD/MM/YYYY
- YYYY/MM/DD
If you have installed an open-door detector
to control it, adjust the maximum time this
can be open before generating the
corresponding alarm.
Leave as "000" if you will not use this
function.
Enter the PIN code (as a combination or not
with the presentation of a proximity card)
that the users can use to open the door.
These codes and cards would have been
programmed by the system administrator
If the panel has a proximity card reader,
with this parameter we can select which
protocol it will use: Data/clock, Wiegand 26,
Wiegand 32 or Wiegand 44.
With this option we can enable or disable
the option to open the entrance hall door
from the apartments and/or from the
entrance hall´s exit button.
Set the external relay parameters that will
simultaneously activate relay 2 According to the
system´s configuration.
See the LYNX Property Management Unit
manual for more details.
Set the corresponding parameters for the lift
control relay, relative to the general system
programming.
See the LYNX Property Management Unit
manual for more details.
SIZE: 3.5 inches
FORMAT: 4:3
RESOLUTION: 320 x 240 pixels
COLORS: 262.000
CONTRAST: 500/1
VIEWINGMODES: 12 points:
LUMINANCE(cd/m2): 400 nits
VIEWINGANGLES: 160H / 160V
BACKLIGHTING: 6 LED diodes
IMPORTANT NOTE:
This instruction sheet has the basic information, both for the installation of
the module and programming.
Please see the following manuals for all of the information on the
operation, installation and programming of the LYNX system:
- Lynx Digital Panels Programming Manual Code 970015.
- Lynx Property Management Unit Manual. Code 970021.
- Lynx Digital Panel Web Server Manual. Code 970020.
- Lynx Digital Panels Installation Manual Code 970014.
This text is viewed on the monitor to activate the
relay.
You can enter a name of up to 16 characters.
See table on the back of these instructions.
This option allows you to change the
INSTALLERCODE.
You can enter any numeric value from
00000 to 99999 or present the master card
(if there is a proximity card reader).
Indicate the time in seconds that relay 1 is open
after activation.
Indicate the time in seconds that relay 2 is open
after activation.
Set the corresponding external relay parameters
that will activate simultaneously with relay 1. Set
the parameters relative to the device´s assigned
IP.
See the LYNX Property Management Unit
Manual for more details.
This text is viewed on the monitor to activate the
relay.
You can enter a name of up to 16 characters.
See table on the back of these instructions.
Indicate the language of the screen
messages and voice synthesizer.
options
-Up to 31 different languages, with their
respective typographies.
Indicate if you want the additional user
information (2nd line) to appear.
DISPLAY
TECHNICAL
SPECIFICATIONS
This parameters function
is informative and to
configure the IP panel.
The panel's IP address can be configured by
choosing between different modes:
- Standard Lynx mode (default selection). Default
IP Address for the digital panel: 10.200.100.0
(General Entrance - Panel: 0). It is very important
that the default addresses are not used in real
installations in order to avoid possible IP
conflicts.
- DHCP mode.
- Static IP mode.
This option is only for informational purposes. This
indicates the panels MAC and IP addresses, besides
the firmware version.
Other manuals for LYNX SKYLINE

1

Other Fermax Control Unit manuals

Fermax 2441 User manual

Fermax

Fermax 2441 User manual

Fermax 2911 User manual

Fermax

Fermax 2911 User manual

Fermax OneToOne W/LOOP MODULE User guide

Fermax

Fermax OneToOne W/LOOP MODULE User guide

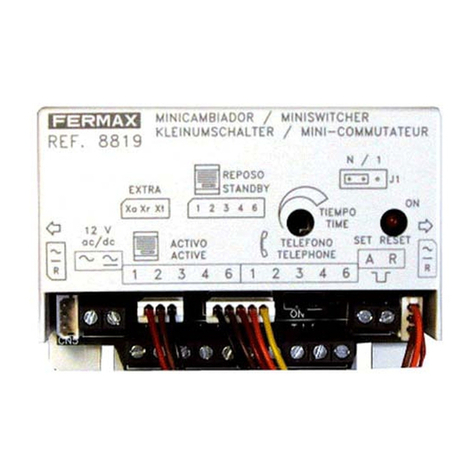
Fermax 8819 User manual

Fermax

Fermax 8819 User manual

Fermax MEET 1490 User guide

Fermax

Fermax MEET 1490 User guide

Fermax VDS PULL UP Quick start guide

Fermax

Fermax VDS PULL UP Quick start guide

Fermax 4 + n User guide

Fermax

Fermax 4 + n User guide

Fermax OneToOne User guide

Fermax

Fermax OneToOne User guide

Fermax 2460 Product guide

Fermax

Fermax 2460 Product guide

Fermax CITYLINE 4+n User manual

Fermax

Fermax CITYLINE 4+n User manual

Fermax DUOX PLUS 1S User manual

Fermax

Fermax DUOX PLUS 1S User manual

Fermax CITYMAX 2498 User manual

Fermax

Fermax CITYMAX 2498 User manual

Fermax 2426 User manual

Fermax

Fermax 2426 User manual

Fermax 6030 User manual

Fermax

Fermax 6030 User manual

Fermax 2440 User manual

Fermax

Fermax 2440 User manual

Fermax LOFT BUS2 User manual

Fermax

Fermax LOFT BUS2 User manual

Fermax DUOX User manual

Fermax

Fermax DUOX User manual

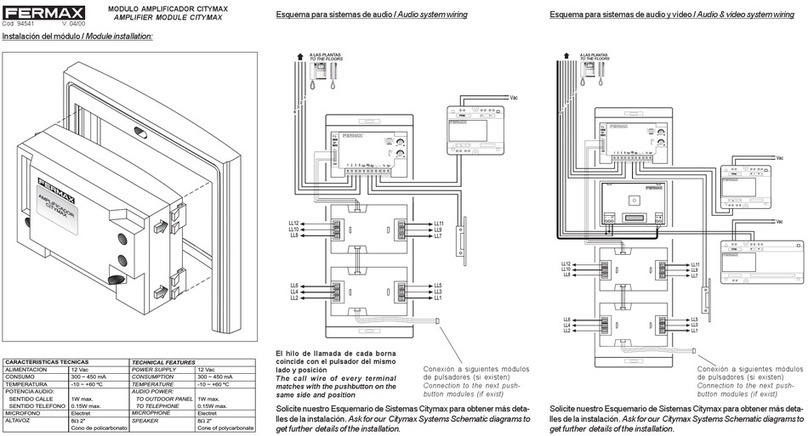
Fermax AMPLIFIER MODULE CITYMAX User manual

Fermax

Fermax AMPLIFIER MODULE CITYMAX User manual

Fermax SKYLINE LYNX DUOX User guide

Fermax

Fermax SKYLINE LYNX DUOX User guide

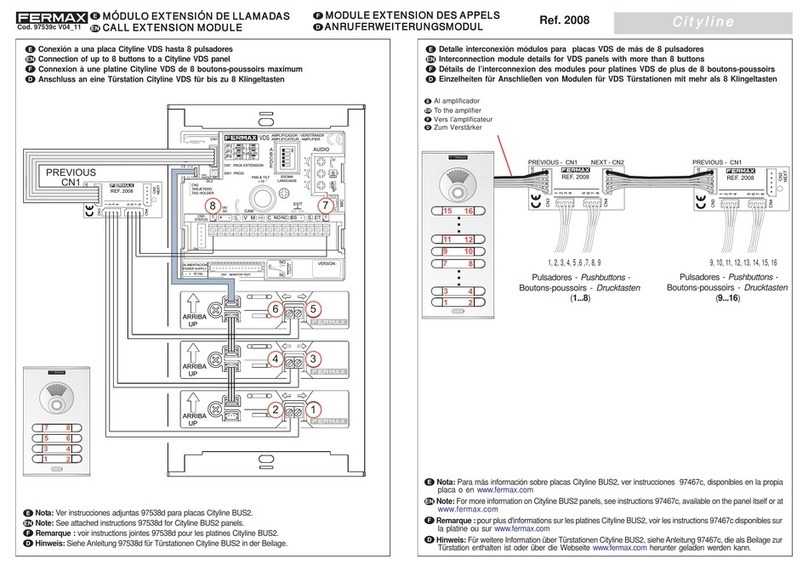
Fermax 2008 User manual

Fermax

Fermax 2008 User manual

Fermax 5293 User guide

Fermax

Fermax 5293 User guide

Popular Control Unit manuals by other brands

Aumuller LZ1-2,5A-KNX Installation and commissioning instructions

Aumuller

Aumuller LZ1-2,5A-KNX Installation and commissioning instructions

Ormazabal ekor.rci General instructions

Ormazabal

Ormazabal ekor.rci General instructions

Tradinco 43 Series user guide

Tradinco

Tradinco 43 Series user guide

CLA-VAL 36 Series Installation, operation & maintenance manual

CLA-VAL

CLA-VAL 36 Series Installation, operation & maintenance manual

Velleman Whadda WPM48 manual

Velleman

Velleman Whadda WPM48 manual

ICPDAS ECAT-2057-32 quick start

ICPDAS

ICPDAS ECAT-2057-32 quick start

DMP Electronics Wiegand 734N Installation and programming guide

DMP Electronics

DMP Electronics Wiegand 734N Installation and programming guide

ICP DAS USA PM-3133i quick start

ICP DAS USA

ICP DAS USA PM-3133i quick start

Armstrong TVS-800 Series manual

Armstrong

Armstrong TVS-800 Series manual

Texas Instruments TDP158RSBEVM user guide

Texas Instruments

Texas Instruments TDP158RSBEVM user guide

Denso DWWB005 installation manual

Denso

Denso DWWB005 installation manual

Honeywell V5832B Product data

Honeywell

Honeywell V5832B Product data

Honeywell ControLinks S7999 Product data

Honeywell

Honeywell ControLinks S7999 Product data

Allen-Bradley CAB6-HA 2 installation instructions

Allen-Bradley

Allen-Bradley CAB6-HA 2 installation instructions

Kollmorgen MMC Smart Drive Hardware manual

Kollmorgen

Kollmorgen MMC Smart Drive Hardware manual

Quectel FC905A user manual

Quectel

Quectel FC905A user manual

McIntosh C712 owner's manual

McIntosh

McIntosh C712 owner's manual

FLIR ACCKBD320 instruction manual

FLIR

FLIR ACCKBD320 instruction manual

manuals.online logo
manuals.online logoBrands
  • About & Mission
  • Contact us
  • Privacy Policy
  • Terms and Conditions

Copyright 2025 Manuals.Online. All Rights Reserved.