manuals.online logo
Brands
  1. Home
  2. •
  3. Brands
  4. •
  5. Festo
  6. •
  7. Control Unit
  8. •
  9. Festo CPX-E-EP User manual

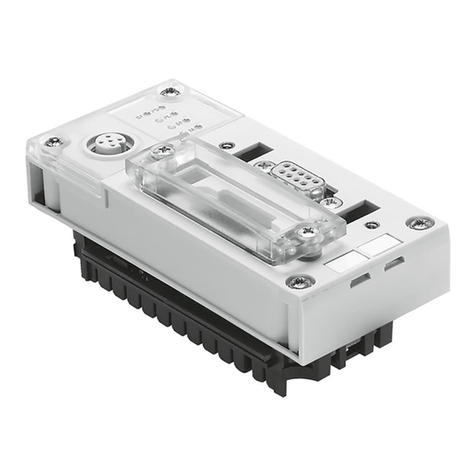
Festo CPX-E-EP User manual

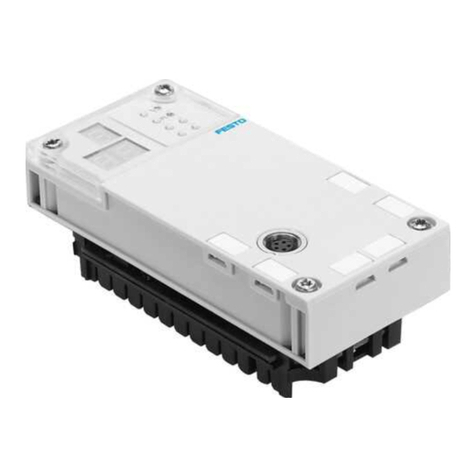
Bus module
CPX-E-EP
Festo AG & Co. KG
Ruiter Straße 82
73734 Esslingen
Germany
+49 711 347-0
www.festo.com
Instructions for use
Original instructions
8071163
2017-07
[8071165]
Bus module CPX-E-EP (EtherNet/IP, Modbus TCP) English...................
1 About this document
This document describes the use of the above-mentioned product.
Certain aspects of use are described in other documents and must be observed
è1.1 Further applicable documents.
EtherNet/IP®and Modbus®are registered trademarks of the respective trade
mark holder in certain countries.
1.1 Further applicable documents
Document Contents
Description of system CPX-E (CPX-E-SYS) Detailed description of the system CPX-E
Instructions for use of system CPX-E
(CPX-E-SYS)
Instructions and important notes on mounting,
electrical installation and maintenance tasks
for a system CPX-E
Description of bus module CPX-E-EP (CPX-E-EP) Detailed description of product function and
parameterisation options
Device description file (EDS) Definition of the modules of a CPX-E system for
integration into the higher-order controller
Documentation for the components in a system
CPX-E and the connected peripherals
Information on use of the components
Documentation for the higher-order controller
and the additional participants in the network
Information on commissioning and
parameterisation of the components
Fig. 1
For all available product documentation èwww.festo.com/pk
1.2 Product version
This document refers to the following product versions:
Product Version
CPX-E-EP Bus module CPX-E-EP, revision 1 onward
Fig. 2
The product version can be identified from the product label or with the help of
appropriate software from Festo.
Appropriate software for identifying the product version can be found in
the Festo Support Portal èwww.festo.com/sp. Information on using the
software can be found in the integrated Help function.
There may be an updated version of this document for these or later
product versions.
 Check whether a corresponding version of this document is available
inthe Festo Support Portal èwww.festo.com/sp.
1.3 Product labelling
The product label is located on the left-hand side of the module. Scanning the
printed Data Matrix Code with an appropriate device opens the Festo Support
Portal with the relevant documents for the product. Alternatively, the Product Key
(11-character alphanumeric code on the product label) can be entered in the
Support Portal search box.
Detailed information about product labelling can be found in the module
description è1.1 Further applicable documents.
1.4 Specified standards
Version status
EN 60529:2013-10 IEC 60204-1:2014-10
EN 61000-6-2:2009-04 IEEE 802.3:2014-00
EN 61000-6-4:2011-09 NE 21:2012-05
Fig. 3
2 Safety
2.1 General safety information
 Take into consideration the legal regulations for the respective location.
 Use the product only within the defined values è13 Technical data.
 Observe product labelling.
 Observe further applicable documents è1.1 Further applicable documents.
 Store the product in a cool, dry, UV-protected and corrosion-protected environ
ment. Ensure storage times are short.
 Before working on the product: Switch off the power supply and secure it
against being switched on again.
 Observe the handling specifications for electrostatically sensitive devices.
2.2 Use for intended purpose
The product described in this document is intended solely for use as an interface
between a system CPX-E and a higher-order controller through participation in
anetwork using the protocols EtherNet/IP or Modbus TCP.
The products must be used only as follows:
– Use only in an industrial environment: Outside of industrial environments,
e.g.incommercial and mixed-residential areas, actions to suppress interference
may have to be taken.
– Use only in combination with modules and components that are permissible for
the respective product variant èwww.festo.com/catalogue.
– Only use the product if it is in perfect technical condition.
– Only use the product in original status without unauthorised modifications.
Onlythe conversions or modifications described in this and the other applicable
documents are permitted.
2.3 Training of specialised personnel
Installation, commissioning, maintenance and disassembly should only be conduc
ted by qualified personnel.
The qualified personnel must be familiar with installation of electrical control
systems.
3 Further information
– Accessories èwww.festo.com/catalogue
– Spare parts èwww.festo.com/spareparts
4 Service
 Contact your regional Festo contact if you have technical questions
èwww.festo.com.
5 Product overview
5.1 Function
The product establishes, as a participant in an EtherNet/IP or Modbus TCP
network, the connection between a higher-order controller and the modules
ofasystem CPX-E.
Web server
The integrated web server provides read access to the key parameters and dia
gnostic functions of the system CPX-E. The web server can be accessed by entering
the IP address in the address bar of a web browser.
Factory settings of the bus module:
IP address: 192.168.1.1, subnet mask: 255.255.255.0 (DHCP = active)
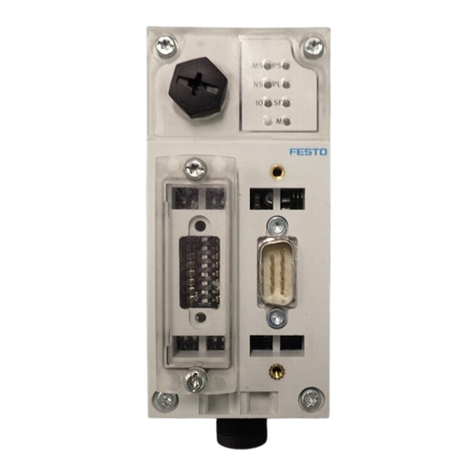
5.2 Product design
1LED indicators
2Rotary and DIL switches
3Operating voltage supply terminal
block UEL/SEN [XD]
4Terminal block lock
5Network connection [XF2]
6Linking
7Network connection [XF1]
2
34
5
1
6
7
Fig. 4
5.3 Display components
1Network-specific LED indicators:
– Module status [MS]
(green, red, orange)
– Network status [NS]
(green, red, orange)
– Connection/data traffic
[XF1]/[XF2] (green)
2System-specific LED indicators:
– Operating voltage supply
UEL/SEN [PS] (green)
– Load voltage supply UOUT [PL]
(green)
– System fault [SF] (red)
– Force mode [M] (yellow)
2
1
Fig. 5
The network-specific LED indicators are described later in the document
è10 Diagnostics and fault clearance.
The system-specific LED indicators are described in “Instructions for use
ofsystem CPX-E” below è1.1 Further applicable documents.
5.4 Control components
Electrostatically sensitive devices.
 Before setting the address using the rotary switch, electrostatically
discharge your own body.
Rotary/DIL
switches
Function
The 3 rotary switches are used to set the 4th octet of the IP address
(192.168.1.XXX).
Possible settings
0 = Dynamic addressing via DHCP/BOOTP
1 … 255 = Permissible address range
Valid values
EtherNet/I P: 300 … 555 (IP address = value – 300)
Modbus TCP: 600 … 855 (IP address = value – 600)
Factory setting: 900
In the case of invalid values, the IP parameters are reset to dynamic addressing
(DHCP).
The diagnostic mode is set using the DIL switches èFig. 7.
Fig. 6
For switch settings 0 ... 255, the EtherNet/IP and Modbus TCP protocols
can be used in parallel. The rights to control the outputs are assigned to
the protocol that sends outputs first.
DIL switches Function
DIL 1: OFF
DIL 2: OFF
No diagnostics1)
DIL 1: OFF
DIL 2: ON
Status bits activated
DIL 1: ON
DIL 2: OFF
I/O diagnostic interface activated
DIL 1: ON
DIL 2: ON
Reserved
1) Factory setting
Fig. 7
Changes to the rotary and DIL switches only take effect following a restart
of the bus module.
5.5 Connecting components
Connection [XD]1) Signal
0+24 V DC operating voltage supply UEL/SEN
1
20 V DC operating voltage supply UEL/SEN
3
1) Ports XD.0 and XD.1 and ports XD.2 and XD.3, respectively, are connected to each other in the
terminalblock.
Fig. 8
Port [XF1], [XF2] Signal Designation
1 TD+ Transmitted data +
2 TD– Transmitted data –
3 RD+ Received data +
4 n.c. –
5 n.c. –
6 RD– Received data –
7 n.c. –
8 n.c. –
1) Shield Functional earth
1) Housing
Fig. 9
6 Transport and storage
 Observe specifications for the environmental and storage conditions
è13 Technical data.
7 Mounting
 The module is to be mounted in accordance with the “Instructions for use of
system CPX-E” è1.1 Further applicable documents.
8 Installation
8.1 Network
 Use cables that meet the cable specification èFig. 17.
8.2 Operating voltage supply UEL/SEN
1. Make sure that the power supply is switched off.
2. Connect cables to the terminal block in accordance with the “Instructions for
use of system CPX-E” è1.1 Further applicable documents.
9 Commissioning
Note
Malfunction due to the higher-order controller and system CPX-E being switched
on in the incorrect order.
 Switch on the higher-order controller and CPX-E system according to the
preset order of the network used.
1. Set up automation project for the higher-order controller with the help of the
corresponding software.
2. Load the device description file into the software èwww.festo.com/sp.
3. Configure the system CPX-E in the software:
– System structure
– Network addressing
– I/O addressing
4. Transfer automation project to the higher-order controller.
Further information about commissioning the system CPX-E can be found
in the “Instructions for use of system CPX-E”. Information about the
parameters can be found in the “Description of system CPX-E” and in the
descriptions of the modules used è1.1 Further applicable documents.
Behaviour of display components following correct commissioning
[MS] (green) [NS] (green, orange)1) [XF1], [XF2] (green)
lights up lights up lights up
1) The colour of the LED indicator is dependent on the network protocol used
(green = EtherNet/IP, orange = Modbus TCP)
Fig. 10
[PS] (green) [PL] (green) [SF] (red) [M] (yellow)
lights up lights up off off
Fig. 11
Information about error elimination in the case of non-conforming
behaviour can be found in the “Description of system CPX-E” and in the
descriptions of the modules used è1.1 Further applicable documents.
10 Diagnostics and fault clearance
10.1 Diagnostics options
For the diagnostics of errors, various possibilities are available:
– Internal system diagnostics
– LED indicators on the product
10.2 Internal system diagnostics
The internal system diagnostics is described in the “Description of
systemCPX-E” è1.1 Further applicable documents.
10.3 LED indicators
This document describes the network-specific LED indicators. The
system-specific LED indicators are described in the documentation for
thesystemCPX-E è1.1 Further applicable documents.
Module status [MS]
LED (green,
red, orange)
Meaning Remedy
lights up green
Normal operating status –
flashes green
Configuration of system CPX-E not
complete or not correct.
 Complete or correct configuration
of the system CPX-E.
lights up red
Error cannot be rectified  Contact Festo service
(èwww.festo.com).
flashes red
Error can be rectified  Check configuration of
systemCPX-E.
flashes alterna
tely red/green
The system CPX-E is in self-test mode. –
lights up orange
Bootloader –
off
No logic supply to the network
interface.
 Check logic supply.
Fig. 12
Network status [NS]1)
LED (green,
red, orange)
Meaning Remedy
lights up green
The system CPX-E is online and has a
network connection (normal operating
status).
–
flashes green
The system CPX-E is online and has
received an IP address but does not
have a configured network connection.
 Check configuration of the system
CPX-E; it is possible that the
system CPX-E is not assigned to
amaster/scanner.
lights up red
Communication has failed.
Non-permitted IP address set that is
already used in the network.
 Correct IP address.
flashes red
One or more “I/O connections” are in
the “time-out status”.
 Check the physical connection to
the master/scanner.
flashes
alternately red/
green
The system CPX-E is in self-test mode. –
lights up orange
Modbus TCP has control over the
output data.
Bootloader if the LED [MS] is also lit up
orange èFig. 12.
–
off
The system CPX-E is offline.
No IP address assigned or no
IPaddress received from DHCP server.
 Check network connection.
 Check IP addressing settings.
1) The behaviour of the LED indicator is dependent on the network protocol used.
Fig. 13
Connection/data traffic [XF1]/[XF2]
LED (green) Meaning Remedy
lights up
Network connection OK –
flashes1)
Data traffic ongoing –
off
No network connection  Check network connection.
1) Flashing frequency is dependent on the traffic.
Fig. 14
11 Maintenance
Note
Accumulation of heat due to reduced air supply to electronics.
 Keep the ventilation slots clear and remove contamination regularly.
12 Disposal
 Dispose of the packaging, and of the product at the end of its useful life,
through environmentally friendly recycling in accordance with applicable
specifications.
13 Technical data
General
Feature Specification/value
General technical data, system CPX-E Description of system CPX-E
è1.1 Further applicable documents
Dimensions (length x width x height) [mm] 125.8 x 37.8 x 76.5
Product weight1) [g] 145
Mounting position Vertical/horizontal
Ambient temperature [°C] –5 … +60 (–5 … +50)2)
Storage temperature [°C] –20 … +70
Air humidity (non-condensing) [%] 0 … 95
Assigned address space (inputs/outputs)
Without diagnostics [bit] –/–
With status bits [bit] 8/–
With I/O diagnostic interface [bit] 16/16
Module code/submodule code
(CPX-E-specific)
222/36
Module identification E-EP
Degree of protection in accordance with EN 60529 IP20
Protection against electric shock (protection against direct
and indirect contact to IEC 60204-1)
Through the use of PELV circuits
(Protected extra-low voltage)
Electromagnetic compatibility To EN 61000-6-2/-4 and NE 21
1) Including linking
2) With horizontal mounting position
Fig. 15
Power supply
Feature Specification/value
Operating voltage supply for electronics/
sensors (UEL/SEN)
[V DC] 24 ± 25 %
Intrinsic current consumption at nominal
operating voltage 24 V from UEL/SEN
[mA] 70
Reverse polarity protection 24 V UEL/SEN against
0 V UEL/SEN
Yes
Mains buffering time [ms] 20
Fig. 16
Network-specific
Feature Specification/value
Protocol Ethernet/I P, Modbus/TCP1)
Specification EtherNet/I P
Transmission rate [Mbps] 10/100 (full duplex/half duplex)
Crossover detection Auto-MDI/MDI-X
Maximum cable length per segment [m] 1002)
Cable specification
Cable type Ethernet twisted pair cable,
screened
Transmission class Category Cat 5/Cat 5e (link class)
Cable diameter [mm] 6 … 8
Wire cross section [mm²] 0.14 … 0.75; 22 AWG3)
1) Based on the Ethernet protocol IEEE 802.3
2) At a transmission rate of 100 Mbps
3) Required for maximum connection length between network participants
Fig. 17

Other manuals for CPX-E-EP

3

Other Festo Control Unit manuals

Festo ERMB User manual

Festo

Festo ERMB User manual

Festo Compact Performance CP-FB6-E Parts list manual

Festo

Festo Compact Performance CP-FB6-E Parts list manual

Festo CAMC-G-S3 Instruction Manual

Festo

Festo CAMC-G-S3 Instruction Manual

Festo VIFB5 Series Parts list manual

Festo

Festo VIFB5 Series Parts list manual

Festo CPX-E-EP User manual

Festo

Festo CPX-E-EP User manual

Festo CMGA-E1-CO User manual

Festo

Festo CMGA-E1-CO User manual

Festo CPX-E User manual

Festo

Festo CPX-E User manual

Festo CPX Series Parts list manual

Festo

Festo CPX Series Parts list manual

Festo CPX-FB11 Parts list manual

Festo

Festo CPX-FB11 Parts list manual

Festo MS4/6-E-IPM-40-80 User manual

Festo

Festo MS4/6-E-IPM-40-80 User manual

Festo MS6-SV Series User manual

Festo

Festo MS6-SV Series User manual

Festo DSM Series User manual

Festo

Festo DSM Series User manual

Festo MSE6-C2M Parts list manual

Festo

Festo MSE6-C2M Parts list manual

Festo CPX-AP-A-16DI-D-M12-5P User manual

Festo

Festo CPX-AP-A-16DI-D-M12-5P User manual

Festo FLSM User manual

Festo

Festo FLSM User manual

Festo CP-FB09-E Parts list manual

Festo

Festo CP-FB09-E Parts list manual

Festo CPX-FVDA-P2 User manual

Festo

Festo CPX-FVDA-P2 User manual

Festo DeviceNet CMGA-E1-DN User manual

Festo

Festo DeviceNet CMGA-E1-DN User manual

Festo JMFH...D...C-EX Series Use and care manual

Festo

Festo JMFH...D...C-EX Series Use and care manual

Festo CPX-E-1CI User manual

Festo

Festo CPX-E-1CI User manual

Festo MSE6-E2M User manual

Festo

Festo MSE6-E2M User manual

Festo CPX-E-4IOL User manual

Festo

Festo CPX-E-4IOL User manual

Festo LF-D Series User manual

Festo

Festo LF-D Series User manual

Festo CAMC-G-S3 User manual

Festo

Festo CAMC-G-S3 User manual

Popular Control Unit manuals by other brands

Huawei ME909 Series Hardware guide

Huawei

Huawei ME909 Series Hardware guide

Sanela SLT 07 quick start guide

Sanela

Sanela SLT 07 quick start guide

LEGRAND 0 677 55L manual

LEGRAND

LEGRAND 0 677 55L manual

V2 FLEXY2 manual

V2

V2 FLEXY2 manual

Panasonic AK-UCU500P operating instructions

Panasonic

Panasonic AK-UCU500P operating instructions

Land Pride 380-166A installation instructions

Land Pride

Land Pride 380-166A installation instructions

Global Fire Equipment ZMU Programming manual

Global Fire Equipment

Global Fire Equipment ZMU Programming manual

Eaton Vickers CM2 Series Overhaul manual

Eaton

Eaton Vickers CM2 Series Overhaul manual

IFM Electronic efector 600 TR2432 operating instructions

IFM Electronic

IFM Electronic efector 600 TR2432 operating instructions

National Instruments NI-5783 Getting started guide

National Instruments

National Instruments NI-5783 Getting started guide

Freescale Semiconductor TWR-MEM-PISMO quick start guide

Freescale Semiconductor

Freescale Semiconductor TWR-MEM-PISMO quick start guide

Novus DIGIRAIL-2A instruction manual

Novus

Novus DIGIRAIL-2A instruction manual

Frequency Central Raging Bull Build documentation

Frequency Central

Frequency Central Raging Bull Build documentation

Weidmüller DPA/DMV operating instructions

Weidmüller

Weidmüller DPA/DMV operating instructions

Acqiris SA230E Startup guide

Acqiris

Acqiris SA230E Startup guide

Advantage SENTRA SRT-1075-300 reference guide

Advantage

Advantage SENTRA SRT-1075-300 reference guide

National Instruments NI DCM-2316 Getting started guide

National Instruments

National Instruments NI DCM-2316 Getting started guide

Belkin F1DN002R manual

Belkin

Belkin F1DN002R manual

manuals.online logo
manuals.online logoBrands
  • About & Mission
  • Contact us
  • Privacy Policy
  • Terms and Conditions

Copyright 2025 Manuals.Online. All Rights Reserved.