manuals.online logo
Brands
  1. Home
  2. •
  3. Brands
  4. •
  5. Festo
  6. •
  7. Control Unit
  8. •
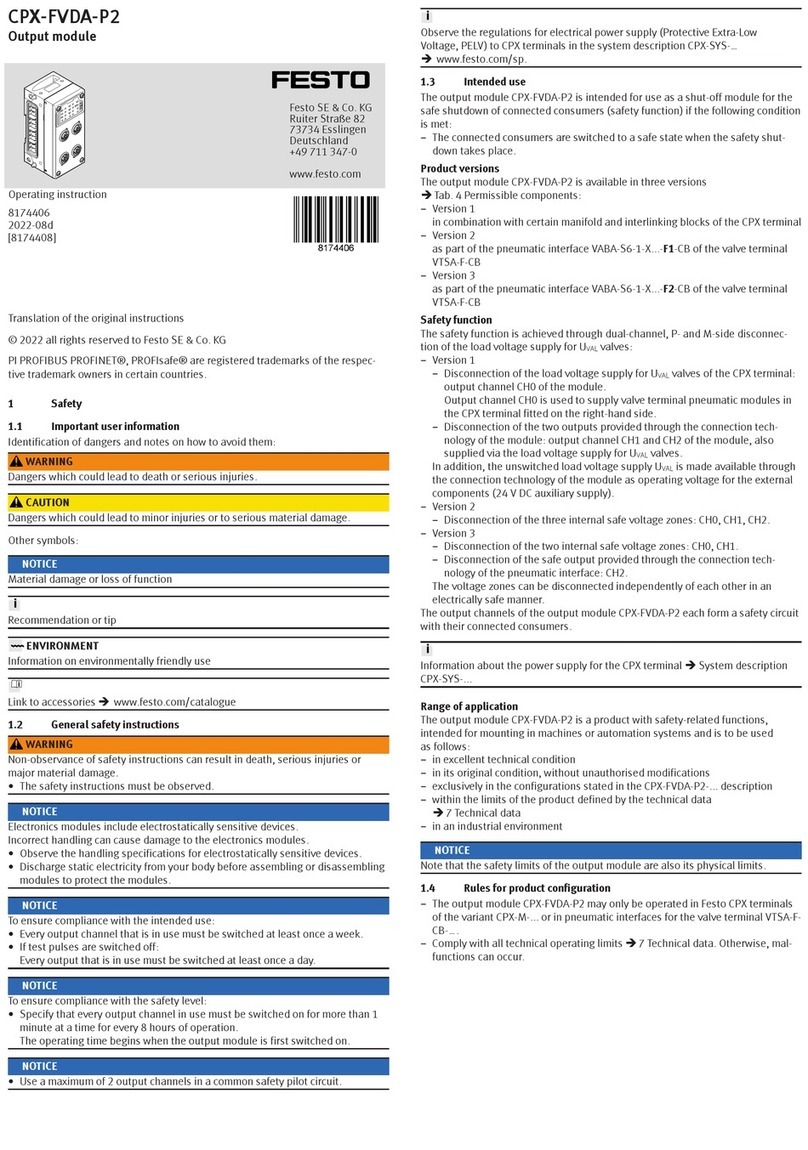
  9. Festo CPX-E User manual

Festo CPX-E User manual

CPX-E System
Festo AG & Co. KG
Ruiter Straße 82
73734 Esslingen
Germany
+49 711 347-0
www.festo.com
Instructions for use
Original instructions
8070967
2017-07
[8070969]
CPX-E System English.................................................
Reproduction, distribution or sale of this document or communication of its con
tents to others without express authorization is prohibited. Offenders will be liable
for damages. All rights reserved in the event that a patent, utility model or design
patent is registered.
1 About this document
This document describes the use of the above-mentioned product family. Certain
aspects of use are described in other documents and must be observed
è1.1 Further applicable documents.
1.1 Further applicable documents
Document Table of contents
Description of the CPX-E system (CPX-E-SYS) Detailed description of the CPX-E system
Documentation of the components in a CPX-E
system and the connected periphery
Information on use of the components
Special documentation on ATEX Information on the use of the product in explos
ive gas atmospheres
Device description files Definition of the modules of a CPX-E system for
integration into the higher-order controller
Documentation of the higher-order controller
and additional participants in the network
Information on commissioning and paramet
erisation of the components
Fig. 1
All available documents for the product èwww.festo.com/pk.
1.2 Product version
This document refers to the system consisting of CPX-E modules.
The product version can be determined by the product labelling or using suitable
Festo software.
Suitable software for determining the product version is available on the
support portal of Festo èwww.festo.com/sp. Information for the use of
the software is included in the integrated help function.
1.3 Product labelling
The CPX-E modules are labelled on the left lateral surface. The product labelling is
described in the documentation supplied with the product.
1.4 Specified standards
Version status
DIN 46228-1:1992-08 EN 60529:2013-10
DIN 46228-4:1990-09 EN 60715:2001-09
EN 60068-2-27:2010-02 IEC 60204-1:2014-10
Fig. 2
2 Safety
2.1 General safety information
 Take into consideration the legal regulations for the respective destination.
 Use the product only within the defined values è15 Technical data.
 Take into account labelling on the product.
 Observe the further applicable documents
è1.1 Further applicable documents.
 Store the product in a cool, dry, UV-protected and corrosion-protected
environment. Ensure storage times are short.
 Before working on the product: Switch off the power supply and secure it
against being switched on again.
 Observe the handling specifications for electrostatically sensitive devices.
2.2 Intended use
The product family described in this document is intended only for use within a
protected range in the vicinity of a machine and/or automated system.
The products must be used only as follows:
– Use only in an industrial environment. Outside of industrial environments, e.g. in
commercial and mixed-residential areas, actions to suppress interference may
have to be taken.
– Use only in combination with modules and components that are permissible for
the respective product variant èwww.festo.com/catalogue.
– Only use the product if it is in perfect technical condition.
– Only use the product in original status without unauthorised modifications. Only
the conversions or modifications described in this and the other applicable doc
uments are permitted.
2.3 Training of specialized personnel
Installation, commissioning, maintenance and disassembly should only be conduc
ted by qualified personnel.
The qualified personnel must be familiar with installation and operation of elec
trical control systems.
3 Further information
– Accessories èwww.festo.com/catalogue
– Spare parts èwww.festo.com/spareparts
4 Service
 Contact your regional Festo contact person if you have technical questions
èwww.festo.com.
5 Product overview
5.1 Function
The CPX-E system is a modular system for the connection of electrical periphery.
The individual modules in a CPX-E system are used, for example, to detect sensor
signals and control actuators. Using a bus module or controller, the CPX-E system
can be connected to a higher-order controller through a network or operated
autonomously. Various interfaces and functions are available for diagnosis.
5.2 Product design
CPX-E system
A CPX-E system consists of a bus module or controller on the left side and at least
one I/O module for signal processing.
The connection between the modules is implemented using linking elements. The
contacts of both external linking elements are protected by end supports.
2 end supports are included with a bus module or controller.
1
2
3
1Input and output modules
2Linking element
3Bus module (here: CPX-E-PN)
Fig. 3
CPX-E modules
The CPX-E modules are designed in such a way that an exchange of individual com
ponents is possible without dismantling the CPX-E system. By disengaging the
interlock of the terminal strips, you can remove them from the module. By disenga
ging the interlock of the module, you can remove an individual module from the
system. The link remains on the H-rail.
1
2
3
4
5
6
7
8
1LED display components
2Terminal strips
3Interlock of terminal strips
4Interlock of module
5Linking element
6Contact of functional earth (FE)
7Housing
8DIL switch1)
1) Module-dependent
Fig. 4
5.3 Display components
The CPX-E modules have LED indicators specific to the module, network or system:
– LED indicators specific to the module or network are described in the document
ation for the respective module.
– An overview of the system-specific LED displays is displayed in the following
table èFig. 5.
– The behaviour of the system-specific LED indicators is described in “Description
of the CPX-E system” (è1.1 Further applicable documents) and further below
è11 Diagnostics and fault clearance.
LED Significance
PS
(green)
Power System Monitoring of the operating voltage supply UEL/SEN
PL
(green)
Power Load Monitoring of the logic and load voltage supply UOUT
SF
(red)
System Failure System fault1)
M
(yellow)
Modify Force mode active or system start with saved para
meterisation and saved CPX expansion have been set.
1) Display of 3 error classes through different flashing behaviours.
Fig. 5
Detailed information on the error classes can be found in “Description of
the CPX-E system” è1.1 Further applicable documents.
5.4 Control elements
A CPX-E module has interlocks for
engaging and disengaging the module
terminal strips and connected
conductors.
1
2
3
1Interlock of spring-loaded terminal
2Interlock of terminal strips
3Interlock of module
Fig. 6
5.5 Connecting components
Connection of the CPX-E system
The individual modules of a CPX-E system are connected to each other through the
link. The contact to the link is established when the modules are hung into the
H-rail è7 Mounting. If a module is removed, the connection to the other modules
is interrupted.
Connecting peripheral equipment
For the connection of the peripheral equipment, the modules have terminal strips
with spring-loaded terminals è8 Installation.
6 Function examples
12
3
4
5
6
1Higher-order controller
2valve terminal VTUG
3Standards-based cylinder with
proximity sensors for position
sensing
4Flow sensor
5Signal lamp
6CPX-E system with bus module and
I/O modules
Fig. 7
7 Mounting
7.1 H-rail mounting
The modules can be mounted to an H-rail 35 × 7.5 mm according to EN 60715.
When selecting screws for H-rail mounting, a distance between the H-rail
and the linking elements of 3 mm must be observed.
The distance between the mounting screws of the H-rail may be a max
imum of 50 mm.
7.2 Mounting clearances
To guarantee a sufficient pressurisation of the modules, the following minimum
distances must be observed for the mounting of the CPX-E system èFig. 8.
1
2
1CPX-E system
2End supports
Dimensions [mm]: a = 40
b = 20
c = 30
d = 106
e = 195
Fig. 8
7.3 Link
Hanging the linking element into place
1. Place the linking element into the
correct position on the H-rail.
2. Clip the linking element to the H-rail.
3. Push together the linking elements
until they engage.
1
2
1.
2.
3.
1
1Linking element
2H-rail
Fig. 9
7.4 Clamping and drilling
Hanging the module into place and engaging it
1. Place the module above the linking
element(s)1) on the H-rail.
2. Press the module onto the H-rail until
the module interlock engages.
1
2
3
1.
2.
4
1Module
2Interlock of module
3H-rail
4Linking element
1) In the case of bus modules, 2 linking elements are required. In the case of controllers, 4 linking ele
ments are required.
Fig. 10
Disengaging and removing the module
1. Disengage the module interlock
(e.g., with a slotted screwdriver).
2. Tilt up the module and remove it
from the H-rail.
1
2
3
4
1.
2.
5
1Module
2Slotted head screwdriver
3Interlock of module
4H-rail
5Linking element
Fig. 11
8 Installation
Note
Malfunction due to electromagnetic interference.
 Connect screening to the connection for functional earth FE.
 Connect the H-rail to the earth potential with low impedance.
8.1 Power supply concept
A CPX-E system uses separate voltages to supply the electronic and sensors (UEL/
SEN) and to supply outputs (UOUT). The voltage potentials (+24 V DC and 0 V DC)
are respectively connected to each other in the terminal strips. It respective
voltage can be conducted from one module to another.
Warning
Risk of injury due to uncontrolled movements of the connected actuators.
A feedback loop through the sensor and/or actuator supply of the modules can
supply the CPX-E system and lead to unwanted functions.
 Keep the range of movement of the connected actuators unobstructed.
Operating voltage supply UEL/SEN
The operating voltage supply UEL/SEN to supply the electronics and sensors is fed
at the bus module or controller and distributed internally to the entire CPX-E
system though the link.
Load voltage supply UOUT
The load voltage supply UOUT to supply the outputs is fed separately directly at
every module with outputs.
1 23456
78
9
1Bus module CPX-E-PN
2Input module CPX-E-16DI
3Output module CPX-E-8DO
4Input module CPX-E-4AI-U-I
5Output module CPX-E-4AO-U-I
6IO-Link® master module
CPX-E-4IOL
7Load voltage supply UOUT
8Operating voltage supply UEL/SEN
9Link
Fig. 12
The operating voltage supply UEL/SEN and load voltage supply UOUT are
implemented separately from each other within the CPX-E system.
If this separation is not required for the respective use case, both voltages
can also be supplied from a common voltage source. In this case, the load
voltage supply must be able to be disconnected separately.
8.2 Connect lines
Warning
Electric voltage
Injury caused by electric shock, damage to machine and to system
 For the electrical power supply, use only PELV circuits in accordance with
IEC 60204-1/EN 60204-1 (Protective Extra-Low Voltage, PELV).
 Observe the general requirements IEC 60204-1/EN 60204-1 of the PELV
power circuits.
 Use only voltage sources that ensure a reliable electric separation from the
mains network in accordance with IEC 60204-1/EN 60204-1.
 Always connect all circuits for the operating and load voltage supplies UEL/SEN
and UOUT.
1. Make sure the module and line are
de-energised.
2. Strip the end of the line and fit wire
end sleeves if required.
3. Disengage the spring-loaded ter
minal interlock (e.g., with a slotted
screwdriver).
4. Insert the end of the line into the ter
minal strip to the limit stop.
5. Engage the spring-loaded terminal
interlock.
1
2
3
43.
4.
1Slotted head screwdriver
2Interlock of spring-loaded terminal
3Terminal strip
4Cable
Fig. 13
8.3 Disconnecting cables
1. Make sure the module and line are
de-energised.
2. Disengage the spring-loaded ter
minal interlock (e.g., with a slotted
screwdriver).
3. Pull the line from the terminal strip.
1
2
3
4
2.
3.
1Slotted head screwdriver
2Interlock of spring-loaded terminal
3Terminal strip
4Cable
Fig. 14
9 Commissioning
The behaviour of the CPX-E system during commissioning is largely determined by
the parameterisation of the bus module.
 Observe information on parameterisation in the description of the bus node
è1.1 Further applicable documents.
Warning
Risk of injury due to uncontrolled movements of the connected actuators.
The CPX-E system starts even if the parameterisation process is incomplete.
 Keep the range of movement of the connected actuators unobstructed.
 Check the parameterisation and address allocation of the inputs and/or
outputs (e.g., using Force mode).
In order to avoid connecting and addressing errors, you must carry out the
commissioning steps as follows.
1. Check the mounting and electrical connections è9.1.
2. Make settings on the bus module or controller è9.2.
3. Functional test (without higher-order controller) è9.3.
4. Commissioning in network (with higher-order controller) è9.4.
5. Parameterisation è9.5.
Note
Addressing errors caused by changing address ranges during operation.
 Do not connect the bus module/controller to the network until after the func
tional test (è9.3).
9.1 Checking the mounting and electrical connections
1. Check the mounting of the CPX-E system.
 Make sure the linking elements are clipped onto the H-rail and engaged in
each other.
 Make sure all module interlocks are engaged to the H-rail.
 Make sure all terminal strip interlocks are engaged to the H-rail.
2. Check the electrical installation of the CPX-E system.
 Check the connections of the functional earth.
 Check the connected lines for a firm seat.
 Check the feed of the voltage supplies.
 Check the allocation of the sensors and actuators to the modules.
9.2 Make settings on the bus module or controller
Settings are made on the bus module or controller independently of the module
using rotary and/or DIL switches.
The functions and factor settings of the rotary and DIL switches (if existent
on the module) are described in the respective documentation
accompanying the product.
 Make the desired settings on the bus module or controller if they deviate from
the factory setting.
9.3 Functional test (without higher-order controller)
1. Switch on the power supplies (UEL/SEN, UOUT).
2. Check the behaviour of the CPX-E system:
– LED displays
– Connected actuators
9.4 Commissioning in network (with higher-order controller)
Note
Malfunction due to the activation of the higher-order controller and CPX-E
system in the incorrect order.
 Switch on the higher-order controller and CPX-E system according to the pre
set order of the network used.
Information on commissioning can be found in the “Instructions for use”
for the respective bus module è1.1 Further applicable documents.
9.5 Parameterisation
With the aid of parameterisation, the behaviour of the CPX-E system the
individual modules and channels can be adapted to each particular application.
Parameterisation can be performed using suitable software from Festo or using
the higher-order controller. The parameters are preset at the factory.
The possibilities of parameterisation depend on the bus module or
controller used (èDescription of the respective bus module/controller).
A list and description of the general parameters can be found in the
“Description of the CPX-E system” è1.1 Further applicable documents.
Parameterisation using Festo software
Suitable software for parameterisation can be found on the support portal
of Festo èwww.festo.com/sp. Information for the use of the software is
included in the integrated help function.
Parameterisation using the higher-order controller
Information on parameterisation using the higher-order controller can be
found in the description of the respective bus module or controller.
Start-up behaviour of the CPX-E system
The “System start” system parameter fundamentally influences the start-up
behaviour of the CPX-E system.
– “Standard parameters” setting (presetting):
The CPX-E system starts with the factory setting.
The desired parameterisation can be established by the higher-order controller.
– “Stored parameters” setting
The CPX-E system starts with the parameters saved in the bus module.
The setting is signaled by the lighting of the “Modify” LED indicator [M]
è5.3 Display components.
If the “Modify” LED indicator [M] is lit continuously, the parameterization of
the system is not restored automatically by the higher-level controller
after a replacement.
 Before replacement, note the required parameters and re-establish
them again after replacement.
10 Operation
The behaviour of the system in case of an error with the following malfunctions is
dependent on the parameterisation of the higher-order controller and the setting
of the system parameters “Fail safe”:
– Telegram failure
– Network interruption
Depending on the parameterisation, the electrical outputs are switched off
(factory setting), switched on or retain their status.
Detailed information on the “Fail safe” can be found in the “Description of
the CPX-E system” è1.1 Further applicable documents.
11 Diagnostics and fault clearance
11.1 Diagnostics options
For the diagnosis of errors, various possibilities are available depending on the
parameterisation and network protocol used:
– Internal system diagnosis
– LED indicators on the product
11.2 Internal system diagnosis
The internal system diagnosis is described in the “Description of the CPX-E
system” and the module descriptions
è1.1 Further applicable documents.
11.3 LED indicators
Various LED indicators are available on every module for the visualisation of the
statuses and errors. In the process, LED indicators specific to the system and
module or network are differentiated.
The system-specific LED indicators of the controllers and bus modules are
described in this document.
LED indicators specific to the module or network are described in the
documentation for the respective module.
Power System [PS] – Operating voltage supply UEL/SEN
LED (green) Significance Remedy
Lights up
ON
OFF
Voltage supply present.
No error.
–
Flashes
ON
OFF
Voltage supply present, but
outside of the tolerance
range.
 Eliminate undervoltage.
The link on the bus module
is missing or incomplete.
 Check the link.
Flashes
ON
OFF
The internal fuse of the
voltage supply has
responded.
 Eliminate short circuit/overload.
Depending on the parameterisa
tion, the voltage supply is then
switched on automatically again
(factory setting) or it must be
switched off and then on again.
Off
ON
OFF
Voltage supply not present.  Check connection of the power
supply.
Fig. 15
Power Load [PL] – Load voltage supply UOUT
LED (green) Significance Remedy
Lights up
ON
OFF
Voltage supply present.
No error.
–
Flashes
ON
OFF
Voltage supply present, but
outside of the tolerance
range.
 Eliminate undervoltage.
Off
ON
OFF
Voltage supply not present.  Check connection of the power
supply.
Fig. 16
System Failure [SF] – System failure
LED (red)1) Significance Remedy
Flashes
ON
OFF
Simple error/information
(error class 1)
èDescription of the CPX-E system
ON
OFF
Error
(Error class 2)
ON
OFF
Serious error
(Error class 3)
Off
ON
OFF
No error –
1) The LED indicator “System Failure” [SF] flashes depending on the error class.
Fig. 17
Modify [M] – Parameterisation modified or “Force” active.
LED (yellow) Significance
Lights up
ON
OFF
System start with saved parameterisation and saved CPX
expansion set; parameters and CPX expansion are saved
remanently; external parameterisation is blocked1)
Caution when replacing systems with saved parameterisation. In
the case of these systems, parameterisation is not carried out
automatically by the higher-order controller on replacement.
 Before replacement, note required settings and restore them
after replacement, if required.
Flashes
ON
OFF
The Forcen function is enabled.1)
Off
ON
OFF
System start with default parameterisation (factory setting) and
current CPX expansion set; external parameterisation is possible
(presetting).
1) The indication of the “Forcen” function (LED flashing) has priority over indication of the setting for the
system start with the saved parameterisation and saved extension (LED lights up).
Fig. 18
12 Maintenance
Note
Accumulation of heat due to reduced air supply to electronics.
 Keep the ventilation slots free and regularly remove contamination.
13 Conversion
13.1 Replacing the module
Note
When a bus module, controller or complete system is replaced, a different
parameterisation will result in deviating behaviour.
 Before replacement, check which settings are required and restore them after
the replacement.
Removing the terminal strips
If a module is exchanged within the course of a conversion or repair, the conductor
remains in the terminal strip and the terminal strips are removed from the module.
1. Ensure that the module is
de-energised.
2. Insert the screwdriver through the
recess of the terminal strip interlock
and into the module interlock.
3. Pull the screwdriver in the direction
of the arrow to disengage the
terminal strips.
4. Remove the terminal strips.
1
2
3
4
2.
3.
4.
1Screwdriver
2Terminal strip
3Interlock of terminal strips
4Interlock of module
Fig. 19
After the terminal is disengaged, it remains in a stopped position. The ter
minal strips that are not removed must be pushed back in to the limit stop.
Disengaging and removing the module
èFig. 11
Hanging the module into place and engaging it
èFig. 10
Inserting terminal strips
1. Ensure that the module is
de-energised.
2. Place the terminal strips in the
appropriate positions on the module.
3. Press in the terminal strips to the
limit stop.
1
2.
3.
1Terminal strip
Fig. 20
To prevent connection faults, the terminal strips of the signals and terminal
strips of the voltage supply have matching codes.
13.2 Replacing the linking element
1. Disengage and remove the module
èFig. 11.
2. Disconnect the linking elements by
pulling them apart.
3. Release the lower lock of linking ele
ment from the H-rail.
4. Remove the linking element from the
H-rail.
5. Hang the new linking element into
place èFig. 9.
1
2
2.
3. 2.
4.
3
1Linking element
2H-rail
3Lower lock of linking element
Fig. 21
14 Disposal
 Dispose of the packaging and the product at the end of its useful life through
environmentally friendly recycling in accordance with applicable specifications.
15 Technical data
General information
Characteristic Specification/value
Assembly position Vertical/horizontal
Ambient temperature [°C] –5 … +60 (–5 … +50)1)
Storage temperature [°C] –20 … +70
Air humidity (non-condensing) [%] 0 … 95
Max. permissible setup altitude above sea level [m] 2000
Max. number of modules per CPX-E system,
including the bus module or controller
11
Address volume of the inputs/outputs [byte] 64/64 (maximum)
Degree of protection in accordance with
EN 60529
IP20
Protection against electric shock (protection
against direct and indirect contact to
IEC 60204-1)
Through the use of PELV circuits
(protected extra-low voltage)
CE marking (see declaration of conformity)
èwww.festo.com
To EU EMC Directive
Explosion prevention and protection (IECEx/
ATE X )
èSpecial documentation on ATEX
Certification certificate RCM compliance mark
Contamination level 2
Vibration and shock resistance in accordance with EN 600682)
Vibration (part 2-6) H-rail SG1
Shock (part 2 - 27) H-rail SG1
Continuous shock (part 2-27) H-rail SG1
1) In case of horizontal mounting position
2) Explanation of the severity level èFig. 23 … Fig. 25
Fig. 22
Vibration load
Frequency range [Hz] Acceleration [m/s2]Deflection [mm]
SL1 SL2 SL1 SL2 SL1 SL2
2 … 8 2 … 8 – – ±3.5 ±3.5
8 … 27 8 … 27 10 10 – –
27 … 58 27 … 60 – – ±0.15 ±0.35
58 … 160 60 … 160 20 50 – –
160 … 200 160 … 200 10 10 – –
Fig. 23
Shock load
Acceleration [m/s2]Duration [ms] Shocks per direction
SL1 SL2 SL1 SL2 SL1 SL2
±150 ±300 11 11 5 5
Fig. 24
Continuous shock load
Acceleration [m/s2]Duration [ms] Shocks per direction
±150 6 1000
Fig. 25
Power supply
Characteristic Specification/value
Operating voltage supply UEL/SEN
Nominal operating voltage [V DC] 24 ± 25 %
Trigger level, undervoltage identification [V DC] 17.5
Max. current load of terminal strip [A] 8
Mains buffering time Module-dependent 1)
Load voltage supply UOUT
Nominal operating voltage [V DC] 24 ± 25 %2)
Trigger level, undervoltage identification Module-dependent 1)
Max. current load of terminal strip [A] 8
1) èDocumentation of the modules
2) The indication of tolerance deviates in case of some modules.
Fig. 26
Connection data of the terminal strips
Key feature Specification/value
4-pin 6-pin
Conductor cross-section
Massive [mm2]0.14 … 1.5
Flexible [mm2]0.14 … 2.5 0.14 … 1.5
Flexible with wire end sleeve
Without plastic sleeve [mm2]0.14 … 1.5
With plastic sleeve [mm2]0.14 … 1.5 0.14 … 1.0
Length of the wire end sleeve without plastic sleeve1)
Conductor cross section 0.14 … 1.0 mm2[mm] 8 … 10
Conductor cross-section 1.5 mm2[mm] 8 … 10 10
Length of the wire end sleeve with plastic sleeve2)
Conductor cross-section 0.14 … 0.34 mm2[mm] 8 … 10
Conductor cross-section 0.5 … 1.0 mm2[mm] 8 … 10 10
1) in accordance with DIN 46228-1
2) in accordance with DIN 46228-4
Fig. 27

Other Festo Control Unit manuals

Festo MX-2-1/4 User manual

Festo

Festo MX-2-1/4 User manual

Festo CDSA-D1-VX Reference guide

Festo

Festo CDSA-D1-VX Reference guide

Festo CPX-FVDA-P Parts list manual

Festo

Festo CPX-FVDA-P Parts list manual

Festo VYKB-F10 User manual

Festo

Festo VYKB-F10 User manual

Festo VOFA-L26-T52-M Series User manual

Festo

Festo VOFA-L26-T52-M Series User manual

Festo CPX-F8DE-P User manual

Festo

Festo CPX-F8DE-P User manual

Festo VZWM-L-M22C User manual

Festo

Festo VZWM-L-M22C User manual

Festo CPX-CMAX-C1-1 Parts list manual

Festo

Festo CPX-CMAX-C1-1 Parts list manual

Festo ZSB-1/8-B User manual

Festo

Festo ZSB-1/8-B User manual

Festo VZBA-...-63-T-22-...-V4V4T series User manual

Festo

Festo VZBA-...-63-T-22-...-V4V4T series User manual

Festo CPX-FB14 Parts list manual

Festo

Festo CPX-FB14 Parts list manual

Festo DRRD-PS1 Series User manual

Festo

Festo DRRD-PS1 Series User manual

Festo CAMC-G-S3 User manual

Festo

Festo CAMC-G-S3 User manual

Festo Smart cubic CPA-SC Series User manual

Festo

Festo Smart cubic CPA-SC Series User manual

Festo CAMC-G-S3 Instruction Manual

Festo

Festo CAMC-G-S3 Instruction Manual

Festo VTSA Series Parts list manual

Festo

Festo VTSA Series Parts list manual

Festo MPPES Series User manual

Festo

Festo MPPES Series User manual

Festo VZXA M Series Parts list manual

Festo

Festo VZXA M Series Parts list manual

Festo VPPL User manual

Festo

Festo VPPL User manual

Festo ZSB-1/8 User manual

Festo

Festo ZSB-1/8 User manual

Festo CMGA-E1-CO User manual

Festo

Festo CMGA-E1-CO User manual

Festo CPX-E Series Operating and installation instructions

Festo

Festo CPX-E Series Operating and installation instructions

Festo MH1 Series Parts list manual

Festo

Festo MH1 Series Parts list manual

Festo CAPC-F1-E-M12 User manual

Festo

Festo CAPC-F1-E-M12 User manual

Popular Control Unit manuals by other brands

Kubic CB9 manual

Kubic

Kubic CB9 manual

Siemens XT55 GPS Startup user guide

Siemens

Siemens XT55 GPS Startup user guide

SEW-Eurodrive MOVISAFE DCS B Series manual

SEW-Eurodrive

SEW-Eurodrive MOVISAFE DCS B Series manual

Neoway Neo WM620 At command guide

Neoway

Neoway Neo WM620 At command guide

INOXPA NL Installation, service and maintenance instructions

INOXPA

INOXPA NL Installation, service and maintenance instructions

jbc DI-2B reference guide

jbc

jbc DI-2B reference guide

Sharp LS013B7DH01 Technical Literature

Sharp

Sharp LS013B7DH01 Technical Literature

Symbol MDM 3006 quick reference

Symbol

Symbol MDM 3006 quick reference

ADTRAN T400 Installation & maintenance

ADTRAN

ADTRAN T400 Installation & maintenance

motogadget m.unit blue Operating and installation guide

motogadget

motogadget m.unit blue Operating and installation guide

Nexta Tech PLANO-ONE/4 manual

Nexta Tech

Nexta Tech PLANO-ONE/4 manual

Honeywell HM700AFVALVE quick start guide

Honeywell

Honeywell HM700AFVALVE quick start guide

Pentair Goyen Precision P1 Installation and operating instructions

Pentair

Pentair Goyen Precision P1 Installation and operating instructions

Lancom GS-1108 manual

Lancom

Lancom GS-1108 manual

Emerson YARWAY 60Y Series Installation, operation and maintenance manual

Emerson

Emerson YARWAY 60Y Series Installation, operation and maintenance manual

ICPDAS HRT-710 user manual

ICPDAS

ICPDAS HRT-710 user manual

EGi play&sound 05022 instruction manual

EGi

EGi play&sound 05022 instruction manual

NOXAS Connection Kit manual

NOXAS

NOXAS Connection Kit manual

manuals.online logo
manuals.online logoBrands
  • About & Mission
  • Contact us
  • Privacy Policy
  • Terms and Conditions

Copyright 2025 Manuals.Online. All Rights Reserved.