manuals.online logo
Brands
  1. Home
  2. •
  3. Brands
  4. •
  5. FingerTec
  6. •
  7. IP Access Controllers
  8. •
  9. FingerTec k-Kadex User manual

FingerTec k-Kadex User manual

A SLEEK ACCESS
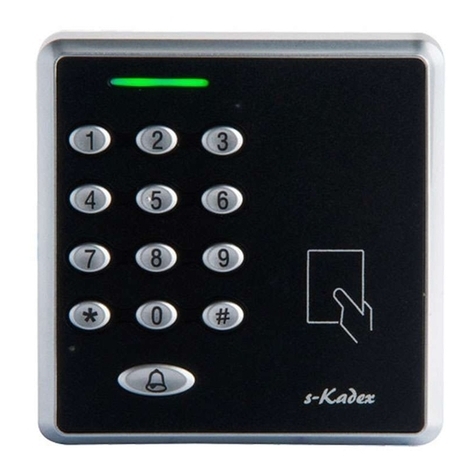
The k-Kadex is the latest slave terminal from FingerTec,
designed exclusively for card and code access. The k-
Kadex reads and records user’s information such as
users ID, password and card information and directly
transmits the information to a master terminal for
verication via Wiegand 26-bit output. It is compulsory
for the master terminal to have a Wiegand 26-bit input
port to receive signals from the k-Kadex.
1 2 3
4 5 6
7 8 9
ESC 0OK
k-Kadex
Rear of k-Kadex Terminal Rear of Master Terminal
Red
Black
White
Green
Purple
Grey
Blue
Yellow
PWR
GND
WD0
WD1
BEEP
G LED
Bell +
Bell -
PWR
GND
INWD0
INWD1
BEEP
G LED
PWR
GND
External Power Supply
External
door bell
+
_
Power supply
for door bell
+
_
External doorbell system
*The doorbell is optional
LED light indicator
The red light indicates standby mode or failed verica-
tion. The green light indicates that the card information
is being read and sent to the master terminal for
verication.
Card scanning area
To scan and receive card information for verication at
the master reader. Default card type: RFID Card, 125kHz
40 to 80mm. Made to order: MIFARE, 13.56MHz 30 to
50mm
Installation
Note: Please read the instructions carefully before installing the k-Kadex.
The k-Kadex has one wire attached to it. For a neat
installation, you need to conceal this wire properly.
Remove the back piece of the k-Kadex from the main
piece.
Secure the back piece of the k-Kadex onto or inside a
wall using the 4 screws provided but make sure that
you have some space for the wire to go through the
center hole. Plug the main piece of the k-Kadex
securely in place.
Note: There are 2 small hooks inside the back piece. Make sure this portion
is facing up.
Verication
User ID & Password
Make sure that the k-Kadex is in its standby mode,
where the LED light blinks red and the user ID and/or
password(s) have been enrolled into a master terminal
before you proceed with verication.
Insert a user ID, for example 1234. Ignore the prex
zeros if the user ID has them. Press OK to conrm the
user ID You will hear a beep. This is an indication that
the User ID has been sent to the master terminal.
LED light
indicator
Card
scanning
area
Door
bell
button
Color
Red
Black
White
Green
Purple
Grey
Blue
Yellow
Wire
PWR
GND
WD0
WD1
Beep
G LED
Bell +
Bell -
Connect to
master
PWR
GND
INWD0
INWD1
BEEP
G LED
Function
Supplies power (DC12V 1A) to
k-Kadex
Wiegand 26-bit output connects to
a master terminal’s. Wiegand 26-bit
input
Buzzer input from the master terminal
LED input from the master terminal
Dry contact to doorbell system (the doorbell system must
have an individual power supply)
Connections & Wiring Diagram
Note: There is only 1 black wire provided which can be shared for the GND for power supply and
Wiegand 26-bit output.
1
2
1
2
1
2
www.fingertec.comwww.fingertec.com
User Guide
A SLEEK ACCESS
The k-Kadex is the latest slave terminal from FingerTec, designed exclusively for card and
password access. The k-Kadex reads and records users’ information such as users ID, password
and card information and directly transmits the information to a master terminal for verication
via Wiegand 26-bit output. It is compulsory for the master terminal to have a Wiegand 26-bit
input port to receive signals from the k-Kadex.
Rear of k-Kadex Terminal Rear of Master Terminal
PWR
GND
WD0
WD1
G LED
R LED
Bell +
Bell -
PWR
GND
INWD0
INWD1
BEEP
G LED
R LED PWR
GND
External Power Supply
External
door bell
+
_
Power supply
for door bell
+
_
External doorbell system
*The doorbell is optional
Card scanning area
To scan and receive card
information for verication at
the master reader. Default card
type: RFID Card, 125kHz 40 to
80mm. Made to order: MIFARE,
13.56MHz 30 to 50mm
Door bell button
Color
Red
Black
Green
White
Purple
Grey
Blue
Yellow
Wire
PWR
GND
WD0
WD1
G LED
R LED
Bell +
Bell -
Connect to master
PWR
GND
INWD0
INWD1
G LED
R LED
Connections &
Wiring Diagram
Note: There is only 1 black wire provided
which can be shared for the GND for power
supply and Wiegand 26-bit output.
LED light indicator
The red light indicates standby
mode or failed verication. The
green light indicates that the
card information is being read
and sent to the master terminal
for verication.
A Firm Access with
FingerTec
k-Kadex
©2015 Timetec Computing Sdn Bhd. All rights reserved • 082015
12
Red
Black
Green
White
Purple
Grey
Blue
Yellow
Red
Black
Green
White
Grey
Blue
Function
Supplies power (DC12V 1A) to k-Kadex
Wiegand 26-bit output connects to a master
terminal’s Wiegand 26-bits input
Buzzer with Green LED input from the master terminal
Buzzer with Red LED input from the master terminal
Dry contact to doorbell system (the doorbell system must have an
individual power supply.
Installation
Note: Please read the instructions carefully before installing the k-Kadex.
The k-Kadex has one wire attached to it. For a neat installation, you need to conceal this wire
properly.
Remove the back piece of the k-Kadex from the main piece.
Secure the back piece of the k-Kadex onto or inside a wall using the 4 screws provided but
make sure that you have some space for the wire to go through the center hole. Plug the
main piece of the k-Kadex securely in place.
1
2
1
2
1
2
3
Note: There are 2
small hooks inside
the back piece.
Make sure this
portion is facing up.
Verication • Card
Wave a card at the card induction area to scan
the card. The k-Kadex captures the card informa-
tion and transmits it to the master terminal for
verication. Make sure that the k-Kadex is in its
standby mode, where the LED light is showing
red before you start using the terminal.
Make sure that you have enrolled the
user/card into the master terminal.
Wave the card at the card induction area. The
LED light will turn green and it will submit the
card information to the master terminal for
verication.
Verication result
a. Successful Verication: Green LED blinks
accompanied with a long beeping sound.
b. Failed Verication: Red LED blinks accom-
panied with two short beeping sound.
Verication • User ID & Password
Make sure that the k-Kadex is in its standby
mode, where the Red LED light is lit on and
the user ID and/or password(s) have been
enrolled into a master terminal before you
proceed with verication.
Insert a user ID, for example 1234. Ignore the
prex zeros if the user ID has them. Press OK
to conrm the user ID You will hear a beep.
This is an indication that the User ID has
been sent to the master terminal.
Insert a password, for example 387034, and
press OK to conrm. If the password is
correct, you will hear a “beep” after you
press the OK button.
Verication result
a. Successful Verication: Green LED
blinks accompanied with a long beeping
sound.
b. Failed Verication: Red LED blinks
accompanied with two short beeping
sound.
Master terminal indication during the
verication process at the k-Kadex:
• Input a
username
• Input a
password
• During
successful
verication
• During
dailed
verication
Master terminal indication during
verication process at the k-Kadex:
• During
successful
verication
• During failed
verication
1
2
3
A Firm Access
with FingerTec
k-Kadex
SPECIFICATIONS
MODEL
SURFACE FINISHING
TYPE OF SCANNER
MICROPROCESSOR
MEMORY
ALGORITHM
PRODUCT DIMENSION (L X W X H), mm
STORAGE
• Cards
• Transaction
ENROLLMENT & VERIFICATION
• Methods
• Card per user ID
• Reading distance,mm
• Verification time (sec)
CARD TECHNOLOGY
• RFID: 64-bit, 125kHz
• MIFARE: MFIS50/S70, 13.56MHz
COMMUNICATIONS
• Method
OPERATING ENVIRONMENT
• Temperature (°C)
• Humidity (%)
• Power input
ACCESS CONTROL
• EM lock driving output
• Alarm output
• Antipassback
k-Kadex
Acrylonitrile Butadiene Styrene (ABS)
RFID antenna
Managed by master
75 x 20 x 115
Storage in master
Card & password
Managed by master
40 ~ 80 (RFID), 30 ~ 50 (Mifare)
Managed by master
Yes
Made to order
Wiegand 26-bit output
-10 ~ 70
20 ~ 80
DC 12V 1A
Managed by master
Pwd Affirm
User ID 00004
ESC OK
Pwd Affirm
User ID 00004
Input Pwd*___
Pwd Affirm
User ID 00004
Verified, TQ
Pwd Affirm
Error Pwd.
Verify
CARD: 0003837885
USER ID: 00001
VERIFIED
Verify PIN Card
No enroll
3
4
5
Card Password

Other FingerTec IP Access Controllers manuals

FingerTec s-Kadex User manual

FingerTec

FingerTec s-Kadex User manual

FingerTec TA100C User manual

FingerTec

FingerTec TA100C User manual

FingerTec TA700W User manual

FingerTec

FingerTec TA700W User manual

FingerTec Face ID2 User manual

FingerTec

FingerTec Face ID2 User manual

FingerTec FaceID2 User manual

FingerTec

FingerTec FaceID2 User manual

FingerTec H2i Operating and maintenance instructions

FingerTec

FingerTec H2i Operating and maintenance instructions

FingerTec AC100C User manual

FingerTec

FingerTec AC100C User manual

FingerTec Face ID3 User manual

FingerTec

FingerTec Face ID3 User manual

FingerTec AC900 User manual

FingerTec

FingerTec AC900 User manual

FingerTec H3i User manual

FingerTec

FingerTec H3i User manual

FingerTec R2 User manual

FingerTec

FingerTec R2 User manual

FingerTec R2 User manual

FingerTec

FingerTec R2 User manual

FingerTec AdapTec Plus Assembly instructions

FingerTec

FingerTec AdapTec Plus Assembly instructions

FingerTec TA500 User manual

FingerTec

FingerTec TA500 User manual

FingerTec AC900 User manual

FingerTec

FingerTec AC900 User manual

FingerTec TA100C User manual

FingerTec

FingerTec TA100C User manual

FingerTec Keylock 8800 User manual

FingerTec

FingerTec Keylock 8800 User manual

FingerTec H3i User manual

FingerTec

FingerTec H3i User manual

FingerTec i-Kiosk 100 User manual

FingerTec

FingerTec i-Kiosk 100 User manual

FingerTec TimeLine 100 User manual

FingerTec

FingerTec TimeLine 100 User manual

FingerTec H3i User manual

FingerTec

FingerTec H3i User manual

FingerTec TA700W User manual

FingerTec

FingerTec TA700W User manual

FingerTec R2c User manual

FingerTec

FingerTec R2c User manual

FingerTec R3 User manual

FingerTec

FingerTec R3 User manual

Popular IP Access Controllers manuals by other brands

H3C WX2880X installation guide

H3C

H3C WX2880X installation guide

SPORTS AFIELD INSTINCT BIOMETRIC Series instruction manual

SPORTS AFIELD

SPORTS AFIELD INSTINCT BIOMETRIC Series instruction manual

LEGRAND 744 33 manual

LEGRAND

LEGRAND 744 33 manual

ZKTeco F6 installation guide

ZKTeco

ZKTeco F6 installation guide

HIK VISION DS-K281X Series quick start guide

HIK VISION

HIK VISION DS-K281X Series quick start guide

CrucialTrak BACS Quattro BQ-A001 Quick user guide

CrucialTrak

CrucialTrak BACS Quattro BQ-A001 Quick user guide

jcm-tech HDOOREVO user manual

jcm-tech

jcm-tech HDOOREVO user manual

suprema BioStation 3 user guide

suprema

suprema BioStation 3 user guide

H3C WX2510H installation guide

H3C

H3C WX2510H installation guide

eKey TOCAhome operating instructions

eKey

eKey TOCAhome operating instructions

NetComm IAC4000 Specifications

NetComm

NetComm IAC4000 Specifications

EVVA AirKey E.A.WL.CUS Assembly manual

EVVA

EVVA AirKey E.A.WL.CUS Assembly manual

Viking RAD-1A Technical practice

Viking

Viking RAD-1A Technical practice

Alarm Lock Trilogy DL3000 Series Programming instructions

Alarm Lock

Alarm Lock Trilogy DL3000 Series Programming instructions

JWS DWPS102U quick start guide

JWS

JWS DWPS102U quick start guide

Paxton PROXIMITY P series instruction manual

Paxton

Paxton PROXIMITY P series instruction manual

Roger MC16-PAC-3-KIT installation manual

Roger

Roger MC16-PAC-3-KIT installation manual

ZKTeco BioPro SA20 quick start guide

ZKTeco

ZKTeco BioPro SA20 quick start guide

manuals.online logo
manuals.online logoBrands
  • About & Mission
  • Contact us
  • Privacy Policy
  • Terms and Conditions

Copyright 2025 Manuals.Online. All Rights Reserved.