manuals.online logo
Brands
  1. Home
  2. •
  3. Brands
  4. •
  5. Fisher-Price
  6. •
  7. Bouncy Seat
  8. •
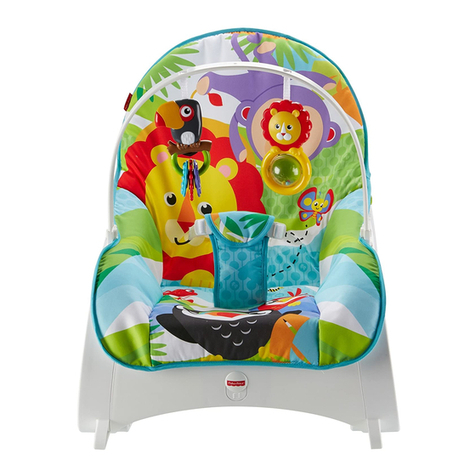
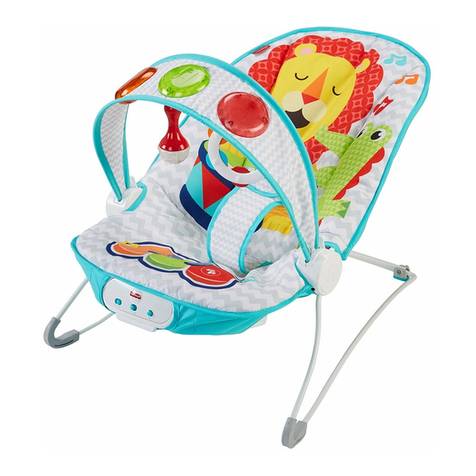
  9. Fisher-Price DXY20 User manual

Fisher-Price DXY20 User manual

1
fisher-price.com
IMPORTANT! Keep these instructions for
future reference.
• Please read these instructions before
assembly and use of this product.
• Adult assembly is required. No tools required
for assembly.
• Requires one D (LR20) alkaline battery (not
included) for soother operation.
• Product features and decorations may vary
from images.
¡IMPORTANTE! Guardar estas instrucciones
para futura referencia.
• Leer estas instrucciones antes de ensamblar
y usar este producto.
• Requiere montaje por un adulto. No es
necesario usar herramientas para el montaje.
• La unidad relajante funciona con 1 pila
alcalina D (LR20) x 1,5V (no incluida).
• Las características y decoración del producto
pueden variar de las mostradas.
DXY20
FBR69
FBR70
FBR71
FBR72
Slide the power switch to turn
vibrations ON or OFF.
Mueve el interruptor de encendido para
ENCENDER o APAGAR las vibraciones.
2
WARNING
SUFFOCATION
HAZARD - Infants
have suffocated:
• In gaps between extra padding and
side of the bassinet/cradle and on
soft bedding.
• Use only the pad provided by
Fisher-Price.
• NEVER add a pillow, comforter, or
another mattress for padding.
3
ADVERTENCIA
PELIGRO DE
ASFIXIA – Los niños
pequeños se pueden
asfixiar:
• En los espacios entre colchones
adicionales y el lado del moisés/cuna
y en ropa de cama suave.
• Usar solo el colchón proporcionado por
Fisher-Price.
• NO añadir una almohada, edredón
u otro colchón.
4
WARNING - Failure to follow these warnings
and the instructions could result in serious injury or death.
ADVERTENCIA - El incumplimiento de estas
advertencias e instrucciones puede resultar en lesiones graves
o la muerte.
• FALL HAZARD - To help prevent falls, do not use this product when the infant
begins to push up on hands and knees or has reached 20 lb (9 kg), whichever
comes first.
• SUFFOCATION HAZARD - This product uses a non-standard size sheet. Only use
the sheet provided with this product.
• Strings can cause strangulation! Never place items with a string around a child’s
neck such as hood strings or pacifier cords. Never suspend strings over product
or attach strings to toys.
• Never place product near a window where cords from blinds or drapes can
strangle a child.
• To reduce the risk of Sudden Infant Death Syndrome (SIDS), pediatricians
recommend healthy infants be placed on their backs to sleep, unless otherwise
advised by your physician.
• PELIGRO DE CAÍDAS: para ayudar a evitar caídas, no usar este producto cuando
el bebé empiece a incorporarse por sí solo con las manos y rodillas o llegue a
pesar 9 kg, lo que ocurra primero.
• PELIGRO DE ASFIXIA: este producto incluye una sábana de un tamaño no
estándar. Sólo usar la sábana incluida con este producto.
• ¡Los cordones pueden causar estrangulación! No poner artículos con cordones,
tales como capuchas o chupones, alrededor del cuello del niño. No suspender
cordones sobre el producto ni amarrar cordones a los juguetes.
• No poner el producto cerca de una ventana donde los cordones de las persianas
o cortinas pueden estrangular al niño.
• Para reducir el riesgo de síndrome de muerte súbita del lactante (SMSL), los
pediatras recomiendan acostar a dormir a los bebés sanos boca arriba, salvo que
su médico indique lo contrario.
5
Parts Piezas
Frame
Armazón
Pad
Colchón
4 Legs
4 patas
Sheet
Sábana
Storage Bag
Bolsa
Fr
am
e
IMPORTANT! Before assembly and each use, inspect this product for damaged hardware, loose
joints, missing parts or sharp edges. Do not use the product if any parts are missing, damaged
or broken. Do not use accessories or replacement parts other than those approved by the
manufacturer. Never substitute parts.
¡IMPORTANTE! Antes del montaje y de cada uso, revisar que el producto no tenga piezas dañadas,
conexiones sueltas, piezas faltantes o bordes filosos. NO usar el producto si falta o está rota alguna
pieza. No usar accesorios ni piezas de repuesto, salvo aquellos aprobados por el fabricante. No usar
piezas de terceros.
6
©2016 Mattel. All Rights Reserved. DXY20-2C70
PRINTED IN CHINA 1101194857-2LC
CONSUMER ASSISTANCE
ATENCIÓN AL CLIENTE
CO SU SS S
1-800-432-5437 (US)
Fisher-Price, Inc., 636 Girard Avenue, East Aurora, NY 14052.
Hearing-impaired consumers/Clientes con problemas auditivos
1-800-382-7470.
Centro de Servicio en México:
59-05-51-00 Ext. 5206 ó 01-800-463-59-89
MÉXICO
Importado y distribuido por Mattel de México,
S.A. de C.V., Miguel de Cervantes Saavedra
No. 193, Pisos 10 y 11, Col. Granada,
Delegación Miguel Hidalgo, C.P. 11520,
México, D.F. R.F.C. MME-920701-NB3.
CHILE
Mattel Chile, S.A., Avenida Américo
Vespucio 501-B, Quilicura, Santiago.
Tel.: 1230-020-6213.
VENEZUELA
Servicio al consumidor Venezuela:
Tel.: 0-800-100-9123.
ARGENTINA
Mattel Argentina, S.A., Curupaytí 1186,
(1607) – Villa Adelina, Buenos Aires.
Tel.: 0800-666-3373.
COLOMBIA
Mattel Colombia, S.A., Calle 123#7-07 P.5,
Bogotá. Tel.: 01800-710-2069.
PERÚ
Mattel Perú, S.A., Av. Juan de Arona # 151,
Centro Empresarial Juan de Arona, Torre C,
Piso 7, Oficina 704, San Isidro, Lima 27,
Perú. RUC: 20425853865. Reg. Importador:
02350-12-JUE-DIGESA. Tel.: 0800-54744.
E-mail Latinoamérica:
[email protected].
Storage and Care
Almacenamiento
y mantenimiento
Storage
• Press the button on a frame upper tube
and remove the leg. Repeat this process to
remove the other three legs.
• Place the legs into the frame.
• Slide the product into the storage bag and
fasten the strap.
Care
• The sheet and storage bag are machine
washable. Wash separately in cold water
on the gentle cycle. Do not use bleach.
Tumble dry separately on low heat and
remove promptly.
• The frame, pad and legs may be wiped clean
using a mild cleaning solution and a damp
cloth. Do not use bleach. Do not use harsh or
abrasive cleaners. Rinse clean with water to
remove residue. Do not immerse the frame.
Almacenamiento
• Presionar el botón de un tubo superior
del armazón y quitar la pata. Repetir este
procedimiento para quitar las otras
tres patas.
• Colocar las patas en el armazón.
• Meter el producto en la bolsa y abrochar
el cinturón.
Mantenimiento
• La sábana y bolsa se pueden lavar a máquina.
Lavarlas por separado en agua fría, ciclo para
ropa delicada. No usar blanqueador. Meterlas
a la secadora por separado a temperatura
baja y sacarlas inmediatamente después de
finalizado el ciclo.
• Limpiar el armazón, colchón y patas con un
paño humedecido en una solución limpiadora
neutra. No usar blanqueador. No usar
limpiadores fuertes o abrasivos. Enjuagar con
agua para eliminar el residuo. No sumergir
el armazón.
7
Assembly Montaje
• While pressing a button on a frame tube,
slide a leg onto the tube until it "snaps"
into place.
Hint: Each leg is designed to fit the tube one
way. Simply align the crease in the leg with the
notch in the tube.
• Pull on the leg to be sure it's attached to
the frame.
• Repeat this process to assemble the other
three legs to the frame.
• Mientras presiona un botón de un tubo del
armazón, meter una pata en el tubo hasta que
haga clic en su lugar.
Atención: cada pata está diseñada para
ajustarse en el tubo de una sola manera.
Alinear el pliegue de la pata con la muesca
del tubo.
• Jalar la pata para asegurarse de que está
segura en el armazón.
• Repetir este procedimiento para ensamblar
las otras tres patas en el armazón.
Frame
Armazón
Legs
Patas
1
2
• Fit the pad into the slot in the sheet.
• Ajustar el colchón en la ranura de la sábana.
Sheet
Sábana
Pad
Colchón
PRESS
PRESS
PRESIONA
PRESIONA
3
• Place the pad with sheet into the frame.
• Press the pad with sheet into place.
• Poner el colchón con la sábana en
el armazón.
• Presionar el colchón con la sábana en
su lugar.
Pad with Sheet
Colchón con sábana
8
Soother Battery Installation
Colocación de la pila de la unidad relajante
• Loosen the screw in the battery compartment
door and remove the door.
• Insert one D (LR20) alkaline battery into the
battery compartment.
• Replace the battery compartment door and
tighten the screw.
• If this product begins to operate erratically,
you may need to reset the electronics. Slide
the power switch off and then back on again.
• When vibration becomes slow or stops, it's
time for an adult to change the battery.
• Aflojar el tornillo de la tapa del
compartimento de la pila y retirar la tapa.
• Insertar 1 pila alcalina D (LR20) x 1,5V en el
compartimento.
• Cerrar la tapa del compartimento de la pila
y apretar el tornillo.
• Si este producto no funciona correctamente,
restablecer el circuito electrónico. Poner
el interruptor de encendido en apagado
y nuevamente en encendido.
• Sustituir la pila cuando la vibración se debilite
o deje de funcionar.
Battery Safety Information
In exceptional circumstances, batteries may
leak fluids that can cause a chemical burn
injury or ruin your product. To avoid
battery leakage:
• Do not mix old and new batteries or batteries
of different types: alkaline, standard (carbon-
zinc) or rechargeable (nickel-cadmium).
• Insert batteries as indicated inside the
battery compartment.
• Remove batteries during long periods of
non-use. Always remove exhausted batteries
from the product. Dispose of batteries safely.
Do not dispose of this product in a fire. The
batteries inside may explode or leak.
• Never short-circuit the battery terminals.
• Use only batteries of the same or equivalent
type, as recommended.
• Do not charge non-rechargeable batteries.
• Remove rechargeable batteries from the
product before charging.
• If removable, rechargeable batteries are
used, they are only to be charged under
adult supervision.
Información de seguridad acerca de las pilas
En circunstancias excepcionales, las pilas
pueden derramar líquido que puede causar
quemaduras o dañar el producto. Para
evitar derrames:
• No mezclar pilas nuevas con gastadas ni
mezclar pilas alcalinas, estándar (carbono-
cinc) o recargables (níquel-cadmio).
• Cerciorarse de que la polaridad de las pilas
sea la correcta.
• Sacar las pilas gastadas del producto
y desecharlas apropiadamente. Sacar las
pilas si el producto no va a ser usado durante
un periodo prolongado. No quemar las pilas
ya que podrían explotar o derramar el líquido
incorporado en ellas.
• No provocar un cortocircuito con
las terminales.
• Usar sólo el tipo de pilas recomendadas
(o su equivalente).
• No cargar pilas no recargables.
• Sacar las pilas recargables antes de cargarlas.
• La carga de las pilas recargables sólo debe
realizarse con la supervisión de un adulto.
+
-- 1,5V x 1
D (LR20)
For longer life, use
alkaline batteries.
Para una mayor duración,
usar solo pilas alcalinas.
• Protect the environment by not
disposing of this product with
household waste (2012/19/EU).
Check your local authority for
recycling advice and facilities.
• Proteger el medio ambiente no
desechando este producto en la
basura del hogar (2012/19/EU).
Consultar con la agencia local
pertinente en cuanto a información
y centros de reciclaje.
9
Preventing Baby’s Head from Flattening
Cómo evitar que la cabeza del bebé se aplane
Pediatricians and child health organizations
agree that healthy babies should be placed on
their backs to sleep for naps and at nighttime,
to reduce the risk of Sudden Infant Death
Syndrome (SIDS). But babies who are always
on their backs can sometimes develop flat
spots on their heads (plagiocephaly). Most
cases of positional plagiocephaly can be
prevented (and sometimes corrected) by
repositioning your baby to relieve pressure on
the back of the head. Here are some tips and
techniques from the experts to keep in mind as
you care for your baby:
• Change the location of your baby’s sleeper
or crib in the room, so she has to look in
different directions to see the door, or the
window, or interesting things going on
around her.
• When your baby is awake, provide
opportunities for adult-supervised “tummy
time” play. Playing on his tummy helps take
the pressure off the back of his head, which
will help prevent flat spots from developing.
Tummy time play also helps your baby’s
head, neck and shoulder muscles get
stronger as part of normal development.
• Try tummy time two or three times a day,
for short periods of time, until your baby
gets used to being on her tummy. Once your
baby begins to enjoy this position, try longer
periods of time or increase the frequency of
tummy time play.
• Help your baby avoid resting his head in
the same position all the time by frequently
changing the direction he lies in the crib. For
example, have your baby’s feet point toward
one end of the crib for a few days, and then
change the position so his feet point toward
the other end of the crib. This will encourage
your baby to turn and look in different
directions.
• Try to minimize the amount of time your baby
spends in car seats, carriers and bouncy
seats while awake.
• Lastly, make sure you enjoy lots of “cuddle
time” with your baby by holding her upright
over your shoulder.
For additional information on positional
plagiocephaly and the benefits of tummy
time play for your baby, speak with your
pediatrician or family physician.
National Institute of Health (NIH) Eunice Kennedy
Shriver National Institute of Child Health and
Human Development
10
Preventing Baby’s Head from Flattening
Cómo evitar que la cabeza del bebé se aplane
Tanto pediatras como organizaciones de
salud de niños están de acuerdo en que los
bebés sanos deben dormir siestas y periodos
más largos boca arriba para reducir el riesgo
de síndrome de muerte súbita infantil. Sin
embargo, los bebés que siempre están
boca arriba, a veces pueden desarrollar
plagiocefalia (aplanamiento de la cabeza). La
mayoría de casos de plagiocefalia posicional
puede ser prevenida (y a veces corregida)
reposicionando al bebé para aliviar la presión
en el dorso de la cabeza. A continuación se
presentan consejos y técnicas de los peritos
para el cuidado del bebé:
• Cambia la ubicación de la camita o cuna del
bebé en el cuarto de modo que, para ver la
puerta, ventana o algún otro objeto de interés,
tenga que ver en diferentes direcciones.
• Cuando el bebé esté despierto, date tiempo
para jugar boca abajo con él/ella. Jugar boca
abajo ayuda a quitar la presión del dorso de
la cabeza y ayuda a prevenir el aplanamiento.
Jugar boca abajo también ayuda a fortalecer
los músculos de la cabeza, cuello y hombros
del bebé como parte de un desarrollo normal.
• Juega boca abajo dos o tres veces al día,
por periodos breves, hasta que el bebé se
acostumbre a estar boca abajo. Ya que el
bebé esté a gusto en esta posición, aumenta
los periodos de tiempo o la frecuencia del
juego boca abajo.
• Ayuda al bebé a evitar apoyar su cabeza en la
misma posición todo el tiempo, cambiando
con frecuencia la dirección en la que está
acostado/a en la cuna. Por ejemplo, por
unos días, apunta los pies del bebé hacia
un extremo de la cuna y, luego, cambia la
posición de los pies hacia el otro extremo de
la cuna. Esto estimulará al bebé a voltearse
y ver en diferentes direcciones.
• Intenta minimizar la cantidad de tiempo que
el bebé pasa en asientos de auto, cargadores
y sillas de rebote mientras está despierto/a.
• Por último, asegúrate de pasar mucho tiempo
con el bebé en brazos, cargándolo con la
cabeza derecha sobre tu hombro.
Habla con el pediatra o médico para obtener
más información sobre plagiocefalia posicional
y los beneficios para el bebé de jugar
boca abajo.
Instituto Nacional de Salud (NIH) Instituto Nacional
de Salud de Niños y Desarrollo Humano Eunice
Kennedy Shriver

This manual suits for next models

4

Other Fisher-Price Bouncy Seat manuals

Fisher-Price H9479 User manual

Fisher-Price

Fisher-Price H9479 User manual

Fisher-Price FPC80 User manual

Fisher-Price

Fisher-Price FPC80 User manual

Fisher-Price C1383 User manual

Fisher-Price

Fisher-Price C1383 User manual

Fisher-Price M2055 User manual

Fisher-Price

Fisher-Price M2055 User manual

Fisher-Price B8865 User manual

Fisher-Price

Fisher-Price B8865 User manual

Fisher-Price FMN39 User manual

Fisher-Price

Fisher-Price FMN39 User manual

Fisher-Price Ocean Wonders Aquarium Bouncer 79030 User manual

Fisher-Price

Fisher-Price Ocean Wonders Aquarium Bouncer 79030 User manual

Fisher-Price COVER'N PLAY 79619 User manual

Fisher-Price

Fisher-Price COVER'N PLAY 79619 User manual

Fisher-Price L0538 User manual

Fisher-Price

Fisher-Price L0538 User manual

Fisher-Price BMM96 User manual

Fisher-Price

Fisher-Price BMM96 User manual

Fisher-Price T2520 User manual

Fisher-Price

Fisher-Price T2520 User manual

Fisher-Price R9949 User manual

Fisher-Price

Fisher-Price R9949 User manual

Fisher-Price K5502 User manual

Fisher-Price

Fisher-Price K5502 User manual

Fisher-Price GDP77 User manual

Fisher-Price

Fisher-Price GDP77 User manual

Fisher-Price FFX45 User manual

Fisher-Price

Fisher-Price FFX45 User manual

Fisher-Price V4552 User manual

Fisher-Price

Fisher-Price V4552 User manual

Fisher-Price P3334 User manual

Fisher-Price

Fisher-Price P3334 User manual

Fisher-Price B8786 User manual

Fisher-Price

Fisher-Price B8786 User manual

Fisher-Price J6982 User manual

Fisher-Price

Fisher-Price J6982 User manual

Fisher-Price 79006 User manual

Fisher-Price

Fisher-Price 79006 User manual

Fisher-Price W9449 User manual

Fisher-Price

Fisher-Price W9449 User manual

Fisher-Price H5985 User manual

Fisher-Price

Fisher-Price H5985 User manual

Fisher-Price K2566 User manual

Fisher-Price

Fisher-Price K2566 User manual

Fisher-Price H5126 User manual

Fisher-Price

Fisher-Price H5126 User manual

Popular Bouncy Seat manuals by other brands

Nuna Leaf manual

Nuna

Nuna Leaf manual

babyplus Isa Assembly and instruction manual

babyplus

babyplus Isa Assembly and instruction manual

manuals.online logo
manuals.online logoBrands
  • About & Mission
  • Contact us
  • Privacy Policy
  • Terms and Conditions

Copyright 2025 Manuals.Online. All Rights Reserved.