Silicone over and around the four original bolt holes used to secure
the vehicle's original rear side window to the vehicle.
H
Insert a Riv-nut (Item 16) into each of the9 mm holes drilled in Step 2G and Crimp Fully.
Congratulations, you have completed your installation. Take a step back and admire your work. Good Job!
K
Install Gullwing door cont...
I
Fit the Gullwing Window back into
position, lining up the hole in the frame
with the Well-nuts inserted in Step 2H.
Secure the Gullwing Window to the
vehicle using the M6 x 25 Button Head
Bolts (Item 15) supplied. Tighten Fully.
Refit the interior panel and seat belt
removed in Steps .2A and 2B
J
Silicone over and around the four original bolt holes used to secure
the vehicle's original rear side window to the vehicle.
H
Insert a Riv-nut (Item 16) into each of the9 mm holes drilled in Step 2G and Crimp Fully.
Congratulations, you have completed your installation. Take a step back and admire your work. Good Job!
K
Install Gullwing door cont...
I
Fit the Gullwing Window back into
position, lining up the hole in the frame
with the Well-nuts inserted in Step 2H.
Secure the Gullwing Window to the
vehicle using the M6 x 25 Button Head
Bolts (Item 15) supplied. Tighten Fully.
Refit the interior panel and seat belt
removed in Steps .2A and 2B.
J
GWTL101-2_REV_A01
F
Mark the position of the six mounting points
indicated, in the Gullwing's frame onto the
vehicle's body.
Using a 4 mm drill bit and drill machine, drill a 4 mm pilot hole on
each of your marking from Step 2F. Change the drill bit to 9 mm
and re-drill all the pilot holes to 9 mm.
G
Fit the Gullwing Window into into position,
ensuring that the Window is tight up against
the bottom and inner edges of the vehicle as
Mark the position of the six mounting points
indicated, in the Gullwing's frame onto the
Install Gullwing door cont...
GLASS GULLWING USED FOR
ILLUSTRATION PURPOSES
the hinges to the vehicle as indicated by
the arrows.
With a friend on the outside ofthe vehicle to support the rear window,
loosen and remove the two screws securing the window latch to the
5
Pull back the Trim / Pinch Weld that runs
down the side of the rear passenger door
opening as shown and carefully free the
interior bodypanel from the vehicle.
Using a 10 mm Tube Socket and Wrench,
loosen and remove the four nuts securing
the hinges to the vehicle as indicated by
the arrows.
C
With a friend on the outside ofthe vehicle to support the rear window,
loosen and remove the two screws securing the window latch to the
vehicle as indicated by the arrows. Remove the window from the
GWTL101-2_REV_A01
5
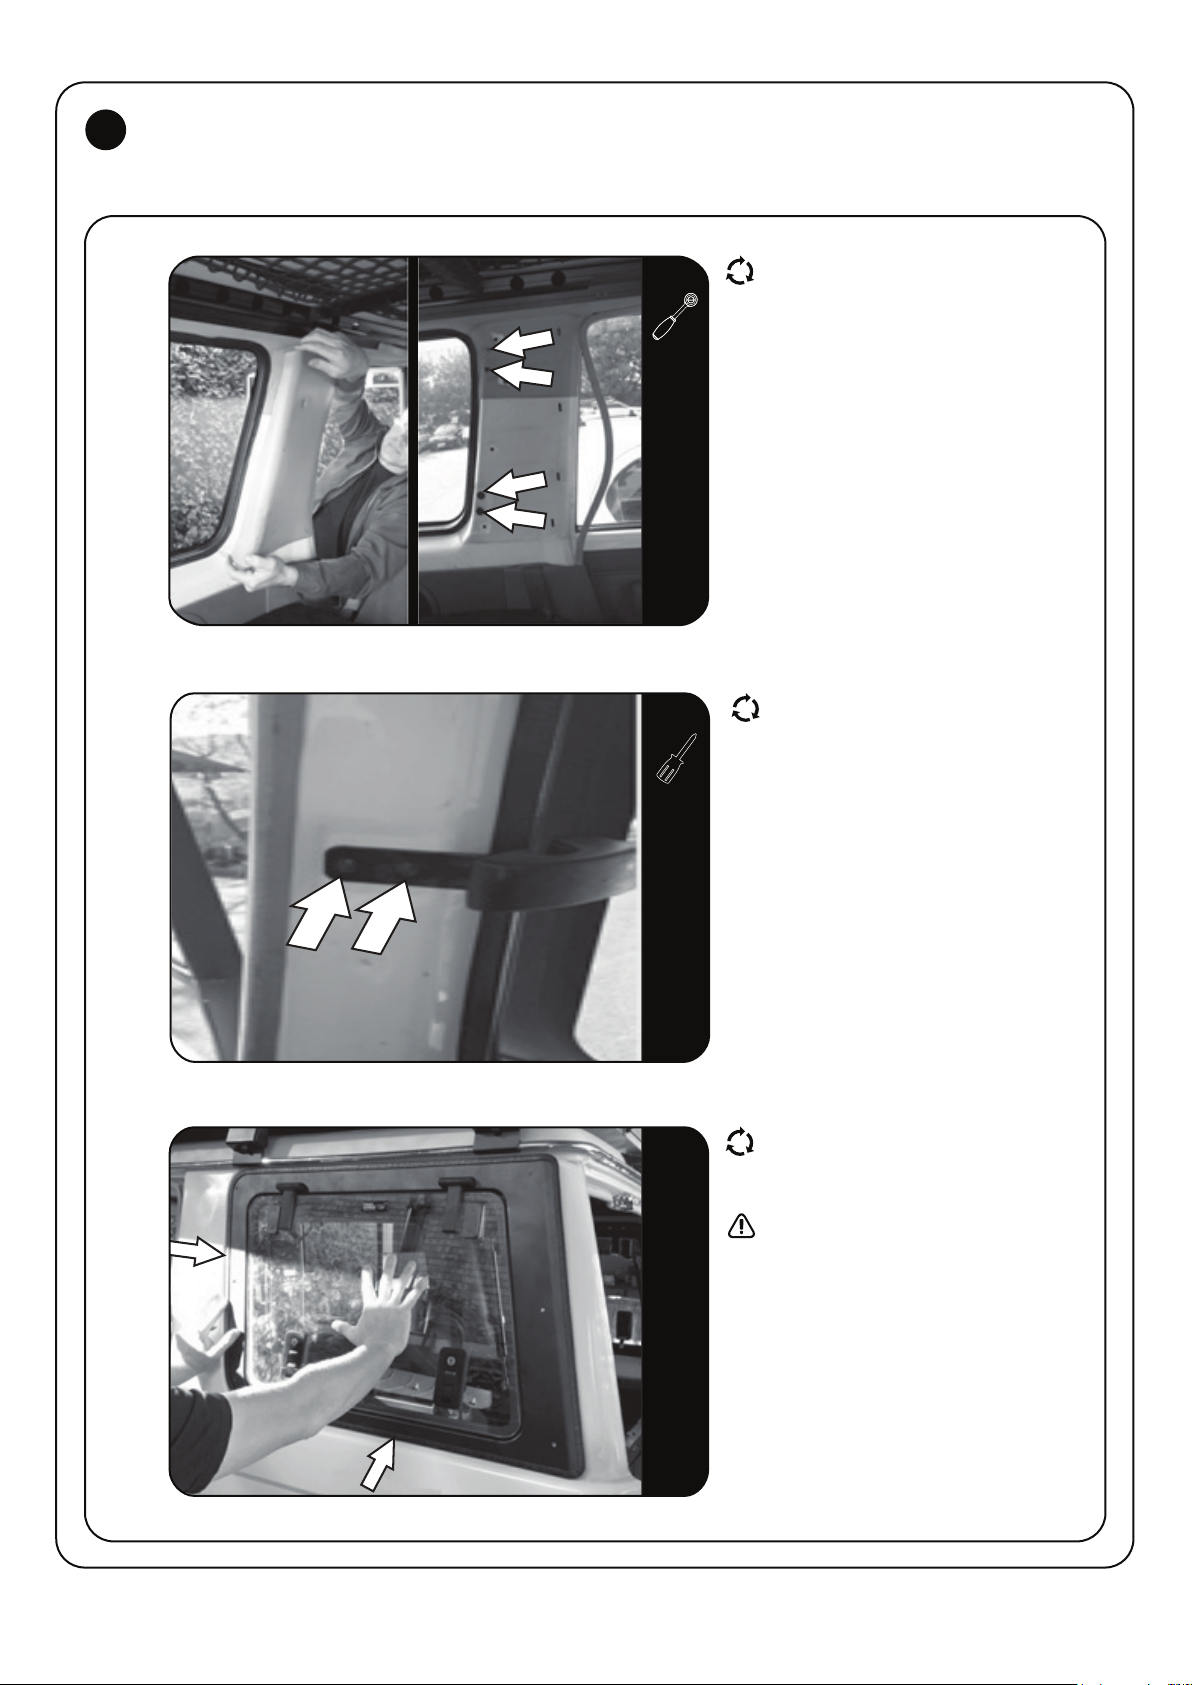
Pull back the Trim / Pinch Weld that runs
down the side of the rear passenger door
opening as shown and carefully free the
interior bodypanel from the vehicle.
B
Using a 10 mm Tube Socket and Wrench,
loosen and remove the four nuts securing
the hinges to the vehicle as indicated by
the arrows.
C
With a friend on the outside ofthe vehicle to support the rear window,
loosen and remove the two screws securing the window latch to the
vehicle as indicated by the arrows. Remove the window from the
vehicle.
D
GWTL101-2_REV_A01 © 2019 FRONT RUNNER VEHICLE OUTFITTERS
5
INSTALL GULLWING WINDOW3
3.2
3.3
3.4
Pull back the Trim / Pinch Weld that runs
down the side of the rear passenger door
opening, cafefully free the interior body
panel from the vehicle.
Loosen and remove the four nuts securing
the hinges to the vehicle as indicated by the
arrows.
With a friend on the outside of the vehicle to
support the rear window, loosen and remove
the two screws securing the window latch
to the vehicle as shown in 3.3. Remove the
window from the vehicle.
Fit the Gullwing Window into postion,
ensuring that the Window is tight up against
the bottom and inner edges of the vehicle as
indicated in 3.4
Glass Gullwing used for illustration.
10mm