GEM Q30 User manual

GEMÜ Q30
Pneumatically operated pinch valve
Operating instructions
EN

All rights including copyrights or industrial property rights are expressly reserved.
Keep the document for future reference.
© GEMÜ Gebr. Müller Apparatebau GmbH & Co. KG
25.08.2021
www.gemu-group.com2 / 19GEMÜ Q30

Contents
1 General information ............................................. 4
1.1 Information .................................................... 4
1.2 Symbols used ................................................ 4
1.3 Definition of terms ........................................ 4
1.4 Warning notes ............................................... 4
1.5 Safety information on the product ............... 4
2 Safety information ............................................... 5
3 Product description ............................................. 5
3.4 Product label ................................................. 6
4 Correct use .......................................................... 6
5 Order data ........................................................... 7
6 Technical data ..................................................... 8
6.1 Medium .......................................................... 8
6.3 Pressure ......................................................... 8
6.4 Actuator data ................................................. 8
6.5 Product compliance ...................................... 8
6.6 Mechanical data ............................................ 8
7 Dimensions .......................................................... 9
7.1 Actuator size 0P1 .......................................... 9
7.2 Actuator size 1P1 .......................................... 10
7.3 Actuator size 2P1 .......................................... 11
7.4 Valve body, without mounting flange ........... 12
8 Manufacturer's information .................................. 13
8.1 Delivery .......................................................... 13
8.2 Packaging ...................................................... 13
8.3 Transport ....................................................... 13
8.4 Storage ........................................................... 13
9 Installation .......................................................... 13
9.1 Preparing for installation .............................. 13
9.2 Installation position ....................................... 13
9.3 Mounting without mounting flange .............. 14
9.4 Mounting with mounting flange ................... 14
9.5 Pneumatic connection .................................. 14
9.5.1 Connecting the control medium ...... 14
10 Inspection and maintenance ................................ 14
12 Removal .............................................................. 17
13 Disposal .............................................................. 17
14 Returns ................................................................ 17
15 Declaration of Incorporation according to
2006/42/EC (Machinery Directive) ....................... 18
GEMÜ Q30www.gemu-group.com 3 / 19

www.gemu-group.com4 / 19GEMÜ Q30
1 General information
1.1 Information
•The descriptions and instructions apply to the standard ver-
sions. For special versions not described in this document
the basic information contained herein applies in combina-
tion with any additional special documentation.
•Correct installation, operation, maintenance and repair work
ensure faultless operation of the product.
•Should there be any doubts or misunderstandings, the Ger-
man version is the authoritative document.
•Contact us at the address on the last page for staff training
information.
1.2 Symbols used
The following symbols are used in this document:
Symbol Meaning
Tasks to be performed
Response(s) to tasks
– Lists
1.3 Definition of terms
Working medium
The medium that flows through the tube.
Control medium
The medium whose increasing or decreasing pressure causes
the GEMÜ product to be actuated and operated.
1.4 Warning notes
Wherever possible, warning notes are organised according to
the following scheme:
SIGNAL WORD
Type and source of the danger
Possible
symbol for the
specific
danger
Possible consequences of non-observance.
Measures for avoiding danger.
Warning notes are always marked with a signal word and
sometimes also with a symbol for the specific danger.
The following signal words and danger levels are used:
DANGER
Imminent danger!
▶Non-observance can cause death or
severe injury.
WARNING
Potentially dangerous situation!
▶Non-observance can cause death or
severe injury.
CAUTION
Potentially dangerous situation!
▶Non-observance can cause moderate
to light injury.
NOTICE
Potentially dangerous situation!
▶Non-observance can cause damage to
property.
The following symbols for the specific dangers can be used
within a warning note:
Symbol Meaning
Danger of explosion
Corrosive chemicals!
Hot plant components!
Risk of crushing!
Risk of crushing due to the compressor shutting
down!
1.5 Safety information on the product
1
Item Symbol Meaning
1 Risk of crushing!
•Do not reach into the tube crushing
area.

www.gemu-group.com 5 / 19 GEMÜ Q30
Missing or illegible adhesive labels on the product must be at-
tached or replaced.
2 Safety information
The safety information in this document refers only to an indi-
vidual product. Potentially dangerous conditions can arise in
combination with other plant components, which need to be
considered on the basis of a risk analysis. The operator is re-
sponsible for the production of the risk analysis and for com-
pliance with the resulting precautionary measures and re-
gional safety regulations.
The document contains fundamental safety information that
must be observed during commissioning, operation and main-
tenance. Non-compliance with these instructions may cause:
•Personal hazard due to electrical, mechanical and chemical
effects.
•Hazard to nearby equipment.
•Failure of important functions.
•Hazard to the environment due to the leakage of dangerous
materials.
The safety information does not take into account:
•Unexpected incidents and events, which may occur during
installation, operation and maintenance.
•Local safety regulations which must be adhered to by the
operator and by any additional installation personnel.
Prior to commissioning:
1. Transport and store the product correctly.
2. Do not paint the bolts and plastic parts of the product.
3. Carry out installation and commissioning using trained
personnel.
4. Provide adequate training for installation and operating
personnel.
5. Ensure that the contents of the document have been fully
understood by the responsible personnel.
6. Define the areas of responsibility.
7. Observe the safety data sheets.
8. Observe the safety regulations for the media used.
During operation:
9. Keep this document available at the place of use.
10. Observe the safety information.
11. Operate the product in accordance with this document.
12. Operate the product in accordance with the specifications.
13. Maintain the product correctly.
14. Do not carry out any maintenance work and repairs not de-
scribed in this document without consulting the manufac-
turer first.
In cases of uncertainty:
15. Consult the nearest GEMÜ sales office.
3 Product description
3.1 Construction
2
3
4
5
1
6
10a
8
9
7a
10b
8
9
7b
11 11
Item Name Materials
1 Optical position indic-
ator
PP
2 Actuator PA6, glass fibre rein-
forced
3 Distance piece with
leak detection hole
Stainless steel
4 Union nut Stainless steel
5 Distance piece with
mounting flange includ-
ing EPDM seal
Stainless steel
6 Compressor Stainless steel
7a Valve body PA6
7b Valve body Stainless steel/PA6
8 Locking ring PA6
9 Tube holder PA6
10a Tube carrier PA6
10b Tube carrier Stainless steel
11 CONEXO RFID chip
3 Product description

www.gemu-group.com6 / 19GEMÜ Q30
4 Correct use
3.2 Description
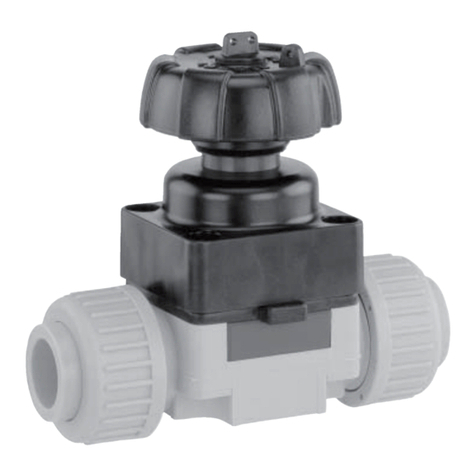
The GEMÜ Q30 2/2-way pinch valve has a plastic piston actu-
ator and is pneumatically operated. The valve guides a tube
which is compressed from above by a compressor to control
and regulate media. The compressor's specially developed
contour and the tube holder's contour minimize the strain on
the tube and thus increase the tubes' service life. Tubes can
be safely inserted and removed in simple steps and without
tools. The available control functions are "normally closed
(NC)" and "normally open (NO)". An integral optical position in-
dicator is standard.
3.3 Function
The product controls a flowing medium by being closed or
opened by a control medium.
3.4 Product label
The product label is located on the actuator. Product label
data (example):
Design in accordance with order data
Item number
Device-specific data
Year of manufacture
Traceability number Counting number
12103529 I0001
The month of manufacture is encoded in the traceability num-
ber and can be obtained from GEMÜ. The product was manu-
factured in Germany.
4 Correct use
DANGER
Danger of explosion
▶Risk of death or severe injury.
●Do not use the product in potentially
explosive zones.
WARNING
Improper use of the product
▶Risk of severe injury or death.
▶Manufacturer liability and guarantee will be void.
●Only use the product in accordance with the operating
conditions specified in the contract documentation and in
this document.
NOTICE
Suitability of the product.
▶The product must be appropriate for the tube's operating
conditions (medium, medium concentration, temperature
and pressure) and the respective ambient conditions.
The product is designed to control a working medium guided
in a tube.
The product is not intended for use in potentially explosive
areas.
●Use the product in accordance with the technical data.

5 Order data
The order data provide an overview of standard configurations.
Please check the availability before ordering. Other configurations available on request.
Order codes
1 Type Code
Pinch valve, pneumatically operated,
plastic piston actuator
Q30
2 Tube inside diameter Code
3.180 mm (1/8") inside diameter 2
6.350 mm (1/4") inside diameter 4
9.530 mm (3/8") inside diameter 6
12.700 mm (1/2") inside diameter 8
19.050 mm (3/4") inside diameter 12
25.400 mm (1") inside diameter 16
3 Tube outside diameter Code
6.350 mm (1/4") outside diameter DA
9.530 mm (3/8") outside diameter DC
11.110 mm (7/16") outside diameter DD
12.700 mm (1/2") outside diameter DE
15.880 mm (5/8") outside diameter DG
19.100 mm (3/4") outside diameter DH
22.230 mm (7/8") outside diameter DI
28.580 -29.970 mm (1 1/8- 1 3/16") outside dia-
meter
DK
35.690 - 38.100 mm (1 13/32- 1 1/2") outside dia-
meter
DN
4 Tube carrier version Code
Plastic design, stainless steel tube carrier and
PA tube holder
7P
Plastic design, PA tube carrier and
PA tube holder
PA
5 Control function Code
Normally closed (NC) 1
Normally open (NO) 2
6 Actuator version Code
Actuator size 0P1 0P1
Actuator size 1P1 1P1
Actuator size 2P1 2P1
7 Mounting option Code
Without mounting flange, with 4 x threaded hole in
body
0
With mounting flange at bottom FB
With mounting flange above FT
8 CONEXO Code
Without
Integrated RFID chip for electronic identification
and traceability
C
Order example
Ordering option Code Description
1 Type Q30 Pinch valve, pneumatically operated,
plastic piston actuator
2 Tube inside diameter 8 12.700 mm (1/2") inside diameter
3 Tube outside diameter DH 19.100 mm (3/4") outside diameter
4 Tube carrier version PA Plastic design, PA tube carrier and
PA tube holder
5 Control function 1 Normally closed (NC)
6 Actuator version 1P1 Actuator size 1P1
7 Mounting option FT With mounting flange above
8 CONEXO Without
5 Order data
www.gemu-group.com 7 / 19 GEMÜ Q30

6 Technical data
6.1 Medium
Working medium: Please observe the tube manufacturer's specifications
Control medium: Inert gases
6.2 Temperature
Media temperature: Please observe the tube manufacturer's specifications
Ambient temperature: Actuator: 0 — 60 °C, Tube: Please observe the tube manufacturer's specifications
Control medium temper-
ature:
max. 60 °C
Storage temperature: 0 — 60 °C
6.3 Pressure
Operating pressure: Please observe the tube manufacturer's specifications
Control pressure: Normally closed (NC) 4 — 7 bar
Normally open (NO) 2 — 3.5 bar
6.4 Actuator data
Filling volume: Actuator size 0P1 0.05 dm³
Actuator size 1P1 0.125 dm³
Actuator size 2P1 0.625 dm³
Piston diameter: Actuator size 0P1 50 mm
Actuator size 1P1 70 mm
Actuator size 2P1 120 mm
6.5 Product compliance
Machinery Directive: 2006/42/EC
6.6 Mechanical data
Weight: Actuator
Actuator size 0P1 0.9 kg
Actuator size 1P1 1.3 kg
Actuator size 2P1 6.9 kg
Valve body
Actuator size 0P1 Stainless steel/PA6 0.2 kg
Actuator size 1P1 PA6 0.066 kg
Stainless steel/PA6 0.228 kg
Actuator size 2P1 Stainless steel/PA6 4.74 kg
Installation position: Optional
www.gemu-group.com8 / 19GEMÜ Q30
6 Technical data

7 Dimensions
7.1 Actuator size 0P1
A
ØB
H1
H2 CT
ØD1* / ØD2*
Ød1
Ød
Øk
ØL
M
G
A ØB CT ØD1* ØD2* Ød Ød1 G H1 H2 Øk ØL M
157.0 72.0 200.0 39.0 42.0 58.0 30.5 G1/4 58.6 15.6 49.0 4.5 M16x1
Dimensions in mm
* D1 = diameter without seal, D2 = diameter with seal
GEMÜ Q30www.gemu-group.com 9 / 19
7 Dimensions

7.2 Actuator size 1P1
A
ØB
H1
H2 CT
ØD1* / ØD2*
Ød1
Ød
Øk
ØL
M
G
Valve
body
code
A ØB CT ØD1* ØD2* Ød Ød1 G H1 H2 Øk ØL M
7P 194.0 96.0 257.0 56.0 60.0 84.0 47.8 G1/4 63.0 26.0 72.0 6.5 M16x1
PA 194.0 96.0 257.0 56.0 60.0 84.0 47.8 G1/4 63.0 34.0 72.0 6.5 M16x1
Dimensions in mm
* D1 = diameter without seal, D2 = diameter with seal
www.gemu-group.com10 / 19GEMÜ Q30
7 Dimensions

7.3 Actuator size 2P1
A
ØB
H1
H2 CT
ØD1* / ØD2*
Ød1
Ød
Øk
ØL
M
G
A ØB CT ØD1* ØD2* Ød Ød1 G H1 H2 Øk ØL M
301.0 168.0 366.0 120.0 92.0 159.0 90.4 G1/4 65.0 52.0 142.5 8.5 M22x1.5
Dimensions in mm
* D1 = diameter without seal, D2 = diameter with seal
GEMÜ Q30www.gemu-group.com 11 / 19
7 Dimensions

7.4 Valve body, without mounting flange
d
k
M
Actuator size d k M
0P1 7.0 7.0 M2
1P1 12.0 12.0 M4
2P1 25.0 25.0 M6
Dimensions in mm
www.gemu-group.com12 / 19GEMÜ Q30
7 Dimensions

www.gemu-group.com 13 / 19 GEMÜ Q30
8 Manufacturer's information
8.1 Delivery
●Check that all parts are present and check for any damage
immediately upon receipt.
The product's performance is tested at the factory. The scope
of delivery is apparent from the dispatch documents and the
design from the order number.
8.2 Packaging
The product is packaged in a cardboard box which can be re-
cycled as paper.
8.3 Transport
1. Only transport the product by suitable means. Do not drop.
Handle carefully.
2. After the installation dispose of transport packaging ma-
terial according to relevant local or national disposal regu-
lations / environmental protection laws.
8.4 Storage
1. Store the product free from dust and moisture in its ori-
ginal packaging.
2. Avoid UV rays and direct sunlight.
3. Do not exceed the maximum storage temperature (see
chapter "Technical data").
4. Do not store solvents, chemicals, acids, fuels or similar
fluids in the same room as GEMÜ products and their spare
parts.
9 Installation
9.1 Preparing for installation
WARNING
The equipment is subject to pressure!
▶Risk of severe injury or death.
●Depressurize the plant.
●Completely drain the plant.
WARNING
Corrosive chemicals!
▶Risk of caustic burns.
●Wear suitable protective gear.
●Completely drain the plant.
CAUTION
Hot plant components!
▶Risk of burns.
●Only work on plant that has cooled
down.
CAUTION
Use as step.
▶Damage to the product.
▶Risk of slipping-off.
●Choose the installation location so that the product can-
not be used as a foothold.
●Do not use the product as a step or a foothold.
NOTICE
Suitability of the product.
▶The product must be appropriate for the tube's operating
conditions (medium, medium concentration, temperature
and pressure) and the respective ambient conditions.
NOTICE
Requirements for tube lines used!
▶Use tube lines suitable for the application, see manufac-
turer's information.
●Only use undamaged tube lines.
NOTICE
Lay tube lines professionally!
▶Lay tube lines professionally and do not bend them below
the minimum bending radius, see manufacturer's inform-
ation.
●Do not kink or twist the tube lines.
NOTICE
Tools
▶The tools required for installation and assembly are not
included in the scope of delivery.
●Use appropriate, functional and safe tools.
1. Ensure the product is suitable for the relevant application.
2. Check the technical data of the product and the materials.
3. Keep appropriate tools ready.
4. Use appropriate protective gear as specified in plant oper-
ator's guidelines.
5. Observe appropriate regulations for connections.
6. Installation work must be performed by trained personnel.
7. Shut off plant or plant component.
8. Secure the plant or plant component against recommis-
sioning.
9. Depressurize the plant or plant component.
10. Completely drain the plant or plant component and allow it
to cool down until the temperature is below the media va-
porization temperature and cannot cause scalding.
11. Pay attention to the installation position (see chapter "In-
stallation position").
9.2 Installation position
The installation position of the product is optional.
9 Installation

www.gemu-group.com14 / 19GEMÜ Q30
10 Inspection and maintenance
9.3 Mounting without mounting flange
1. Before mounting the valve body, machine the housing in
accordance with the borehole pattern in the chapter "Di-
mensions" so that the valve body can be secured to the
housing.
2. Secure the valve body to the housing using four screws.
3. Re-attach or reactivate all safety and protective devices.
9.4 Mounting with mounting flange
1. Before mounting the actuator, machine the housing in ac-
cordance with the borehole pattern in the chapter "Dimen-
sions" so that the valve body can be guided through the re-
cess.
2. Guide the valve body through the recess in the housing.
The actuator's mounting flange must be flush with the
housing.
3. Connect the mounting flange and housing using appropri-
ate screws and washers (not included in the scope of de-
livery).
9.5 Pneumatic connection
The following types are available:
Normally closed (NC):
Actuator resting position: closed by spring force. Activation of
the actuator (connector 2) opens the actuator. When the actu-
ator is vented, the actuator is closed by spring force.
Normally open (NO):
Actuator resting position: opened by spring force. Activation
of the actuator (connector 4) closes the actuator. When the
actuator is vented, the actuator is opened by spring force.
Control function Control medium
connector 2 (open)
Control medium
connector 4 (close)
1 (NC) + -
2 (NO) – +
+ = available
– = not available
9.5.1 Connecting the control medium
1. Use suitable connectors.
2. Connect the control medium lines tension-free and
without any bends or knots.
Thread size of the control medium connectors: G1/4
Control function Connections
1 Normally closed (NC) 2: Control medium
(open)
2 Normally open (NO) 4: Control medium
(close)
2
4
3. If necessary, remove blanking plugs from the control me-
dium connectors.
4. Control function 1: Screw the control medium line into
control medium connector 2 of the actuator.
5. Control function 2: Screw the control medium line into
control medium connector 4 of the actuator.
10 Inspection and maintenance
WARNING
The equipment is subject to pressure!
▶Risk of severe injury or death.
●Depressurize the plant.
●Completely drain the plant.
CAUTION
Use of incorrect spare parts!
▶Damage to the GEMÜ product.
▶Manufacturer liability and guarantee will be void.
●Use only genuine parts from GEMÜ.
CAUTION
Hot plant components!
▶Risk of burns.
●Only work on plant that has cooled
down.
CAUTION
Risk of crushing!
▶Risk of severe injury!
●Before performing any work on the
GEMÜ product, depressurize the plant.
NOTICE
Requirements for tube lines used!
▶Use tube lines suitable for the application, see manufac-
turer's information.
●Only use undamaged tube lines.

www.gemu-group.com 15 / 19 GEMÜ Q30
NOTICE
Lay tube lines professionally!
▶Lay tube lines professionally and do not bend them below
the minimum bending radius, see manufacturer's inform-
ation.
●Do not kink or twist the tube lines.
NOTICE
Exceptional maintenance work!
▶Damage to the GEMÜ product.
●Any maintenance work and repairs not described in these
operating instructions must not be performed without
consulting the manufacturer first.
The operator must carry out regular visual examination of the
GEMÜ products depending on the operating conditions and
the potential danger in order to prevent leakage and damage.
The product also must be disassembled and checked for
wear in the corresponding intervals.
1. Have servicing and maintenance work performed by
trained personnel.
2. Wear appropriate protective gear as specified in plant op-
erator's guidelines.
3. Shut off plant or plant component.
4. Secure plant or plant component against recommission-
ing.
5. Depressurize the plant or plant component.
6. Actuate GEMÜ products which are always in the same po-
sition four times a year.
10.1 Spare parts
Spare parts on request.
10.2 Removing the tube
CAUTION
Risk of crushing!
▶While the tube holder is open, the actu-
ator can move. Severe injury due to
crushing or shearing of the fingers.
●Ensure that the actuator remains in the
open position during tube replace-
ment.
●Do not reach into the tube crushing
area.
1. Move the actuator A to the open position.
WARNING!Pneumatic actuator with control function 1:
Risk of crushing due to the compressor shutting down.
Ensure that the actuator remains in the open position dur-
ing tube replacement. Do not reach into the tube crushing
area.
b
2. Turn the locking ring b by 90° in the direction of the arrow.
ðThe word "unlocked" can be read on the tube holder.
1
3. Open the tube holder 1.
4. Remove the tube.
10.3 Disassembling the tube holder
1. Remove the tube (see “Removing the tube“, page15).
1
c
2. Loosen the fixing screw c using an Allen key.
3. Remove the tube holder 1.
10 Inspection and maintenance

www.gemu-group.com16 / 19GEMÜ Q30
10 Inspection and maintenance
10.4 Disassembling the compressor
CAUTION
Risk of crushing due to the compressor
shutting down!
▶Severe injury due to crushing or shear-
ing of the fingers.
●Ensure that the actuator remains in the
open position while replacing the com-
pressor.
●Do not reach into the tube crushing
area.
1. Remove the tube (see “Removing the tube“, page15).
2. Disassemble the tube holder (see “Disassembling the tube
holder“, page15).
3. Move the actuator A to the closed position.
2
4. Pull the compressor 2 out downwards.
10.5 Installing the compressor
CAUTION
Risk of crushing due to the compressor
shutting down!
▶Severe injury due to crushing or shear-
ing of the fingers.
●Ensure that the actuator remains in the
open position while replacing the com-
pressor.
●Do not reach into the tube crushing
area.
1. Remove the tube (see “Removing the tube“, page15).
2. Disassemble the tube holder (see “Disassembling the tube
holder“, page15).
3. Disassemble the compressor (see “Disassembling the
compressor“, page16).
2
4. Insert the compressor 2 and press upwards until the com-
pressor engages.
5. Move the actuator A to the open position.
10.6 Assembling the tube holder
1. Disassemble the tube holder (see “Disassembling the tube
holder“, page15).
1
c
2. Insert the tube holder 1.
3. Tighten the fixing screw c using an Allen key.
10.7 Inserting the tube
1. Remove the tube (see “Removing the tube“, page15).
2. Insert the tube.
1
3. Close the tube holder 1.

www.gemu-group.com 17 / 19 GEMÜ Q30
b
4. Turn the locking ring b by 90° in the direction of the arrow.
ðThe word "locked" can be read on the tube holder.
5. With the valve fully assembled, check the function and
tightness.
11 Troubleshooting
Error Possible cause Troubleshooting
The product leaks
downstream
(doesn't close or
doesn't close fully)
Operating pressure
too high
Operate the
product at operat-
ing pressure spe-
cified in the tube
manufacturer's
datasheet
Tube leaking or
damaged
Check tube for po-
tential damage, re-
place tube if neces-
sary
The product
doesn't open or
doesn't open fully
Actuator defective Replace valve
Control pressure
too low (for control
function NC)
Operate the
product at the spe-
cified control pres-
sure (see chapter
"Technical data")
Foreign matter in
the product
Remove and clean
the product
The actuator
design is not suit-
able for the operat-
ing conditions
Use an actuator
that is designed for
the operating con-
ditions
The product
doesn't close or
doesn't close fully
The actuator
design is not suit-
able for the operat-
ing conditions
Use an actuator
that is designed for
the operating con-
ditions
Foreign matter in
the product
Remove and clean
the product
Control pressure
too low (for control
function NO)
Operate the
product at the spe-
cified control pres-
sure (see chapter
"Technical data")
12 Removal
1. Remove in reverse order to installation.
2. Deactivate the control medium.
3. Disconnect the control medium line(s).
4. Disassemble the product. Observe warning notes and
safety information.
13 Disposal
1. Pay attention to adhered residual material and gas diffu-
sion from penetrated media.
2. Dispose of all parts in accordance with the disposal regu-
lations/environmental protection laws.
14 Returns
Legal regulations for the protection of the environment and
personnel require that the completed and signed return deliv-
ery note is included with the dispatch documents. Returned
goods can be processed only when this note is completed. If
no return delivery note is included with the product, GEMÜ
cannot process credits or repair work but will dispose of the
goods at the operator's expense.
1. Clean the product.
2. Request a return delivery note from GEMÜ.
3. Complete the return delivery note.
4. Send the product with a completed return delivery note to
GEMÜ.
14 Returns

15 Declaration of Incorporation according to 2006/42/EC (Machinery Directive)
Declaration of Incorporation
according to the EC Machinery Directive 2006/42/EC, Annex II, 1.B for partly
completed machinery
We, GEMÜ Gebr. Müller Apparatebau GmbH & Co. KG
Fritz-Müller-Straße 6-8
74653 Ingelfingen-Criesbach, Germany
declare that the following product
Make: GEMÜ pinch valve
Serial number: From 1st October 2020
Project number: Q30/40
Commercial name: GEMÜ Q30
meets the following essential requirements of the Machinery Directive 2006/42/EC:
1.1.5, 1.2.1, 1.2.2, 1.2.3, 1.2.5, 1.3., 1.3.2, 1.3.4, 1.3.7, 1.3.8, 1.3.9, 1.5.3, 1.5.5, 1.5.14, 1.6.1, 1.6.3
We also declare that the specific technical documentation has been compiled in accordance with part B of Annex VII.
The manufacturer or his authorised representative undertake to transmit, in response to a reasoned request by the national au-
thorities, relevant information on the partly completed machinery. This transmission takes place:
Electronically
Authorised documentation officer GEMÜ Gebr. Müller Apparatebau GmbH & Co. KG
Fritz-Müller-Straße 6-8
74653 Ingelfingen, Germany
This does not affect the industrial property rights!
Important note! The partly completed machinery may be put into service only if it was determined, where appropriate, that the
machinery into which the partly completed machinery is to be installed meets the provisions of this Directive.
2021-08-18
Joachim Brien
Head of Technical Department
www.gemu-group.com18 / 19GEMÜ Q30
15 Declaration of Incorporation according to 2006/42/EC (Machinery Directive)

GEMÜ Gebr. Müller Apparatebau GmbH & Co. KG
Fritz-Müller-Straße 6-8, 74653 Ingelfingen-Criesbach, Germany
Phone +49 (0) 7940 1230 · [email protected]
www.gemu-group.com
Subject to alteration
08.2021 | 88723847
*88723847*
Other manuals for Q30
1
Table of contents
Other GEM Control Unit manuals

GEM
GEM 655 Assembly instructions

GEM
GEM R470 Tugela User manual

GEM
GEM 617 Assembly instructions

GEM
GEM R480 Victoria User manual

GEM
GEM 620 Series User manual

GEM
GEM R563 User manual

GEM
GEM 751 Assembly instructions

GEM
GEM 653 Assembly instructions

GEM
GEM 225 Assembly instructions

GEM
GEM 539 eSyDrive User manual
Popular Control Unit manuals by other brands

Sigalarm
Sigalarm GENERATION 5 WIRELESS Installation and operation manual

Trenz Electronic
Trenz Electronic TEF1001 Schematics

Siemens
Siemens SIMATIC NET IE/AS-INTERFACE LINK PN IO manual

Blue Bamboo
Blue Bamboo H50 installation guide

WOMIX
WOMIX MIX M 3-20 Mounting and operating instruction

Xerox
Xerox 4151 Printer Reference