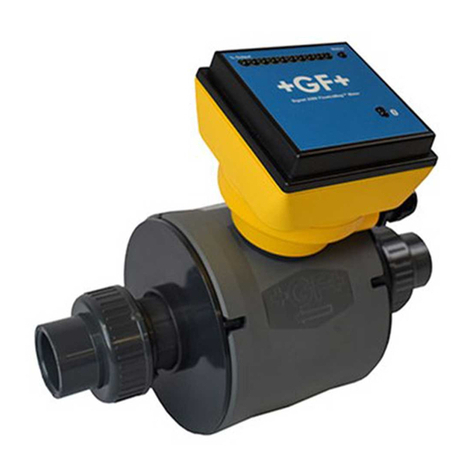
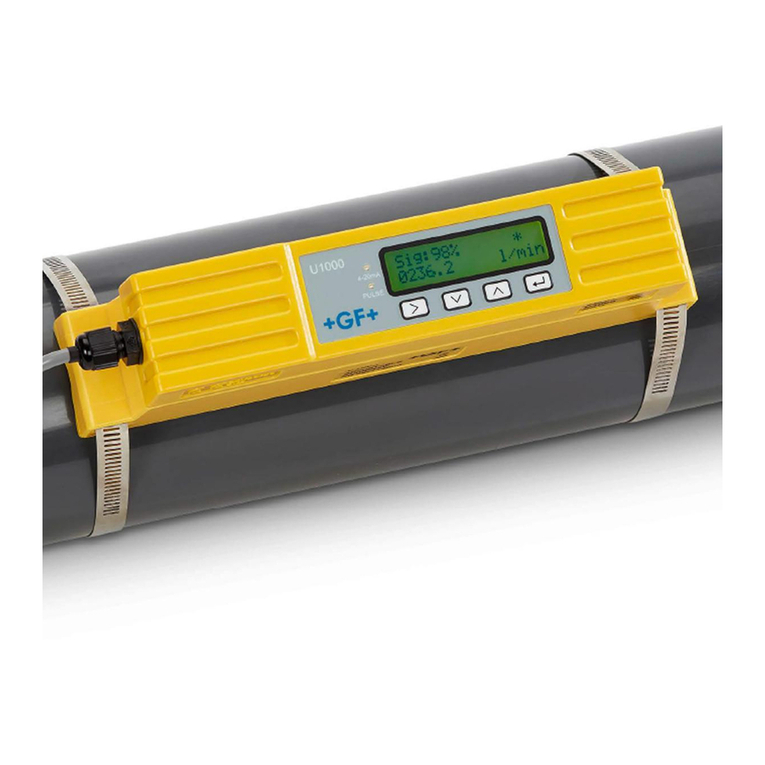
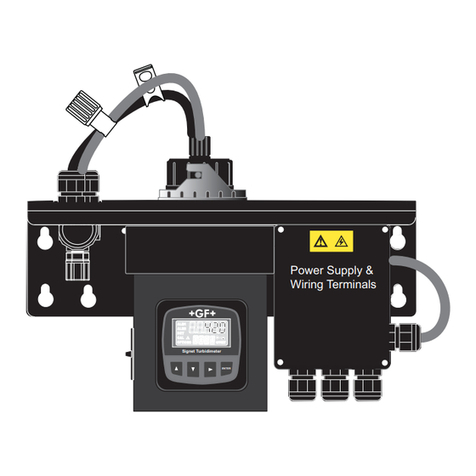
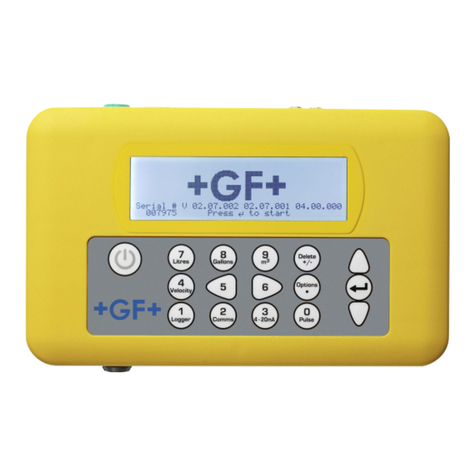
GF Signet 4150 User manual

The Signet 4150 Turbidimeter provides accurate and reliable water quality monitoring
for municipal and industrial applications.
The 4150 uses the Nephelometric method to calculate the turbidity of a sample as it
flows through a viewing chamber. Models are available that use white light technology
as required by the U.S. EPA 180.1 standard, or select the models that use infrared
technology as required by ISO 7027.
Periodic calibration is mandatory with most turbidity systems, and the 4150 makes it
fast and easy with sealed, reusable primary calibration standards.
Two dry contact relays serve as high or low alarms, with programmable setpoints and
time-based delays to prevent false alarms.
Additional features include a bright backlight for the display and a convenient holder for
the cuvette during calibration.
An ultrasonic automatic cuvette cleaning system is standard for 0 to 100 NTU/FNU
systems and optional for 0 to 1000 NTU/FNU systems.
Signet Turbidimeter
ENTER
Power Supply &
Wiring Terminals
*3-4150.090*
3-4150.090 Rev. P 03/15
Signet 4150 Turbidimeter
English
Operating Instructions
Description
Table of Contents
• English
• Deutsch
• Français
• Español
NOTE: This manual is for 4150 Turbidimeters manufactured after 3/10/2010.
If your menus look different than what is shown in this manual, you
have the earlier version. That manual (rev G) is available in the
Archived Products section at www.gfsignet.com.
Warranty Statement.............................................................................. 2
Product Registration ............................................................................. 2
Safety Information................................................................................. 2
Disclaimer............................................................................................. 2
4150 Turbidimeter Parts ....................................................................... 2
Specifications........................................................................................ 3
Dimensions........................................................................................... 3
Installation and Commissioning............................................................ 4
Mounting Procedure ............................................................................. 4
Preassembly......................................................................................... 4
Plumbing............................................................................................... 5
Electrical Connections .......................................................................... 6
Overview of the Display and Keypad.................................................... 7
Display Icons and Functions................................................................. 7
Security Feature ................................................................................... 8
Access to CALIBRATE Menu ............................................................... 8
Access to OPTIONS Menu................................................................... 8
Calibration Standards ........................................................................... 9
Calibration Procedure .................................................................... 10-11
OPTIONS Menu.................................................................................. 12
Configuring the 4 to 20 mA Output ..................................................... 12
Configuring the RS-485 Output .......................................................... 13
Modbus RS-485 Output and Commands....................................... 14-16
Options: Alarm Relays ........................................................................ 17
Options: Instrument Offset.................................................................. 18
Options: Extended .............................................................................. 19
Vapor Purge System........................................................................... 20
Replacing Desiccant ........................................................................... 20
Cleaning the Flow-Through Cuvette................................................... 20
Ultrasonic Cleaning............................................................................. 21
Troubleshooting .................................................................................. 22
Notes .................................................................................................. 23
Ordering Information........................................................................... 24

2Signet 4150 Turbidimeter
Refer to your local Georg Fischer Sales office for the most
current warranty statement.
All warranty and non-warranty repairs being returned must
include a fully completed Service Form and goods must be
returned to your local GF Sales office or distributor.
Product returned without a Service Form may not be
warranty replaced or repaired.
Signet products with limited shelf-life (e.g. pH, ORP, chlorine
electrodes, calibration solutions; e.g. pH buffers, turbidity
standards or other solutions) are warranted out of box but not
warranted against any damage, due to process or application
failures (e.g. high temperature,
chemical poisoning, dry-out) or
mishandling (e.g. broken glass,
damaged membrane, freezing
and/or extreme temperatures).
Thank you for purchasing the Signet line of Georg Fischer
measurement products.
If you would like to register your product(s), you can now
register online in one of the following ways:
• Visit our website www.gfsignet.com.
Under Service and Support click on
Product Registration Form
• If this is a pdf manual (digital copy), click here
Warranty Information Disclaimer
4150 Turbidimeter Parts
Product Registration
Safety Information
This manual contains basic instructions that must be followed
during the commissioning, operation, care and maintenance
of the instrument. The safety protection provided by this
equipment may be impaired if it is commissioned and/or used
in a manner not described in this manual. Consequently, all
responsible personnel must read this manual prior to working
with this instrument.
Georg Fischer Signet LLC accepts no responsibility for damage
caused by the introduction of vapors, fluids or other materials
into the instrument process stream which is not compatible with
the wetted materials. A list of the wetted materials can be found
in the specifications on page 3 of this manual.
Material Safety Data Sheets (MSDS) are available online at
www.gfsignet.com
It is the responsibility of the Distributor, Dealer, or Agent to
provide a current copy of the MSDS to the Consumers of
Georg Fischer Piping Systems products. The information
contained herein is presented in good faith and has been
compiled from sources believed to be reliable. It represents the
best information currently available to us. No warranty express
or implied, or merchantability, fitness or otherwise is made and
we assume no liability resulting from its use. This information is
offered for your consideration and users should make their own
investigation and verification to determine the suitability of the
information for their particular purposes. In no event shall
Georg Fischer Piping Systems, the parent company or its
subsidiaries be liable for any claims, losses, or damages of any
third party or for lost profits or any special, indirect, incidental,
consequential or exemplary damages, howsoever arising,
even if Georg Fischer Piping Systems has been advised of the
possibility of such damages. This information relates to the
material designated and may not be valid for such material
used in combination with any other materials nor in any process.
Caution / Warning / Danger
Indicates a potential hazard. Failure to follow all warnings
may lead to equipment damage, injury, or death
Electrostatic Discharge (ESD) / Electrocution Danger
Alerts user to risk of potential damage to product by ESD,
and/or risk of potential injury or death via electrocution.
Do Not Use Tools
Use of tool(s) may damage product beyond repair and
potentially void product warranty.
DO NOT
FREEZE
Do Not Freeze (Calibration Standards)
Products are temperature sensitive and may contain
freezable liquids. Freezing damage voids accuracy.
Unpacking and Inspecting the Instrument and Accessories
The table below indicates the items in the Turbidimeter shipment.
Qty Item
1 3-4150- ( __ ) Turbidimeter
1 3-4150.090 Instruction Manual
1 3-4150.380 Desiccant Pack (Do not open until ready to install)
1 4150-0009 or 4150-0004 Measurement Cuvette
1 4150-0005 Tubing Kit:
1
1
2
2
1
shutoff clamp
backpressure valve
connectors and inserts [customer-supplied 8 mm (5/16 in.) tubing]
connecting tubing with fittings for flow-through assembly
drain vent screw (used in pressurized systems)
1 Mounting Hardware Kit
Remove the instrument from the packing carton.
Carefully inspect all items to ensure that no visible damage has
occurred during shipment.
If the items received do not match the order, please immediately
contact the local distributor or the Georg Fischer Signet Customer
Service department.

Signet 4150 Turbidimeter 3
Dimensions
13.5 in.
7.34 in.
4.0 in.
2.0 in.
8.9 in
2 in.
Top View
Front View
Side View
Cuvette
Holder
Measuring
Cell
12.25 in.
10.75 in.
Measurement Range ............ 0 to 100.0 NTU or 0 to 1000.0 NTU
(NTU = FNU = FTU)
Accuracy:
< 40 NTU........................... ±2% of reading or ±0.02 NTU
whichever is greater
> 40 NTU........................... ±5% of reading
Resolution ............................. 0.0001 NTU (below 10 NTU)
Response Time ..................... Adjustable
Display................................... Multi-Line LCD with backlighting
Alarm Relays (2) ................... 120 to 240 VAC, 2A Form C Relay
Current Output ...................... Active 4 to 20 mA, 600 Ω
Digital Output ........................ RS-485
Wetted Materials
Tubing ................................... Vinyl
Measuring Cuvette................ Borosilicate Glass
Glass Washer Seal ............... Silicone
Pressure Regulator ............... Polypropylene, FPM,
316 Stainless Steel,
Polyoxymethylene (POM)
Inlet Tube............................... 316 Stainless Steel
Maximum Inlet Pressure ....... Recommended 345 kPa (50 psi)
based on tubing connection
provided
Pressure Regulator ............... Rated up to 200 psi
Flow Rate .............................. 0.1 L/m to 1 L/m
(0.026 GPM to 0.26 GPM)
Operating Temperature ........ 1 °C to 50 °C (34 °F to 122 °F)
Sample Temp. Range........ 1 °C to 50 °C (34 °F to 122 °F)
Power Supply ....................... 100 to 240 VAC, 47 to 63 Hz, 80 VA
(12 to 24 VDC option available.
Contact factory)
Insulation Rating ................... Double Insulated
Pollution Degree 2
Over voltage Category II
Altitude .................................. 2000 meters (6562 ft) maximum
Relative Humidity .................. Maximum 95% RH non-condensing
Enclosure Rating................... Power Supply Box: NEMA 4X / IP66
Environmental Conditions..... Not recommended for outdoor use
Shipping Weight.................... 2.5 kg (5.5 lb)
Standards and Approvals
CE, WEEE, RoHS Compliant
White Light version................ Compliant to U.S. EPA 180.1
Infrared version ..................... Compliant to ISO 7027
ETL Listed ............................. UL 61010-1 and CSA C22.2
No. 61010-1
China RoHS (visit www.gfsignet.com for details)
This device complies with Part 15 of the FCC rules.
Operation is subject to the following two conditions:
(1) This device may not cause harmful interference, and,
(2) This device must accept any interference received,
including interference that may cause undesired operation.
Specifications

4Signet 4150 Turbidimeter
Mounting & Site Selection
The 4150 is designed to be wall mounted. If wall mounting the instrument is not a
practical option, it can be mounted on any suitable level surface.
Four M6 (14 x 1 ¼ in.) pan head screws and four plastic wall anchors are provided to
mount the Turbidimeter.
• Mount the 4150 within 2 m to 3 m (6 ft to 10 ft) of the sampling point to ensure a
quick response time.
• It is recommended an isolation valve (NOT provided) be used to interrupt the inlet
flow to the Turbidimeter.
• For ease of service there should be about 20 cm (8 in.) free area above the
instrument for calibration and cuvette maintenance.
• Choose a location that is easily accessible for operation and service.
• The display should be positioned at eye level.
• The overall mounting dimensions of the instrument are shown on page 3. A mounting template is provided.
• Mount the Turbidimeter according to local electrical, building, and plumbing codes and seismic requirements.
Install the Glass Cuvette: (See Fig. 2 and 3)
The Calibration Kit should be available for this procedure.
CAUTION:
Risk of impairment of the instrument's performance and damage to the internal
electronics of the instrument.
Fluid, moisture, or debris can intrude into the instrument through the measuring cell opening.
Cover the measuring cell opening while the cuvette is being installed.
• Clean and dry the external surface of the cuvette glass (and transducer) completely
from fluid, moisture, or debris with the special cleaning cloth that is supplied with the
calibration kit.
• Ensure the cuvette is not leaking fluids before placing it back in the measuring cell.
• Leave the measuring cell open only as long as necessary.
1. Locate and have ready the special cleaning cloth that comes with the Calibration Kit.
2. Locate the glass measuring cuvette.
NOTE: Use the special cleaning cloth that comes with the calibration
kit when handling the cuvette in order to avoid scratching or
marking the glass surface of the cuvette. Substances on the
surface of the glass will cause errors in the measurement.
Remove the glass cuvette from its shipping package.
3. Unlock the measuring cell by holding the measuring cell with one
hand and twisting the measuring cell lock ring counter-clockwise.
4. Inspect the red gasket in the
measuring cell
for any defects, tears or dirt.
Clean or replace if necessary.
5. Carefully thread the glass cuvette on the measuring cell. Hand tighten,
being careful not to over tighten the cuvette. Over-tightening may cause
the cuvette to crack or break.
6. Clean the glass cuvette with the special cleaning cloth that comes in the Calibration Kit.
Do not use any other cloth.
7. Insert the measuring cuvette assembly back into the instrument and rotate the locking ring
clockwise to secure the assembly.
Signet Turbidimeter
ENTER
Measuring Cell
Sensor Interconnect cable
Cuvette
Signet Turbidimeter
ENTER Sensor
Interconnect
Cable
Provide 8 in. clearance
for maintenance.
Fig. 1
Signet Turbidimeter
ENTER
1
2
Signet Turbidimeter
ENTER
Fig. 2
1. Take a water-level and a pencil and use the mounting dimensions illustrated
on page 3 to mark four mounting hole locations on the mounting surface.
NOTE: Refer to the full scale mounting bracket template for easy mounting.
2. Drill four holes for M6 (14 x 1 1/4 in.) screws into the mounting surface and
insert four plastic wall anchors into them.
3. Use M6 (14 x 1 1/4 in.) screws and a Phillips screwdriver to fix the
instrument to the mounting surface.
Installation and Commissioning
Mounting Procedure
Preassembly
Install Connection Tubes To The Measuring Cell:
1. Locate Tubing Kit 4150-0005 and install the tube kit with the shutoff clamp (labeled “IN”)
to the nipple assembly marked “IN” on the Turbidimeter and to the measuring cell nipple marked "IN". See Fig. 1.
2. Install the tube kit with the small back pressure valve to the nipple assembly marked “OUT” on the top right front corner of the
turbidimeter and to the measuring cell nipple marked “OUT”. See Fig. 1. NOTE: Hand tighten only. Do not use any tools.
Fig. 3

Signet 4150 Turbidimeter 5
Plumbing
Adjust the Flow to Eliminate Bubbles
The cuvette must be free of air bubbles to provide accurate measurement. The 4150 provides two tools to make this adjustment.
Open the SHUTOFF CLAMP to allow water to flow through the cuvette.
1. If the flow is gravity-fed, remove the screw that is blocking the DRAIN VENT. This allows for atmospheric equalization and
helps to release air from the effluent tube. The vent may leak for a few seconds, until the flow is well established.
2. Adjust the BACKPRESSURE VALVE to prevent air from coming out of solution, which may be observed as tiny air bubbles in
the cuvette.
• Remove the measuring cuvette assembly from the measuring cell and place it in the cuvette holder so it is visible while making
these adjustments.
• If bubbles are visible inside the cuvette, turn the BACKPRESSURE VALVE until the bubbles disappear.
If bubbles are still visible inside the cuvette, a Stilling/Bubble Chamber, Signet part number 4150-0003 (159 001 587), can be ordered.
• Use 8 mm (5/16 in.) OD, 5 mm (3/16 in.) ID flexible tubing for the water
supply connections.
• Opaque tubing (not supplied) should be used to prevent algae growth if the
tubing will be exposed to sunlight.
• The 4150 requires only 1 psi head pressure to operate.
• The flow through cuvette is rated for a flow of 100 mL/m to 1 L/m
(0.026 GPM to 0.26 GPM).
• Inlet water pressure should not exceed 50 psi to avoid damage to the
tubing connection to the regulator.
• The integral pressure regulator is factory adjusted.
Do not tamper with the regulator.
• Fluid temperature must not exceed 50 °C (122 °F).
• The shutoff clamp is used to interrupt the flow during cuvette maintenance.
• Route the sensor drain tubing to a suitable drain. Do not reintroduce the
drain sample to the process stream.
• Ensure all tubing connections are fitted tightly and no leakages occur.
DESICCANT COMPARTMENT
OPEN ONLY FOR MAINTENANCE
Water IN
from source Measuring
Cuvette Assy
Desiccant access
Water OUT
to Drain
Shutoff
Clamp
Pressure
Regulator
Backpressure
Valve
Drain Vent
Measuring
Cell
Install the Desiccant Pack: (See Fig. 4)
1. Locate the 3-4150.380 desiccant pack.
2. Remove the desiccant pack from its vacuum-sealed package.
3. Open the desiccant access door by turning it counterclockwise.
It is located on the left side of the Turbidimeter.
4. Place the desiccant pack into the instrument's body.
5. Reinstall the access door and rotate clockwise.
NOTE: In regions where moisture or high humidity is prevalent,
more than one desiccant pouch may be needed, and
desiccant may need to be monitored more often.
DESICCANT COMPARTMENT
OPEN ONLY FOR MAINTENANCE
Backpressure
Valve
Shutoff
Clamp
Backpressure
Valve
Drain vent
To Drain
Pressure
Regulator
CAUTION:
Risk of damage to the tubing
connection.
Do not adjust the pressure
regulator.
The tubing connection to the
pressure regulator is rated up
to 50 psi inlet water pressure.
Contact the factory if inlet
pressure will exceed 50 psi.
A modified tubing connection
may be required.
DESSICANT COMPARTMENT
OPEN ONLYFOR MAINTENANCE
Fig. 4
Desiccant Pouch
3-4150.380

6Signet 4150 Turbidimeter
All of the electrical connections to the 4150 are made inside the power supply,
located to the right of the display.
The connections are labeled within the terminal box and are self-descriptive.
An external grounding terminal is provided for use in the most extreme
electrical noise environments. It is not required for most installations.
V+
V-
Normal O
p
eration
Normally Closed
Normally Open
Common
Relay
Coil
4150 Internal Power
External
Power
Supply
V+
V-
Normally Closed
Normally Open
Common
4150 Internal Power
External
Power
Supply
Alarm Condition
or Power Failure
Relay
Coil
NC
COM
NO
NC
COM
NO
ALARM2 ALARM1 +-
AB
}
4-20 mA
RS-485
Removable
Terminals
AC Cable
Restraint
115/230 VAC
Ground
100-240 VAC
47-63 Hz
Power
• The 4150 is not supplied with a power cord.
• The power cable bulkhead will accept cable diameters from
5.8 mm (0.23 in.) up to 10 mm (0.395 in.).
• All terminals are designed to accept wires in the range of 14 to 28 AWG.
• All wires should be stripped to a length of 6 mm (¼ in.).
• A strain relief strap is provided to reduce tension on the AC power terminals.
RS-485
• The RS-485 half-duplex (2-wire) digital interface operates with
differential levels that are not susceptible to electrical interferences.
• The last device on each bus requires terminating with a 120 Ω
resistor to eliminate signal reflection on the line.
• Do not run RS-485 cables in the same conduit as power.
Relays
Both alarm relays are configured for fail-safe operation.
The normal condition is with power applied to the 4150 and
in a non-alarm condition.
• The relays are rated for 2 A maximum.
• If power is removed from the 4150, the relays will be in an alarm state.
4 to 20 mA
• The active 4 to 20 mA output is driven by a 15 VDC power
source and can drive external loads up to 600 ohms.
• Do not run 4 to 20 mA cables in the same conduit as power.
Attach a wire to the small spade lug and connect
the housing to a local Earth ground if necessary.
WARNING:
Risk of damage to the instrument or injury.
This instrument is equipped with a 100 to 240 VAC, 47 to 63 Hz switching power supply.
• Ensure that the line voltage falls within these specifications before connecting.
• Install a circuit breaker in the AC line before the 4150 power connection to allow for service.
DANGER:
Risk of injury or death via electrocution.
This instrument requires AC voltages.
• The electrical connection must only be carried out by authorized
technical personnel.
• Ensure there is no voltage at the power cord before wiring the instrument.
• Follow all local and government recommendations and methods for
installation of electrical connections.
DANGER:
Risk of shock hazard.
Ratings of the instrument will be jeopardized if any of the
bulkheads are not tightened properly around a cable or plug.
• Ensure that the watertight seal is maintained after the
power supply box has been wired for operation.
Electrical Connections

Signet 4150 Turbidimeter 7
Display Icons and Functions
All of the elements on the LCD are identified here: Four keys are used to set up, calibrate and
operate the 4150.
ENTER
UP, DOWN keys
Scroll through Menu options
RIGHT key
Select item or character to edit
ENTER Key
Access menus
Save changes
If the unit is set up for 4 to 20 mA output in the Options menu and the circuit is open, the lower
NoMA (no mA) display will flash.
If the unit is set up for 4 to 20 mA output in the Options menu and the circuit is closed, pressing
▲will show the mA current. This display will return to the normal menu after 10 seconds or until
▼is pressed.
The instrument is equipped with a security access code to protect the instrument settings from
inadvertent modification.
If the CODE feature is enabled in the OPTIONS menu, the KEY icon is displayed.
If OFFSET is displayed, the 4150 output has been calibrated to match an external reference
measurement.
The ALM1 and ALM2 icons are displayed if the 4150 measurement has exceeded a HIGH or LOW
alarm setpoint.
DRY indicates that the 4150 is in a drying period, following the replacement of the cuvette. The internal
fan will circulate air to clear condensation from the cuvette.
NOTE: DRY is not an alarm condition. During a DRY period the ultrasonic cleaning system is disabled,
but the instrument is still operating.
CAL is displayed when the 4150 is being calibrated.
• The alarm relays are held in their NORMAL condition when CAL is displayed.
• The 4150 will return to normal operation if no keys are pressed in the CAL menu for 15 minutes.
OPTIONS is displayed when the 4150 is being configured.
• The alarm relays are held in their NORMAL condition when OPTIONS is displayed.
• The 4150 will return to normal operation if no keys are pressed in the OPTIONS menu for 10 minutes.
NOTE: Pressing ▲►keys together and holding for 10 seconds resets ALL instrument parameters back to factory defaults.
During normal operation, the instrument will have the Units selection displayed on the lower row of the
display and the measured reading on the upper row of the display.
Turbidity Measurement
Security Indicator
Offset Indicator
Alarm Indicators
Calibrate Menu
Options Menu
Drying Period
Units Display
Error Messages
Display Overview Keypad Overview

8Signet 4150 Turbidimeter
If CODE is enabled in the OPTIONS menu, the Access code (▲-▲-▲-▼) must be entered to gain access to CAL or OPTIONS menus.
6. Press the ▲and ▼keys to select the NTU standard value
needed.
Alarm relay contacts are held at the last valid condition while
the instrument is in the CALIBRATE or in the OPTIONS menu.
While in the CALIBRATE menu, the instrument has a time-
out feature that automatically returns the system to normal
operation if no keys are pressed for 15 minutes.
CALIBRATE
The 4150 is tested prior to leaving the factory.
Calibration is required before utilizing the 4150.
The EPA recommends that on-line turbidity systems be
calibrated at least once every three months if they are used for
EPA reporting.
The 4150 is designed to recognize the specific NTU values of
certified calibration standards to make periodic recalibration
very safe, quick and simple. The CALIBRATE menu is
dedicated to this method of calibration.
The OFFSET function found in the OPTIONS menu allows a
single-point alignment with an external measurement device.
OFFSET is not a substitute for calibration, but it may be useful
if standard solutions are not readily available.
Signet Turbidimeter
ENTER
2s
ENTER
ENTER
ENTER
ENTER
100 NTU Calibration for
4150-3, 4150-4 Only
2. Press the ▲key
3. Press the ▲key
4. Press the ▲key
5. Press the ▼key
ALM RELAY
is now LOCKED
1. Press and
hold the ENTER
key for 2 seconds
Signet Turbidimeter
ENTER
5s
ENTER
ENTER
ENTER
ENTER
2. Press the ▲key
3. Press the ▲key
4. Press the ▲key
5. Press the ▼key
ALM RELAY
is now LOCKED
1. Press and hold
the ENTER key
for 5 seconds
Security Feature
Access to CALIBRATE Menu Access to OPTIONS Menu
6. Press the ▲and ▼keys to select the
OPTIONS function that will be modified.
While in the OPTIONS menu, the instrument has a
time-out feature that automatically returns the system to
normal operation if no keys are pressed for 10 minutes.
Output Options:
Select the 4 to 20 mA output or
the RS-485 Digital output.
Extended Options:
Display many single-set options like
brightness and decimal location.
(See OPTIONS: EXTENDED, pg. 19.)
Code option:
Turn the Access Code ON or OFF.
Offset option:
Turn the OFFSET option ON or OFF.
Alarm 1 Option:
Turn on the 1st ALARM RELAY.
Alarm 2 Option:
Turn on the 2nd ALARM RELAY.

Signet 4150 Turbidimeter 9
Calibration Standards
The Calibration Standards Kit includes three cuvettes and three pre-mixed calibration standards which are
certified to be within the stated accuracy tolerances.
CAUTION:
Calibration standards are temperature sensitive and may contain freezable liquids. Freezing damage voids accuracy.
Calibration Tips
• Keep the measurement cell covered as much as possible during the calibration period.
• Replace the cuvette immediately after the calibration to prevent accelerated saturation of the desiccant.
Indexing Calibration Standard Cuvettes
To achieve the greatest accuracy, and compensate for normal scratches and aberrations in cuvette
glass when calibrating, index new calibration standard cuvettes to the specific instrument before
using the first time. For best results, use the indexing rings supplied with the calibration standard kits.
The following steps allow repeatable indexing of calibration standard cuvettes:
1. With the instrument in normal display mode, remove the measuring cuvette assembly and
place it in the cuvette holder.
2. Insert the calibration standard cuvette into the measurement chamber of the 4150 Turbidimeter.
Allow a few minutes for the NTU/FNU reading to stabilize.
3. While slowly rotating the calibration standard cuvette inside the optical well one complete
revolution (360º), observe the measured turbidity and locate the position of the cuvette having
the lowest reading.
4. With the calibration standard cuvette positioned at the location having the lowest turbidity
reading, install an indexing ring over the cuvette cap so that the pointer of the indexing ring
aligns with the white reference line on the 4150 Turbidimeter.
The calibration standard cuvette is now indexed and ready for use.
Perform this procedure with each calibration standard cuvette.
IMPORTANT! Calibration does NOT remove OFFSET values.
ALWAYS turn the OFFSET function OFF (Options menu) before performing a full calibration
NOTE: When using the calibration standard cuvette in future or for multiple systems,
always insert the cuvette so that the pointer of the indexing ring aligns with the white
reference line on the 4150 Turbidimeter. Slowly rotate the calibration standard cuvette
back and forth about 5° to locate the position of the cuvette having the lowest reading.
Cuvette Indexing Ring
4
10 NTU
10 NTU
Signet Turbidimeter
ENTER
Signet Turbidimeter
ENTER
2
1
• For 3-4150-3 and -4 (range 0 to 100 NTU): P/N 3822-4001 (code 159 001 585) Calibration Kit, Turbidity, 100, 10 & 0.02 NTU.
• For 3-4150-1, -2, -5 and -6 (range 0 to 1000 NTU): P/N 3822-4003 (code 159 001 586) Calibration Kit, Turbidity, 1000, 10 & 0.02 NTU.
• A Formazin stock solution kit is also available (P/N 3822-4002). Formazin is very unstable, so it is important to ensure that a fresh
stock suspension of Formazin is used to achieve the accuracy quoted for the instrument.
• The non-Formazin calibration standards are much more stable than Formazin and have a shelf life of 12 months.
• If the application is limited to measurements below 10 NTU, such as potable water, a 2-point calibration may be performed using only
a 10 NTU and a 0.02 NTU standard.
• If the Signet 4150 Turbidimeter will be used over the entire range, a 3-point calibration is required.
• For best results, index new calibration standard cuvettes to the specific instrument before first use.
• Calibration standards with values of 0.02 NTU and 1000 NTU are supplied in sealed glass cuvettes and are ready to use.
• Calibration standards with values of 10 NTU and 100 NTU are supplied in a 125 ml bottle and must be poured into the empty glass
cuvettes included in the Calibration Standards Kit. The 125 ml plastic bottle contains sufficient calibration standard to perform the
calibration four times.
DO NOT
FREEZE
Preparing 10 and 100 NTU Calibration Standards
The 10 and 100 NTU solution is supplied in a 125 ml bottle and must be poured into the empty cuvettes supplied.
Prepare the 10 and 100 NTU solution using the same method outlined below.
1. Pour 5 ml of the 10 or 100 NTU calibration standard into the empty cuvette included in the Calibration Standards Kit.
2. Swirl the calibration standard to cover the entire internal surface of the cuvette and discard.
3. Fill the cuvette with 20 ml of the calibration standard and tighten cap to prevent contamination.
Save the 125 ml plastic bottle with the remaining calibration standard for future use.
4. Mark the cap of the cuvette with the initial pour date of the calibration standard.
5. Use the soft lint-free cloth supplied with the Calibration Standard Kit to clean the outside of the cuvette.
6. Index the calibration standard cuvette as described below.
The solution is now ready to perform a "Primary calibration". Once the "primary" calibration is performed the calibration
kit can also be used to verify that the 4150 is still accurate. Use either the 10 or 100 NTU cuvette to perform spot
checks on the 4150 in between primary calibrations.
NOTE: The 10 and 100 NTU solution degrades and becomes inaccurate after three months (90 days).
It is important to discard the solution and rinse the cuvettes with mild detergent and
DI water prior to replacing the solution. DO NOT USE a bottle brush to clean the cuvette,
scratches to the internal surface will alter the optical quality of the glass.

10 Signet 4150 Turbidimeter
1. Access the Calibrate menu by pressing the ENTER key for 2 seconds.
2. Enter the access security code if necessary. (See pg. 8.)
• CAL will be illuminated on the display.
• The upper display will show the measured NTU value.
• The lower display will alternate the value of the first NTU standard and .
3. Remove the measuring cuvette assembly and place it in the cuvette holder.
10 NTU
10 NTU
Signet Turbidimeter
ENTER
Signet Turbidimeter
ENTER
Signet Turbidimeter
ENTER
Signet Turbidimeter
ENTER
5. Insert the 10 NTU calibration standard cuvette.
• Align the pointer of the indexing ring with the white reference line on the 4150 Turbidimeter. Slowly rotate the calibration standard
cuvette back and forth about 5° to locate the position of the cuvette having the lowest reading.
• Press the ►key. The 4150 will begin the calibration process. Be sure the lower CAL number corresponds to the second calibration
standard you are using. In this example it is 10. The upper display will count down the progress. When the process is complete,
the upper display shows the new NTU value, while the lower display alternates the value of the NTU standard and .
• Press the ▼key. The lower display will show the next NTU Standard value and .
Signet Turbidimeter
ENTER
Signet Turbidimeter
ENTER
4. Insert the first calibration standard cuvette requested by the 4150.
The first NTU standard requested will be either 1000 or 100, depending on the range of your 4150. In this example it is 1000.
If the application will be limited to low turbidity values (less than 10 NTU), press the ▼key to go to the 10 NTU calibration.
NOTE: 10 and 100 NTU solution must be replaced every three months and the glass cuvette must be cleaned properly.
• Align the pointer of the indexing ring with the white reference line on the 4150 Turbidimeter. Slowly rotate the calibration standard
cuvette back and forth about 5° to locate the position of the cuvette having the lowest reading.
• Press the ►key. The 4150 will begin the calibration process. The upper display will count down the progress. When the process is
complete, the upper display shows the new NTU value, while the lower display alternates the value of the NTU standard and .
• Press the ▼key. The lower display will show the next NTU Standard value and .
CAUTION:
Risk of impairment of the instrument's performance and damage to
the internal electronics of the instrument.
Fluid, moisture, or debris can intrude into the instrument through the
measuring cell opening.
• Cover the measuring cell opening while the cuvette is being installed.
• Clean and dry the external surface of the cuvette glass
(and transducer) completely from fluid, moisture, or debris with
the special cleaning cloth that is supplied with the calibration kit.
• Ensure the cuvette is not leaking fluids before placing it back in
the measuring cell.
• Leave the measuring cell open only as long as necessary.
NOTE: Use the special cleaning cloth that comes with the calibration kit when handling the
cuvette in order to avoid scratching or marking the glass surface of the cuvette.
Substances on the surface of the glass will cause errors in the measurement.
NOTE: Removing the cuvette will cause the cleaning cycle to be interrupted
for 30 minutes to allow the desiccant time to remove any introduced moisture.
Calibration Procedure

Signet 4150 Turbidimeter 11
Calibration Procedure
Calibration Error
If the 4150 displays Error after calibration, the calibration standards were out of calibration range, or the standard did not match the
NTU value being requested by the 4150. The instrument cannot be used until the error is resolved.
6. Insert the 0.02 NTU calibration standard cuvette.
• Align the pointer of the indexing ring with the white reference line on the 4150 Turbidimeter. Slowly rotate the calibration standard
cuvette back and forth about 5° to locate the position of the cuvette having the lowest reading.
• Press the ►key. The 4150 will begin the calibration process. Be sure the lower CAL number corresponds to the third calibration
standard you are using. In this example it is 0.02. The upper display will count down the progress. When the process is complete,
the upper display shows the new NTU value, while the lower display alternates the value of the NTU standard and .
1. Check the standards and recalibrate:
• Press and hold the ENTER key for 2 seconds and start the calibration sequence again.
2. To restore only the factory calibration:
• Press and hold the ▲key for 3 seconds until the display changes.
IMPORTANT!
This action will reset the CALIBRATE settings back to factory
default (00.00 NTUs). The OPTION settings will not be changed.
Signet Turbidimeter
ENTER
Signet Turbidimeter
ENTER
When calibration is complete, press the ▲and ▼keys
together to exit the CAL menu and return to normal operation.
Operating Tip:
Use the 10 and 100 NTU cuvette daily to spot check the accuracy of the 4150.
This eliminates the use of a hand-held device and reduces the amount of time to verify the accuracy of the 4150.
NOTE: Replace the 10 and 100 NTU solutions after three months of use (90 days).

12 Signet 4150 Turbidimeter
ENTER
The OPTIONS menu contains settings that are generally set
once then rarely changed. The factory setting for all the items
in the OPTIONS menu is OFF. When an option is turned ON,
settings related to that option will appear in the menu. Signet Turbidimeter
ENTER
5s
Press and hold the ENTER key until
OPTIONS is illuminated on the display.
Enter the ACCESS CODE if the key is
displayed.
1. Press the ▼key. The lower display shows 4 mA.
2. Press the ►key. The upper display will begin blinking.
3. Press the ▲and ▼keys to scroll to the NTU/FNU value at 4 mA.
4. Press the ENTER key to save the setting.
5. Press the ▼key. The lower display shows 20 mA.
6. Press the ►key. The upper display will begin blinking.
7. Press the ▲and ▼keys to scroll to the NTU/FNU value at 20 mA.
8. Press the ▼key. The lower display shows ERLV (Error Level).
Choose 2 mA, 4 mA, 0 mA, or OFF. This is an mA value that
the 4150 will generate if there is a system failure.
9. Press the ENTER key to save the setting.
Press the ▲and ▼keys simultaneously to exit the OPTIONS
menu and return to normal operation.
OPTIONS: Output (O/P)
1. The lower display should show O/P. If it does not,
Push the ▼key until the lower display shows O/P.
2. Press the ►key. The upper display will begin blinking.
3. Press the ▲or ▼keys to scroll to the 4 to 20 mA
output, the RS-485 Output or OFF.
4. Press the ENTER key to save the selection.
Output Options:
Select 4–20 mA output (O/P),
RS-485 digital output or OFF.
Extended Options:
Enable access to performance and
setup options like brightness and
decimal location.
(See OPTIONS: EXTENDED, pg. 19)
Code option:
Turn the Access Code ON or OFF.
Offset Option:
Turn the OFFSET option ON or OFF.
Alarm 1 Option:
Turn ALARM RELAY 1 ON or OFF.
Alarm 2 Option:
Turn ALARM RELAY 2 ON or OFF.
OPTIONS Menu
Configuring the 4 to 20 mA Output

Signet 4150 Turbidimeter 13
Configuring the RS-485 Output
ENTER
1. Press the ▼key. The lower display shows BAUD.
2. Press the ►key. The upper display will begin blinking.
3. Press the ▲and ▼keys to scroll to the baud rate required
(1200, 2400, 4800, 9600, or 19200)
4. Press the ENTER key to save the setting.
5. Press the ▼key. The lower display shows ADDR (Address).
6. Press the ►key. The upper display will begin blinking.
7. Press the ▲and ▼keys to scroll to the correct address.
Address options are from 1 to 255.
8. Press the ENTER key to save the setting.
9. Press the ▼key. The lower display shows MBUS.
10. Press the ►key. The upper display will begin blinking.
11. Press the ▲and ▼keys to select ASCII or RTU.
12. Press the ENTER key to save the setting.
Press the ▲and ▼keys simultaneously to exit the OPTIONS
menu and return to normal operation.
Modbus Serial Communication Protocol
Modbus is a communication protocol based on a multidrop Master/Slave architecture.
This technique supports a network of up to 255 slave devices with each device given a unique address.
The transmission protocol used in the 4150 is RS-485, with the unit operating as a slave to a master Modbus device.
The 4150 has two transmission modes:
Either ASCII (American Standard Code for Information Interchange) or RTU (Remote Terminal Unit).
To prevent damage to the instrument, be sure that the 4150 is not powered when connecting the RS-485 line.
RS–485 Default Settings
RS–485 must be selected in order to access this menu function.
The setting of 8 bits, 1 stop bit and no parity are set as default for the RS–485 port.
To change these settings, enable the Extended Options menu and scroll down the
Extended Options to the menus seen below.

14 Signet 4150 Turbidimeter
Valid Addresses
0001–00XXX
Input Status
These single-bit values are readable from the master.
The data will be returned with the lowest addressed input status in the LSB of the data.
Unused bits in the data will be set to 0.
Code Name Broadcast
0x01 Read Coil Status No
0X05 Force Single Coil Yes
Valid Command(s)
MSB LSB
Bit
15
Bit
14
Bit
13
Bit
12
Bit
11
Bit
10
Bit
9
Bit
8
Bit
7
Bit
6
Bit
5
Bit
4
Bit
3
Bit
2
Bit
1
Bit
0
Format
16-bit word format
Address Function Default
00001 Offset added False
00002 Flow alarm selected False
00003 Access code enabled False
00004 Ultrasonic cleaning enabled (if available) True
00005 Desiccant set as error (True) or warnings (False) True
Definitions
Code Name Broadcast
0x02 Read Input Status No
Valid Command(s)
MSB LSB
Bit
15
Bit
14
Bit
13
Bit
12
Bit
11
Bit
10
Bit
9
Bit
8
Bit
7
Bit
6
Bit
5
Bit
4
Bit
3
Bit
2
Bit
1
Bit
0
Format
16-bit word format
Valid Addresses
10001–10XXX
Address Function
10001 Instrument error
10002 Alarm 1 active
10003 Alarm 2 active
10004 Calibration error
10005 Desiccant error
Definitions
Coils
These single-bit values are readable and changeable from the master.
The data will be returned with the lowest addressed coil in the LSB of the data.
Unused bits in the data will be set to 0.
True is 1 and False is 0.
If the connection is to the master on a RS-232 serial port, an RS-232 to RS-485 converter is required.
If the connection to the master is USB, an RS-485 to USB converter is required.
Modbus RS-485 Output and Commands

Signet 4150 Turbidimeter 15
Valid Addresses
40001 – 40XXX
Holding Registers
These 16-bit values are readable and changeable from the master.
The data is stored and transmitted with the MSB first and then the LSB.
Address Type Register Value Default Function
40001, 40002 Float Offset value -- 0.0 0.0 – 2.0
40003 Int Decimal places 0 2 XXXXX.
1 XXXX.X
2 XXX.XX
3 XX.XXX
4 X.XXXX
40004 Int Response time -- 10 1–100 seconds
40005 Int LCD backlight -- 8 1–10 (brightest)
40006 Int Output option 0 0 None
1 4 to 20 mA
2 RS-485 (if available)
40007, 40008 Float 4 to 20 mA minimum value -- 0.02 0.0 to max range of instrument
40009, 40010 Float 4 to 20 mA maximum value -- 10.0 0.0 to max range of instrument
40011 Int RS-485 baud rate 0 3 1,200
1 2,400
2 4,800
3 9,600
4 19,200
40012 Int Instrument address -- 1 1–255
40013 Int Modbus serial mode 0 0 RTU
1 ASCII
40014 Int Alarm 1 type 0 0 Off
1 Low alarm
2 High alarm
40015, 40016 Float Alarm 1 set point -- 1.0 0.0 to max range of instrument
40017 Int Alarm 1 delay on -- 1 1–30 seconds
40018 Int Alarm 1 delay off -- 1 1–30 seconds
40019 Int Alarm 2 type 0 0 Off
1 Low alarm
2 High alarm
40020 Int Not used --
40021, 40022 Float Alarm 2 set point -- 1.0 0.0 to max range of instrument
40023 Int Alarm 2 delay on -- 1 1–30 seconds
40024 Int Alarm 2 delay off 1 1 1–30 seconds
40025 Int Units (scaling) 1 1 NTU
2 FNU
Code Name Broadcast
0x03 Read Holding Registers No
0x06 Preset Single Register Yes
0x16 Preset Multiple Registers Yes
Valid Command(s)
Float: This is stored in two consecutive addresses, with the first address containing the least significant word (lower part of mantissa)
and the second address containing the most significant word (sign, exponent, and upper part of mantissa).
Definitions
Format

16 Signet 4150 Turbidimeter
Input Registers
These 16-bit values are readable by the master. The data is stored with the MSB first and then the LSB.
Valid Command(s)
Code Name Broadcast
0x04 Read Input Registers No
Format
Float: This is stored in two consecutive addresses, with the first address containing the least significant word (lower part of mantissa)
and the second address containing the most significant word (sign, exponent, and upper part of mantissa).
Valid Addresses
30001 – 30XXX
Definitions
Exception Responses Implemented
Code Name Meaning
00 -- No error
01 ILLEGAL FUNCTION The function code is not allowed in the device.
02 ILLEGAL DATA ADDRESS The data address is not allowed in the device
03 ILLEGAL DATA VALUE A value contained in the query field is wrong for the device
Address Type Register Value Function
30001, 30002 Float Sensor reading -- The meter reading
30003, 30004 Float Sensor reading raw -- Sensor reading to six significant places
30005 Int Version major -- Software version major number
30006 Int Version minor -- Software version minor number
30007 Int Version revision -- Software version revision number
30008 Int Model number -- Product number
30009 Int Model suffix number -- 0 if no options
30010 Int Reading status 1 normal
2 over range
3 under range
6 reading problem
30011 Int Instrument error summary
(bit-mapped)
0x0000 Normal
0x0001 Error
0x0002 Alarm 1 is active
0x0004 Alarm 2 is active
0x0008 Calibration error
30012 Int Errors (bit-mapped) 0x0000 Normal
0x0001 Replace desiccant
0x0002 Break in the 4 to 20 mA
0x0004 Calibration error
0x0010 Data over-range
0x0020 Flow switch alarm
0x0040 Lamp problem
0x0080 Auto-cleaning problem
0x0100 General error
0x0200 General error
0x0400 General error
30013 Int PCB Revision 0 Revision 1
1 Revision 2

Signet 4150 Turbidimeter 17
Signet Turbidimeter
ENTER
ENTER
ENTER
ENTER
ENTER
Press the ▲and ▼keys simultaneously to exit the
OPTIONS menu and return to normal operation.
1. Press the ▼key to scroll to the ALM1 display.
3. Press the ▲and ▼keys to select Off, Error, Hi or Lo operating mode
for this relay. Press the ENTER key to save the setting. The Error
setting allows the alarm to trigger if there are the following errors:
• DESC - See Vapor Purge (pg. 20)
• CLN - See Ultrasonic Cleaning (pg. 21)
• NoMA - See Display Overview (pg. 7)
• Any system failure
4. Press the ▼key. The lower display shows S/P (Set Point).
The ALM1 or ALM2 icons will be displayed to indicate which relay is being set.
Press the ►key. The upper display begins blinking.
Press the ▲and ▼keys to scroll to the NTU value where the Alarm will be
activated.
Press the ENTER key to save the setting.
Press the ▼key to scroll to the next menu item.
5. Press the ▼key. The lower display shows DLY ▲(Delay ON time).
Press the ►key. The upper display begins blinking.
Press the ▲and ▼keys to scroll to the time (from 1 second to 30 seconds)
before the Alarm relay will be activated.
Press the ENTER key to save the setting.
Press the ▼key to scroll to the next menu item.
6. Press the ▼key. The lower display shows DLY ▼(Delay OFF time).
Press the ►key. The upper display begins blinking.
Press the ▲and ▼keys to scroll to the time (from 1 second to 30 seconds)
before the Alarm relay will be deactivated.
Press the ENTER key to save the setting.
Press the ▼key again to go to ALM2 display.
Press the ►key to begin programming ALM2. The upper display
begins blinking. Repeat steps 3 through 6.
2. Press the ►key to begin programming Alarm #1.
The upper display begins blinking.
The 4150 has two relays that can be programmed to serve as High, Low or Error alarms.
The relays are factory set to OFF.
When activated, and the mode is set to either High or Low, each relay can be
programmed with a Setpoint (S/P), a Delay ON time and a Delay OFF time.
Options: Alarm Relays (ALM)
Options: Alarm Relays

18 Signet 4150 Turbidimeter
1. Using a handheld device, take a sample of the water from the same source as the 4150.
2. Test according to manufacturers instructions.
3. Compare the turbidity reported by the 4150 to the handheld meter. Subtract that value from the 4150 value.
5. If the OFFSET value is a POSITIVE number,
press the ▲key to scroll to a positive offset value.
Example:
Laboratory sample measures 4.20 NTU, while the 4150 reads 4.50 NTU, or 0.3 NTU high. The OFFSET needs to be set to -0.3
1. Press and hold the ENTER key until OPTIONS is illuminated on the display.
2. Push the ▼key until OFST is displayed on the lower row.
3. If the upper display says ON, go to step 4.
If the upper display says OFF:
• Press the ►key and then ▼to turn the OFFSET function ON.
• Press the ENTER key to save the change.
• Press the ▼key to display the OFFSET value in the upper display.
If the OFFSET value is a NEGATIVE number,
press the ▼key to scroll to a negative offset value.
Scroll UP for
positive Offset.
Scroll DOWN for
negative Offset.
The OFFSET function allows the 4150 to be calibrated to match a process grab sample.
This procedure is not recommended in lieu of regular instrument calibration.
This function is only useful at turbidity levels in the immediate vicinity of the grab
sample and not in the full range of the instrument.
The OFFSET icon is illuminated in the normal display whenever an offset is applied.
The maximum offset is ± 1.00 NTU.
If the 4150 varies from the sample by more than 1 NTU a full calibration is required.
Options: Instrument Offset (OFST)
IMPORTANT! Offset values will remain in the memory even after a complete calibration.
ALWAYS turn the OFFSET function OFF (Options menu) before performing a full calibration with the calibration standards.
4. Press the ►key. The upper display will begin blinking.
Options: Instrument Offset

Signet 4150 Turbidimeter 19
Options: Extended
The EXTENDED menu contains many single-set options and will
always revert to OFF when you exit the menu.
Options: Extended Options (EXTD)
OPTIONS: Extended: Response Time
The response time determines how quickly the 4150 responds to changes in the NTU measurement.
1 = approx. 5 seconds, 100 = approx. 500 s. Select a high value to avoid reading air and other anomalies.
Select a low value to react to rapid changes in the measurement.
Set the response time using the ▲and ▼keys. Press the ENTER key to save the new setting.
OPTIONS: Extended: Display Resolution
The 4150 can display up to four decimal places. The factory setting is 0.01. Set the resolution by
pressing the ▲or ▼keys. Press ENTER key to save the selection.
OPTIONS: Extended: LCD Backlight Brightness
The LCD backlight brightness can be adjusted. Ten levels are available. The default brightness is 8.
Set the brightness by pressing the ▲or ▼keys. Press ENTER key to save the selection.
OPTIONS: Extended: Units
All instruments are shipped from the factory set in NTU mode. The 4150 can also display in FNU
(Formazin Nephelometric Units). Use the ▲and ▼keys to change to FNU.
Press ENTER key to save the selection.
OPTIONS: Extended: RS-485 Parameters
These three menus will only appear if the RS-485 is selected as the OUTPUT option.
Factory settings are:
OPTIONS: Extended: Ultrasonic Cleaning (3-4150-3, -4, -5, -6 models)
The default mode is On. Unit will stay in CLN mode unless turned off.
Use the ▲and ▼keys to turn OFF.
Press the ENTER key to save the selection.
OPTIONS: Extended: Desiccant Alarm
Turn ON to activate the alarms when the humidity detector indicates that the internal environment is
close to the point where humidity could cause condensation. The 4 to 20 mA output will then fall to the
ERLV value you set in the 4 to 20 mA output settings in the OPTIONS menu (pg. 12, item 8).
OPTIONS: Extended: Adjust 4 mA
Applies a ± 10% offset from 4 mA. Units are in microamps (μA). 100 microamps = 0.1 mA.
Maximum adjustable limit is 3.6 mA to 4.4 mA (± 400 μA).
OPTIONS: Extended: Adjust 20 mA
Applies a ± 10% offset from 20 mA. Units are in microamps (μA). 100 microamps = 0.1 mA.
Maximum adjustable limit is 18 mA to 22 mA (± 2000 μA).
8 Bits
No (nOnE) Parity
1 Stop Bit
Make selections using the ▲and ▼keys.
Press the ENTER key to save the selection

20 Signet 4150 Turbidimeter
If the air inside the 4150 is too humid it will cloud the optical glass cuvette surface and
will interfere with the transmission of light.
A continuous vapor purge system in the 4150 keeps the inside of the instrument dry.
• The air inside the unit is dried by a replaceable desiccant pouch (order number 3-4150.380)
located under the measuring cell.
• System heat is used to warm the air.
• A fan inside the instrument continuously circulates heated dry air around the measuring cell and the flow-through cuvette.
• A humidity detector in the 4150 continuously monitors the desiccant condition. When the internal environment approaches
the point where condensation may occur, the instrument will display DESC as a warning.
• The DESC warning does not interrupt the operation of the 4150, but the cause of the high condensation must be checked.
• If DESC ALARM is turned on (see OPTIONS: EXTENDED on pg. 19), any active relay will go into alarm condition
(if set up in the OPTIONS menu) and the 4 to 20 mA output will be locked to the ERLV (Error Level) value you set in the
4 to 20 mA output configuration in the OPTIONS menu (pg. 12): OFF, 0 mA, 2 mA or 4 mA. Factory default is OFF.
Signet Turbidimeter
ENTER
Measuring Cell
Sensor Interconnect cable
Cuvette
CAUTION:
Risk of impairment of the instrument's performance and damage to the internal electronics of the instrument.
Fluid, moisture, or debris can intrude into the instrument through the measuring cell opening.
• Move the cuvette away from the measuring cell opening and cover the measuring cell while the cuvette is being serviced.
• Clean and dry the external surface of the cuvette glass (and transducer) completely from fluid, moisture, or debris with the
special cleaning cloth that is supplied with the calibration kit.
• Ensure the cuvette is not leaking fluids before placing it back in the measuring cell.
• Leave the measuring cell open only as long as necessary.
DESSICANT COMPARTMENT
OPEN ONLYFOR MAINTENANCE
Desiccant Pouch
3-4150.380
• To install or remove the desiccant pouch, open the round port on the side of the 4150.
• Open the protective packaging of the desiccant and place the desiccant inside the instrument.
• Close the access door quickly to minimize exposing the desiccant to the atmosphere.
Operating Tip
• To speed up recovery after a DESC alarm, disconnect the
sensor interconnect cable (connector on the right side of the
Turbidimeter power supply) for 2 seconds and then reconnect it.
• Order spare desiccant pouches to keep on the shelf.
NOTE: In regions where moisture or high humidity is prevalent, more than one desiccant pouch
may be placed in the instrument, and desiccant may need to be monitored more often.
CAUTION:
Risk of impairment of the instrument's performance and damage to the
internal electronics of the instrument.
The desiccant's shelf life degrades once exposed to the atmosphere.
• Remove the desiccant from the packaging just before installation.
• Close the access door to the desiccant compartment quickly after installation.
• Replace the desiccant when the instrument displays DESC as a warning or
when the desiccant is saturated.
• Ensure access door to the desiccant compartment seals properly.
• DO NOT DRY AND REUSE THE DESICCANT.
All glass cuvettes must be clean and free of marks or scratches.
• Clean the interior and exterior with a detergent solution and
then rinse several times with distilled or deionized water.
CAUTION:
Do not use a bottle brush to clean the cuvette.
Scratches will alter the optical quality of the glass.
To replace a cuvette:
• Shut off the flow using the shutoff clamp.
• Unscrew the old cuvette and replace with a fresh clean one.
• Do not touch the glass surface of the cuvette. Fingerprints can
compromise the accuracy of the measurement.
Vapor Purge System
Replacing Desiccant
Cleaning the Flow-Through Cuvette
Other manuals for Signet 4150
1
Table of contents
Other GF Measuring Instrument manuals
Popular Measuring Instrument manuals by other brands

Reed Instruments
Reed Instruments R5001 instruction manual

radiance
radiance RT818/E product manual

METREL
METREL Energy Master MI 2883 instruction manual

GAPS
GAPS Clack WS1 Installation, operation and maintenance guide

Wetekom
Wetekom PM-30E instruction manual

Keysight Technologies
Keysight Technologies EPM Series Configuration guide