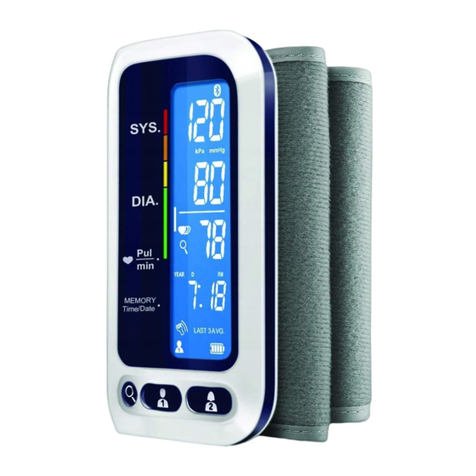
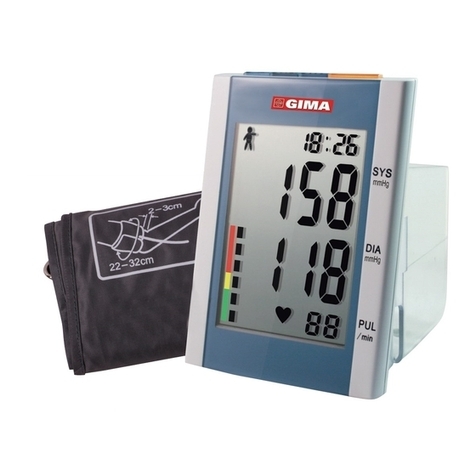
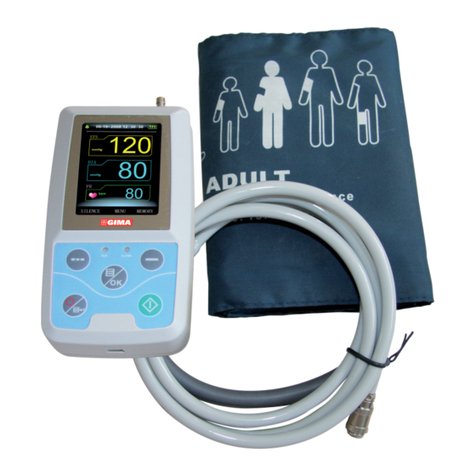
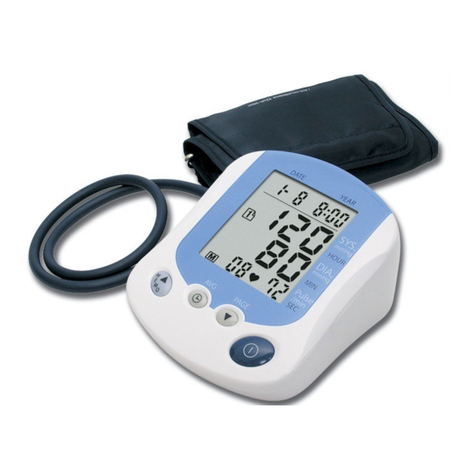
Gima 32902 User manual

32902 / CONTEC08A
M-32902-GB-Rev.0.09.17
CONTEC MEDICAL SYSTEMS CO., LTD
No.112 Qinhuang West Street, Economic & Technical Development Zone,
Qinhuangdao, Hebei Province, PEOPLE’S REPUBLIC OF CHINA
Made in China
LEO BLOOD PRESSURE MONITOR
WITH SOFTWARE
PROFESSIONAL MEDICAL PRODUCTS
0123
Shanghai International Holding Corp. GmbH (Europe)
Eiestrasse 80, 20537 Hamburg, Germany
MAX
55°C
MIN
-20°C
Gima S.p.A.
Via Marconi, 1 - 20060 Gessate (MI) Italy
gima@gimaitaly.com - export@gimaitaly.com
www.gimaitaly.com
ATTENTION: The operators must carefully
read and completely understand the
present manual before using the product.
User manual

47 ENGLISH
Contents
Chapter 1 Safety Precautions ............................................................................................................. 49
1.1 Operation for AC Adapter (Separate Sale) ..................................................................... 50
1.2 Operation for Battery...................................................................................................... 51
Chapter 2 Main Unit ............................................................................................................................. 53
Chapter 3 Button Functions ................................................................................................................ 56
Chapter 4 External Interfaces ............................................................................................................. 57
Chapter 5 Dry Battery/AC Adapter Installation ................................................................................. 58
5.1 Dry Battery Installation ................................................................................................... 58
5.2 Using the AC Adapter..................................................................................................... 59
Chapter 6 Setting the Date and Time ................................................................................................. 60
Chapter 7 Unit....................................................................................................................................... 61
Chapter 8 User Switch......................................................................................................................... 62
Chapter 9 Applying the Arm Cuff........................................................................................................ 63
Chapter 10 Usage Method of Sphygmomanometer ........................................................................... 64
10.1 Accurate Measurement Way ........................................................................................ 64
10.2 BP Measurement.......................................................................................................... 65
Chapter 11 Memory Function................................................................................................................ 66
11.1 Review Memory Values ................................................................................................ 66
11.2 Delete Memory Values.................................................................................................. 67
Chapter 12 Alarm Function.................................................................................................................... 68
12.1 Physiological Alarm ...................................................................................................... 68
12.2 Technical Alarm ............................................................................................................ 69

48
ENGLISH
Chapter 13 SpO2Measurement Function ............................................................................................ 69
Chapter 14 SpO2Measurement Method .............................................................................................. 72
Chapter 15 Installation of the Software................................................................................................ 73
15.1 Demand of Editor ......................................................................................................... 73
15.2 Installation of Software................................................................................................. 74
Chapter 16 Keys and Symbols .............................................................................................................. 74
Chapter 17 Error Message.....................................................................................................................76
Chapter 18 Troubleshooting.................................................................................................................. 77
Chapter 19 Maintenance, Cleaning and Keeping................................................................................ 79
Chapter 20 NIBP Specification.............................................................................................................. 82
Chapter 21 SpO2Specification ............................................................................................................. 84
Appendix .............................................................................................................................................. 85

49 ENGLISH
Chapter 1
SAFETY PRECAUTIONS
• Beforeuse,carefullyread“SafetyPrecautions”foracorrectuse.
• Topreventuserssufferedhurtordamnicationduetoimproperuse,referto“SafetyPrecautions”,
and use this product properly.
For safety reasons, be sure to comply with safety precautions.
Note
If not to use correctly, it exists that a potentially hazardous situation which may result in injury to the user
or patient or damage to the equipment or other property.
Note
Human and the surrounding environment are in the range of electromagnetic radiation which generated
by this device,there is no energy hazard to human or the surrounding environment, also not affected by
the electromagnetic interference of the external device. This device has slight energy radiation, should be
avoided too close to the high precision requirements equipment.
Note
Self-diagnosis and treatment using measured results may be dangerous. Follow the instructions of your
physician.
Please hand measurement results to the doctor who know your health to accept diagnosis.
For severe blood circulation disorder or arrhythmia patients, please use the device under the guidance of
a doctor.
Otherwise it may lead to acute hemorrhage, or measurement error as a result of squeezed arm.

50
For Infant and the person who can’t express oneself, please use the device under the guidance of a
doctor.
Otherwise it may cause accident or dissension.
Please do not use for any other purpose.
Otherwise it may cause accident or holdback.
Please use special cuff.
Otherwise it is possible that measurement result is incorrect.
Pleasedonotkeepthecuffintheover-inatedstateforalongtime.
Otherwise it may cause risk.
Do not disassemble,repair and change the device.
Otherwise it can not measure correctly.
Donotusethedeviceinthecaseofthereareammableanestheticgassesmixingwiththeairornitrous
oxide.
1.1 Operation for AC Adapter (Separate Sale)
Note
Please use the dedicated AC adapter of this device.
Otherwise it may cause trouble.
The dedicated AC adapter must use AC 100V-240V.
Otherwise it may cause re or electric shock.
When there is breakage of dedicated AC adapter plug or wire, please do not use it.
Otherwise it may cause re or electric shock.
Please do not plug or unplug the adapter on the socket with wet hands.
Otherwise it may cause electric shock or injury.
ENGLISH

51
1.2 Operation for Battery
Note
Pleaseuse4“AA”manganeseoralkalinebatteries,donotusebatteriesofothertypes.
Otherwise it may cause re.
New and old batteries, different kinds batteries can not be used together.
Otherwise it may cause battery leakage, heat, rupture, and damage to the device.
Please don’t put wrong positive and negative of battery. When the batteries power exhausts, replace with
four new batteries at the same time.
Please take out the dry batteries when you do not use the device for a long time.
Otherwise it may cause battery leakage, heat, rupture, and damage to the device.
If electrolyte of the batteries immodestly get in your eyes, immediately rinse with plenty of clean water.
It will cause blindness or other hazards,Should immediately go to the nearest hospital for treatment.
If electrolyte of the batteries immodestly glues on the skin or the clothes, immediately rinse with plenty of
clean water.
Otherwise it may hurt the skin.
Advice
Do not strike or drop the device.
Donotinatebeforethecuffwrappsaroundthearm.
Donotinectthecuffandtheairtubeforcibly.
Description of functions
The Sphygmomanometer apply to measure the non-invasive blood pressure and SpO2of human (adult,
children, neonate), uses three-user mode, each user can store 100 items records of measurement results
at most. Each record includes detailed measuring time, systolic pressure, diastolic pressure, average
ENGLISH

52
pressure, pulse rate and record number, etc. With 2.8 inch color LCD screen, clear interface, the function
of data review is complete. User can implement ON/OFF, manual measuring, system setup, parameters
change and other operations with seven buttons which are located on the front panel of the device.
The Sphygmomanometer uses audible and visual alarm, when the battery power is low, the buzzer will
intermittentbuzzingandLCDscreendisplays“LowPower”topromptuserreplacebatteries.Whenthe
measurement data exceeds the set alarm limit, the font color of measurement results will change to red
and the audible alarm will occur, user can open and close the alarm sound according to needs.
With timing shutdown function, if there is no operation and SpO2measurement, the device will
automatically turn off after 2 minutes. With USB interface, Users can send measurement results to PC.
Refer to the help or explication of the related software for specic operation.
Purpose
The device apply to measure the non-invasive blood pressure and SpO2of human. Record parameter
value of blood pressure to provide the reference for the health care professional.
Warning
Please use the device on the adult object who can read the user manual and the error message shown
on the screen. Read the user manual before use the device in order to take actions according to the
manual when something wrong with the device. For pediatric and neonatal population, measurement
should be only performed by qualied personnel. And please make sure to select the right user mode
and cuff before use .
ENGLISH

53
Chapter 2
MAIN UNIT
The production is in the package. Open the package and conrm whether the production is whole.
Cuff plug
Cuff air plug jack
Display
Adult cuff
USER SWITCH button
ON/OFF button
START/STOP button
Dry battery
UP/DOWN button
MEMORY button
AC adapter jack
MENU button
USB plug jack
ENGLISH

54
Accessories
(Specication: limb circumference 22-32cm (middle part of upper arm), please choose suited cuff when
measuring pediatric or other).
USB Data Line Software CD User Manual
Optional Accessories
AC adapter
Input: voltage: AC 100V~240V
frequency: 50Hz/60HZ
rated current: AC 150mA
Output: DC 6.0V ± 0.2V 1.0A
or DC5.0V ± 0.2V 1.0A
Integrated SpO2probe: Y10UCH150
(This part is only suitable for European Union market)
A. SpO2measurement
Measurement range: 0%~100%
Error: 70~100%: ± 2%; Below 70%: unspecied
ENGLISH

55
B. PR (pulse rate) measurement
Measurement range: 30bpm~250bpm
Error: ±2bpm or ±2% (select the larger)
C. Optical sensor: red light (wavelength: 660nm, 6.65mW)
infrared light (wavelength: 880nm, 6.75mW)
Note
• TheoptionalprobeoftheSphygmomanometerisanintegrated
SpO2probe, the measuring part is integrated with the probe.
• TheservicelifeoftheintegratedSpO2probe is three years.
Cuff
There are several suitable cuffs (range of limb circumference, middle part of upper arm)
the range of limb circumference is 6-11cm
the range of limb circumference is 10-19cm
the range of limb circumference is 18-26cm
the range of limb circumference is 32-43cm
Note
• Thecuffisaconsumable.Calculatebymeasuring6timesaday(3timeseachmorningandevening),
the service life of the cuff is about 1 year.(using our experimental conditions).
• Inordertocorrectlymeasurebloodpressure,pleasereplacethecuffintime.
• Ifthecuffleaks,pleasecontactourcompanytobuyanewone.Thecuffpurchasedseparatelydoes
not include the airway tube plug. When replacing, please do not throw the airway tube plug away,
install it on the new cuff.
ENGLISH

56
Note
When the product and accessories described in this manual are about to exceed the period of use,
they must be disposed according to relevant product handling specication. If you want to know more
information, please contact our company or representative organization.
Chapter 3
BUTTON FUNCTIONS
All the operations to the Electronic Sphygmomanometer are through the buttons. The names of the
buttons are above them. They are:
ON/OFF Press this button to turn on/off the device.
START/STOPPressittoinatethecuffandstartabloodpressuremeasurement.
Duringmeasuring,pressittocancelthemeasurementanddeatethecuff.
At all levels interface, the three buttons correspond respectively with
the text prompts below the LCD screen, pressing any button will
carry on the corresponding function, eg: MENU - ENTER - LIST -
USER etc.
Up and down buttons, respectively carry on the functions of moving the cursor up and down,
changing the parameters and switching the status.
ENGLISH

57
Chapter 4
EXTERNAL INTERFACES
Note
Please hold the airway tube plug to remove the NIBP cuff.
Cuff socket of Sphygmomanometer
The right side of the device is USB socket
and AC adapter socket.
USB socket
AC adapter socket
Left side
Right side
ENGLISH

58
Note
The cuff socket and AC adapter socket of the sphygmomanometer only connect to the stated equipment
whichaccordwiththerequirementsofIEC60601-1:1988“Medicalelectricalequipment-Part1:General
requirementsforsafety”.
Chapter 5
DRY BATTERY/AC ADAPTER INSTALLATION
The product can use dry battery or AC adapter as power source.
5.1 Dry Battery Installation
1. Demount the battery cover in the direction of the arrow.
2.Install“AA”drybatteriesaccordingto+-polarities.
3. Slide to close the battery cover.
Icon“”:thebatteries’powerwillexhaust.
Replace with four new batteries (the same sort) at the same time.
Turn the unit off before replacing the batteries.
1 2 3
ENGLISH

59
Note
Dispose of the exhausted batteries according to applicable local regulations about environmental.
5.2 Using the AC Adapter
1. Connect the device and the AC adapter. Insert the AC adapter plug into the AC adapter socket on the
right side of the device.
2. Please insert the power plug of AC adapter into the 100V- 240V socket.
Note
• HoldandpulltheHousingtoremovetheACAdapterfromtheelectricaloutlet.Donotremove
by pulling on the cord.
• RemovetheACAdapterplugfromtheunit.
Please be sure to use dedicated AC adapter.
Note
You’d better take off batteries when use the AC adapter as power source. If there is any damage
to the AC adapter, you should use batteries to run the device.
When adapter and batteries are both used at the same time, the battery power will not be
consumed. Switch adapter and battery as power supply when the device is off, otherwise,
the device may shutdown due to power failure.
ENGLISH ENGLISH

60
Chapter 6
SETTING THE DATE AND TIME
It is necessary to set date and time after turning on the device.
The Electronic Sphygmomanometer can automatically stores measurement results, date and time.
If dry battery power exhausts or removed, the time to stop.
At the moment, please reset date and time.
The Electronic Sphygmomanometer stores measure results of three users automatically, and up to 100
items for every user. If the date and time are set correctly, the date and time when measuring will be
correct in the memory, otherwise it may not be correct.The results can be uploaded to PC via USB and
processed with the PC software.
Note
Correctly use data upload function:
1. First, make sure the time is right, there are two modes of time setting:
(1) When using the Sphygmomanometer for the rst time or after
the Sphygmomanometer has been placed without power supply for a certain
time (more than 5 minutes), after power on, there is a prompt of time error
on the main interface, set date and time with UP, DOWN and ENTER button.
(2) Press MENU button on the main interface to enter system menu, then enter SYSTEM TIME item,
the current time will be displayed on the screen. Set date and time with UP, DOWN and ENTER
button.
ENGLISH

61
2. After completing all time setting, select CONFIRM option and press ENTER button to conrm the
setting value. If you do not want to change the time, select EXIT option and press ENTER button
to return to the previous menu.
Note
Please choose the computer which should be ensured compliance with the requirements of
IEC60950, or else it may damage the device.
Chapter 7
UNIT
Therearetwounits:“mmHg”and“kPa”.
Thedefaultis:“mmHg”.
Enter the SYSTEM SETUP submenu
in SYSTEM MENU, then select UNIT option to switch
unitsbetween“mmHg”and“kPa”.
ENGLISH

62
Chapter 8
USER SWITCH
The Electronic Sphygmomanometer stores the measure
results of three users automatically, and up to 100 items
for every user.
Press USER button in main interface to switch users.
Or press USER PURVIEW item in SYSTEM SETUP
menu to switch users.
Note
When the USER PURVIEW is set to ALL, current user
can be switched under main interface; when set to a certain
user, it will not be able to switch under main interface.
User type can be set to adult, pediatric and neonatal three
different kinds, setting method is as follows:
Chapter 9
APPLYING THE ARM CUFF
Both left and right arm can be measured.
Bare your arm or cloth close-tting clothing during measurement.
Carry out the operation in a room with comfortable temperature.
ENGLISH

63
When measuring, take the thick clothes off instead of rolling up the sleeves.
In order to measure accurately, pay attention to applying the cuff properly (left arm).
1. Insert the arm cuff air plug
in the cuff socket of sphygmomanometer.
2. Stretch cuff into a barrel for the arm
can conformable enter into the barrel.
3. Left arm penetrate through the cuff,
the air tube of the cuff will pass the top of your palm.
4. Wrap the cuff to your upper arm. Make the air tube
inside the forearm and aligned with your middle nger.
5. The bottom of the cuff should be
approximately 2cm~3cm above your elbow.
6. Be xed with cloths, and wrapped tight cuff,
the arm and the cuff should not have gaps.
ENGLISH

64
Chapter 10
USAGE METHOD OF SPHYGMOMANOMETER
10.1 Accurate Measurement Way
Measurement in quiet and relaxing state.
1. Place your elbow on a table.
2. The cuff is level with your heart.
3. The palm of the hand is up, and the body relax.
Advice
Try to measure your blood pressure at the same time each day with the same arm and the same
pose for consistency.
The high and low location of cuff will cause changes in measurement results.
Do not touch Electronic Sphygmomanometer, cuff and windpipe during measurement.
Measurements should be taken in a quiet place and keep the body relaxed.
Remain still for 4~5 minutes before measurement.
Relax the body, do not let the muscle activity.
Do not talk and movement during the measurement.
Wait more than 4~5 minutes between measurements.
Do not use precision instruments near the Sphygmomanometer.
Please use the sphygmomanometer at an environment of suitable temperature and humidity (refer to
Chapter 20), otherwise it will cause measurement error.
ENGLISH

65
10.2 BP Measurement
1.Press START/STOP button to take a measurement.
Start measurement Measurement result
During measurement, please keep correct pose and quiet state, do not move.
Wish to stop measurement
During measurement, press START/STOPbutton,devicewillstopinating,andreleasetheairfromthe
cuff.
2. Conrm measurement value
Measurement value can be automatically stored. ([Memory Function] refer to Chapter 11)
*Self-diagnosis and treatment using measured results may be dangerous. Follow the instructions
of your physician.
ENGLISH
This manual suits for next models
1
Table of contents
Other Gima Blood Pressure Monitor manuals
Popular Blood Pressure Monitor manuals by other brands

Beurer
Beurer BM 58 Instructions for use

Sunbeam
Sunbeam HEALTH AT HOME 7623 instruction manual

uebe
uebe visomat comfort 20/40 instruction manual

Microlife
Microlife #BP3AA1-2 Instruction booklet

HoMedics
HoMedics BP-A11-02CA Instruction manual and warranty information

Beurer
Beurer BM 50 Instructions for use