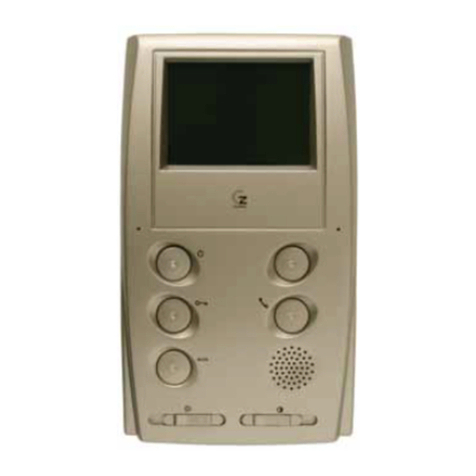
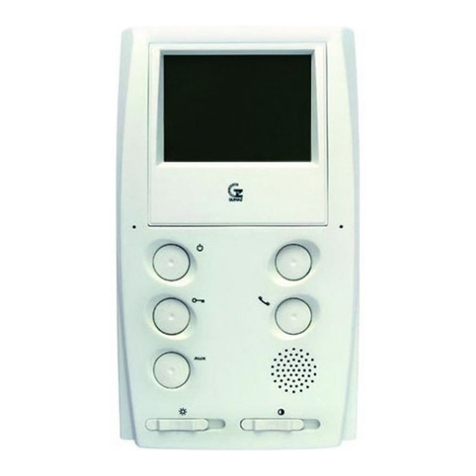
Guinaz M3760 User manual

GUÍA DE INSTALACIÓN INSTALLATION GUIDE
MONITORES TACTILE
PARA SISTEMA S2
REF.M3760 Y REF.M3760E
TACTILE MONITORS
FOR S2 SYSTEM
REF.M3760 AND REF.M3760E

G503201 - R00
CARACTERÍSTICAS Y FUNCIONAMIENTO. CHARACTERISTICS AND FUNCTIONING.
2
1. Al reci ir una llamada, el monitor emite un sonido itonal y
la imagen aparece instantáneamente en la pantalla. Mientras
el usuario visualiza la visita, esta no advierte su presencia
hasta que no se activa la comunicación de audio.
2. Para esta lecer contacto auditivo asta con pulsar el otón
de comunicación , en los 60 seg. siguientes a la recepción
de la llamada. Si se agota este tiempo, el monitor se
desconecta perdiendo la llamada.
3. La comunicación finalizará automáticamente una vez
transcurridos 3 min. desde que se esta leció contacto
auditivo. Tam ién se puede finalizar la comunicación pulsando
el otón de encendido/apagado . Una vez finalizada la
comunicación, dispone de 30 seg. para retomarla pulsando
el otón de encendido/apagado y accediendo a la opción
videovigilancia. Tras activar esta opción, active el otón de
comunicación .
4. La apertura de la puerta se realiza mediante el pulsador de
a repuertas .
5. Para realizar vigilancia, pulsar el otón de encendido/apagado
y acceder al menú videovigilancia. La imagen aparecerá
en el monitor. Si además quiere esta lecer contacto auditivo,
pulse el otón de comunicación . Durante la vigilancia
puede a rir la puerta en cualquier momento mediante el
otón de a repuertas . La vigilancia finalizará
automáticamente a los 3 min. de iniciada, o pulsando de
nuevo el otón de encendido/apagado . Si la instalación
de su vivienda cuenta con más de un acceso de vídeo,
puede seleccionar la imagen del acceso deseado activando
sucesivamente el pulsador flecha arri a .
6. Dispone de un pulsador , al que puede asignar funciones
como activar la salida auxiliar, o llamar a conserjería (opción
válida si está instalada).
7. Para conseguir una adecuada calidad de imagen los
monitores disponen de ajuste de color, rillo y contraste
dentro del menú de AJUSTES DE PANTALLA.
Si hay conectada una conserjería en la instalación, el
funcionamiento es el siguiente:
1. Al reci ir una llamada desde la conserjería, el monitor emite
un sonido itonal. En la pantalla del monitor aparecerá el
mensaje LLAMANDO CONSERJE. Pulse el otón
descolgado para esta lecer comunicación de audio.
2.Para realizar una llamada desde el monitor de la vivienda a
la conserjería, puede acceder al MENU FUNCIONES
LLAMAR A CONSERJE, o mediante el pulsador si
previamente se le ha asignado esta función al pulsador.
Llegados a este punto, pueden ocurrir tres cosas:
a)Si la conserjería está li re, el monitor emite tonos de
llamada y aparece el texto: LLAMANDO CONSERJE.
)Si el us está ocupado por otro usuario, en el monitor se
escuchará el sonido de ocupado y aparece el texto:
SISTEMA OCUPADO. FUNCIÓN NO DISPONIBLE
c)Si la conserjería se encuentra en modo REPOSO, el monitor
emite tres tonos de ocupado y aparece el texto:
CONSERJERÍA NO ACTIVA. LLAMADA REGISTRADA,
indicando con ello que la llamada ha sido memorizada
en la conserjería.
Todos estos dispositivos son para uso exclusivo en instalaciones
de porteros y videoporteros GUINAZ. Su instalación de e
realizarse tal y como se especifica en esta guía y aplicando la
reglamentación vigente.
La manipulación interna de estos productos sólo puede
realizarse por personal especializado, y siempre con el equipo
desconectado de la alimentación.
Los monitores están diseñados para ser instalados en interiores;
no se han de exponer a gotas o proyecciones de agua.
Se recomienda instalar los monitores en lugares desde los
cuales se escuche la llamada en toda la vivienda, y que estén
alejados de fuentes de calor (radiadores, estufas, etc.) o de
am ientes agresivos (cocinas, etc).
1. When a call i received, the image appear immediately on
your monitor. While you ee the vi itor, he will not be aware
you are at home until audio contact i e tabli hed.
2. To e tabli h audio contact pre the communication button
within 60 ec. following the call. The monitor i
di connected and the call i lo t if thi time run out.
3.The communication will automatically end 3 min. from the
moment audio contact wa e tabli hed. The communication
can al o be ended by pre ing the on/off button . Once
the communication ha ended, you will have 30 ec. to
continue thi by pre ing the on/off button and pre ing
the button .
4.The door i opened by pre ing de door opener pu hbutton
.
5.To perform video urveillance, pre the on/off button . The
image will appear on the monitor. Pre the communication
button if you al o want to e tabli h audio contact. The
door can be opened at any time during urveillance by pre ing
the door opener button .. Video urveillance will end
automatically 3 min. after tarting, or by pre ing the on/off
button once again. If your dwelling in tallation ha more
than one video acce , you can elect the de ired acce
image by activating con ecutively the up arrow pu h-
button .
6.Available with an pu h-button, where function can be
activated uch a auxiliary output activation, or calling the
concierge (valid option if in talled).
7.In order to obtain a uitable creen quality, it i po ible to et
the contra t, brightne and colour adju tment in the SCREEN
ADJUSTMENT menu.
If there is a porter's lodge connected to the installation,
functioning will be as follows:
1.When a call i received from the porter' lodge, the monitor
emit a dual tone ound. In the monitor creen a CALLING
CONCIERGE me age i hown. Pre the communication
button to e tabli h audio communication.
2.To make a call from the dwelling monitor to the concierge
office, you can acce the FUNCTIONS MENU CALL
CONCIERGE, or by the pu h-button if thi function ha
been previou ly a igned to the ame. Once arrived at thi
point, three thing can happen:
a)If the concierge office i free, the monitor will i ue ringing
tone and the following text i hown: CALLING CONCIERGE.
b)If the bu i occupied by another u er, an occupied ringing
will be heard by the monitor and the following text i hown:
SYSTEM BUSY. FUNCTION NOT AVAILABLE.
c)If the concierge office i in STAND-BY mode, the monitor
will i ue three occupied ringing tone and the following text
i hown: CONCIERGERY NOT ACTIVE. CALL SAVED,
indicating that the call ha been memori ed at the concierge
office.
All the e device are for exclu ive u e in facilitie of video door
entry i tem of GUINAZ. The in tallation mu t be made uch
a it i pecified in thi guide and i applied the effective
regulation.
The product mu t be handle only by e pecialized per onnel,
and alway with the di connected equipment of the feeding.
The monitor hould be in talled indoor ; not be expo ed to
water droplet or projection .
In talling the monitor in place where call can be heard all
around the dwelling and far from heat ource (radiator , heater ,
etc.) or aggre ive environment (kitchen , etc.) i
recommended.
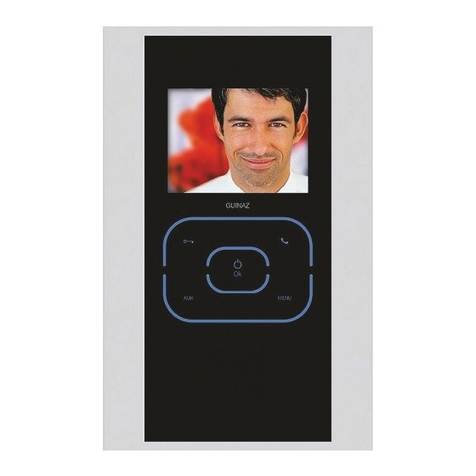
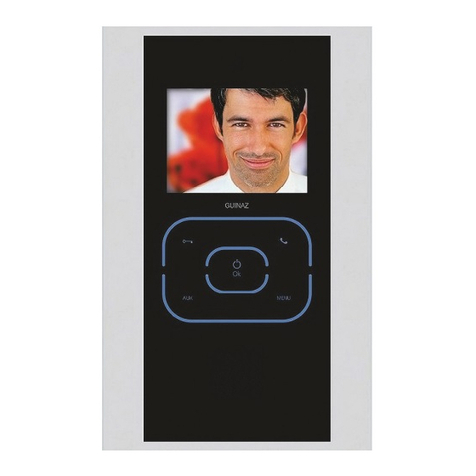
DESCRIPCIÓN MONITORES M3760 / M3760E.
DESCRIPTION OF THE M3760 / M3760E MONITORS.
3
1. Pulsador de encendido/apagado. Utilizado para
conectar y desconectar el monitor. Si el menú está activo
su función es ACEPTAR la selección correspondiente
dentro del menú.
On/off push-button. U ed to connect and di connect
the monitor. In ide the menu, it i u ed to acce different
option .
2. Pulsador abrepuertas . Sirve para a rir la puerta.
Door opener push-button . Thi i pre ed to open
the door.
3. Pulsador auxiliar . Utilizado para funciones adicionales
al monitor (llamada a conserjería, iluminación escalera,
apertura segunda puerta....).
Supplementary push-button . U ed for function
other than tho e of the video entryphone in tallation (lighting
of tair , opening a econd door...).
4. lecha arriba . Para desplazarse hacia arri a dentro de
los menús, o incrementar el valor numérico de los ajustes.
Adicionalmente cam ia de cámara cuando la videovigilancia
está activa.
p arrow . To move upward within the menu , or increa e
the numerical value of the adju tment . Additionally it
change from camera when the video urveillance i active.
. lecha abajo . Para desplazarse hacia a ajo dentro de
los menús o para decrementar el valor numérico de los
ajustes.
Down arrow . To move downward within the menu , or
decrea e the numerical value of the adju tment
6. Pulsador comunicación . Sirve para esta lecer
comunicación audio entre placa calle y monitor, con el
monitor encendido previamente.
Communication push-button . Thi i u ed to e tabli h
audio communication between the treet panel and the
monitor, a long a the monitor ha been previou ly turned
on.
7. Pulsador menu . Si el monitor está encendido
y no está activo el menú, sirve para acceder a él. Si el menú
está activo, saldrá del mismo.
Push-button menu MEN . If the monitor i witched-
on and the menu i not active, it will acce the ame. If the
menu i active, it will leave the ame.
G503201 - R00

IN
BUS OUT
BUS OUT
16 IN
ST IN
VDCGND
4
CABLEADO TARJETA CONEXIONES MONITOR M3760 / M3760E.
WIRING OF THE CONNECTION CARD MONITOR M3760 / M3760E.
M3760
M3760E
CONFIGURACIÓN DE LA RESISTENCIA DE TERMINACIÓN DE LÍNEA.
LINE ENDING RESISTANCE CONFIGURATION.
OUT 16
IN VDC
GND
G503201 - R00
Ca le de 2 hilos
2-wire cable
A siguiente monitor.
To the following monitor.
IN ST
BUS IN
Configuración cuando el monitor no es el último de su rama de distri ución. Es decir, el ca le entra y
sale de la ase mural hacia otro monitor.
Configuration when the monitor i not the la t along the di tribution line. That i to ay, the cable enter
and exit the wall ba e toward another monitor.
Configuración cuando el monitor es el último de su rama de distri ución. Es decir, el ca le sólo entra
a la ase mural.
Configuration when the monitor being the la t along the di tribution line. That i to ay, the cable only
enter the wall ba e panel.
Salida auxiliar (11Vdc ± 1V / 100mA).
Output Auxiliary (max 11Vdc ± 1V / max 100mA).
Pulsador 2º tono. Pu hbutton for 2º tone..
La resistencia de terminación de línea se configura mediante dos microinterruptores (SW1) situados en la tarjeta principal del
monitor M3760 / M3760E.
The line ending re i tance i et by two witche (SW1) located on the main board of the monitor M3760 / M3760E.
Las conexiones se realizan en la tarjeta de ornas del monitor.
Connection are made on the card terminal monitor.
BUS OUT
1
2
Fuente de
Alimentación
Auxiliar
F1330 ó F1334
Auxiliary Power
Supply F1330 or
F1334

5
G503201 - R00
BORNA IN ST: UNCIONAMIENTO 2º TONO
La manera de conectar el 2º tono se descri e en la página 4,
en el punto Ca leado Tarjeta Conexiones Monitor M3760 /
M3760E. El 2º tono es una aplicación para instalaciones en
las que se necesita que suene un tono de llamada en el monitor
cuando se acciona un pulsador ajeno a la instalación de
videoportero (por ejemplo, tim re de entrada directa a la
vivienda).
Para poder diferenciar desde donde se ha producido la llamada,
este 2º tono tiene un sonido distinto del generado cuando se
llama desde la placa calle del sistema de videoportero.
El 2º tono no enciende la imagen del monitor. Solamente
aparece un texto en la pantalla donde se indica que se está
activando el 2º tono. Si el monitor está en comunicación audio
o en videovigilancia, la llamada del 2º tono tendrá un volumen
más ajo.
BORNA OUT 16: SALIDA AUXILIAR
(salida 11Vdc ± 1V / 100mA)
A través de la orna 16 de la tarjeta de conexiones, el monitor
suministra una señal de 11Vdc ± 1V y una corriente máxima
de 100mA durante el tiempo configurado en el menú
ACTIVACION SALIDAS, tiempo AUX 1. Se puede configurar
para que esté activo entre 1 y 60 segundos.
Esta señal está referida a la masa del monitor (ca le GND) y
se puede utilizar para activar funciones ajenas a la instalación
de videoportero.
BORNA IN VDC: ENTRADA ALIMENTACIÓN AUXILIAR
Es posi le alimentar el monitor desde una fuente de alimentación
externa al sistema. Para ello, se pueden utilizar las fuentes
F1330 ó F1340 de GUINAZ. La señal que aportan estas fuentes
es de +17Vdc, y se de e conectar con la polaridad indicada
en la figura de la página 4.
TERMINAL BLOCK IN ST: F NCTIONING OF THE 2nd
TONE.
The way to connect the 2º tone i de cribed on page 4. Wiring
of the conection card monitor M3760. Application for in tallation
requiring a call tone to be heard from the monitor when a
pu hbutton not belonging to the video entryphone i pre ed
(for example, bell for direct entry to the dwelling).
Thi 2nd tone ha a different ound from that generated when
calling from the treet panel of the video entryphone y tem in
order to differentiate where the call i from.
The 2nd tone doe not turn on the monitor. If the monitor i in
audio communication or in video urveillance mode, the volume
of the call with the 2nd tone will be lower.
TERMINAL BLOCK O T 16: O TP T A X
(output 11Vdc ± 1V / 100mA)
Through the terminal block 16 of the connection card, the
monitor upplie a ignal of 11Vdc ± 1V and a maximum current
of 100mA, configured in the OUTPUT ACTIVATION menu, time
AUX 1. It can be configured to be active between 1 and 60
econd .
Thi ignal i referred to the monitor ground (cable GND) and
can be u ed to activate function beyond the video door entry
y tem .
TERMINAL BLOCK IN VDC: A XILIARY POWER INP T
It i po ible to power the monitor from an external power upply
to the y tem. For thi , can be u ed F1330 or F1340 power
upplie of GUINAZ. The ignal provided by the e power upplie
i +17Vdc, and mu t be connected with the polarity indicated
in the figure on page 4.
TARJETA DE CONEXIONES.
DESCRIPCIÓN DE LAS BORNAS. CONNECTION CARD. DESCRIPTION OF
THE TERMINAL BLOCK.
IMPORTANTE:
a) En ningún caso deben unirse cables del bus
directamente. Para prolongar el bus después de un
monitor, se deben utilizar las bornas BUS OUT de la
tarjeta de conexiones del monitor.
b) Si se utilizan en la instalación cables multipar, sólo
se puede utilizar uno de los pares, y nunca unir más
de un par para doblar sección.
c) Si el cable utilizado es multipolar, sólo se pueden
usar dos de los cables, y nunca unir varios cables
para doblar sección.
IMPORTANT:
a) In no case should join bus cables directly. To extend
the bus after a monitor, you should use the B S O T
terminal of the connection board of the monitor.
b) If the multipair cable is used in the installation, you
can only use one pair, and never more than a couple
unite to bend section.
c) If the cable used has several wires, you can only
use two wires, and never must unite several cables
to bend section.
INSTALACIÓN BASE MURAL Y MONITOR M3760.
INSTALLATION OF WALL BASE AND MONITOR M3760.
1Colocar la ase mural en la pared
mediante 4 tirafondos y conectar
tarjeta de conexiones.
NOTA: Es posi le sujetar a caja
universal mediante 3 tirafondos.
A emble thi wall ba e panel on
the wall u ing 4 leeper- crew
and connect it to the connection
card.
NOTE: It i po ible to ecure the
univer al box by mean of 3 lag
crew .
1600mm aprox
1600mm aprox

6G503201 - R00
INSTALACIÓN DE LA CAJA DE EMPOTRAR Y DEL MONITOR M3760E.
INSTALLATION OF FLUSH MOUNTED BOX AND MONITOR M3760E.
1Empotrar la caja ref. M4540 en la
pared. El canto de la caja de e
quedar a ras de la pared.
Embed the box ref. M4540 on the
wall. The edge of the box hould
be flu h with the wall.
.
Configurar la resistencia de terminación de
línea tal como se indica en la pág. 4, y
conectar monitor.
Configure line termination re i tance a hown
on pg. 4, and connect the monitor connector.
23Colocación monitor:
A;B) Encajar so re ase mural
C) Presionar hasta clipar.
4Fijación del monitor:
Atornillar monitor a la ase mural.
A embly of the monitor:
Screw the monitor on the wall panel.
Se recomienda instalar los
monitores en lugares desde
los cuales se escuche la
llamada en toda la vivienda,
y que estén alejados de
fuentes de calor (radiadores,
estufas, etc.) o de am ientes
agresivos (cocinas, etc.).
In talling the monitor in place
where call can be heard all
around the dwelling and far from
heat ource (radiator ,
heater , etc.) or aggre ive
environment (kitchen , etc.)
i recommended.
A embly of the monitor:
A) A emble on the wall panel.
B) Pre down until it clip in.
Para separar monitor
A)Aflojar tornillo.
B)Empujar hacia arri a y luego
hacia afuera.
Di a embly the monitor.
A)Screw loo ening.
B)Move UP and then out ward .
215mm
130
40
1.700mm Aprox.
BB
B
A

7
2
Configurar la resistencia de terminación de línea tal
como se indica en la pág. 4, y conectar monitor.
Configure line termination re i tance a hown on
pg. 4, and connect the monitor connector.
Colocar la tarjeta de conexiones:
a) Soltar los dos tornillos.
) Atornillar la tarjeta.
c) Conectar los ca les de la
instalación.
Place card connection :
a) Remove the two crew .
b) Screw the card.
c) Connect the in tallation wiring.
3
Colocación del monitor en la caja:
A) Apoyar so re el anclaje superior y empujar
hacia arri a.
B) Colocar so re el anclaje inferior empujando
hacia adentro.
Placing the monitor in the box:
A) Support on top and pu h the anchor up.
B) Place on the lower anchorage pu hing in.
G503201 - R00
Se recomienda instalar los
monitores en lugares desde
los cuales se escuche la
llamada en toda la vivienda,
y que estén alejados de fuentes
de calor (radiadores, estufas, etc.)
o de am ientes agresivos
(cocinas, etc.).
In talling the monitor in place
where call can be heard all
around the dwelling and far from
heat ource (radiator , heater ,
etc.) or aggre ive environment
(kitchen , etc.) i recommended.
6Girar el monitor para ajustar su
posición.
Turn the monitor to adju t it po ition.
a) ) c)
Ajustar los anclajes superior e inferior para que el monitor
quede a ras de la pared.
Adju t the upper and lower anchor for the monitor flu h with
the wall.
4
anclaje superior
upper anchorage
anclaje inferior
lower anchorage
A
A
BB

DESCRIPCIÓN DE FUNCIONES DEL
MENU
DESCRIPTION OF FUNCTIONS MENU.
LANG AGES
To elect the language of the text di played in the creen monitor,
you mu t acce MAIN MENU CONFIGURATION
LANGUAGE, and from there it po ible to elect between 4
language : Spani h, Engli h, French o Portugue e.
MONITOR INSTALLATION.
To switch-on the monitor, press the switch-on/ switch-off OK
key. If the monitor has not een previously programmed, it will
ask to select the language first. Select the correct language y
using the OK key.
Once the language has een selected, the INSTALLATION
MENU will automatically appear.
If the monitor has een already configured and you want to
access some of the parameters, you must access the menu
from the following way: MAIN MENU INSTALLATION.
From this menu, you can configure the num er of the monitor,
as well as the type of terminal to e installed:
MANUAL INSTALLATION MODE.
If you already know the Monitor number and the Terminal
type to be in talled, you can access the OK key through the
NUMBER option. The monitor will ask you to input the password.
It is always a fixed one, and corresponds to the key sequence:
+ OK (to accept).
Once having input the correct password, the selected option
(in this case NUMBER) is shown on a red ackground. Modify
the num er of the monitor to program through the and
keys. To validate the num er, press the OK push- utton again.
The monitor will ask you to confirm the modification, select the
option YES and press OK. If you also want to modify the
Terminal type, move to the option TERMINAL and press OK.
The selected option appears again on a red ackground and
we can choose the MAIN or AUXILIARY option through the
and keys. If there are several monitors with the same num er,
there must e only one as the MAIN num er and the rest as
AUXILIARY.
Press YES and then OK.
The monitor will ask you to confirm the modification, select the
YES option through the and keys and press OK.
LAST CALL INSTALLATION MODE.
This option allows to configure the monitor without knowing
previously the num er that must e assigned.
Select the option LAST CALL and press OK. When sending a
call from the street panel the num er of the monitor to which
the last call has een made is shown.
To assign this num er to the monitor, press OK.
If you have not entered previously in the installation menu, you
are requested to enter the password through the key sequence:
+ OK (to accept).
The monitor will ask you to confirm the modification, select the
YES option and press OK.
When viewing the monitor num er of the last call, an additional
help information is displayed if:
- The num er is already assigned to another monitor:
RESERVED.
- The num er is the one configured in the monitor: PRESENT.
If none of the previous text is displayed, then the num er is
free.
If the option FACTORY SETTINGS is selected, the monitor will
e programmed with the default values: Num er=0 /
Terminal=Main. This option also configures the colour, rightness
and contrast adjustments y default, as well as the ring and
auxiliary outputs which are configura le.
IDIOMAS
Para seleccionar el idioma de los textos que aparecen en la
pantalla del monitor, de e acceder a MENU PRINCIPAL
CONFIGURACIÓN IDIOMA, y es posi le seleccionar entre
cuatro idiomas: Español, Inglés, Francés o Portugués.
INSTALACIÓN MONITOR.
Para encender el monitor, pulse la tecla encendido/apagado
OK. Si el monitor no se ha programado anteriormente, le pedirá
que seleccione el lenguaje en el que aparecerán los textos.
Seleccione el lenguaje adecuado mediante la tecla OK.
Una vez seleccionado el idioma, accederá automáticamente
al MENU DE INSTALACIÓN.
Si ya tiene el monitor configurado y desea modificar cualquiera
de sus parámetros, acceda a este menú de la siguiente manera:
MENU PRINCIPAL INSTALACION.
En este menú, podrá configurar tanto el número de monitor,
como el tipo de terminal que va a instalar:
MODO INSTALACIÓN MANUAL.
Si ya conoce el Nº del monitor que va a instalar y el tipo de
terminal, acceda mediante la tecla OK a la opción NUMERO.
El monitor le pedirá que introduzca la contraseña. Esta es
siempre fija, y corresponde a la secuencia de teclas:
+ OK (para aceptar).
Una vez introducida la clave correctamente, la opción
seleccionada (en este caso NUMERO) aparece so re fondo
rojo. Modifique el número con el que va a programar el monitor
mediante las teclas y . Para validar el número, asta con
activar el pulsador OK nuevamente.
El monitor le pedirá que confirme la modificación, seleccione
la opción SI y pulse OK. Si se desea modificar tam ién el tipo
de terminal, muévase hasta la opción TERMINAL y pulse OK.
Vuelve a aparecer la opción seleccionada so re fondo rojo y
podemos elegir la opción PRINCIPAL o SUPLETORIO mediante
las teclas y . Si hay varios monitores con un mismo número,
solamente de e de existir uno como PRINCIPAL y el resto
como SUPLETORIO.
SI y pulse OK.
El monitor le pedirá que confirme la modificación, seleccione
la opción SI mediante las teclas y y pulse OK.
MODO INSTALACIÓN ÚLTIMA LLAMADA.
Esta opción permite configurar el monitor sin conocer
previamente el número que se le de e asignar.
Seleccione la opción ULTIMA LLAMADA y pulse OK. Al lanzar
una llamada desde la placa de calle se muestra en la pantalla
el número de monitor al que se ha realizado la última llamada.
Para asignar este número al monitor, pulse OK.
Si previamente no ha entrado en el menú de instalación, le
volverá a pedir la contraseña que, como hemos explicado
anteriormente, responde a la secuencia de teclas: +
OK (para aceptar).
El monitor le pedirá que confirme la modificación, seleccione
la opción SI y pulse OK.
Al visualizar el número de monitor de la última llamada, aparece
una información adicional de ayuda si:
- El número ya está asignado a otro monitor: RESERVADO.
- El número es el que tiene configurado el monitor: ACTUAL.
Si no aparece ninguno de los dos textos anteriores, el número
está li re.
Si selecciona la opción VALORES DE FÁBRICA, el monitor se
programará con los valores por defecto: Numero=0 /
Terminal=Principal. Esta opción además configura por defecto
los ajustes de color, rillo y contraste, así como los de tim re
y salidas auxiliares que son configura les.
8G503201 - R00

DESCRIPCIÓN DE FUNCIONES DEL
MENU
DESCRIPTION OF FUNCTIONS MENU.
SCREEN ADJ STMENT
It i po ible to modify the image adju tment of the monitor.
In ide the MAIN MENU SCREEN ADJUSTMENT, the
brightne , contra t and colour of the image can be adju ted.
Once one of the e adju tment ha been acce ed, the image
of the video urveillance telecamara will be di played automatically
(if the y tem i not occupied) to verify the modification .
You can increa e (up arrow) or decrea e (down arrow) the
percentage of thi value. To validate the modification, activate
the OK pu h-button. To cancel, activate the menu pu h-button.
RING ADJUSTMENTS
Thi monitor ha different adju tment available for the ring call
tone a well a the econd tone ound. The e adju tment are
found in ide the following menu:
MAIN MENU CONFIGURATION RING.
The adju tment that can be performed are the duration, the
volume and the type of ring.
O TP T ACTIVATION
It i al o po ible to modify independently the activation time
of each of the output . In ide the MAIN MENU
CONFIGURATION OUTPUT ACTIVATION it i po ible to
configure the activation time between 1 and 60 econd .
Auxiliary Output corre pond to the terminal block OUT 16.
SWITCHING-ON MODE
Switching-on the monitor is configura le. When activating the
same, one can access to the FUNCTIONS MENU, or directly
to video urveillance.
Inside the menu: MAIN MENU CONFIGURATION
SWITCHING-ON MODE
It is possi le to select:
· MAIN MENU. When switching-on the monitor the
FUNCTIONS MENU is displayed.
· VIDEO SURVEILLANCE. When switching-on the monitor
the video urveillance is directly displayed. In this case, to
activate the menu, press the MENU key.
A X KEY F NCTION
It i po ible to configure the AUX key, depending on the
nece ity of each in tallation.
In ide the MAIN MENU CONFIGURATION AUX KEY
FUNCTION, the following function can be a igned to thi key:
· Activate auxiliary output.
· Call the concierge.
Thi way it i po ible to activate one of the e function without
needing to enter the FUNCTIONS MENU.
F NCTIONS MEN
Thi i the fir t menu that i di played in the creen, which
allow the u er to ea ily activate the direct function :
· Video urveillance
· Call the concierge
· Activate output AUX
To activate the de ired function elect the option with the up-
arrow or down-arrow key and pre OK.
From thi creen one can acce to the re t of menu electing
the MAIN MENU option.
AJUSTES DE PANTALLA
Es posi le modificar los ajustes de la imagen del monitor.
Dentro de MENU PRINCIPAL AJUSTES PANTALLA, se podrá
ajustar rillo, contraste y color de la misma. Una vez se haya
accedido a uno de estos ajustes automáticamente aparecerá
la imagen de la telecámara de videovigilancia (si el sistema no
está ocupado) para verificar las modificaciones.
Puede aumentar (flecha arri a) o disminuir (flecha a ajo)
el porcentaje de este valor. Para validar la modificación,
active el pulsador OK. Para cancelar, active el pulsador MENU.
AJUSTES TIMBRE
Este monitor dispone de diferentes ajustes tanto para el sonido
de llamada como para el sonido de segundo tono. Estos
ajustes se encuentran dentro del siguiente menú:
MENU PRINCIPAL CONFIGURACIÓN TIMBRE.
Los ajustes que se pueden realizar son la duración, el volumen
y el tipo de tim re.
ACTIVACIÓN SALIDAS
Tam ién se puede modificar el tiempo de activación de cada
una de las salidas independientemente. Dentro del MENU
PRINCIPAL CONFIGURACIÓN ACTIVACIÓN DE SALIDAS
es posi le configurar el tiempo de activación entre 1 y 60
segundos.
Salida Auxiliar corresponde a la orna OUT 16.
MODO ENCENDIDO
El encendido del monitor es configura le. Al activarlo, se puede
acceder al MENU DE FUNCIONES, o directamente a
videovigilancia.
Dentro del menú: MENU PRINCIPAL CONFIGURACIÓN
MODO ENCENDIDO
Se puede seleccionar:
· MENU INICIAL. Al encender el monitor aparece el MENU
FUNCIONES.
·VIDEOVIGILANCIA. Al encender el monitor directamente
accede a videovigilancia. En este caso, para activar el
menú, pulse la tecla MENU.
UNCIÓN TECLA AUX
Es posi le configurar la función de la tecla AUX, dependiendo
de la necesidad de cada instalación.
Dentro del MENU PRINCIPAL CONFIGURACIÓN
FUNCIÓN TECLA AUX, se puede asignar a esta tecla una de
las siguientes funciones:
· Activar salida auxiliar.
· Llamar a conserje.
De esta forma se puede activar una de estas funciones sin
necesidad de entrar en el MENU FUNCIONES.
MENU UNCIONES
Este menú es el primero que aparece en la pantalla, lo que
permite al usuario activar fácilmente las funciones directas:
· Videovigilancia
· Llamada a conserje
· Activación salida AUX
Para activar la función deseada seleccione la opción con las
flechas arri a y a ajo y pulse OK.
Desde esta pantalla se puede acceder al resto de menús
seleccionando la opción MENU PRINCIPAL.
9
G503201 - R00

TABLA DE MENÚS TABLE OF MENUS.
10
AJUSTES DE PANTA A
IDIOMA / ANGUAJE
CONFIGURACION
INSTA ACION
VO VER
MENU PRINCIPAL
AJUSTES DE PANTALLA
BRI O
CONTRASTE
CO OR
VO VER
ESPAÑO
ENG ISH
FRANCAIS
PORTUGÊS
VO VER
IDIOMA / LANGUAGE
CON IGURACION
TIMBRE
ACTIVACION DE SA IDA
MODO DE ENCENDIDO
FUNCION TEC A AUX
VO VER
G503201 - R00
MENU UNCIONES Primer menú al que se accede. Se pueden realizar varias
funciones o acceder al menú principal.
Menú principal Se accede al menú principal.
Video vigilancia Activa video vigilancia.
Llamar a conserje. Llama al conserje si es que existe en la instalación.
Activa AUX. Activa la salida AUX. Borna 16.
F NCTIONS MEN Fir t menu acce ed. Several function can be carried out
or acce the main menu.
Main menu Accede to the main menu.
Video urveillance Activate the video urveillance.
Call concierge Call the concierge if it exi t in the in tallation.
Activating AUX Activate output AUX. Terminal block 16.
MENU PRINCIPAL
Ajustes pantalla Ajusta rillo / contraste / color.
Idioma/language Configura idioma Español / English / Francais / Portugues
Configuración Configura el tim re / la activación de las salidas /
el modo de encendido / asigna función a la tecla AUX
Instalación Configura el número y tipo de monitor en la instalación.
Volver
MAIN MEN
Screen adju tment Adju t brightne / contra t / colour.
Language Configure the language Spani h / Engli h / French / Portugue e
Configuration Configure the ring / the output activation / the witching-on mode /
a ign function to the AUX key
In tallation Configure the number and type of monitor in the in tallation.
Return
AJUSTES DE PANTALLA Ajuste los valores de la imagen:
Brillo
Contraste
Color
Volver
SCREEN ADJ STMENT Adju t the image value to:
Brightne
Contra t
Colour
Return
IDIOMA / LANGUAGE Configure el idioma en el que aparecerán los textos del TFT.
Español
English
Francais
Portugues
Volver
LANG AGE Configure the language of the text di played in the TFT.
E pañol
Engli h
Francai
Portugue
Return
CON IGURACIÓN
Tim re Ajuste los valores de tim re.
Activación salida Tiempo de activación de la salida.
Modo encendido Modo de encendido del monitor
Funcion tecla AUX Asigna función a la tecla AUX.
Volver
CONFIG RATION
Ring Adju t the ring value .
Output activation Activation time of output.
Switching-ON mode Switching-on mode of the monitor
AUX key function A ign a function to the AUX key.
Return
1
AMAR A CONSERJE
MENU PRINCIPA
VIDEO VIGI ANCIA
ACTIVA AUX
SA IR
MENU UNCIONES
2
3

A TO
MEDIO
BAJO
VO VER
VOLUMEN
ME ODIA 1
ME ODIA 2
ME ODIA 3
ME ODIA 4
VO VER
SONIDO 2º TONO
SONIDO LLAMADA
ME ODIA 1
ME ODIA 2
ME ODIA 3
ME ODIA 4
VO VER
11
TIMBRE
VO UMEN
DURACION TIMBRE
SONIDO DE AMADA
SONIDO 2º TONO
VO VER
TIMBRE Ajuste los valores del tim re que suena en el monitor.
Volumen El volumen puede ser: Alto / Medio / Bajo
Duración tim re Ajuste de 1 a 10 seg. el tiempo que estará sonando
el tim re.
Sonido de llamada 4 diferentes melodías cuando se llama desde placa
de calle.
Sonido 2º tono 4 diferentes melodías cuando se llama desde el
pulsador auxiliar.
Volver
RING Adju t the ring value in the monitor.
Volume The volume cam be: High / Medium / Low
Ring duration Adju t from 1 to 10 ec. The time the ring will be
ringing.
Calling ound 4 different melodie when calling from the treet panel.
2 tone ound 4 different melodie when calling from the auxiliary
pu h-button.
Return
VOLUMEN Seleccione con el pulsador OK el volumen que
desea para el tim re de llamada.
Alto
Medio
Bajo
Volver
VOL ME Select with the OK push- utton the desired
volume of the call sound.
High
Medium
Low
Return
G503201 - R00
3
2
14
SONIDO LAMADA Seleccione con el pulsador OK la melodía
que desea para el tim re de llamada desde
Melodía 1 placa de calle.
Melodía 2
Melodía 3
Melodía 4
Volver
CALLING SO ND Select with the OK pu h-button the melodyof the
call ound from the treet panel.
Melody 1
Melody 2
Melody 3
Melody 4
Return
SONIDO 2º TONO Seleccione con el pulsador OK la melodía que
desea para el tim re de 2º tono.
Melodía 1
Melodía 2
Melodía 3
Melodía 4
Volver
2 TONE SO ND Select with the OK pu h-button the melody of the
2º call ound.
Melody 1
Melody 2
Melody 3
Melody 4
Return
DURACIÓN TIMBRE Ajuste de 1 a 10 seg. el tiempo que está
sonando el tim re.
RING D RATION Adju t from 1 to 10 ec. The time the ring
will be ringing.
SEGUNDOS
2
OK / Cancel (MENU)
DURACION TIMBRE

ACTIVA AUX
AMAR A CONSERJE
VO VER
UNCION TECLA AUX
ACTIVACION DE SALIDAS
ACTIVA AUX
VO VER
MODO DE ENCENDIDO
MENU INICIA
VIDEO VIGI ANCIA
VO VER
CONFIRMAR
CAMBIO
SI
NO
NUMERO : 2
TERMINA : PRINCIPA
VA ORES DE FABRICA
U TIMA AMADA
VO VER
INSTALACION
*G503201*
G503201 - R00
3
2
14ACTIVACIÓN SALIDAS Tiempo durante el cual van a estar activas las
salidas auxiliares.
Tiempo AUX Ajuste de 1 a 60 seg. El tiempo que estará activa
AUX. Borna OUT 16.
Volver
O TP T ACTIVATION Time when auxiliary output are active.
AUX Time Adju tment from 1 to 60 ec. The time that AUX i
active. Terminal block OUT 16.
Return
MODO ENCENDIDO Al encender el monitor puede hacerlo de estas
dos maneras:
Menú inicial El monitor accede al menú de funciones.
video vigilancia El monitor directamente realiza la función de
video-vigilancia.
Volver
SWITCHING-ON MODE When witching-on the monitor it can be done
in two way :
Startup menu The monitor accede to the function menu.
Video urveillance The monitor directly perform the video- urveillance
function.
Return
UNCION TECLA AUX A la tecla AUX, se le pueden asignar las siguientes
funciones:
Activa AUX Activa la salida AUX. Borna OUT 16.
Llamar a conserje Llama al conserje si es que existe en la instalación.
Volver
A X KEY F NCTION To the AUX key, the following function can be a igned.
Active AUX Activate output AUX. Terminal block OUT 16.
Call concierge Call the concierge if it exi t in the in tallation.
Return
INSTALACIÓN
Numero. Número del terminal dentro de la instalación.
Terminal. Principal o supletorio.
Valores de fá rica. Por defecto:
Ultima llamada. Aparece el código del monitor al que se ha realizado
la última llamada.
Volver Puede ocurrir que el monitor ya exista, o que no.
INSTALLATION
Number Terminal number in ide the in tallation.
Terminal. Main or auxiliary.
Factory etting By default:
La t call The monitor code i di played of the la t call.
Return It can happen that the monitor already exi t , or not.
Other manuals for M3760
1
This manual suits for next models
1
Table of contents
Other Guinaz Intercom System manuals

Guinaz
Guinaz M2710D User manual

Guinaz
Guinaz 1140V2 User manual

Guinaz
Guinaz M3780 User manual

Guinaz
Guinaz KA001LA User manual

Guinaz
Guinaz GD0501 User manual

Guinaz
Guinaz KC001 User manual

Guinaz
Guinaz A2420 User manual

Guinaz
Guinaz M3760 User manual

Guinaz
Guinaz M2710D User manual

Guinaz
Guinaz A2410 User manual