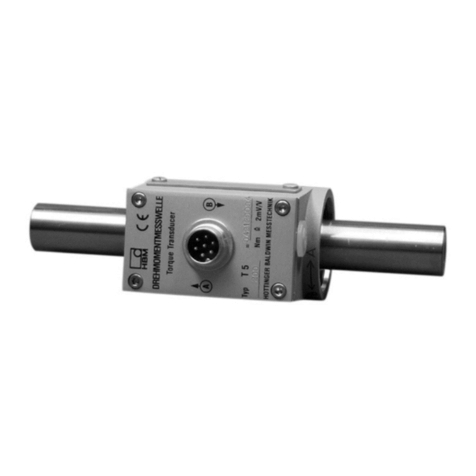
HBM T21WN User manual

Mounting Instructions | Montageanleitung |
Notice de montage
English Deutsch Français
T21WN

Hottinger Baldwin Messtechnik GmbH
Im Tiefen See 45
D-64239 Darmstadt
Tel. +49 6151 803-0
Fax +49 6151 803-9100
www.hbm.com
Mat.: 7-2001.4776
DVS: A4776-1.0 HBM: public
09.2017
EHottinger Baldwin Messtechnik GmbH.
Subject to modifications.
All product descriptions are for general information only.
They are not to be understood as a guarantee of quality or
durability.
Änderungen vorbehalten.
Alle Angaben beschreiben unsere Produkte in allgemeiner
Form. Sie stellen keine Beschaffenheits- oder Haltbarkeits
garantie dar.
Sous réserve de modifications.
Les caractéristiques indiquées ne décrivent nos produits
que sous une forme générale. Elles n'impliquent aucune
garantie de qualité ou de durabilité.

Mounting Instructions | Montageanleitung |
Notice de montage
English Deutsch Français
T21WN

2A4776-1.0 HBM: public T21WN
English
1 Safety instructions 3........................................
2 Markings used 5............................................
2.1 The markings used in this document 5..........................
2.2 Symbols on the product 5.....................................
3 Application 6...............................................
4 Installation 7...............................................
4.1 Installation position 7.........................................
4.2 Installation options 7.........................................
4.3 Couplings 8.................................................
4.3.1 Installation position with couplings 8............................
4.3.2 Installation 8................................................
5 Electrical connection 10......................................
5.1 General instructions 10........................................
5.2 Connector 10.................................................
5.3 Cable extension 12...........................................
5.4 Shielding design 13...........................................
6 Load‐carrying capacity 14....................................
6.1 Measuring dynamic torque 14..................................
6.2 Rotation speed 15............................................
7 Displaying torque and direction of rotation 17.................
8 Maintenance 18..............................................
9 Dimensions 19..............................................
10 Specifications 20............................................
11 Accessories 25..............................................
11.1 Bellows‐type couplings 26......................................
11.1.1 Dimensions for the bellows‐type couplings (in mm) 26.............
11.1.2 Specifications for bellows‐type couplings 27......................

Safety instructions
T21WN A4776-1.0 HBM: public 3
1 Safety instructions
Use in accordance with the regulations
Torque transducer T21WN is used exclusively for torque and rotation speed
measurement tasks and control and adjustment tasks directly connected
thereto. Use for any additional purpose shall be deemed to be not in
accordance with the regulations.
In the interests of safety, the transducer should only be operated as described
in the Operating Manual. It is also essential to observe the appropriate legal
and safety regulations for the application concerned during use. The same
applies to the use of accessories.
The transducer is not a safety element within the meaning of its use as
intended. Proper and safe operation of this transducer requires proper trans
portation, correct storage, assembly and mounting and careful operation.
General dangers of failing to follow the safety instructions
The transducer corresponds to the state of the art and is fail‐safe. The
transducer can give rise to remaining dangers if it is inappropriately installed
and operated by untrained personnel.
Everyone involved with the installation, commissioning, maintenance or repair
of the transducer must have read and understood the Operating Manual and in
particular the technical safety instructions.
Remaining dangers
The scope of supply and performance of the transducer covers only a small
area of torque measurement technique. In addition, equipment planners,
installers and operators should plan, implement and respond to the safety
engineering considerations of torque measurement technique in such a way as
to minimise remaining dangers. Prevailing regulations must be complied with at
all times. Reference must be made to remaining dangers connected with
torque measurement technology.

Safety instructions
4A4776-1.0 HBM: public T21WN
Conversions and modifications
The transducer must not be modified from the design or safety engineering
point of view except with our express agreement. Any modification shall
exclude all liability on our part for any damage resulting therefrom.
Qualified personnel
The transducer must only to be installed and used by qualified personnel,
strictly in accordance with the specifications and with safety requirements and
regulations. It is also essential to observe the appropriate legal and safety
regulations for the application concerned during use. The same applies to the
use of accessories.
Qualified personnel means persons entrusted with the installation, fitting, com
missioning and operation of the product who possess the appropriate qualifica
tions for their function.
Prevention of accidents
In accordance with the health and safety regulations relevant to accident
prevention, once the operator has fitted the torque transducer, a cover or
cladding must be attached as follows:
SThe cover or cladding must not be free to rotate.
SThe cover or cladding must prevent access to any areas where crushing or
shearing could occur, and must provide protection against any parts that
may come loose.
SCovers and cladding must be positioned at a suitable distance or so
arranged that it prevents access to any moving parts within.
SCovers and cladding must also be attached if the moving parts of the torque
transducers are installed outside the area in which people are moving about
and working.
The only permitted exceptions to the above requirements are if the various
parts and assemblies of the machine are already fully protected by the design
of the machine or by existing safety precautions.
In this Operating Manual remaining dangers are pointed out using the following
symbols:

Markings used
T21WN A4776-1.0 HBM: public 5
2 Markings used
2.1 The markings used in this document
Important instructions for your safety are specifically identified. It is essential to
follow these instructions in order to prevent accidents and damage to property.
Symbol Significance
CAUTION This marking warns of a potentially dangerous
situation in which failure to comply with safety
requirements can result in slight or moderate physical
injury.
Notice This marking draws your attention to a situation in
which failure to comply with safety requirements can
lead to damage to property.
Emphasis
See….
Italics are used to emphasize and highlight text and
references to other chapters and external documents.
2.2 Symbols on the product
CE mark
The CE mark enables the manufacturer to guarantee that
the product complies with the requirements of the rele
vant EC directives (the declaration of conformity is avail
able at http://www.hbm.com/HBMdoc).
Statutory marking requirements for waste disposal
National and local regulations regarding the protection of
the environment and recycling of raw materials require
old equipment to be separated from regular domestic
waste for disposal.
For more detailed information on disposal, please contact
the local authorities or the dealer from whom you pur
chased the product.

Application
6A4776-1.0 HBM: public T21WN
3 Application
Torque transducer T21WN measure static and dynamic torque and rotation
speeds or angles of rotation for turning or static machine parts in any direction
of rotation. It is designed for small to medium‐sized torque, such as that
measured on performance or function test benches for domestic or business
machines.

Installation
T21WN A4776-1.0 HBM: public 7
4 Installation
4.1 Installation position
Any installation position can be chosen for torque transducer (see
Chapter 4.3.1).
4.2 Installation options
CAUTION
The permissible load limits given in the specifications (see Page 20) are
mandatory.
ÈÈ
ÈÈ
ÈÈ
ÈÈÈÈÈÈÈ
ÈÈÈÈÈÈÈ
ÈÈÈÈÈÈÈ
ÈÈ
ÈÈÈ
F
Base mounting
between two full
couplings1)
Front mounting,
full coupling on the
right 2)-belt drive on
the left
1) HBM accessories: bellows‐type couplings. You will need two of these couplings.
2) HBM accessories: bellows‐type couplings. You will need one of these couplings.
Fig. 4.1 Installation options with couplings

Installation
8A4776-1.0 HBM: public T21WN
4.3 Couplings
HBM supplies bellows‐type couplings for the installation of torque transducers.
When prepared for delivery, the couplings and the torque transducer are kept
separate. The following points must be observed during installation:
SOnly tighten the clamping screws of the couplings once the shafts are
installed in the coupling hubs!
SThe bellows‐type coupling must not be overstretched beyond the specified
permissible flexibility.
SDrive and output shafts must be without burr.
SRun the shaft diameter with j6 tolerance, to produce the preferred fit H7/j6.
4.3.1 Installation position with couplings
With the bellows‐type couplings, the T21WN torque transducer can be oper
ated in any installation position (horizontal, vertical or diagonal). With vertical
and diagonal operation, make sure that additional frames are adequately sup
ported.
4.3.2 Installation
1. Degrease the hub bore of each coupling half member and the shaft ends
with solvent (for example, acetone).
2. Push the hub onto the shaft, set the reference gap L (making use of the full
clamping length of the coupling) and align the shafts.
3. Tighten the clamp element clamping screws with a torque wrench (for the
required tightening torque, see Tab. 4.1).
CAUTION
When installing the coupling, you must not exceed the permissible axial and
lateral forces or bending limit moments of the torque transducer!
When tightening the clamping screws, hold the coupling on the clamp element.

Installation
T21WN A4776-1.0 HBM: public 9
Measuring range Tightening torque
(N·m) (N·m)
0.1
0.35
0.2
0.5
10.75
2
51.5
10
20 14
50 35
100 75
200 120
Tab. 4.1 Tightening torque of the clamping screws

Electrical connection
10 A4776-1.0 HBM: public T21WN
5 Electrical connection
5.1 General instructions
We recommend to use shielded, low-capacitance cable from HBM for the elec
trical connection between torque transducer and measuring amplifier.
With cable extensions it is important to ensure that a good connection is pro
vided, with minimum contact resistance and good insulation. All plug connec
tions or cap nuts have to be tightened firmly.
Do not route measurement cables in parallel to power lines and control circuits.
If this is not possible (for example in cable ducts), maintain a minimum dis
tance of 50 cm and protect the cable with a steel tube.
Avoid transformers, motors, contactors, thyristor controllers and similar
sources of stray fields.
5.2 Connector
The transducer is equipped with a permanent housing connector.
It can be connected to the relevant measurement electronics by using the
transducer connection cable (accessories, see Page 25). The pin assignment
for the transducer connection cable can be found in the following table:

Electrical connection
T21WN A4776-1.0 HBM: public 11
A
B
C
D
E
F
G
J
H
L
M
K
Pin Pin assignment Wire
colour
Bridge
Switch
(NO)
Release cali
bration signal
(without
VK20A)
ATorque measurement signal
(frequency output; 5V)1)2) BK
BMeasurement signal speed/
angle of rotation 5 V
RD
CMeasurement signal torque
"10 V
BN
DMeasurement signal torque
0 V
WH
EGround (supply+speed/
angle of rotation)
YE
FSupply voltage
+10 V … 28.8 V
VT
GMeasurement signal speed/
angle of rotation 5 V, 90°
phase shifted
GN
HNo function PK
JMeasurement signal - ready
for measurement
GY
KControl signal trigger GY/PK
LTorque measurement signal
(frequency output; 5V)1)2) BU/RD
MVoltage reference for rota
tional speed/angle 3) BU
1) RS-422 complementary signals; with cable lengths exceeding 10m, we recommend using a
termination resistor R = 120 ohms between the wires (bk) and (bu/rd)
2) RS-422: Pin A corresponds to A, pin L corresponds to B
3) Without an external voltage reference the output for rotational speed output, angle and ready for
measurement returns a TTL level. If higher levels are required (for PLC inputs, etc.), a voltage
reference 5V<U<24V can be assigned via pin M.

Electrical connection
12 A4776-1.0 HBM: public T21WN
Control (pin K) Torque (pin C)
Torque ground (pin D)
Frequency output (pin A)
Frequency output (pin L)
Rotational speed output (pin G)
(optional)
Angle of track A (pin G) (optional)
Angle of track B (pin B) (optional)
The supply ground and torque
ground can be joined at the
source if necessary
Reference voltage of angle (pin M)
optional increase in level of the angle and
rotational speed output to 5 V < U < 24 V
Type
Measuring range
Input and output voltage
Serial number
Supply (pin F)
Supply ground (pin E)
Nm
Nm
rpm
degr.
U=U=
Fig. 5.1 T21WN connection diagram
The transducer generates an internally galvanically isolated measurement
signal. The grounds must not be bridged directly on the transducer, otherwise
measurement errors may occur depending on the supply and analysis device.
If necessary they can be bridged on the supply and analysis device. The
"control signal" is used to test the transducer. It produces a maximum signal of
+10 V, for example (with clockwise load). The modulation level is 4.5 V up to
the supply voltage. The reference voltage is the supply ground.
The transducer has a ready for measurement signal. If the output is returning a
HIGH level, normally the measurement electronics are working. With a LOW
level there is an error.
5.3 Cable extension
Extension cables must be the shielded, low‐capacitance type. We recommend
the use of HBM cables that comply with these requirements.

Electrical connection
T21WN A4776-1.0 HBM: public 13
When using cable extensions, ensure that the connection is perfect, with the
lowest possible contact resistance and good insulation. For this reason all
connections should be soldered, or at the very least should use firmly fixed
terminals or screwed connectors.
Measurement cables should not be laid parallel to high‐voltage lines or control
circuits (and therefore should not be laid in common cable shafts). If this is not
possible, protect the measurement cable with, for example, armoured steel
tubing and keep them as far away as possible from other cables. Avoid the
stray fields of transformers, motors and contactors.
Notice
At the maximum rotational speed of 20,000 rpm the cable length is limited to
maximum 10 m.
5.4 Shielding design
The cable shielding is connected in accordance with the Greenline concept.
This encloses the measurement system in a Faraday cage. It is important that
the shield is laid flat on the housing ground at both ends of the cable. Any
electromagnetic interference active here does not affect the measurement
signal.
In the case of interference caused by differences in potential (compensating
currents), separate the connections between the zero operating voltage and
the housing ground on the measuring amplifier and connect a potential
equalisation line between the transducer housing and the amplifier housing
(copper wire, 10 mm2conductor cross‐section).

Load‐carrying capacity
14 A4776-1.0 HBM: public T21WN
6 Load‐carrying capacity
The torque transducer T21WN is suitable for measuring static and dynamic
torque.
Nominal torque can be exceeded statically up to the limit torque. If nominal
torque is exceeded, additional irregular loading is not permissible. This includes
longitudinal forces, lateral forces and bending moments. Limit values can be
found in chapter 10 ”Specifications”, page 20.
6.1 Measuring dynamic torque
The following applies to the measurement of dynamic torque:
SThe calibration carried out for static torque also applies for dynamic torque
measurement.
Notice
The frequency of the dynamic torque must be lower than the natural frequency
of the mechanical measuring system.
SThe natural frequency f0of the mechanical measuring system depends on
the moments of inertia J1and J2of the coupled rotating masses and de
pends on the torsional stiffness of the transducer.
The natural frequency f0of the mechanical measuring system can be
determined from the following equation.
f0+1
2p· cT·ǒ1
J1
)1
J2ǓǸf0= Natural frequency in Hz
J1, J2= Moment of inertia in kg⋅m2
cT= Torsional stiffness in N⋅m/rad
SThe vibration bandwidth (peak‐to‐peak) must not exceed 80 % of the
nominal torque identified for the torque transducer, even at alternating load.
In all cases the vibration bandwidth must lie within the loading range defined
by -MNand +MN.

Load‐carrying capacity
T21WN A4776-1.0 HBM: public 15
+MN100
-MN100
0
45
35
torque MNin %
80 % MN
vibration bandwidth
Lower torque limit
Upper torque limit
Fig. 6.1 Permissible dynamic loading
6.2 Rotation speed
A slotted disk is installed on the loaded member. It is sampled with an encoder
in the enclosure. The T21WN returns two square wave signals to the output
offset by 90° with 360 pulses/ revolution. Detection of the direction of rotation is
possible with this angle. With clockwise rotation, channel A is 90° ahead
compared to channel B.

Load‐carrying capacity
16 A4776-1.0 HBM: public T21WN
U (5 V)
Channel A
(Pin G)
Channel B
(Pin B)
U (5 V)
t
t
Notice
Torque transducer T21WN allows torque measurements up to a rotational
speed of 20,000 rpm and rotational speed measurements up to 20,000 rpm.
When used with couplings the rotational speed is limited to 10,000 rpm.

Displaying torque and direction of rotation
T21WN A4776-1.0 HBM: public 17
7 Displaying torque and direction of rotation
Torque
If a clockwise torque is introduced, a positive output signal from 0...+10 V or
+15 kHz is present.
Direction of rotation
The sign on the display indicates the direction of rotation. With HBM measuring
amplifiers, the output voltage or display is positive, if the transducer shaft is
turning clockwise, looking at the measuring side.
Measuring side
mark
Fig. 7.1 Direction of rotation for positive display

Maintenance
18 A4776-1.0 HBM: public T21WN
8 Maintenance
Torque transducer T21WN is largely maintenance free. We recommend that
the low‐friction special bearing should be replaced at the Darmstadt factory,
after approx. 20 000 working hours. The calibration will also be checked at this
time.
Table of contents
Languages:
Other HBM Transducer manuals
Popular Transducer manuals by other brands

Humminbird
Humminbird PIRANHAMAX 4 install guide

Thinkrace
Thinkrace VT460 user manual

Spectris
Spectris HBM U2B Mounting instructions

Gems Sensors & Controls
Gems Sensors & Controls 4000K Series Operating & installation instructions

Gems
Gems 2200 Series Operating & installation instructions

Emerson
Emerson Rosemount 3051 Reference manual