DR. JOHANNES HEIDENHAIN GmbH
Technical
support,
measur
ing
systems
+49
8669
31
-31
04
.
E-mail:
ser
[email protected] 1100268-92 · Ver02 · Printed in Germany · 12/2020 · H *I1100268-92*
Incremental rotary encoder without Integral Bearing.
Inkrementale Drehgeber ohne Eigenlagerung.
Capteur rotatif incrémental sans roulement.
Trasduttore rotativo incrementale senza cuscinetto proprio.
Generadores rotativos de impulsos incremental sin
rodamiento propio.
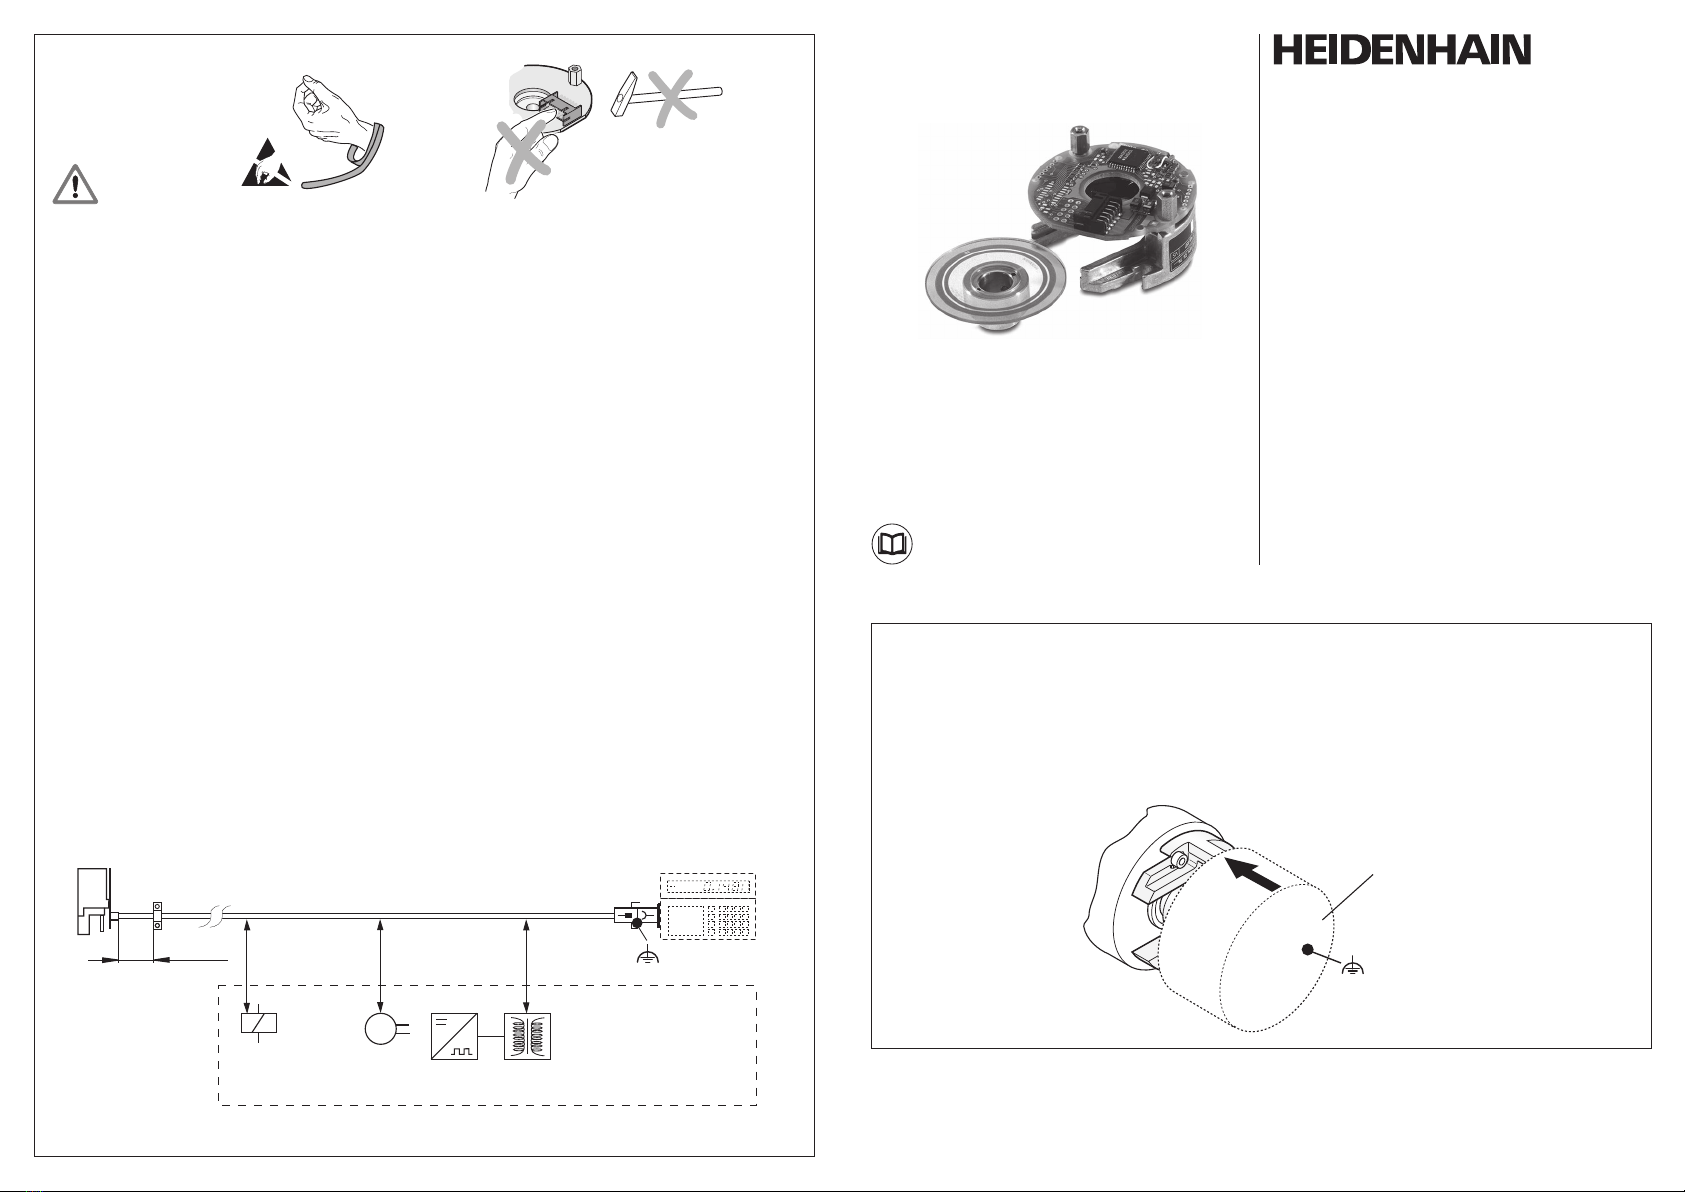
Noise sources
Störquellen
Sources parasites
Origine del disturbo
Fuentes de interferencias
M
ERO 1225
ERO 1285
WELLA1: 34x
FLANA1: 30
ANELA1: 87S12
BELEA1: 30
www.heidenhain.de/documentation 12/2020
Mounting Instructions
Montageanleitung
Instructions de montage
Istruzioni di montaggio
Instrucciones de montaje
Note: Mounting and commissioning is to be conducted by a qualified specialist under compliance with local
safety regulations.
In addition to this, the machine manufacturer or designer himself must define the other data required for final
assembly (e.g. anti-rotation lock for screws required or not) for the respective application.
Do not engage or disengage any connections while under power.
The system must be disconnected from power.
Achtung: Die Montage und Inbetriebnahme ist von einer qualifizierten Fachkraft unter Beachtung der
örtlichen Sicherheitsvorschriften vorzunehmen.
Zusätzlich muss der Maschinenhersteller/-konstrukteur die erforderlichen weiteren Angaben zur Endmontage
(z.B. Losdrehsicherung für Schrauben ja/nein) für die jeweilige Anwendung selbst festlegen.
Die Steckverbindung darf nur spannungsfrei verbunden oder gelöst werden.
Die Anlage muss spannungsfrei geschaltet sein!
Attention: le montage et la mise en service doivent être assurés par un personnel qualifié dans le respect
des consignes de sécurité locales.
D’autre part, le fabricant/constructeur de la machine doit définir d’autres données nécessaires au montage
final (p.ex. sécurité frein de vis oui/non) pour l´application respective.
Le connecteur ne doit être connecté ou déconnecté qu’hors potentiel.
L’équipement doit être connecté hors potentiel!
Attenzione: Il montaggio e la messa in funzione devono essere eseguite da personale qualifucato nel rispetto
delle norme di sicurezza locali.
Inoltre, il costruttore della macchina deve definire le ulteriori procedure necessarie per completare il montaggio
(ad esempio: sicurezza allentamento viti sì/no) di ogni specifica applicazione.
I cavi posso essere collegati o scollegati solo in assenza di tensione.
L’impianto deve essere spento!
Atención: El montaje y la puesta en marcha deben ser realizados por un especialista cualificado, observando
las prescripciones locales de seguridad.
Adicionalmente, el fabricante/constructor de la máquina debe determinar él mismo el resto de indicaciones
requeridas para el montaje final para cada aplicación en particular (p.ej., seguro antigiro para tornillos sí/no).
Conectar o desconectar el conector sólo en ausencia de tensión.
¡La instalación debe ser conectada en ausencia de tensión!
Warnings
Warnhinweise
Avertissements
Avvertenze
Advertencias
(protective cap)
(Schutzkappe)
(capot de protection)
(Protezione)
(Tapa de protección)
The electromagnetic compatibility of the complete system must be ensured.
Die elektromagnetische Verträglichkeit muss im Gesamtsystem sichergestellt werden.
La compatibilité électromagnétique doit être garantie à l’échelle du système global.
La compatibilità elettromagnetica deve essere assicurata nell’intero sistema
La compatibilidad electromagnética debe estar garantizada en la totalidad del sistema.
0.5 m


