manuals.online logo
Brands
  1. Home
  2. •
  3. Brands
  4. •
  5. Himolla
  6. •
  7. Indoor Furnishing
  8. •
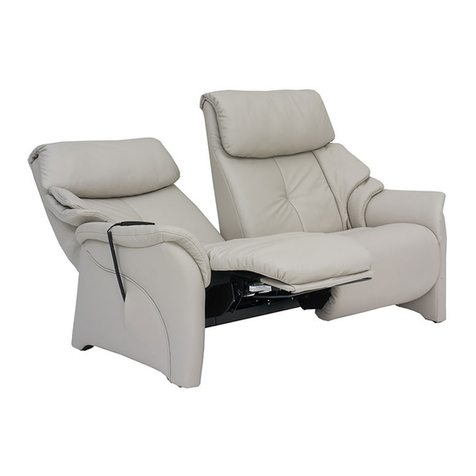
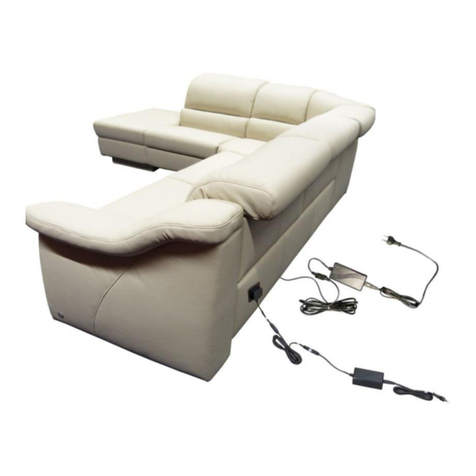
  9. Himolla AZURE 4080 User manual

Himolla AZURE 4080 User manual

07.12.2022_Ver.2.2_HR
LM: 29000 24
Montagematerial,Assembly material,Matériel de montage
Inhaltsverzeichnis / Table of Contents / Contenu
LM
2900024
Montagezeit ca. --- Min.
Assembly time / Temps de montage 21.1.19
letzte Änderung Version Kürzel Seite
1.0 HR 2/17
Modellart / model type / Type de modèle Seite / Side / Page
4
Seite / Side / Page
Modellart / model type / Type de modèle
Montage,Assembly, Montage
5 - 741, 42, 80,81, 82,
8 -1141,42, 80, 81, 82, Z87, Z89,
12 -13
41, 42,
Seite / Side / PageModellart / modeltype / Type de modèle
Funktionskontrolle, Functional check,Contrôle du fonctionnement
14
•Bei nicht vorschriftsgemäßer und/oderfachgerechter Montage sowie unsachgemäßerNutzungwird bei Personen-
oder Sachschadenkeinerlei Haftung übernommen!
•Wir empfehlen die Montage nur durch fachkundigesPersonal.
•Die Montageanleitungund demontierteBauteile sollten aufbewahrt werden.
•Bei veränderter Zusammenstellungkann sich die Montagezeit verändern.
•Am Aufstellort muss für eine geeignete Unterlage gesorgt werden, damitbei der Montage der Bodenbelagnicht
beschädigtwird.
•AchtenSie bei der Montage darauf, dass Sie das Bezugsmaterial des Möbels nicht beschädigen.
•No liability can be assumed for personal injury or material damagein theevent of incorrect and/or unprofessional
assembly or improper use.
•Werecommend that the assembly only be carried out by competentpersonnel.
•The assembly instructionsand disassembled componentsshould be kept for future reference.
•The assembly time may differ with a different configuration.
•A suitable underlaymust be provided at the installation site so that the floor covering is not damaged during
installation.
•During assembly, make sure that you do not damagethe cover material of the furniture.
• Aucune responsabilité n’est assumée pour les dommages corporels ou matériels éventuels en cas de montage non
conforme aux instructions et/ou inapproprié ainsi qu’en cas d’utilisation abusive.
•Nous recommandonsde faire réaliser le montagepar du personnelqualifié.
•Le manuelde montageet les pièces démontéesdoivent être conservés.
• Le temps de montage peut varier en cas d’assemblage différent.
•Merci de placer uneprotection de sol adaptée afin de ne pas endommagerle sol pendantle montage.
•Faire attention de ne pas endommager le revêtement du meublependantle montage.
Seite / Side / Page
Datum
07.12.22
Version Kürzel Seite
2.2 HR 2/14
Modellart / model type / Type de modèle
Auspacken, Unpacking,Déballage
3
Seite / Side / Page
•Verpackungmit einem nicht spitzen
Gegenstandöffnen z.B. Folienschneider
•Open packagingwith a device thatis not
pointed or sharp, e.g. a foil cutter
• Ouvrir l’emballage à l’aide d’un outil non-
pointu (p.e. un découpeplastique)
Montageanleitung
Assembly instructions/ Manuel de montage
LM
2900024
Montagezeit ca. 10 Min.
Assembly time / Temps de montage
Datum
07.12.22
Version Kürzel Seite
2.2 HR 3/14
Auspacken, Unpacking,Déballage
•Schraubenfür die Montage der Elemente
sind mit der Nummer 85…55
gekennzeichnet.
•Schraubenfür die Fuss-Kufen Montage
sind mit der Nummer 85…56
gekennzeichnet.
•Screws to assemble the elements are
marked with the number85…55.
•Screws to assemble the feet-runners are
marked with the number85…56.
•Les vis servant au montagedes éléments
sont identifiées par le numéro 85…55.
•Les vis servant au montagedes
patins/piedssont identifiées par le numéro
85…56.
•Je nach Zusammenstellungihrer Garnitur
verändert sich das Montagematerial des
Beipack Kartons.
•Die Fuss-Kufen Montageanleitungbefindet
sich in diesem Karton.
•The assembly material in the accessories
box differs depending on the configuration
of your furniture.
•The assembly instructionsfor the feet-
runnerscan be found in this box.
•Le matériel de montage présentdans le
carton d’accessoires varie en fonction de la
configuration du meuble.
•La notice de montage des patins/piedsse
trouve dans ce carton.
•In dem Zubehörkartonbefinden sich Füße,
Kufen unddas Montagematerial je nach
ihrer Zusammenstellung.
•Feet, runners and the assembly material
can be found in the box of accessories
dependingon the configuration.
•Ce carton d'accessoires contient les pieds,
les patins et le matériel de montage
correspondant à la configuration du
meuble.
Montageanleitung
Assembly instructions/ Manuel de montage
LM
2900024
Montagezeitca. Min.
Assembly time / Temps de montage
Datum
07.12.22
Version Kürzel Seite
2.2 HR 4/14
Montagematerial,Assembly material, Matériel de montage
•Wenn vorhanden, Kabelbinder lösen und
Transportplatte nach untenschieben.
•Schutzfolie entfernen
•Loosen cable ties, where present, and push
transport plate down.
•Remove protective film
•Le cas échéant,retirer les serre-câbles et
déplacer la plaquede transport vers le bas.
•Retirer le film de protection
•Element auf den Rücken drehen.
•Place the element on its back.
• Tourner l‘élément sur le dos.
8500055
Montagezubehör,
mounting accessories
Matériel de montages
Nr. / No / N°Größe / Size / Taille
1813300
M7 x 60
mitgeliefertes Material / Material included / Matériel fourni
L u. P Schraube
Montageanleitung
Assembly instructions/ Manuel de montage
41,42,80,81,82,
LM
2900024
Montagezeit ca. 25 Min.
Assembly time / Temps de montage
Datum
07.12.22
Version Kürzel Seite
2.2 HR 5/14
Montage,Assembly, Montage,
•Führungsbolzenauf beiden Seiten in die
vorgesehene Öffnung einführen.
•Mitgelieferte Schraubendurch das Chassis
mit der Sitz-Rückeneinheit auf beiden
Seiten verschrauben.
•Insert guidebolts into the designated holes
on both sides.
•Screw enclosed bolts through the chassis
into the seat back unit on both sides.
•Insérer les boulons de guidage des deux
côtés dans l’ouverture prévue.
•Visser les vis fournies dans le châssis avec
l’unité assise-dossier des deux côtés.
•Sitzeinheit mit 2 Personen einhängen.
•Assembleseat element with 2 people.
• Accrocher l’élément d’assise à 2
personnes.
•Wenn vorhanden, die gleichen Aufkleber
zum richtigen montieren beachten.
•If present, observe the related stickers for
correct mounting.
•S'il y a lieu, observer les mêmes
autocollants pour un montage correct.
41,42,80,81,82,,
LM
2900024
Montagezeit ca. 25 Min.
Assembly time / Temps de montage
Datum
07.12.22
Version Kürzel Seite
2.2 HR 6/14
Montageanleitung
Assembly instructions/ Manuel de montage
•Stecker am Motor verbinden.
•Connect the plug to themotor.
•Brancher la fiche au moteur.
•Kabelbinderentfernen.
•Zur besseren Montage, Beschlag an der
markierten Strebeanfassen.
•Remove the cable ties.
•Grasp the mechanismby the strut for
easier assembly.
• Retirer l’attache de câble.
•Pour simplifier le montage, saisir la ferrure
au niveau de l’entretoise marquée en
rouge.
41,42,80,81,82,
LM
2900024
Montagezeit ca. 25 Min.
Assembly time / Temps de montage
Datum
07.12.22
Version Kürzel Seite
2.2 HR 7/14
Montageanleitung
Assembly instructions/ Manuel de montage
•Element auf denRücken legen und die
WellpappeKlötze unterlegen.
•Für Montagevideo QR –Code Scannen.
•Putthe element into the back, and place
corrugated cardboard blocks beneath it.
•Scan the QR code for an assembly video.
• Positionner l’élément sur le dossier et
placer les blocs de carton ondulédessous
•Scannerle code QR pour voir la vidéo de
montage.
Stück / Piece / PièceNr. / No / N°Größe / Size / Taille
1208002
1208005
85 mm
105mm
1408301
240x160x55
mitgeliefertes Material / Material included / Matériel fourni
Wellpappe-Klotz
Corrugated cardboard block
Bloc de carton ondulé
StützFuß
ab einer Chassis breite
von 1,5m
Montagezubehör,
mounting accessories
Matériel de montages
Nr. / No / N°Größe / Size / Taille
1152900
M10
1195700
M8 8500355
2982200M10
mitgeliefertes Material / Material included / Matériel fourni
Ansatzschraube
Motorbolzen
SicherungMotorbolzen
Montageanleitung
Assembly instructions/ Manuel de montage
41, 42, 80,81, 82,
Z87, Z89,
LM
2900024
Montagezeit ca. 35 Min.
Assembly time / Temps de montage
Datum
07.12.22
Version Kürzel Seite
2.2 HR 8/14
Montage,Assembly, Montage,
•Sitzeinheit mit 2 Personen einhängen.
•Assembleseat element with 2 people.
• Accrocher l’élément d’assise à 2
personnes.
•Wenn vorhanden, die gleichen Aufkleber
zum richtigen montieren beachten.
•If present, observe the related stickers for
correct mounting.
•S'il y a lieu, observer les mêmes
autocollants pour un montagecorrect.
•Wenn vorhanden, Kabelbinder lösen und
Transportplatte nach untenschieben.
•Schutzfolie entfernen
•Loosen cable ties, where present, and push
transport plate down.
•Remove protective film
•Le cas échéant,retirer les serre-câbles et
déplacer la plaquede transport vers le bas.
•Retirer le film de protection
Montageanleitung
Assembly instructions/ Manuel de montage
41, 42, 80,81, 82,
Z87, Z89,
LM
2900024
Montagezeit ca. 35 Min.
Assembly time / Temps de montage
Datum
07.12.22
Version Kürzel Seite
2.2 HR 9/14
•Stecker am Motor verbinden.
•Wenn vorhanden, Stützfuß eindrehen
•Connect the plug to themotor.
•Screw in the supportfoot, where present.
•Brancher la fiche au moteur.
•Le cas échéant,visser le pieds de support.
•Beim Vierkanteisen die Schraubevon innen
nach außen schrauben.
•Beim Rundeisendie Schraubevon außen
nach innen schrauben.
•Fit thescrews from theinside outwards on
the square bars.
•Fit thescrews from theoutside inwards on
the round bars.
•Sur les fers carrés, visser la vis de
l’intérieur vers l’extérieur.
•Sur les fers ronds,visser la vis de
l’extérieur vers l’intérieur.
•Kabelbinderentfernen.
•Zur besseren Montage, Beschlag an der
Weiß markierten Strebe anfassen.
•Remove the cable ties.
•Grasp the mechanismby the white strut for
easier assembly.
• Retirer l’attache de câble.
•Pour simplifier le montage, saisir la ferrure
au niveau de l’entretoise marquée en blanc.
Montageanleitung
Assembly instructions/ Manuel de montage
41, 42, 80,81, 82,
Z87, Z89,
LM
2900024
Montagezeit ca. 35 Min.
Assembly time / Temps de montage 21.1.19
letzte Änderung Version Kürzel Seite
4.0 HR 6/19
Datum
07.12.22
Version Kürzel Seite
2.2 HR 10/14
•Den Absenkmotor an der markierten Strebe
fahren bis Bohrungvon Motor und
Beschlagin gleicher Position ist.
•Bolzen durchsteckenundanschließend
Stecksicherungaufstecken.
•Move the lowering motor by the marked
strut, untilthe holes on the motor and the
fitting are aligned.
•Insert the bolt and then fit the fastener.
• Déplacer le moteur d’abaissement sur
l’entretoise marquée jusqu’à ce que les
perçages du moteur et de la ferrure soient
dans la mêmeposition.
•Enficher les boulonspuis insérer la fixation.
•Absenkmotormit der mittleren
Tastenfunktion in Position fahren.
•Vorsicht Verletzungsgefahr
•Move lowering motor into position using the
middlebutton.
•Caution: Risk of injury
• Placer le moteur d’abaissement en position
à l’aide du bouton central.
•Prudence : risque de blessure
Montageanleitung
Assembly instructions/ Manuel de montage
41, 42, 80,81, 82,
Z87, Z89,
LM
2900024
Montagezeit ca. 35 Min.
Assembly time / Temps de montage 21.1.19
letzte Änderung Version Kürzel Seite
4.0 HR 6/19
Datum
07.12.22
Version Kürzel Seite
2.2 HR 11/14
•Gewindestifte mit dem kurzen Gewinde in
die Platte eindrehen.
•Gewindestifte undKabel in die
vorgesehenen Bohrungenbeim Ablagetisch
schieben.
•Screw the short thread of the grub screw
into the table surface.
•Pushthe grub screws and cables into the
designateddrilled holes in the table.
•Visser les tiges filetées avec le filetage
court dans la plaque.
•Introduireles tiges filetées et câbles dans
les perçages de la tablette prévusà cet
effet.
•Nach Einbau der Sitze.
•Element auf den Rücken drehen.
•Nessel beim Ablagetischöffnen.
•After installing the seats
•Place the element on its back.
• Open the table’s calico flap.
•Après le montage des assises.
• Tourner l‘élément sur le dos.
•Ouvrir la toile sur la tablette.
8502055
Montagezubehör,
mounting accessories
Matériel de montages
Nr. / No / N°Größe / Size / Taille
2972400
M8 x 70
1762300
M8
29342008,4 x 25
mitgeliefertes Material / Material included / Matériel fourni
Sechskantmutter
Gewindestift
Unterlegscheibe
Montageanleitung
Assembly instructions/ Manuel de montage
41, 42,
LM
2900024
Montagezeit ca. 20 Min.
Assembly time / Temps de montage
Datum
07.12.22
Version Kürzel Seite
2.2 HR 12/14
Montage,Assembly, Montage,
Montagezeit ca. 20 Min.
Assembly time / Temps de montage
•Alle vorhandenen Stecker verbinden.
•Nessel am Klettbandschließen.
•Connect all of the plugs, where present.
•Close the Velcro fastener on the calico flap.
•Connecter toutes les fiches fournies.
•Fermer la toile au niveau de la bande
Velcro.
•Jeden Gewindestift mit Unterlegscheibe
undMutter montieren und festziehen.
•Fit each grub screw with a washer and
tighten.
•Monter et serrer chaquetige filetée à bloc
avec unerondelle et un écrou.
Montageanleitung
Assembly instructions/ Manuel de montage
41,42,
LM
2900024 07.12.22
Datum Version Kürzel Seite
2.2 HR 13/14
•Funktionskontrollebei allen Elementen
ohne Belastungdurchführen
•Überlastungen auf der Beinauflage führen
zu Beschädigungen
•Please conduct the function control for all
elements without load
•Overloading on the footrest will result in
damages
•Tester tous les élémentssans pression
•Une surcharge sur le repose-pieds peut
entrainer des dommages
•Netzverbindungherstellen
•Connect to the mains
•Brancher le raccordement secteur
•Alle Stützfüßenachstellen bis
Bodenkontaktvorhanden ist, bzw.
Spaltmaßeanpassen.
•Adjustall supportfeet untilthey make
contact with the floor and/or adjust the
clearances.
• Régler tous les pieds de support jusqu’à ce
qu’ils soient en contact avec le sol ou
ajuster l’écartement.
Montageanleitung
Assembly instructions/ Manuel de montage
LM
2900024
Montagezeit ca. 10 Min.
Assembly time / Temps de montage 21.1.19
letzte Änderung Version Kürzel Seite
4.0 HR 13/19
Funktionskontrolle, Functional check,Contrôle du fonctionnement
Datum
07.12.22
Version Kürzel Seite
2.2 HR 14/14

This manual suits for next models

1

Other Himolla Indoor Furnishing manuals

Himolla 29000 33 User manual

Himolla

Himolla 29000 33 User manual

Himolla TANGRAM SOFA 9065 User manual

Himolla

Himolla TANGRAM SOFA 9065 User manual

Himolla 29000 34 User manual

Himolla

Himolla 29000 34 User manual

Himolla 29111 48 User manual

Himolla

Himolla 29111 48 User manual

Himolla 29000 20 80 User manual

Himolla

Himolla 29000 20 80 User manual

Himolla LM 29111 46 User manual

Himolla

Himolla LM 29111 46 User manual

Himolla SIGNA 1051 User manual

Himolla

Himolla SIGNA 1051 User manual

Himolla 29000 38 User manual

Himolla

Himolla 29000 38 User manual

Himolla LM 29111 48 User manual

Himolla

Himolla LM 29111 48 User manual

Himolla Planopoly Motion User manual

Himolla

Himolla Planopoly Motion User manual

Himolla Z87 User manual

Himolla

Himolla Z87 User manual

Himolla LM 29111 25 User manual

Himolla

Himolla LM 29111 25 User manual

Himolla Tangram Motion Series User manual

Himolla

Himolla Tangram Motion Series User manual

Himolla 29000 25 User manual

Himolla

Himolla 29000 25 User manual

Himolla Cumuly Comfort 29111 43 User manual

Himolla

Himolla Cumuly Comfort 29111 43 User manual

Himolla Easy Comfort Series User manual

Himolla

Himolla Easy Comfort Series User manual

Himolla 7568 User manual

Himolla

Himolla 7568 User manual
Himolla Lounger Series User manual

Himolla

Himolla Lounger Series User manual

Himolla CUMULY 4928 User manual

Himolla

Himolla CUMULY 4928 User manual

Himolla 29111 35 User manual

Himolla

Himolla 29111 35 User manual

Himolla SIGNA 1052 User manual

Himolla

Himolla SIGNA 1052 User manual

Himolla LM 29000 01 User manual

Himolla

Himolla LM 29000 01 User manual
Popular Indoor Furnishing manuals by other brands

Songmics VASAGLE KDT75 quick start guide

Songmics

Songmics VASAGLE KDT75 quick start guide

Kingfisher 3663602637578 manual

Kingfisher

Kingfisher 3663602637578 manual

Next STANTON Assembly instructions

Next

Next STANTON Assembly instructions

DHP DA038-CH manual

DHP

DHP DA038-CH manual

Kvik PU760 manual

Kvik

Kvik PU760 manual

GHARiENi 601 instruction manual

GHARiENi

GHARiENi 601 instruction manual

Seville Classics AirLift OFF65856 manual

Seville Classics

Seville Classics AirLift OFF65856 manual

Face KAF212 installation manual

Face

Face KAF212 installation manual

Forte NYLB30 Assembling Instruction

Forte

Forte NYLB30 Assembling Instruction

Little Partners DELUXE LEARN AND PLAY ART CENTER LP0280 (R2) manual

Little Partners

Little Partners DELUXE LEARN AND PLAY ART CENTER LP0280 (R2) manual

Safavieh Furniture FOX8209A quick start guide

Safavieh Furniture

Safavieh Furniture FOX8209A quick start guide

EXPEDO COLORADO S1K6 Assembly manual

EXPEDO

EXPEDO COLORADO S1K6 Assembly manual

Jysk STOCKHOLM 5204202 quick start guide

Jysk

Jysk STOCKHOLM 5204202 quick start guide

Schreiber Windsor 615/0387 Assembly lnstructions

Schreiber

Schreiber Windsor 615/0387 Assembly lnstructions

Manhattan Comfort Viennese Sideboard Assembly instructions

Manhattan Comfort

Manhattan Comfort Viennese Sideboard Assembly instructions

BDI 8239 Assembly instructions

BDI

BDI 8239 Assembly instructions

Madeli B930-36-002 series Specication & installation guide

Madeli

Madeli B930-36-002 series Specication & installation guide

MultiTable FlexTable Assembly manual

MultiTable

MultiTable FlexTable Assembly manual

manuals.online logo
manuals.online logoBrands
  • About & Mission
  • Contact us
  • Privacy Policy
  • Terms and Conditions

Copyright 2025 Manuals.Online. All Rights Reserved.