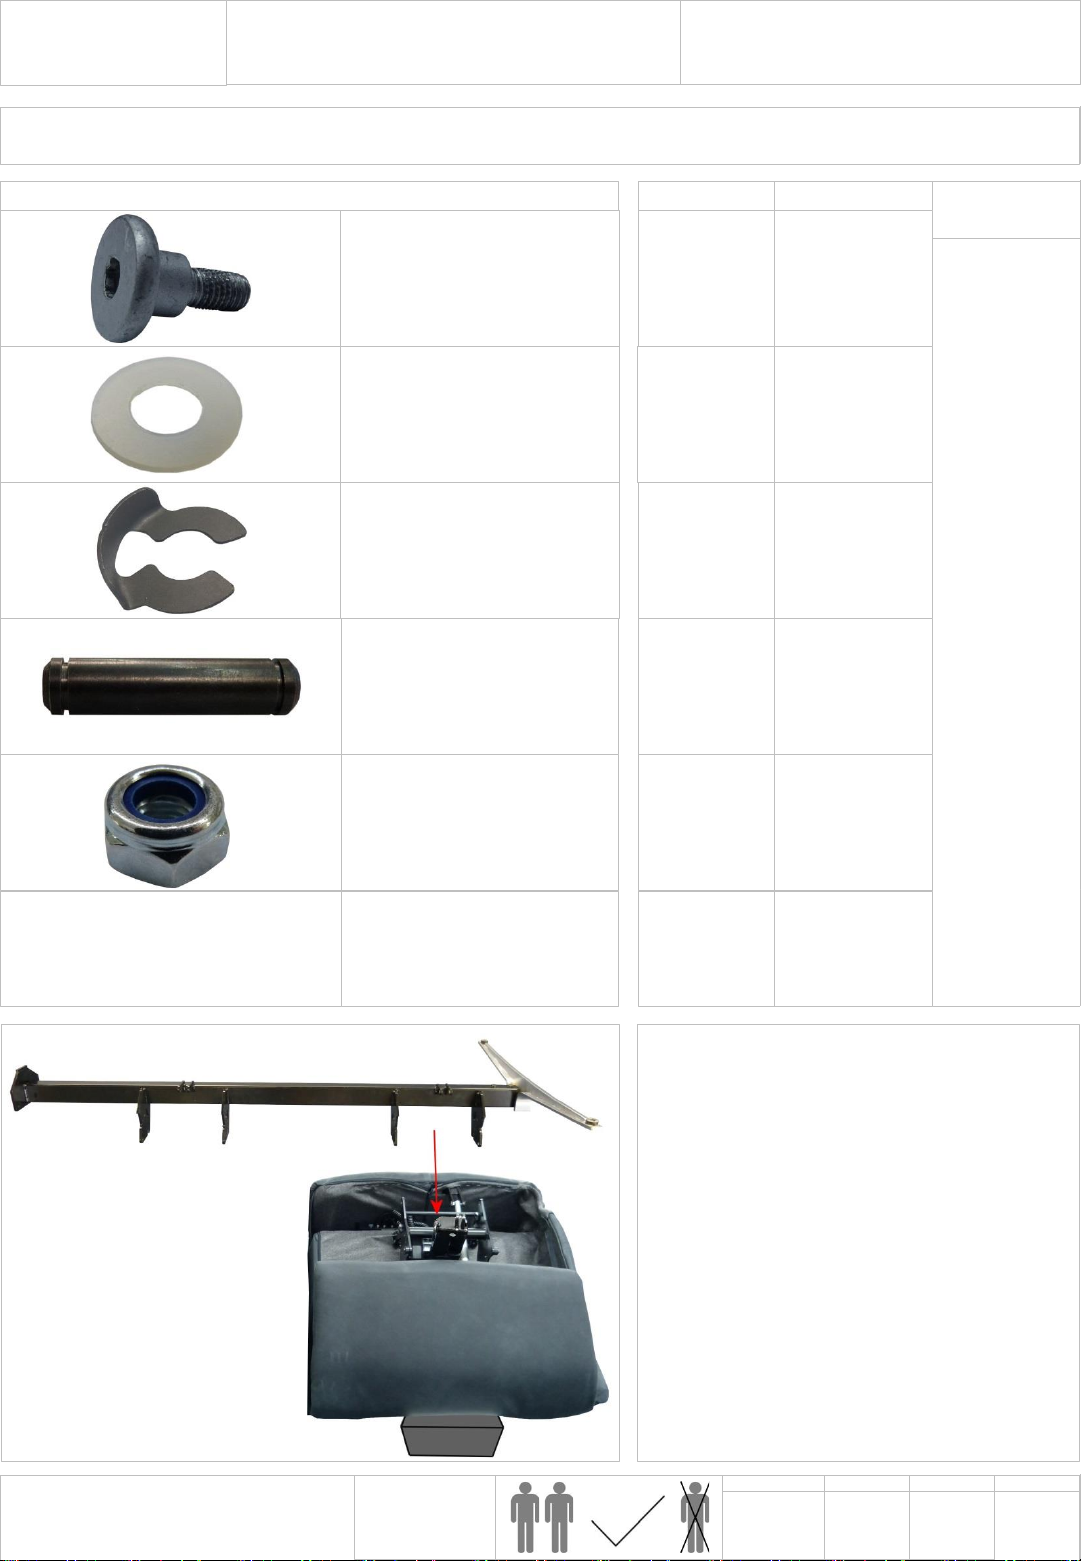
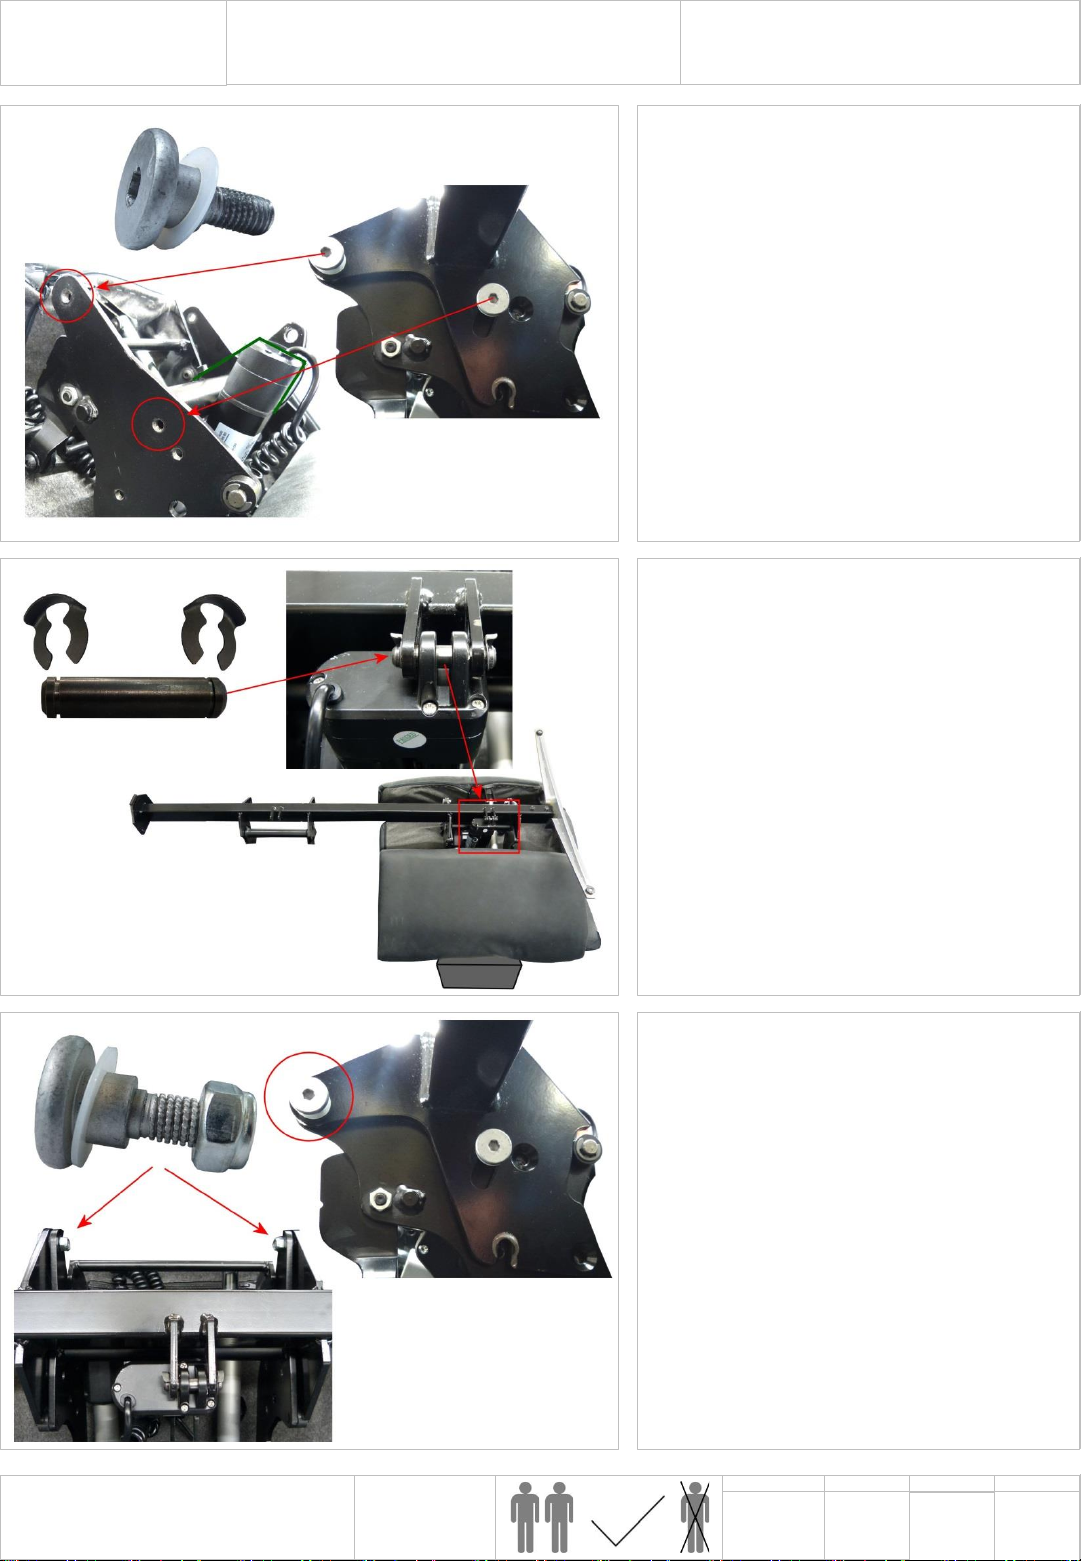
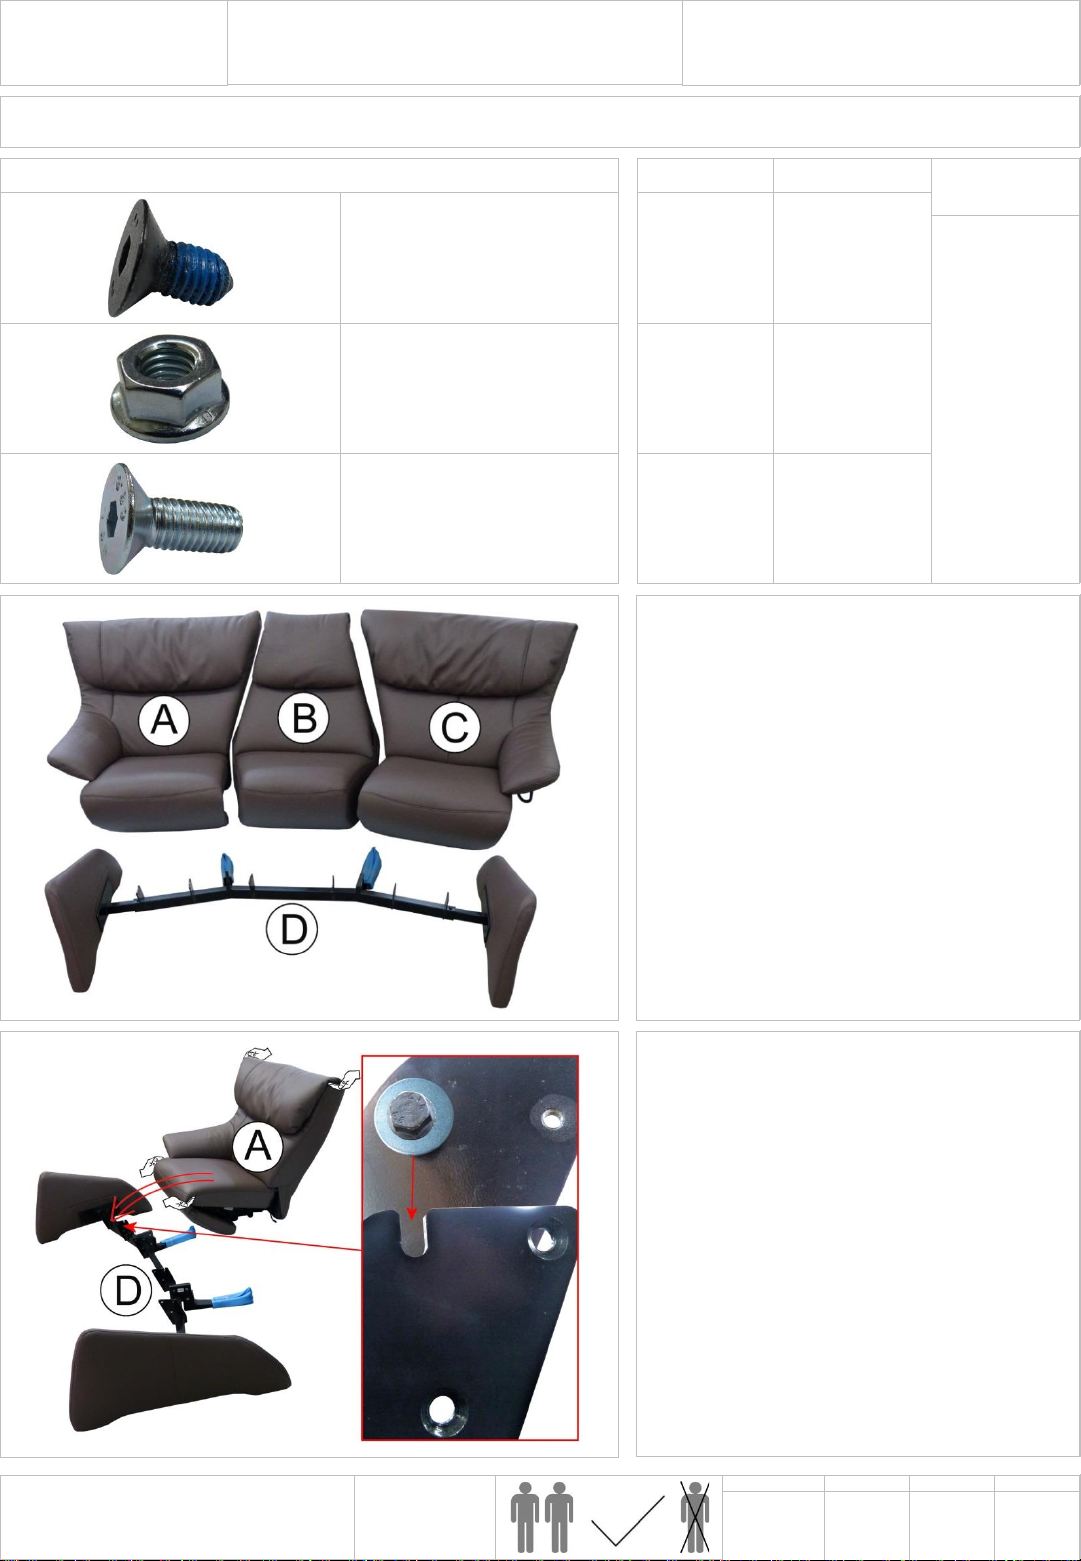
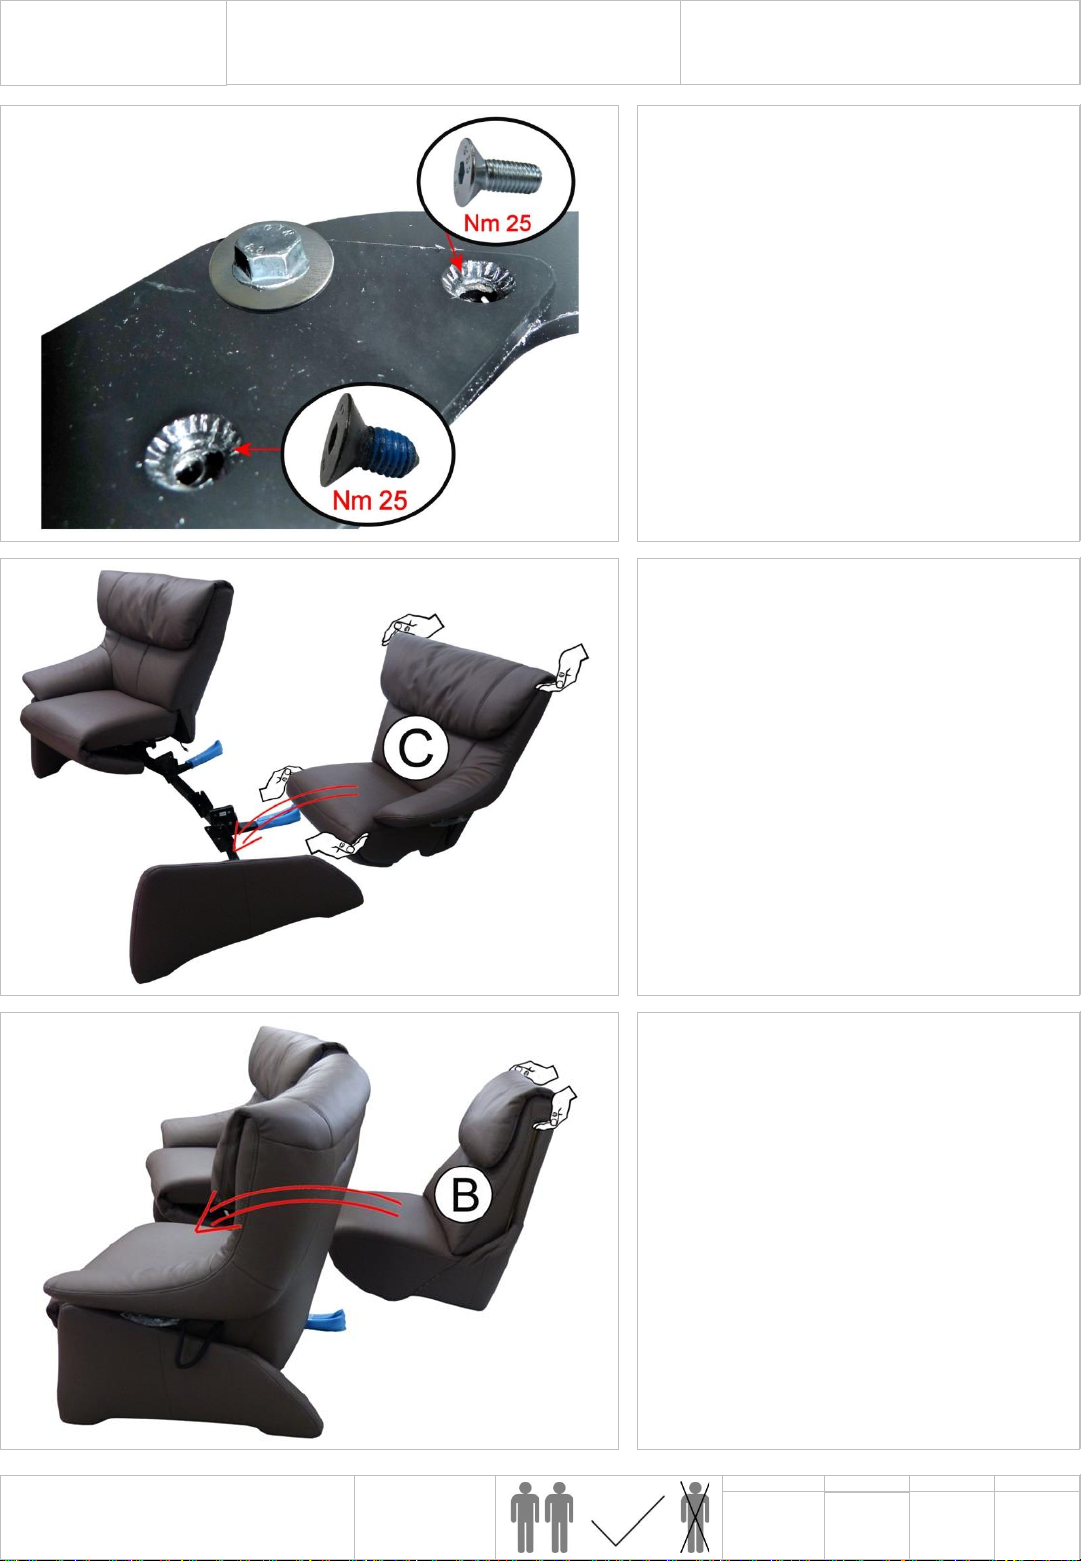
Himolla LM 29111 25 User manual


Other Himolla Indoor Furnishing manuals

Himolla
Himolla TANGRAM SOFA 9065 User manual

Himolla
Himolla CUMULY 4928 User manual

Himolla
Himolla LM 29111 46 User manual

Himolla
Himolla 7568 User manual

Himolla
Himolla 29000 25 User manual

Himolla
Himolla 29111 35 User manual

Himolla
Himolla 29000 20 80 User manual

Himolla
Himolla Planopoly Motion User manual

Himolla
Himolla SIGNA 1051 User manual

Himolla
Himolla SIGNA 1052 User manual

Himolla
Himolla Easy Comfort Series User manual

Himolla
Himolla Tangram Motion Series User manual

Himolla
Himolla 29000 33 User manual

Himolla
Himolla LM 29111 48 User manual

Himolla
Himolla LM 29000 01 User manual

Himolla
Himolla 29111 48 User manual

Himolla
Himolla 29000 38 User manual

Himolla
Himolla Cumuly Comfort 29111 43 User manual

Himolla
Himolla 29000 34 User manual

Himolla
Himolla Z87 User manual


Popular Indoor Furnishing manuals by other brands

Regency
Regency LWMS3015 Assembly instructions

Furniture of America
Furniture of America CM7751C Assembly instructions

Safavieh Furniture
Safavieh Furniture Estella CNS5731 manual

PLACES OF STYLE
PLACES OF STYLE Ovalfuss Assembly instruction

Trasman
Trasman 1138 Bo1 Assembly manual

Costway
Costway JV10856 manual


