manuals.online logo
Brands
  1. Home
  2. •
  3. Brands
  4. •
  5. Himolla
  6. •
  7. Indoor Furnishing
  8. •
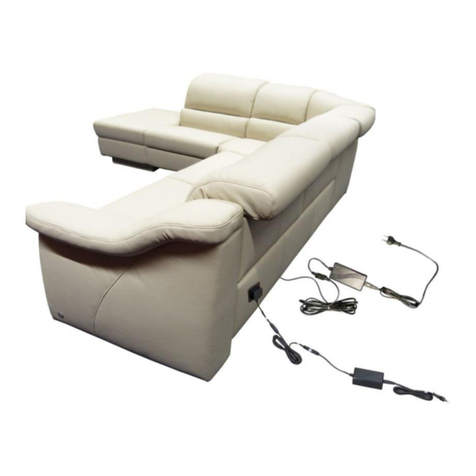
  9. Himolla Lounger Series User manual

Himolla Lounger Series User manual

26.09.2019_Ver.2.1_HR
LM: 29111 14
Auspacken, Unpacking, Déballage
Inhaltsverzeichnis / Table of Contents / Contenu
LM
29111 14
Montagezeit ca. --- Min.
Assembly time / Temps de montage 21.1.19
letzte Änderung Version Kürzel Seite
1.0 HR 2/17
Modellart / model type / Type de modèle Seite / Side / Page
3
Seite / Side / Page
Modellart / model type / Type de modèle
Montage,Assembly, Montage
4 - 511, 12, 15/16, 17/18, 37/38,
6 - 747/48, 69, 70, 81, 82, 85/86, 87/88,
825/26,
9 - 1069, 70,
11 - 1374/75,
Seite / Side / PageModellart / model type / Type de modèle
Funktionskontrolle, Functional check, Contrôle du fonctionnement
16 - 17
•Bei nicht vorschriftsgemäßer und/oder fachgerechter Montage sowie unsachgemäßer Nutzung wird bei Personen-
oder Sachschaden keinerlei Haftung übernommen!
•Wir empfehlen die Montage nur durch fachkundiges Personal.
•Die Montageanleitung und demontierte Bauteile sollten aufbewahrt werden.
•Bei veränderter Zusammenstellung kann sich die Montagezeit verändern.
•Am Aufstellort muss für eine geeignete Unterlage gesorgt werden, damit bei der Montage der Bodenbelag nicht
beschädigt wird.
•Achten Sie bei der Montage darauf, dass Sie das Bezugsmaterial des Möbels nicht beschädigen.
•No liability can be assumed for personal injury or material damage in the event of incorrect and/or unprofessional
assembly or improper use.
•We recommend that the assembly only be carried out by competent personnel.
•The assembly instructions and disassembled components should be kept for future reference.
•The assembly time may differ with a different configuration.
•A suitable underlay must be provided at the installation site so that the floor covering is not damaged during
installation.
•During assembly, make sure that you do not damage the cover material of the furniture.
• Aucune responsabilité n’est assumée pour les dommages corporels ou matériels éventuels en cas de montage non
conforme aux instructions et/ou inapproprié ainsi qu’en cas d’utilisation abusive.
•Nous recommandons de faire réaliser le montage par du personnel qualifié.
•Le manuel de montage et les pièces démontées doivent être conservés.
• Le temps de montage peut varier en cas d’assemblage différent.
•Merci de placer une protection de sol adaptée afin de ne pas endommager le sol pendant le montage.
•Faire attention de ne pas endommager le revêtement du meuble pendant le montage.
Seite / Side / Page
14 - 15
21/22, 23/24, 27/28, 29/30,
26.09.19
Datum Version Kürzel Seite
2.1 HR 2/17
•Verpackung mit einem nicht spitzen
Gegenstand öffnen z.B. Folienschneider
•Open packaging with a device that is not
pointed or sharp, e.g. a foil cutter
• Ouvrir l’emballage à l’aide d’un outil non-
pointu (p.e. un découpe plastique)
Montageanleitung
Assembly instructions / Manuel de montage
LM
29111 14
Montagezeit ca. 10 Min.
Assembly time / Temps de montage 26.09.19
Datum Version Kürzel Seite
2.1 HR 3/17
Auspacken, Unpacking, Déballage
•Bei jeder offenen Bohrung vom Chassis die
Schraube am Korpus bis zur Hälfte
eindrehen.
•Screw the screw half way into the body in
every hole in the chassis.
•Pour chaque alésage ouvert du châssis,
serrer la vis jusqu’à mi-course sur le corps.
•Element auf die Sitzfläche legen.
•Klettverschluss öffnen.
•Lay the element seat-side down.
•Open the Velcro fastener.
• Placer l’élément sur l’assise.
•Ouvrir la fermeture auto-agrippante.
Montagezubehör,
mounting accessories
Matériel de montages
Nr. / No / N°
Größe / Size / Taille
85012 55
13647 00
M8 x 30
25236 00
8,4 mm
mitgeliefertes Material / Material included / Matériel fourni
Sechskantschraube
Fächerscheibe
Form A
Montageanleitung
Assembly instructions / Manuel de montage
11, 12, 15/16, 17/18,
37/38,
LM
29111 14
Montagezeit ca. 15 Min.
Assembly time / Temps de montage 26.09.19
Datum Version Kürzel Seite
2.1 HR 4/17
Montage,Assembly, Montage
•Klettverschluss schließen.
•Sitzelement auf das Chassis stellen.
•Close the Velcro fastener.
•Place seat unit on the chassis.
•Fermer la fermeture auto-agrippante.
• Placer l’élément d’assise sur le châssis.
•Je Chassis Anschraublasche 3 mal mit
Fächerscheibe und 1 mal ohne
verschrauben.
•Bolt each chassis mounting bracket into
place using 3 bolts with serrated washers
and 1 bolt without.
•Sur chaque châssis, serrer l'attache à
visser 3 fois avec une rondelle éventail et
1 fois sans.
•Chassis mit 2 Personen einhängen.
•Assemble chassis with 2 people.
•Accrocher le châssis à 2 personnes.
Montageanleitung
Assembly instructions / Manuel de montage
11, 12, 15/16, 17/18,
37/38,
LM
29111 14
Montagezeit ca. 15 Min.
Assembly time / Temps de montage 26.09.19
Datum Version Kürzel Seite
2.1 HR 5/17
•Chassis mit 2 Personen eindrehen bis
unten die vormontierte Sechskantschraube
und oben der Führungsbolzen richtig
Positioniert sind.
•Fit the chassis with 2 people until the pre-
mounted hex head bolt at the bottom and
the guide bolt at the top are correctly
positioned.
•Visser le châssis à 2 personnes jusqu’à ce
que la vis à six pans prémontée soit
positionnée correctement en bas et que le
boulon de guidage soit en haut.
•Elemente nebeneinander aufstellen.
•Styroporklötze unterlegen.
•Place the elements alongside each other.
•Place polystyrene blocks beneath the
element.
•Placer les éléments les uns à côté des
autres.
•Placer les blocs de polystyrène en
dessous.
Montagezubehör,
mounting accessories
Matériel de montages
Nr. / No / N°
Größe / Size / Taille
85002 55
17586 00
M8 x 16
mitgeliefertes Material / Material included / Matériel fourni
Senkkopfschraube mit
Innensechskant schwarz
und Spitze
Styroporklotz
Montageanleitung
Assembly instructions / Manuel de montage
47/48, 69, 70, 81, 82,
85/86, 87/88,
LM
29111 14
Montagezeit ca. 25 Min.
Assembly time / Temps de montage 26.09.19
Datum Version Kürzel Seite
2.1 HR 6/17
Montage,Assembly, Montage
•Achtung beim wenden darauf achten, das
der Boden durch Füße oder Kufen nicht
beschädigt wird.
•When turning over, make sure that the floor
is not damaged by the feet or runners.
•Attention lors du retournement, il faut veiller
à ce que le sol ne soit pas endommagé par
les pieds ou les patins.
•Sechskantschraube und Senkkopfschraube
mit 25Nm bei allen Verbindungen fest
ziehen.
•Stecker verbinden.
•Tighten the hex head bolts and countersunk
screws of every connection to 25Nm.
•Connect plug.
•Serrer la vis à six pans et la vis à tête
fraisée avec un couple de 25 Nm sur tous
les raccords.
•Connecter la fiche.
•Chassis mit der Hand oder mit einer
Unterlage nach oben drücken, bis das
Gewinde für die Senkkopfschraube in
Position ist.
•Push the chassis upwards by hand or using
a support until the thread for the
countersunk screw is in position.
• Pousser le châssis à la main ou à l’aide
d’un support vers le haut jusqu’à ce que le
filetage de la vis à tête fraisée soit
positionné.
Montageanleitung
Assembly instructions / Manuel de montage
47/48, 69, 70, 81, 82,
85/86, 87/88,
LM
29111 14
Montagezeit ca. 25 Min.
Assembly time / Temps de montage 26.09.19
Datum Version Kürzel Seite
2.1 HR 7/17
•Sechskantschraube und Senkkopfschraube
mit 25Nm bei allen Verbindungen fest
ziehen.
•Serrer la vis à six pans et la vis à tête
fraisée avec un couple de 25 Nm sur tous
les raccords.
•Tighten the hex head bolts and countersunk
screws of every connection to 25Nm.
•Chassis mit 2 Personen eindrehen bis
unten die vormontierte Sechskantschraube
und oben der Führungsbolzen richtig
Positioniert sind.
•Fit the chassis with 2 people until the pre-
mounted hex head bolt at the bottom and
the guide bolt at the top are correctly
positioned.
•Visser le châssis à 2 personnes jusqu’à ce
que la vis à six pans prémontée soit
positionnée correctement en bas et que le
boulon de guidage soit en haut.
Montagezubehör,
mounting accessories
Matériel de montages
Nr. / No / N°
Größe / Size / Taille
85002 55
17586 00
M8 x 16
mitgeliefertes Material / Material included / Matériel fourni
Senkkopfschraube mit
Innensechskant schwarz
und Spitze
Montageanleitung
Assembly instructions / Manuel de montage
25/26,
LM
29111 14
Montagezeit ca. 15 Min.
Assembly time / Temps de montage 26.09.19
Datum Version Kürzel Seite
2.1 HR 8/17
Montage,Assembly, Montage
•Ablageplatte ausrichten und die beiden
Öffnungen übereinander legen.
•Align the table so that the two holes are
above each other.
•Aligner la plaque de support et superposer
les deux ouvertures.
•Ablageplatte auf das Chassis legen.
•Place table on the chassis.
•Poser la plaque de support sur le châssis.
Montagezubehör,
mounting accessories
Matériel de montages
Nr. / No / N°
Größe / Size / Taille
85015 55
23263 00
M6 x 20
mitgeliefertes Material / Material included / Matériel fourni
Linsenschraube
Montageanleitung
Assembly instructions / Manuel de montage
69, 70,
LM
29111 14
Montagezeit ca. 10 Min.
Assembly time / Temps de montage 26.09.19
Datum Version Kürzel Seite
2.1 HR 9/17
Montage,Assembly, Montage
•Stecker von der Ablageplatte durch die
Öffnung stecken und Verbinden.
• Pass the table’s plug through the hole and
connect.
•Faire passer le connecteur de la plaque de
support à travers l’ouverture et le raccorder.
•Ablageplatte mit den mitgelieferten
Schrauben befestigen.
•Fasten the table in place with the two
enclosed screws.
•Fixer la plaque de support au moyen des
vis fournies.
Montageanleitung
Assembly instructions / Manuel de montage
69, 70,
LM
29111 14
Montagezeit ca. 10 Min.
Assembly time / Temps de montage 26.09.19
Datum Version Kürzel Seite
2.1 HR 10/17
•Chassis mit 2 Personen eindrehen bis
unten die vormontierte Sechskantschraube
und oben der Führungsbolzen richtig
Positioniert sind.
•Fit the chassis with 2 people until the pre-
mounted hex head bolt at the bottom and
the guide bolt at the top are correctly
positioned.
•Visser le châssis à 2 personnes jusqu’à ce
que la vis à six pans prémontée soit
positionnée correctement en bas et que le
boulon de guidage soit en haut.
•Elemente nebeneinander aufstellen.
•Styroporklötze unterlegen.
•Place the elements alongside each other.
•Place polystyrene blocks beneath the
element.
•Placer les éléments les uns à côté des
autres.
•Placer les blocs de polystyrène en
dessous.
Montagezubehör,
mounting accessories
Matériel de montages
Nr. / No / N°
Größe / Size / Taille
85002 55
17586 00
M8 x 16
mitgeliefertes Material / Material included / Matériel fourni
Senkkopfschraube mit
Innensechskant schwarz
und Spitze
Montageanleitung
Assembly instructions / Manuel de montage
74/75,
LM
29111 14
Montagezeit ca. 30 Min.
Assembly time / Temps de montage 26.09.19
Datum Version Kürzel Seite
2.1 HR 11/17
Montage,Assembly, Montage
•Ablagetisch bei Chassis am Sitzelement
ansetzen.
•Position the table against the seating
element at the chassis.
•Placer la tablette au niveau de l'élément
d’assise sur le châssis.
•Sechskantschraube und Senkkopfschraube
mit 25Nm bei allen Verbindungen fest
ziehen.
•Serrer la vis à six pans et la vis à tête
fraisée avec un couple de 25 Nm sur tous
les raccords.
•Tighten the hex head bolts and countersunk
screws of every connection to 25Nm.
•Chassis mit der Hand oder mit einer
Unterlage nach oben drücken, bis das
Gewinde für die Senkkopfschraube in
Position ist.
•Push the chassis upwards by hand or using
a support until the thread for the
countersunk screw is in position.
• Pousser le châssis à la main ou à l’aide
d’un support vers le haut jusqu’à ce que le
filetage de la vis à tête fraisée soit
positionné.
Montageanleitung
Assembly instructions / Manuel de montage
74/75,
LM
29111 14
Montagezeit ca. 30 Min.
Assembly time / Temps de montage 26.09.19
Datum Version Kürzel Seite
2.1 HR 12/17
•Stecker verbinden.
•Connect plug.
•Connecter la fiche.
•Elemente verschrauben: Federscheiben
aufsetzen, Elemente zusammenschieben
und Muttern festziehen.
•For bolting the items together: attach spring
washers, push items together and tighten
nuts.
•Visser les éléments: Appliquer les
rondelles, assembler les éléments et serrer
l’écrou.
Montagezubehör,
mounting accessories
Matériel de montages
Nr. / No / N°Größe / Size / Taille
85014 55
24759 00M10
17632 0010,5
mitgeliefertes Material / Material included / Matériel fourni
Federscheibe
Form B
Sechskantmutter
schwarz
Montageanleitung
Assembly instructions / Manuel de montage
74/75,
LM
29111 14
Montagezeit ca. 30 Min.
Assembly time / Temps de montage 26.09.19
Datum Version Kürzel Seite
2.1 HR 13/17
•Transportschutz entfernen.
•Kunststoffscheibe und Unterlegscheibe mit
den beiden Muttern Handfest anziehen.
•Remove the transport protection.
•Tighten the plastic washer and other
washer with the two nuts by hand.
•Retirer la protection de transport.
•Serrer la rondelle en plastique et la rondelle
avec les deux écrous à la main.
•Beim einhängen steht die Platte vom
Sitzelement etwas über.
•Dorn von Recamiere mit 2 Personen in die
Aufnahmehülse am Chassis durchstecken
bis die Rollen auf der Platte aufliegen.
• The seat element’s panel protrudes slightly
when the hung in place.
•Insert the shaft of the recamier into the
shaft sleeve of the chassis with 2 people
until the rollers are resting on the plate.
• Une fois l’accrochage réalisé, la plaque se
situe un peu au-dessus de l'assise.
•Insérer le mandrin du récamier à
2 personnes dans la douille du châssis
jusqu'à ce que les galets reposent sur la
plaque.
Montagezubehör,
mounting accessories
Matériel de montages
Nr. / No / N°Größe / Size / Taille
24759 00M10
85013 55
14027 00
14754 00
mitgeliefertes Material / Material included / Matériel fourni
Kunststoffscheibe
Ø 50mm
Sechskantmutter
schwarz
Unterlegscheibe
Montageanleitung
Assembly instructions / Manuel de montage
21/22, 23/24, 27/28,
29/30,
LM
29111 14
Montagezeit ca. 20 Min.
Assembly time / Temps de montage 26.09.19
Datum Version Kürzel Seite
2.1 HR 14/17
•Obere Mutter zur unteren Mutter kontern.
•Lock the top nut against the bottom nut.
• Contrer l’écrou supérieur sur l’écrou
inférieur.
Montageanleitung
Assembly instructions / Manuel de montage
21/22, 23/24, 27/28,
29/30,
LM
29111 14
Montagezeit ca. 20 Min.
Assembly time / Temps de montage 26.09.19
Datum Version Kürzel Seite
2.1 HR 15/17
•Elemente verschrauben: Federscheiben
aufsetzen, Elemente zusammenschieben
und Muttern festziehen.
•For bolting the items together: attach spring
washers, push items together and tighten
nuts.
•Visser les éléments: Appliquer les
rondelles, assembler les éléments et serrer
l’écrou.
Montagezubehör,
mounting accessories
Matériel de montages
Nr. / No / N°Größe / Size / Taille
24759 00
M10
17632 00
10,5 85014 55
mitgeliefertes Material / Material included / Matériel fourni
Federscheibe
Form B
Sechskantmutter
schwarz
Montageanleitung
Assembly instructions / Manuel de montage
LM
29111 14
Montagezeit ca. 10 Min.
Assembly time / Temps de montage 26.09.19
Datum Version Kürzel Seite
2.1 HR 16/17
Funktionskontrolle, Functional check, Contrôle du fonctionnement
•Die Beinauflage ist keine Sitzfläche und
darum nicht für große Belastungen
ausgelegt.
•The leg rest is not a seat and is therefore
not designed to support heavy loads.
•Le repose-pieds n’est pas une surface
d’assise et n’est donc pas conçu pour des
charges importantes.
•Funktionskontrolle bei allen Elementen
ohne Belastung durchführen.
•Überlastungen auf der Beinauflage führen
zu Beschädigungen.
•Please conduct the function control for all
elements without load.
•Overloading on the footrest will result in
damages.
•Tester tous les éléments sans pression.
•Une surcharge sur le repose-pieds peut
entrainer des dommages.
•Netzverbindung herstellen
•Schutzhüllen entfernen.
•Connect to the mains
•Remove the protective covers.
•Brancher le raccordement secteur
•Retirer les housses de protection.
Montageanleitung
Assembly instructions / Manuel de montage
21/22, 23/24, 27/28,
29/30,
LM
29111 14
Montagezeit ca. 10 Min.
Assembly time / Temps de montage 26.09.19
Datum Version Kürzel Seite
2.1 HR 17/17

Other Himolla Indoor Furnishing manuals

Himolla 29000 33 User manual

Himolla

Himolla 29000 33 User manual

Himolla LM 29000 01 User manual

Himolla

Himolla LM 29000 01 User manual

Himolla LM 29111 25 User manual

Himolla

Himolla LM 29111 25 User manual

Himolla SIGNA 1052 User manual

Himolla

Himolla SIGNA 1052 User manual

Himolla 29000 34 User manual

Himolla

Himolla 29000 34 User manual

Himolla Cumuly Comfort 29111 43 User manual

Himolla

Himolla Cumuly Comfort 29111 43 User manual

Himolla LM 29111 48 User manual

Himolla

Himolla LM 29111 48 User manual

Himolla 29111 48 User manual

Himolla

Himolla 29111 48 User manual

Himolla 29000 20 80 User manual

Himolla

Himolla 29000 20 80 User manual

Himolla TANGRAM SOFA 9065 User manual

Himolla

Himolla TANGRAM SOFA 9065 User manual

Himolla LM 29111 46 User manual

Himolla

Himolla LM 29111 46 User manual

Himolla CUMULY 4928 User manual

Himolla

Himolla CUMULY 4928 User manual

Himolla 29000 25 User manual

Himolla

Himolla 29000 25 User manual

Himolla SIGNA 1051 User manual

Himolla

Himolla SIGNA 1051 User manual

Himolla 29111 35 User manual

Himolla

Himolla 29111 35 User manual

Himolla 29000 38 User manual

Himolla

Himolla 29000 38 User manual

Himolla Z87 User manual

Himolla

Himolla Z87 User manual

Himolla Easy Comfort Series User manual

Himolla

Himolla Easy Comfort Series User manual

Himolla Tangram Motion Series User manual

Himolla

Himolla Tangram Motion Series User manual

Himolla Planopoly Motion User manual

Himolla

Himolla Planopoly Motion User manual

Himolla AZURE 4080 User manual

Himolla

Himolla AZURE 4080 User manual

Himolla 7568 User manual

Himolla

Himolla 7568 User manual

Popular Indoor Furnishing manuals by other brands

Clarke CC76 Aassembly Instructions

Clarke

Clarke CC76 Aassembly Instructions

Whittier Wood Furniture 1100AFGACa Assembly instructions

Whittier Wood Furniture

Whittier Wood Furniture 1100AFGACa Assembly instructions

Lightolier LytePoints 56946 specification

Lightolier

Lightolier LytePoints 56946 specification

Allen + Roth LW158B04 manual

Allen + Roth

Allen + Roth LW158B04 manual

BLACK RED WHITE Porto S322-SZF2D1S Assembly instructions

BLACK RED WHITE

BLACK RED WHITE Porto S322-SZF2D1S Assembly instructions

URBAN OUTFITTERS Benji 84902360 Assembly instructions

URBAN OUTFITTERS

URBAN OUTFITTERS Benji 84902360 Assembly instructions

Kvik MO845 manual

Kvik

Kvik MO845 manual

Frederick York ARYA FRYAR48SNVBG installation guide

Frederick York

Frederick York ARYA FRYAR48SNVBG installation guide

MasterCraft 068-1554-6 instruction manual

MasterCraft

MasterCraft 068-1554-6 instruction manual

VERSARE Operable Wall Sliding Assembly instructions

VERSARE

VERSARE Operable Wall Sliding Assembly instructions

Unfinished Furniture of Wilmington 29 IN RANCH STOOL S-930 Assembly instructions

Unfinished Furniture of Wilmington

Unfinished Furniture of Wilmington 29 IN RANCH STOOL S-930 Assembly instructions

Kvik MH839,060 Assembly manual

Kvik

Kvik MH839,060 Assembly manual

Westfalia 94 53 31 Original instructions

Westfalia

Westfalia 94 53 31 Original instructions

NDI PL 112 GGA-A2 instructions

NDI

NDI PL 112 GGA-A2 instructions

Germania 1692 Assembly instruction

Germania

Germania 1692 Assembly instruction

Safavieh Furniture Lavinia FOX2552 quick start guide

Safavieh Furniture

Safavieh Furniture Lavinia FOX2552 quick start guide

Leggett & Platt Falcon 2.0+ owner's manual

Leggett & Platt

Leggett & Platt Falcon 2.0+ owner's manual

Birlea Stratus 4' Bed 5056206616519 Assembly instructions

Birlea

Birlea Stratus 4' Bed 5056206616519 Assembly instructions

manuals.online logo
manuals.online logoBrands
  • About & Mission
  • Contact us
  • Privacy Policy
  • Terms and Conditions

Copyright 2025 Manuals.Online. All Rights Reserved.