manuals.online logo
Brands
  1. Home
  2. •
  3. Brands
  4. •
  5. Himolla
  6. •
  7. Indoor Furnishing
  8. •
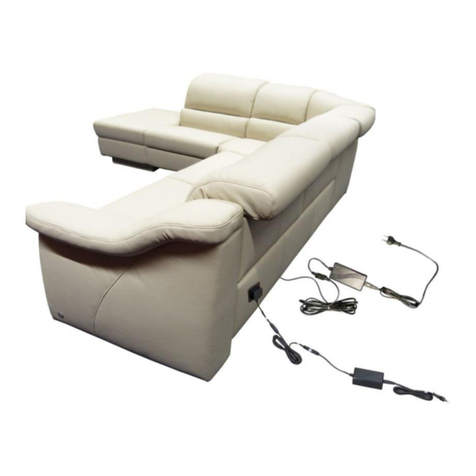
  9. Himolla LM 29000 01 User manual

Himolla LM 29000 01 User manual

29.05.2019_Ver.2.5_HR
LM: 29000 01
LM
29000 01
Montagezeit ca. --- Min.
Assembly time / Temps de montage 29.05.19
Datum Version Kürzel Seite
2.5 HR 2/13
13
Seite / Side / PageModellart / model type / Type de modèle
Demontage elektrischer Bauteile, Disassembly of electrical components,
Démontage des composants électriques
Seite / Side / PageModellart / model type / Type de modèle
Demontage, Disassembly, Démontage
13
12
Seite / Side / PageModellart / model type / Type de modèle
Funktionskontrolle, Functional check, Contrôle du fonctionnement
967/68, 69/70, 71/72, 73/74, 77/78, 81, 82, 85/86, 89, 90, 91/92,
917/18, 19/20, 21/22, 23/24, 25/26, 27/28, 29/30, 61, 62, 65/66,
Seite / Side / PageModellart / model type / Type de modèle
Rückenmontage, Backrest assembly, Montage du dossier
6 - 817/18, 19/20, 21/22, 81, 82, 85/86, 87/88,
Seite / Side / PageModellart / model type / Type de modèle
Beinauflage, Leg rest assembly, Repose-pieds
Modellart / model type / Type de modèle
Fußmontage, Foot assembly, Montage des pieds
5
Seite / Side / Page
Modellart / model type / Type de modèle Seite / Side / Page
4
Auspacken, Unpacking, Déballage
Inhaltsverzeichnis / Table of Contents / Contenu
10 - 1151, 52, 77/78,
LM
29000 01
Montagezeit ca. --- Min.
Assembly time / Temps de montage 29.05.19
Datum Version Kürzel Seite
2.5 HR 3/13
•Bei nicht vorschriftsgemäßer und/oder fachgerechter Montage sowie unsachgemäßer Nutzung wird bei Personen-
oder Sachschaden keinerlei Haftung übernommen!
•Wir empfehlen die Montage nur durch fachkundiges Personal.
•Die Montageanleitung und demontierten Bauteile sollten aufbewahrt werden.
•Bei veränderter Zusammenstellung kann sich die Montagezeit verändern.
•Am Aufstellort muss für eine geeignete Unterlage gesorgt werden, damit bei der Montage der Bodenbelag nicht
beschädigt wird.
•Achten Sie bei der Montage darauf, dass Sie das Bezugsmaterial des Möbels nicht beschädigen.
•Nach Ende der Nutzungsphase, müssen laut ElektroG alle elektrischen Komponenten (gekennzeichnet mit der
durchgestrichenen Mülltonne mit schwarzem Balken) demontiert werden und anschließend fachgerecht bei den
kommunalen Sammelstellen entsorgt werden.
•No liability can be assumed for personal injury or material damage in the event of incorrect and/or unprofessional
assembly or improper use.
•We recommend that the assembly only be carried out by competent personnel.
•The assembly instructions and disassembled components should be kept for future reference.
•The assembly time may differ with a different configuration.
•A suitable underlay must be provided at the installation site so that the floor covering is not damaged during
installation.
•During assembly, make sure that you do not damage the cover material of the furniture.
•At the end of their lifetime, all electrical components (identified by a waste bin icon crossed out in black) must be
dismantled and disposed of correctly in a municipal collection centre according to the ElektroG (German Electrical
Equipment Act).
• Aucune responsabilité n’est assumée pour les dommages corporels ou matériels éventuels en cas de montage non
conforme aux instructions et/ou inapproprié ainsi qu’en cas d’utilisation abusive.
•Nous recommandons de faire réaliser le montage par du personnel qualifié.
•Le manuel de montage et les pièces démontées doivent être conservés.
• Le temps de montage peut varier en cas d’assemblage différent
•Merci de placer une protection de sol adaptée afin de ne pas endommager le sol pendant le montage.
•Faire attention de ne pas endommager le revêtement du meuble pendant le montage.
• Une fois l’appareil hors d’usage, conformément à la loi allemande « ElektroG », tous les composants électriques
(signalés par la poubelle barrée avec des barres noires) doivent être démontés et être ensuite éliminés de façon
conforme dans des points de collecte communaux.
Inhaltsverzeichnis / Table of Contents / Contenu
•Verpackung mit einem nicht spitzen
Gegenstand öffnen z.B. Folienschneider
•Open packaging with a device that is not
pointed or sharp, e.g. a foil cutter
• Ouvrir l’emballage à l’aide d’un outil non-
pointu (p.e. un découpe plastique)
Montageanleitung
Assembly instructions / Manuel de montage
LM
29000 01
Montagezeit ca. 10 Min.
Assembly time / Temps de montage 29.05.19
Datum Version Kürzel Seite
2.5 HR 4/13
Auspacken, Unpacking, Déballage
•Falls nötig, die Möbelfüße nach
beiliegender Anleitung montieren.
•Assemble the furniture feet according to the
enclosed instructions if necessary.
•Si nécessaire, monter les pieds du meuble
selon le manuel fourni.
•Fußmontage siehe beiliegende Anleitung
29111 46
•See the enclosed instructions 29111 46 to
assemble the foot
•Montage des pieds, voir notice jointe 29111
46
Montageanleitung
Assembly instructions / Manuel de montage
LM
29000 01
Montagezeit ca. 10 Min.
Assembly time / Temps de montage 29.05.19
Datum Version Kürzel Seite
2.5 HR 5/13
Fußmontage, Foot assembly, Montage des pieds
Montagezubehör,
mounting accessories
Matériel de montages
Nr. / No / N°Größe / Size / Taille
17596 00M6 x 20
19/20, 21/22,
85006 55
-------------------
81, 82, 85/86,
87/88,
85005 55
mitgeliefertes Material / Material included / Matériel fourni
Senkkopfschraube
schwarz
Montagezubehör,
mounting accessories
Matériel de montages
Nr. / No / N°Größe / Size / Taille
27649 00
6 x 25
12132 00
6,4 x 16
19/20, 21/22,
85006 55
-------------------
81, 82, 85/86,
87/88,
85005 55
12335 00M8 x 140
mitgeliefertes Material / Material included / Matériel fourni
Unterlegscheibe
Zylinderschraube
Sechskantschraube
Montagezubehör,
mounting accessories
Matériel de montages
Nr. / No / N°Größe / Size / Taille
26783 00
M6 x 16
10329 00
19/20, 21/22,
85006 55
-------------------
81, 82, 85/86,
87/88,
85005 55
mitgeliefertes Material / Material included / Matériel fourni
Winkel
Senkkopfschraube
Montageanleitung
Assembly instructions / Manuel de montage
19/20, 21/22, 81, 82,
85/86, 87/88,
LM
29000 01
Montagezeit ca. 15 Min.
Assembly time / Temps de montage 29.05.19
Datum Version Kürzel Seite
2.5 HR 6/13
Beinauflage, Leg rest assembly, Repose-pieds
•Blendleiste an Korpus montieren.
•3 Stück Transportfüße zusammenstecken
und mit beigefügter 140 x 8
Sechskantschraube vorne innen befestigen.
•Mount the panel strip onto the body.
•Assemble the 3 transport feet and fasten in
place from the inside using the enclosed
140 x 8 hex head bolt.
•Monter la plinthe sur le corps.
•Assembler 3 unités de pieds de transport et
les fixer à l’avant à l’intérieur avec la vis à
six pans 140 x 8 fournie.
•Winkel an Blende schrauben.
•Screw the bracket to the panel.
• Visser l’équerre sur le cache.
•Kabelbinder lösen und Blende entfernen.
•Schutz für Rückenbeschlag noch nicht
entfernen.
•Sitzelement wenden
•Release the cable ties and remove the
panel.
•Do not yet remove the protection for the
back mechanism.
•Turn the seat element over
•Détacher le serre-câbles et retirer le cache.
•Ne pas retirer la protection de la garniture
du dossier.
• Retourner l’élément d’assise
Montageanleitung
Assembly instructions / Manuel de montage
19/20, 21/22, 81, 82,
85/86, 87/88,
LM
29000 01
Montagezeit ca. 15 Min.
Assembly time / Temps de montage 29.05.19
Datum Version Kürzel Seite
2.5 HR 7/13
•Achtung beim wenden darauf achten, das
der Boden durch Füße oder Kufen nicht
beschädigt wird.
•When turning over, make sure that the floor
is not damaged by the feet or runners.
•Attention lors du retournement, il faut veiller
à ce que le sol ne soit pas endommagé par
les pieds ou les patins.
•Kabelbinder lösen
•Fußbrett montieren: Achtung, kurzer
Abstand ist vorne
•Release the cable ties
•Fit the footrest: attention, the shorter gap
goes at the front
•Détacher le serre-câbles
•Monter le repose-pieds : attention, le côté
court doit être devant
•Je Beinauflage mit den Inbusschrauben
und Unterlegscheiben montieren.
•Stecker verbinden und Kabel Best möglich
in die Öffnung zurückschieben.
•Fit each leg rest with the Allen screws and
washers.
•Connect the plug and push the cable back
into the opening as far as possible.
• Monter l’unité sur le repose-pieds avec les
vis à six pans et les rondelles.
•Brancher la fiche et remettre le câble dans
l’ouverture le mieux possible.
Montageanleitung
Assembly instructions / Manuel de montage
19/20, 21/22, 81, 82,
85/86, 87/88,
LM
29000 01
Montagezeit ca. 15 Min.
Assembly time / Temps de montage 29.05.19
Datum Version Kürzel Seite
2.5 HR 8/13
•Jeden Rücken mit 4 Stück Sperrmuttern
befestigen.
•Fasten each back element with 4 lock nuts.
•Fixer le dossier avec 4 contre-écrous.
•Transportschutz und Kabelbinder
entfernen.
•Rücken auf den Rückenbeschlag aufsetzen
•Remove the transport protection and cable
ties
•Place the back onto its mount
•Retirer la protection de transport et les
serre-câbles.
•Placer le dossier sur la garniture du dossier
Montagezubehör,
mounting accessories
Matériel de montages
Nr. / No / N°Größe / Size / Taille
18130 00
M6
85007 55
mitgeliefertes Material / Material included / Matériel fourni
Mutter mit
Sperrverzahnung
Montageanleitung
Assembly instructions / Manuel de montage
alle Modellarten,
all model types,
tous Type de modèle
LM
29000 01
Montagezeit ca. 10 Min.
Assembly time / Temps de montage 29.05.19
Datum Version Kürzel Seite
2.5 HR 9/13
Rückenmontage, Backrest assembly, Montage du dossier
•Nessel unten am Klettband öffnen.
•Open nettle at the Velcro tape at the
bottom.
•Ouvrir le velcro de la toile du dessous
Montagezubehör,
mounting accessories
Matériel de montages
Nr. / No / N°Größe / Size / Taille
17618 00
M8
29771 00
M8 x 25 85008 55
21288 00M8
mitgeliefertes Material / Material included / Matériel fourni
Senkkopfschraube
Mutter mit
Sperrverzahnung
Zahnscheibe Form V
Montageanleitung
Assembly instructions / Manuel de montage
51, 52, 77/78,
LM
29000 01
Montagezeit ca. 10 Min.
Assembly time / Temps de montage 29.05.19
Datum Version Kürzel Seite
2.5 HR 10/13
Rückenmontage, Backrest assembly, Montage du dossier
•Führungsschraube am Rückenbeschlag
muss immer nach außen zeigen.
•Rückenbeschlag mit Führungsschraube
durch Öffnung in den Führungsschlitz
schieben.
•Push the backrest fitting with guide screw
through the opening in the guide slot.
• Passer la ferrure du dossier par l’ouverture
dans la fente de guidage
•Klettband mit Nessel wieder schließen.
•Close nettle with Velcro tape again.
•Refermer le velcro de la toile du dessous.
•Jeden Rücken mit 3 Stück Sperrmuttern,
Zahnscheibe und Sechskantmutter
befestigen.
•Führungsschraube anziehen.
•Fasten each back with 3 locking nuts, lock
washer and hex nut.
•Tighten the guide screw.
• Fixer le dossier à l’aide des 3 écrous,
disques dentés et vis hexagonales
•Serrer la vis de guidage.
Montageanleitung
Assembly instructions / Manuel de montage
51, 52, 77/78,
LM
29000 01
Montagezeit ca. 10 Min.
Assembly time / Temps de montage 29.05.19
Datum Version Kürzel Seite
2.5 HR 11/13
Rückenmontage, Backrest assembly, Montage du dossier
•Rückenbeschlag mit Führungsschraube in
den vorgesehenen Führungsschlitz
schieben
•Führungsschraube am Rückenbeschlag
muss immer nach außen zeigen.
•Slide the backrest fitting with the guide
screw into the guide slot provided.
•The guide bolt on the backrest cover must
always point outwards.
•Pousser la ferrure de dossier dans la fente
de guidage à l’aide de la vis de guidage
•La vis de guidage sur la ferrure du dossier
doit toujours être dirigée vers l’extérieur.
•Überlastungen auf der Beinauflage führen
zu Beschädigungen.
•Bei Einzelfüßen mit geringer Auflage ist zu
empfehlen, den mitgelieferten
Möbeluntersetzer unter zu legen.
•Overloading on the leg rest will result in
damages.
•For single feet with a relatively small
contact surface, it is recommended to put
the provided furniture mat underneath.
•Une surcharge sur le repose-pieds peut
entrainer des dommages.
•Sur les pieds uniques à charge faible, il est
recommandé d’utiliser le support de meuble
faisant partie de la livraison
•Netzverbindung herstellen
•Funktionskontrolle bei allen Elementen
ohne Belastung durchführen.
•Connect to the mains
•Please conduct the function control for all
elements without load.
•Brancher le raccordement secteur
•Tester tous les éléments sans pression
•Bei allen Elementen Haken und Laschen
einhängen.
•Transportfüße entfernen (1)
•Engage hooks and lugs on all elements.
•Remove the transport feet (1)
•Accrocher les crochets et les attaches sur
tous les éléments.
•Retirer les pieds de transport (1)
Montageanleitung
Assembly instructions / Manuel de montage
LM
29000 01
Montagezeit ca. 10 Min.
Assembly time / Temps de montage 29.05.19
Datum Version Kürzel Seite
2.5 HR 12/13
Funktionskontrolle, Functional check, Contrôle du fonctionnement
•Stecker lösen und Schrauben entfernen.
•Disconnect plug and remove screws.
•Débrancher la fiche et retirer les vis.
•Element wenden, Schrauben und
Beinauflage entfernen.
•Turn the element over, remove the screws
and leg rest.
• Retourner l’élément, retirer les vis et le
repose-pieds.
Montageanleitung
Assembly instructions / Manuel de montage
LM
29000 01
Montagezeit ca. 15 Min.
Assembly time / Temps de montage 29.05.19
Datum Version Kürzel Seite
2.5 HR 13/13
Demontage elektrischer Bauteile, Disassembly of electrical components,
Démontage des composants électriques

Other Himolla Indoor Furnishing manuals

Himolla 29000 20 80 User manual

Himolla

Himolla 29000 20 80 User manual

Himolla 29111 48 User manual

Himolla

Himolla 29111 48 User manual

Himolla Lounger Series User manual

Himolla

Himolla Lounger Series User manual

Himolla LM 29111 46 User manual

Himolla

Himolla LM 29111 46 User manual

Himolla 7568 User manual

Himolla

Himolla 7568 User manual

Himolla LM 29111 48 User manual

Himolla

Himolla LM 29111 48 User manual

Himolla SIGNA 1051 User manual

Himolla

Himolla SIGNA 1051 User manual

Himolla Tangram Motion Series User manual

Himolla

Himolla Tangram Motion Series User manual

Himolla Easy Comfort Series User manual

Himolla

Himolla Easy Comfort Series User manual

Himolla 29000 33 User manual

Himolla

Himolla 29000 33 User manual

Himolla 29000 25 User manual

Himolla

Himolla 29000 25 User manual

Himolla Z87 User manual

Himolla

Himolla Z87 User manual

Himolla LM 29111 25 User manual

Himolla

Himolla LM 29111 25 User manual

Himolla 29000 34 User manual

Himolla

Himolla 29000 34 User manual

Himolla Planopoly Motion User manual

Himolla

Himolla Planopoly Motion User manual

Himolla 29111 35 User manual

Himolla

Himolla 29111 35 User manual

Himolla TANGRAM SOFA 9065 User manual

Himolla

Himolla TANGRAM SOFA 9065 User manual

Himolla Cumuly Comfort 29111 43 User manual

Himolla

Himolla Cumuly Comfort 29111 43 User manual

Himolla AZURE 4080 User manual

Himolla

Himolla AZURE 4080 User manual

Himolla SIGNA 1052 User manual

Himolla

Himolla SIGNA 1052 User manual

Himolla 29000 38 User manual

Himolla

Himolla 29000 38 User manual

Himolla CUMULY 4928 User manual

Himolla

Himolla CUMULY 4928 User manual

Popular Indoor Furnishing manuals by other brands

LDI Spaces Safco Serenity 3470 Assembly instructions

LDI Spaces

LDI Spaces Safco Serenity 3470 Assembly instructions

ZEITRAUM E8 Assembly instructions

ZEITRAUM

ZEITRAUM E8 Assembly instructions

Mimosa CORAL BAY CORNER LOUNGE SETTING Assembly instructions

Mimosa

Mimosa CORAL BAY CORNER LOUNGE SETTING Assembly instructions

Atlantic Furniture 84” HARVARD BOOK SHELF Assembly instructions

Atlantic Furniture

Atlantic Furniture 84” HARVARD BOOK SHELF Assembly instructions

Dimensions Furniture 1702 Assembly instructions

Dimensions Furniture

Dimensions Furniture 1702 Assembly instructions

Next Day Blinds Premium Cordless installation instructions

Next Day Blinds

Next Day Blinds Premium Cordless installation instructions

VITRA Map Table Assembly instructions

VITRA

VITRA Map Table Assembly instructions

Hathaway BG2556W Assembly instructions

Hathaway

Hathaway BG2556W Assembly instructions

ROOMS TO GO GLOB 8856-2 Assembly instructions

ROOMS TO GO

ROOMS TO GO GLOB 8856-2 Assembly instructions

Allen + Roth FELIX 36WG installation manual

Allen + Roth

Allen + Roth FELIX 36WG installation manual

Costway HW66418 user manual

Costway

Costway HW66418 user manual

RUSTA MILANO 60101158 manual

RUSTA

RUSTA MILANO 60101158 manual

studioduc juno nightstand Assembly instructions

studioduc

studioduc juno nightstand Assembly instructions

CUR AQUA 003907 operating instructions

CUR AQUA

CUR AQUA 003907 operating instructions

VARANGUE 112007 Instructions for use

VARANGUE

VARANGUE 112007 Instructions for use

OfficeSource 83846H Assembly instructions

OfficeSource

OfficeSource 83846H Assembly instructions

Hudson & Canal TV1719 Assembly instructions

Hudson & Canal

Hudson & Canal TV1719 Assembly instructions

Noble House Home Furnishings Barstool Assembly instructions

Noble House Home Furnishings

Noble House Home Furnishings Barstool Assembly instructions

manuals.online logo
manuals.online logoBrands
  • About & Mission
  • Contact us
  • Privacy Policy
  • Terms and Conditions

Copyright 2025 Manuals.Online. All Rights Reserved.