manuals.online logo
Brands
  1. Home
  2. •
  3. Brands
  4. •
  5. Himolla
  6. •
  7. Indoor Furnishing
  8. •
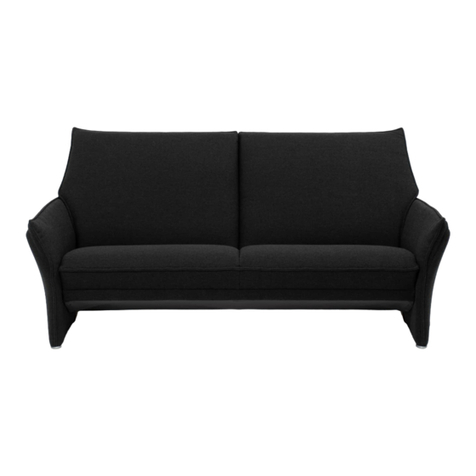
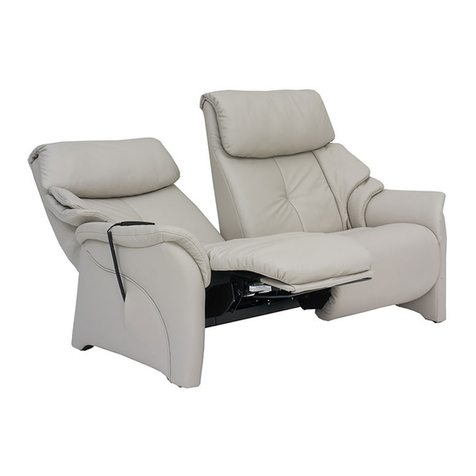
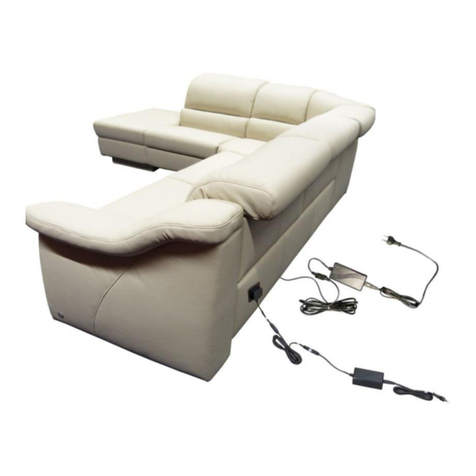
  9. Himolla 29000 33 User manual

Himolla 29000 33 User manual

08.09.2021_Ver.2.0_HR
LM: 29000 33
Auspacken, Unpacking, Déballage
Inhaltsverzeichnis / Table of Contents / Contenu
LM
29000 33
Montagezeit ca. --- Min.
Assembly time / Temps de montage 21.1.19
letzte Änderung Version Kürzel Seite
1.0 HR 2/17
Modellart / model type / Type de modèle Seite / Side / Page
4
Modellart / model type / Type de modèle
Montage,Assembly, Montage
11 - 13543/44, 545/46, 547/48, 553/54, 555/56, 557/58,
11 - 13571/72, 573/74, 575/76, 577/78, 581/82, 583/84, 585/86, 587/88,
15 - 19231, 232, 233, 234, 235, 236, 237, 238,
20
121, 122, 123, 124, 125, 126, 127, 128, 141, 142, 143, 144, 145,
146, 147, 148, 151, 152, 153, 154, 155, 156, 157, 158, 162, 164,
166, 168, 173, 174,
21357, 358, 366, 368,
Seite / Side / PageModellart / model type / Type de modèle
Funktionskontrolle, Functional check, Contrôle du fonctionnement
25 - 26
Seite / Side / Page
Datum
08.09.21
Version Kürzel Seite
2.0 HR 2/28
Seite / Side / PageModellart / model type / Type de modèle
Demontage, Disassembly, Démontage
27 - 28530,
Seite / Side / Page
Modellart / model type / Type de modèle
Stützfuß-Kufe montieren / Assembly of support feet and support runners / Montage
du pied de support et du patin de support
6 - 9
10173, 174,
Seite / Side / Page
Seite / Side / PageModellart / model type / Type de modèle
Fußmontage, Foot assembly, Montage des pieds
5
22 - 23525, 526, 529, 530,
24515, 516, 519, 520,
14543, 544, 545, 546, 547, 548,
Inhaltsverzeichnis / Table of Contents / Contenu
LM
29000 33
Montagezeit ca. --- Min.
Assembly time / Temps de montage 21.1.19
letzte Änderung Version Kürzel Seite
1.0 HR 2/17
•Bei nicht vorschriftsgemäßer und/oder fachgerechter Montage sowie unsachgemäßer Nutzung wird bei Personen-
oder Sachschaden keinerlei Haftung übernommen!
•Wir empfehlen die Montage nur durch fachkundiges Personal.
•Die Montageanleitung und demontierte Bauteile sollten aufbewahrt werden.
•Bei veränderter Zusammenstellung kann sich die Montagezeit verändern.
•Am Aufstellort muss für eine geeignete Unterlage gesorgt werden, damit bei der Montage der Bodenbelag nicht
beschädigt wird.
•Achten Sie bei der Montage darauf, dass Sie das Bezugsmaterial des Möbels nicht beschädigen.
•No liability can be assumed for personal injury or material damage in the event of incorrect and/or unprofessional
assembly or improper use.
•We recommend that the assembly only be carried out by competent personnel.
•The assembly instructions and disassembled components should be kept for future reference.
•The assembly time may differ with a different configuration.
•A suitable underlay must be provided at the installation site so that the floor covering is not damaged during
installation.
•During assembly, make sure that you do not damage the cover material of the furniture.
• Aucune responsabilité n’est assumée pour les dommages corporels ou matériels éventuels en cas de montage non
conforme aux instructions et/ou inapproprié ainsi qu’en cas d’utilisation abusive.
•Nous recommandons de faire réaliser le montage par du personnel qualifié.
•Le manuel de montage et les pièces démontées doivent être conservés.
• Le temps de montage peut varier en cas d’assemblage différent.
•Merci de placer une protection de sol adaptée afin de ne pas endommager le sol pendant le montage.
•Faire attention de ne pas endommager le revêtement du meuble pendant le montage.
Datum
08.09.21
Version Kürzel Seite
2.0 HR 3/28
•Verpackung mit einem nicht spitzen
Gegenstand öffnen z.B. Folienschneider
•Open packaging with a device that is not
pointed or sharp, e.g. a foil cutter
• Ouvrir l’emballage à l’aide d’un outil non-
pointu (p.e. un découpe plastique)
Montageanleitung
Assembly instructions / Manuel de montage
LM
29000 33
Montagezeit ca. 10 Min.
Assembly time / Temps de montage
Datum
08.09.21
Version Kürzel Seite
2.0 HR 4/28
Auspacken, Unpacking, Déballage
•Falls nötig, die Möbelfüße nach
beiliegender Anleitung montieren.
•Assemble the furniture feet according to the
enclosed instructions if necessary.
•Si nécessaire, monter les pieds du meuble
selon le manuel fourni.
•Fußmontage siehe beiliegende Anleitung
29111 46
•See the enclosed instructions 29111 46 to
assemble the foot
•Montage des pieds, voir notice jointe 29111
46
Montageanleitung
Assembly instructions / Manuel de montage
LM
29000 33
Montagezeit ca. 10 Min.
Assembly time / Temps de montage
Datum
08.09.21
Version Kürzel Seite
2.0 HR 5/28
Fußmontage, Foot assembly, Montage des pieds
•Wenn vorhanden, Stecker verbinden
•Connect the plug, where present
•Le cas échéant, connecter la fiche
•Auf der Laschen Seite die Stützkufe mit den
Senkschrauben montieren.
•Fit the support runner with the countersunk
screws on the lug side.
•Monter le patin de support du côté des
languettes avec les vis à tête fraisée.
85027 55
Montagezubehör,
mounting accessories
Matériel de montages
Nr. / No / N°Größe / Size / Taille
13637 00
M8 x 20
14024 00
mitgeliefertes Material / Material included / Matériel fourni
Senkschraube
Countersunk screw
Vis à tête fraisée
Stützkufe
Support runner
Patin de support
Montageanleitung
Assembly instructions / Manuel de montage
LM
29000 33
Montagezeit ca. 10 Min.
Assembly time / Temps de montage
Datum
08.09.21
Version Kürzel Seite
2.0 HR 6/28
Montage,Assembly, Montage,
•Stützfuß eindrehen
•Screw in the support foot
•Visser le pied de support
•Auf der Laschen Seite die Stützkufe mit den
Senkschrauben montieren.
•Fit the support runner with the countersunk
screws on the lug side.
•Monter le patin de support du côté des
languettes avec les vis à tête fraisée.
85027 55
Montagezubehör,
mounting accessories
Matériel de montages
Nr. / No / N°Größe / Size / Taille
13637 00
M8 x 20
14024 00
mitgeliefertes Material / Material included / Matériel fourni
Senkschraube
Countersunk screw
Vis à tête fraisée
Stützkufe
Support runner
Patin de support
Montageanleitung
Assembly instructions / Manuel de montage
LM
29000 33
Montagezeit ca. 10 Min.
Assembly time / Temps de montage
Datum
08.09.21
Version Kürzel Seite
2.0 HR 7/28
Montage,Assembly, Montage,
LM
29000 33
Montagezeit ca. --- Min.
Assembly time / Temps de montage 08.09.21
Datum Version Kürzel Seite
2.0 HR 8/28
Montage Stützkufe / Assembly of support runner / Montage du
patin de support
Modellart / model type / Type de modèle
316, 317, 318, 319,
Zweisitzig Stützkufe / Two-seater support runner / Patin de support - deux places
352, 354, 356, 358,
252, 254, 256, 258,
Seite / Side / Page
6
Modellart / model type / Type de modèle
111, 112, 113, 114,
Einsitzig Stützkufe / One-seater support runner / Patin de support –une place
122, 124, 126, 128,
311, 312, 313, 314,
322, 324, 326, 328,
Seite / Side / Page
6
Modellart / model type / Type de modèle
162, 164, 166, 168,
Zweisitzig 2 Teile / Two-seater 2 parts / Deux places en 2 parties
141, 143, 145, 147,
151, 153, 155, 157,
142, 144, 146, 148,
152, 154, 156, 158,
Seite / Side / Page
6
Modellart / model type / Type de modèle
516, 520, 526, 530,
Recamiere, Bett, / Recamier, bed / Méridienne, lit
232, 234, 236, 238,
Seite / Side / Page
6
Modellart / model type / Type de modèle
531, 532, 534, 535,
Eckteile, / Corner parts, / Angles,
Seite / Side / Page
7
1
2
3
1 2 3
1
2
3
4
1 2 3 4
1
2
3
4
1 2 3 4 5
5
1
2
1 2
1
2
3 536,
539, 540,
1 2 3
LM
29000 33
Montagezeit ca. --- Min.
Assembly time / Temps de montage 08.09.21
Datum Version Kürzel Seite
2.0 HR 9/28
Modellart / model type / Type de modèle
562, 564,
Integrierte Eckteile / Integrated corner parts / Angles intégrés
581, 583, 585, 587,
582, 584, 586, 588,
Seite / Side / Page
6 - 7
1
2
3
1 2 3
Modellart / model type / Type de modèle
543, 545, 547,
OffenerAbschluss / Open end element / Extrémité ouverte
544, 546, 548,
553, 555, 557,
554, 556, 558,
Seite / Side / Page
11
1
2
3
4
1 2
Montage Stützfuß / Assembly of the support foot /
Montage du pied de support
Modellart / model type / Type de modèle
531, 532, 534, 535, 581, 583, 585, 587,
Eckteile / Corner parts / Angles
536, 582, 584, 586, 588,
539, 540,
Seite / Side / Page
7
1 2 3 1
2
3
Modellart / model type / Type de modèle
561, 562, 563, 564,
Integrierte Eckteile / Integrated corner parts / Angles intégrés
Seite / Side / Page
7
1
Modellart / model type / Type de modèle
173, 174,
Seite / Side / Page
6
1 1
3 4
1
•Jeden Gewindestift mit Unterlegscheibe
und Mutter montieren und festziehen.
•Alle vorhandenen Stecker verbinden.
•Nessel am Klettband schließen.
•Fit each grub screw with a washer and
tighten.
•Connect all of the plugs, where present.
•Close the Velcro fastener on the calico flap.
•Monter et serrer chaque tige filetée à bloc
avec une rondelle et un écrou.
•Connecter toutes les fiches fournies.
•Fermer la toile au niveau de la bande
Velcro.
•Gewindestifte mit dem kurzen Gewinde in die
Platte eindrehen.
•Nessel am Klettband öffnen.
•Gewindestifte und Kabel in die vorgesehenen
Bohrungen beim Ablagetisch schieben.
•Screw the short thread of the grub screw into
the table surface.
•Open the Velcro fastener on the calico flap.
•Push the grub screws and cables into the
designated drilled holes in the table.
•Visser les tiges filetées avec le filetage court
dans la plaque.
•Ouvrir la toile au niveau de la bande Velcro.
•Introduire les tiges filetées et câbles dans les
perçages de la tablette prévus à cet effet.
85020 55
Montagezubehör,
mounting accessories
Matériel de montages
Nr. / No / N°Größe / Size / Taille
29724 00
M8 x 70
17623 00
M8
29342 008,4 x 25
mitgeliefertes Material / Material included / Matériel fourni
Sechskantmutter
Gewindestift
Unterlegscheibe
Montageanleitung
Assembly instructions / Manuel de montage
173, 174,
LM
29000 33
Montagezeit ca. 10 Min.
Assembly time / Temps de montage
Datum
08.09.21
Version Kürzel Seite
2.0 HR 10/28
Montage,Assembly, Montage,
•Deckel von Anbauhocker öffnen.
•Stützkufe außen mit M8x16 und innen mit
siehe nächstes Bild verschrauben.
•Open the lid of the footstool end section.
•Bolt the support runner on the outside with
M8x16. For the inside, see next image.
• Ouvrir le couvercle du pouf d’extrémité.
•Visser le patin de support à l'extérieur avec
des vis M8x16 et à l'intérieur, voir la photo
suivante
Montagezubehör,
mounting accessories
Matériel de montages
Nr. / No / N°Größe / Size / Taille
27281 00
40 x 13
85030 55
27281 0140 x 13
14024 00
mitgeliefertes Material / Material included / Matériel fourni
Unterlegscheibe
Gekappt
Capped washer
Rondelle coupée
Unterlegscheibe
Washer
Rondelle
Stützkufe
Support runner
Patin de support
85030 55
Montagezubehör,
mounting accessories
Matériel de montages
Nr. / No / N°Größe / Size / Taille
29726 00
M8 x 50
17565 00
M8 x 16
29719 00M8
mitgeliefertes Material / Material included / Matériel fourni
Senkschraube
Countersunk screw
Vis à tête fraisée
Gewindestift
Grub screw
Tige filetée
Hülsenmutter
Sleeve nut
Écrou manchon
Montageanleitung
Assembly instructions / Manuel de montage
LM
29000 33
Montagezeit ca. 15 Min.
Assembly time / Temps de montage
Datum
08.09.21
Version Kürzel Seite
2.0 HR 11/28
Montage,Assembly, Montage,
Montagezeit ca. 15 Min.
Assembly time / Temps de montage
•Winkelgleiter entfernen.
•Stützkufe nach Anleitung auf Seite 6
montieren.
•Remove the angled slide.
•Fit the support runner according to the
instructions on page 6.
•Retirer le patin d'angle.
•Monter le patin de support selon les
instructions de la page 6.
•Siehe Fußmontage
•See assembly of the foot
•Voir le montage des pieds
•Innen Hülse und Unterlegscheibe mit der
äußeren Schraube verbinden.
•Beim Beschlag die gekappte
Unterlegscheibe verwenden.
•Connect the inner sleeve and washer with
the outer screw.
•Use the capped washer for the fittings
•Raccorder la douille intérieure et la rondelle
avec la vis extérieure.
•Utiliser la rondelle coupée pour la garniture.
Montageanleitung
Assembly instructions / Manuel de montage
LM
29000 33 08.09.21
Datum Version Kürzel Seite
2.0 HR 12/28
Montagezeit ca. 15 Min.
Assembly time / Temps de montage
•Unterlegscheibe und Hülsenmutter in die
Bohrungen des Anbauhockers stecken und
mit Inbusschlüssel festziehen.
•Insert the washers and sleeve nuts into the
holes drilled in the footstool end section and
tighten with an Allen key.
• Placer la rondelle et l’écrou douille dans les
perçages du pouf d’extrémité, puis serrer
avec la clé Allen.
•Gewindestifte mit der kurzen Seite in die
Einschlagmutter eindrehen.
•Anbauhocker mit den vorgesehenen
Bohrungen über die Gewindestifte
schieben.
•Screw the short side of the grub screw into
the drive-in nut.
•Align the designated holes drilled in the
footstool end section over the grub screws.
•Visser les tiges filetées avec le côté court
dans l’écrou à enfoncer.
• Faire glisser le pouf d’extrémité sur les
tiges filetées en utilisant les perçages
prévus à cet effet.
Montageanleitung
Assembly instructions / Manuel de montage
LM
29000 33 08.09.21
Datum Version Kürzel Seite
2.0 HR 13/28
•Anbauhocker mit Unterlegscheibe und
Muttern verschrauben.
•Nessel am Klettband schließen.
•Bolt end stool together with washers and
nuts.
•Close the Velcro fastener on the calico flap.
• Visser le pouf d’extrémité avec des
rondelles et des écrous.
•Fermer la toile au niveau de la bande
Velcro.
•Nessel am Klettband öffnen.
•Gewindestifte bei den vorgesehenen
Bohrungen am Korpus ansetzen.
•Open the Velcro fastener on the calico flap.
•Insert grub screws into the designated
drilled holes in the body.
•Ouvrir la toile au niveau de la bande Velcro.
•Insérer les tiges filetées dans les perçages
prévus sur le corps.
85020 55
Montagezubehör,
mounting accessories
Matériel de montages
Nr. / No / N°Größe / Size / Taille
17623 00
M8
29342 00
8,4 x 2
29724 00M8 x 70
mitgeliefertes Material / Material included / Matériel fourni
Unterlegscheibe
Sechskantmutter
Gewindestift
Montageanleitung
Assembly instructions / Manuel de montage
543, 544, 545, 546,
547, 548,
LM
29000 33
Montagezeit ca. 10 Min.
Assembly time / Temps de montage
Datum
08.09.21
Version Kürzel Seite
2.0 HR 14/28
Montage,Assembly, Montage,
•Sitzfläche drehen.
•Turn the seat.
•Tourner l'assise.
•Kabelbinder und Transportschutz entfernen.
•Achtung: Untergestell steht beim aufklappen
durch einer Feder unter Spannung.
•Remove the cable ties and transport
protection.
•Attention: When unfolding, the base frame is
under tension because of the spring.
•Retirer le serre-câble et la protection de
transport.
•Attention: le socle est tendu par un ressort
au moment d’être rabattu.
85029 55
Montagezubehör,
mounting accessories
Matériel de montages
Nr. / No / N°Größe / Size / Taille
17568 00
M6 x 55
mitgeliefertes Material / Material included / Matériel fourni
Senkschraube
Countersunk screw
Vis à tête fraisée
Montageanleitung
Assembly instructions / Manuel de montage
LM
29000 33
Montagezeit ca. 25 Min.
Assembly time / Temps de montage
Datum
08.09.21
Version Kürzel Seite
2.0 HR 15/28
Montage,Assembly, Montage,
Montagezeit ca. 25 Min.
Assembly time / Temps de montage
•Führungsdübel am Seitenteil in die
Bohrung am Bettgestell einführen.
•Insert the plugs on the side part into the
drilled hole in the bed frame.
•Introduire la cheville de guidage sur la
partie latérale dans le perçage sur le cadre
du lit.
•Transportschutz entfernen.
•Remove transport protection.
•Supprimer la protection de transport.
Montagezubehör,
mounting accessories
Matériel de montages
Nr. / No / N°Größe / Size / Taille
85028 55
20251 00 00
M8 x 70
mitgeliefertes Material / Material included / Matériel fourni
Senkschraube
Countersunk screw
Vis à tête fraisée
Montageanleitung
Assembly instructions / Manuel de montage
LM
29000 33 08.09.21
Datum Version Kürzel Seite
2.0 HR 16/28
Montagezeit ca. 25 Min.
Assembly time / Temps de montage
•Pappe Transportschutz beim Lattenrost
unterlegen.
•Senkschraube M8x70 unten oben in das
Seitenteil montieren.
•Place the cardboard transport protection
beneath the slatted frame.
•Fit a M8x70 countersunk screw into the top
and bottom of the side part.
•Placer une protection de transport en
carton sous le caillebotis.
•Placer une vis à tête fraisée M8x70 en bas
et en haut dans la partie latérale.
•Seitenteil mit den Senkschrauben M8x70
montieren.
•Fuß-Kufen Montage siehe beiliegende
Anleitung
•Mount the side part with the M8x70
countersunk screws.
•Please refer to the enclosed instructions
when mounting the feet-runners
•Monter la partie latérale avec les vis à tête
fraisée M8x70.
•Montage du pied/patin. Voir les instructions
ci-jointes
Montageanleitung
Assembly instructions / Manuel de montage
LM
29000 33 08.09.21
Datum Version Kürzel Seite
2.0 HR 17/28
Montagezeit ca. 25 Min.
Assembly time / Temps de montage
•Metalllasche in der Führungsschiene ganz
nach hinten ziehen und mit dem Lattenrost
verschrauben.
•Pull the metal lug in the guide rail as far
back as it will go and screw to the slatted
frame.
•Tirer la languette métallique du rail de
guidage à fond vers l'arrière et la visser au
caillebotis.
•Lattenrost mit Kopfteil ganz rausziehen.
•Pull slatted frame with headrest completely
out.
•Sortir complètement le caillebotis avec
l'appuie-tête.
Montagezubehör,
mounting accessories
Matériel de montages
Nr. / No / N°Größe / Size / Taille
85029 55
17568 00
M6 x 55
mitgeliefertes Material / Material included / Matériel fourni
Senkschraube
Countersunk screw
Vis à tête fraisée
Montageanleitung
Assembly instructions / Manuel de montage
LM
29000 33 08.09.21
Datum Version Kürzel Seite
2.0 HR 18/28
Montagezeit ca. 25 Min.
Assembly time / Temps de montage
•Rücken entriegeln und in Grundposition
bringen.
•Unlock the back and move to its initial
position.
•Déverrouiller le dossier et le placer en
position initiale.
•Rücken anheben und Sitzfläche
einschieben.
•Lift up the back and slide in the seat.
•Relever le dossier et pousser l'assise.
Montageanleitung
Assembly instructions / Manuel de montage
LM
29000 33 08.09.21
Datum Version Kürzel Seite
2.0 HR 19/28
•Mutter ganz nach unten schieben und am
Spannkopf mit dem Gewinde festdrehen.
•Push the nut right down and tighten with the
thread on the clamping head.
• Insérer l’écrou jusqu’en bas et tourner la
tête de serrage avec le filetage.
•Kopfstütze in den Rücken stecken bis der
Sicherheitsclip am Spannkopf anliegt.
•Push the headrest into the back until the
safety clip rests against the clamping head.
• Enficher l’appuie-tête dans le dossier
jusqu’à ce que l’attache de sécurité repose
sur la tête de serrage.
Stück / Piece / PièceNr. / No / N°Größe / Size / Taillemitgeliefertes Material / Material included / Matériel fourni
Montageanleitung
Assembly instructions / Manuel de montage
LM
29000 33
Montagezeit ca. 5 Min.
Assembly time / Temps de montage
Datum
08.09.21
Version Kürzel Seite
2.0 HR 20/28
Montage,Assembly, Montage

Other Himolla Indoor Furnishing manuals

Himolla Lounger Series User manual

Himolla

Himolla Lounger Series User manual

Himolla 29000 34 User manual

Himolla

Himolla 29000 34 User manual

Himolla LM 29111 25 User manual

Himolla

Himolla LM 29111 25 User manual

Himolla 29000 25 User manual

Himolla

Himolla 29000 25 User manual

Himolla LM 29000 01 User manual

Himolla

Himolla LM 29000 01 User manual

Himolla Tangram Motion Series User manual

Himolla

Himolla Tangram Motion Series User manual

Himolla 29111 48 User manual

Himolla

Himolla 29111 48 User manual

Himolla SIGNA 1052 User manual

Himolla

Himolla SIGNA 1052 User manual

Himolla LM 29111 48 User manual

Himolla

Himolla LM 29111 48 User manual

Himolla 29000 38 User manual

Himolla

Himolla 29000 38 User manual

Himolla 7568 User manual

Himolla

Himolla 7568 User manual

Himolla 29111 35 User manual

Himolla

Himolla 29111 35 User manual

Himolla Cumuly Comfort 29111 43 User manual

Himolla

Himolla Cumuly Comfort 29111 43 User manual

Himolla Planopoly Motion User manual

Himolla

Himolla Planopoly Motion User manual
Himolla LM 29111 46 User manual

Himolla

Himolla LM 29111 46 User manual

Himolla TANGRAM SOFA 9065 User manual

Himolla

Himolla TANGRAM SOFA 9065 User manual

Himolla Z87 User manual

Himolla

Himolla Z87 User manual

Himolla CUMULY 4928 User manual

Himolla

Himolla CUMULY 4928 User manual

Himolla AZURE 4080 User manual

Himolla

Himolla AZURE 4080 User manual

Himolla SIGNA 1051 User manual

Himolla

Himolla SIGNA 1051 User manual
Himolla 29000 20 80 User manual

Himolla

Himolla 29000 20 80 User manual

Himolla Easy Comfort Series User manual

Himolla

Himolla Easy Comfort Series User manual

Popular Indoor Furnishing manuals by other brands

Case Ballet Care Instructions

Case

Case Ballet Care Instructions

Rapidline Boost Plus Single Sided Desk Workstation Assembly instructions

Rapidline

Rapidline Boost Plus Single Sided Desk Workstation Assembly instructions

Screen Innovations Nano Box installation instructions

Screen Innovations

Screen Innovations Nano Box installation instructions

American Standard Cascada 30" Vanity 9437.200 Assembly and installation instructions

American Standard

American Standard Cascada 30" Vanity 9437.200 Assembly and installation instructions

Westwood Design WOODLAND ADVENTURES DP-TR-3109GR-ELM Assembly instruction

Westwood Design

Westwood Design WOODLAND ADVENTURES DP-TR-3109GR-ELM Assembly instruction

BullFrog 0221 WUMMS Assembly and instruction manual

BullFrog

BullFrog 0221 WUMMS Assembly and instruction manual

Sauder Office Works Affirm 431916 manual

Sauder

Sauder Office Works Affirm 431916 manual

Master Garden Island Bar BBI-6 Assembly manual

Master Garden

Master Garden Island Bar BBI-6 Assembly manual

Trinity Basics TBTZ-0968 owner's manual

Trinity Basics

Trinity Basics TBTZ-0968 owner's manual

CONFORAMA MILIS Assembling instructions

CONFORAMA

CONFORAMA MILIS Assembling instructions

Amart Furniture VALHALLA 74497 Assembly instruction

Amart Furniture

Amart Furniture VALHALLA 74497 Assembly instruction

Sun Chiro Table PETTIBON Assembly instructions

Sun Chiro Table

Sun Chiro Table PETTIBON Assembly instructions

East West Furniture HET Assembly instructions

East West Furniture

East West Furniture HET Assembly instructions

Rauch M2575 Assembly instructions

Rauch

Rauch M2575 Assembly instructions

Amart Furniture SIGNATURE NERO 2200 Assembly instruction

Amart Furniture

Amart Furniture SIGNATURE NERO 2200 Assembly instruction

JWA ROBINSON 74321 Assembly instruction

JWA

JWA ROBINSON 74321 Assembly instruction

KEUCO iLook move Instructions for use

KEUCO

KEUCO iLook move Instructions for use

Next 514033 Assembly instructions

Next

Next 514033 Assembly instructions

manuals.online logo
manuals.online logoBrands
  • About & Mission
  • Contact us
  • Privacy Policy
  • Terms and Conditions

Copyright 2025 Manuals.Online. All Rights Reserved.