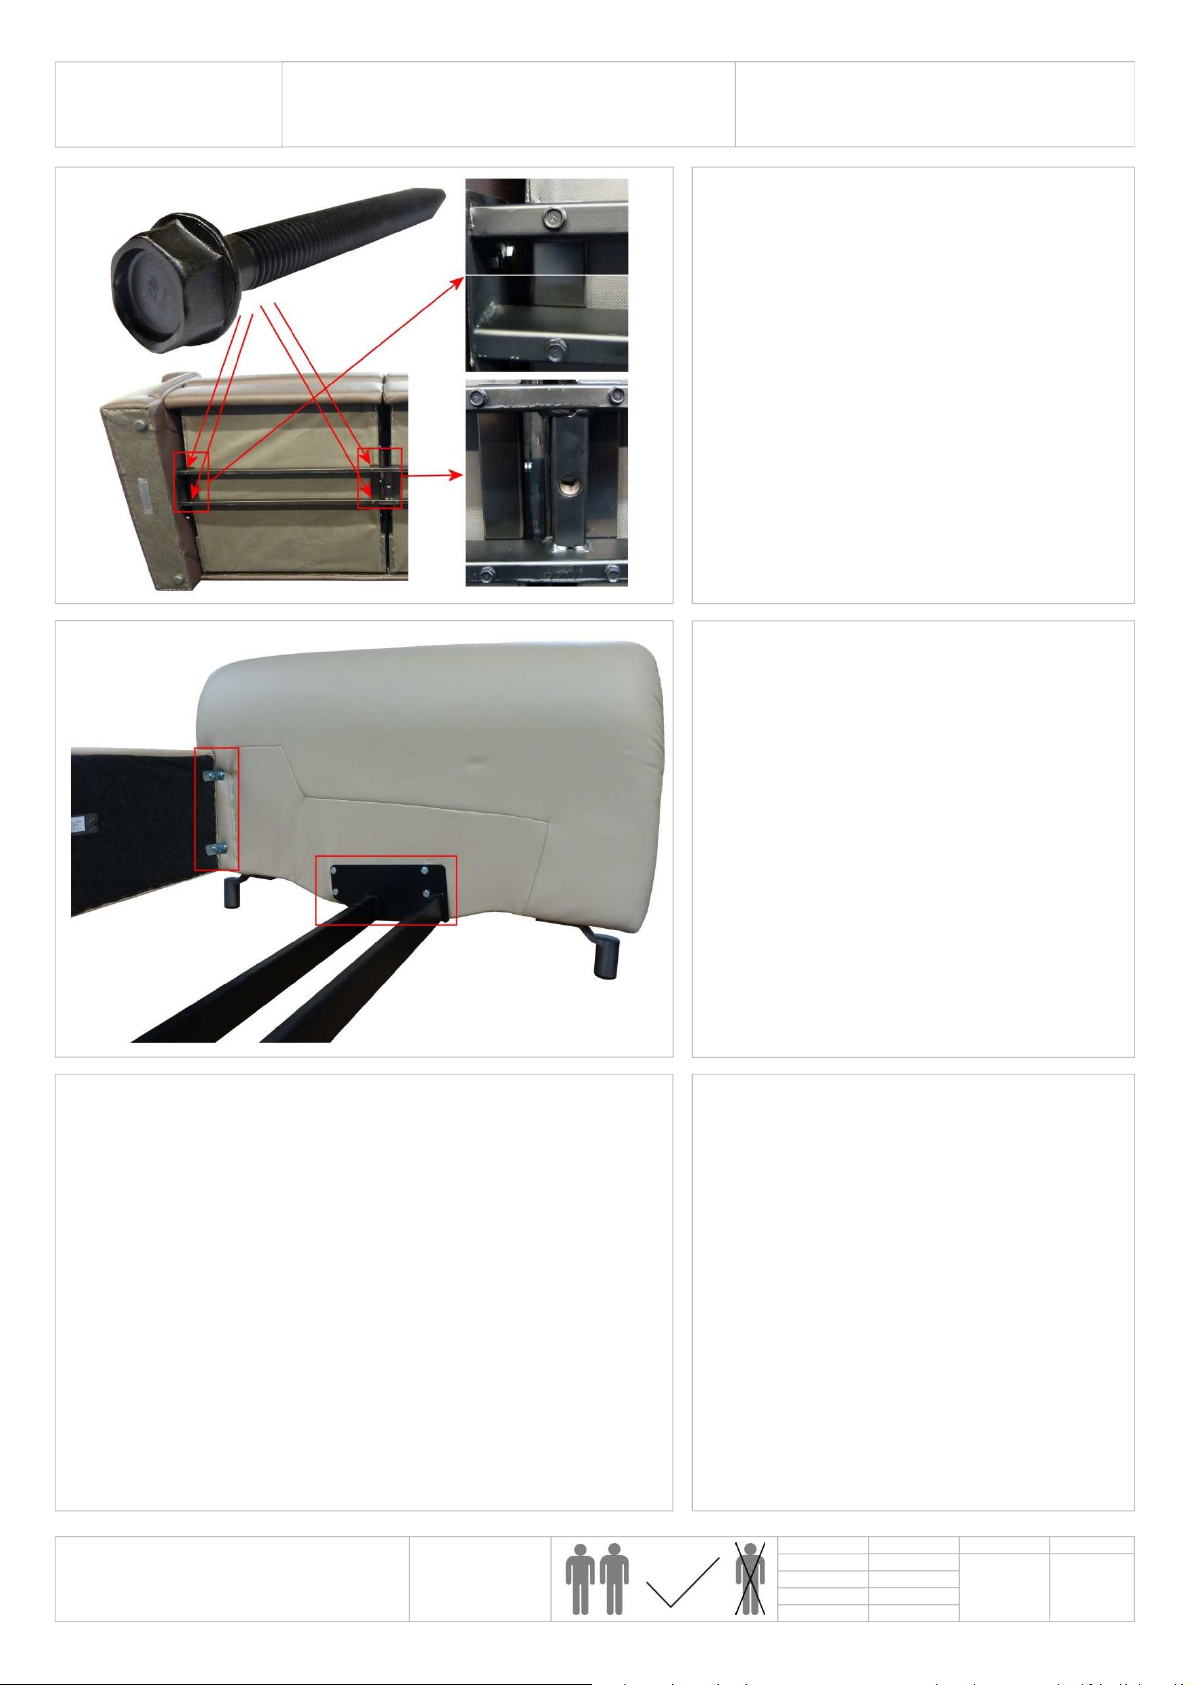
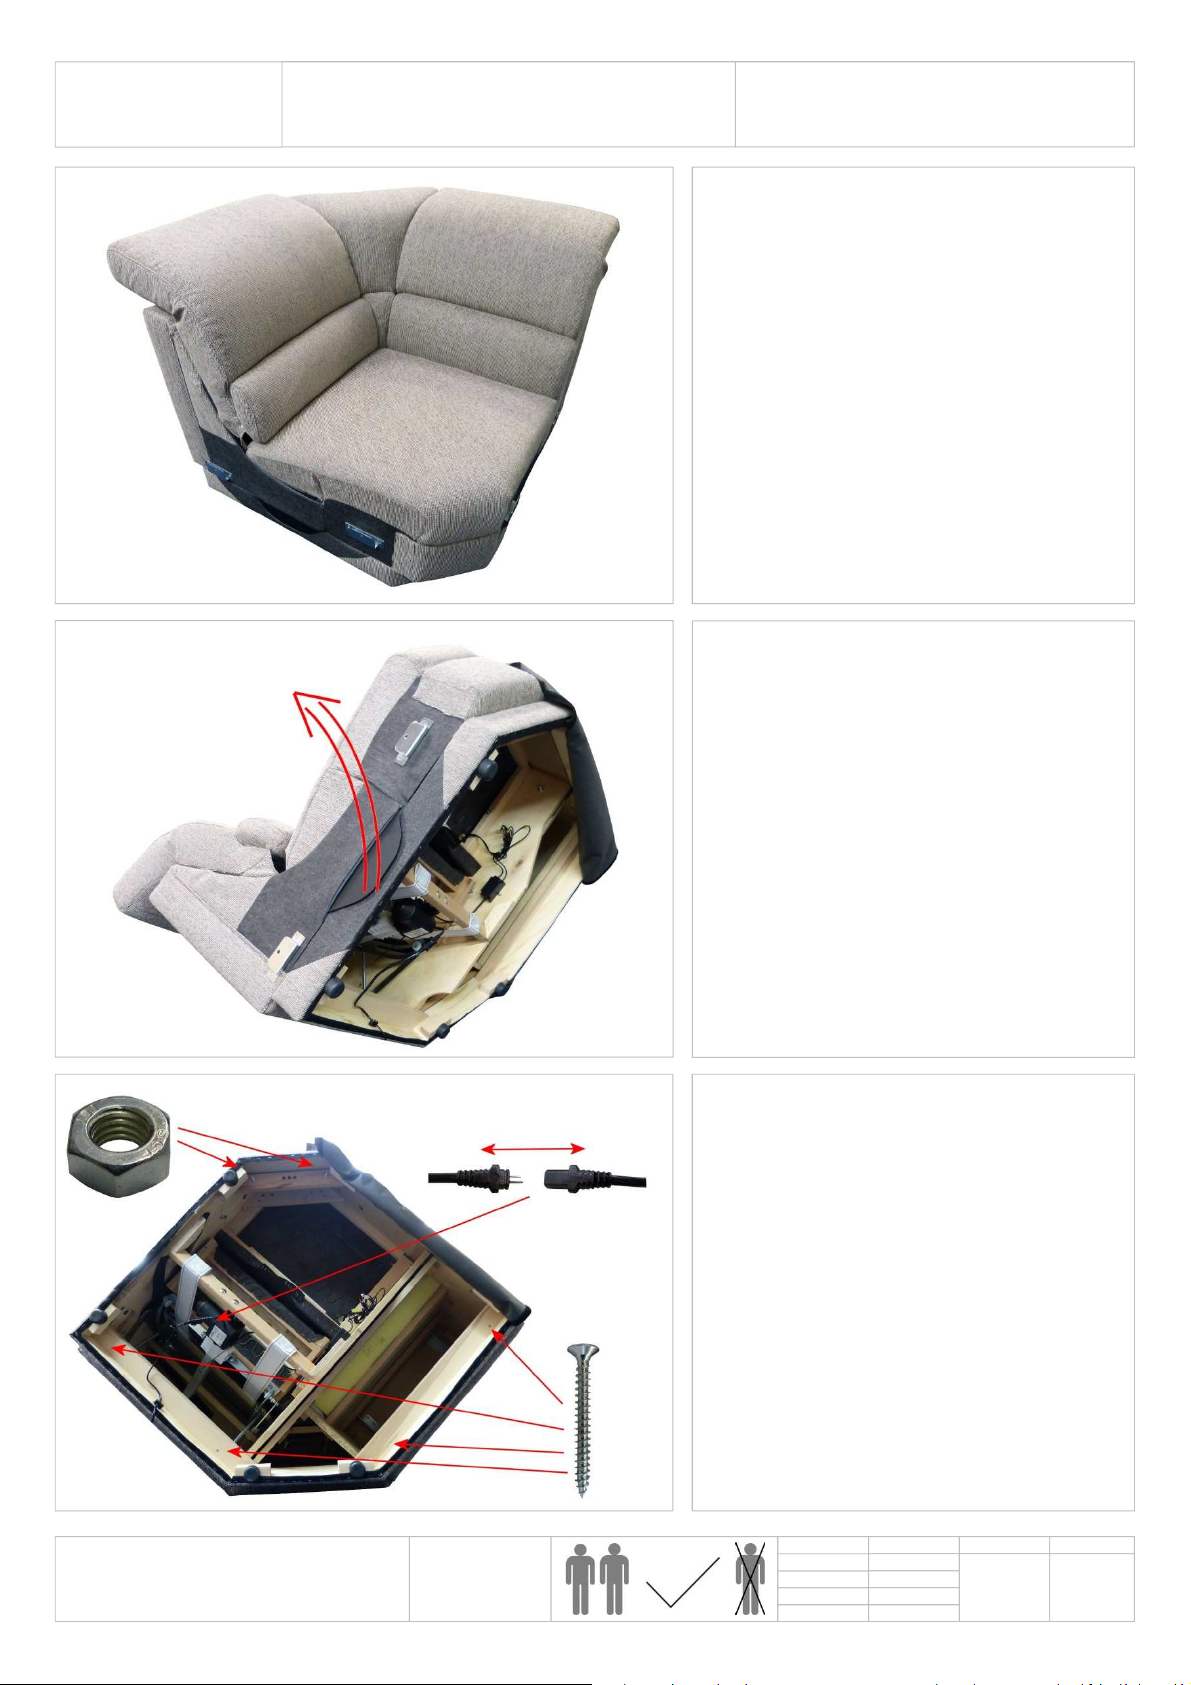
Himolla Planopoly Motion User manual


This manual suits for next models
1
Other Himolla Indoor Furnishing manuals

Himolla
Himolla LM 29111 46 User manual

Himolla
Himolla SIGNA 1051 User manual

Himolla
Himolla Cumuly Comfort 29111 43 User manual

Himolla
Himolla AZURE 4080 User manual

Himolla
Himolla 7568 User manual

Himolla
Himolla 29000 20 80 User manual

Himolla
Himolla 29000 33 User manual

Himolla
Himolla Z87 User manual

Himolla
Himolla LM 29111 48 User manual

Himolla
Himolla TANGRAM SOFA 9065 User manual

Himolla
Himolla 29000 34 User manual

Himolla
Himolla SIGNA 1052 User manual

Himolla
Himolla Easy Comfort Series User manual

Himolla
Himolla Tangram Motion Series User manual

Himolla
Himolla LM 29000 01 User manual

Himolla
Himolla 29111 48 User manual

Himolla
Himolla 29111 35 User manual

Himolla
Himolla LM 29111 25 User manual

Himolla
Himolla CUMULY 4928 User manual

Himolla
Himolla Lounger Series User manual


Popular Indoor Furnishing manuals by other brands


Tempur-Pedic
Tempur-Pedic TEMPUR+SEALY EASE Troubleshooting steps

beaux meubles
beaux meubles BL 03 Assembly instructions

your zone
your zone Beckett YZW-10001 Instruction booklet

Columbia
Columbia COCA2135 manual

SportsPlay Equipment
SportsPlay Equipment 352-176 Assembly instructions

Uplift Desk
Uplift Desk UPL140 quick start guide


