13
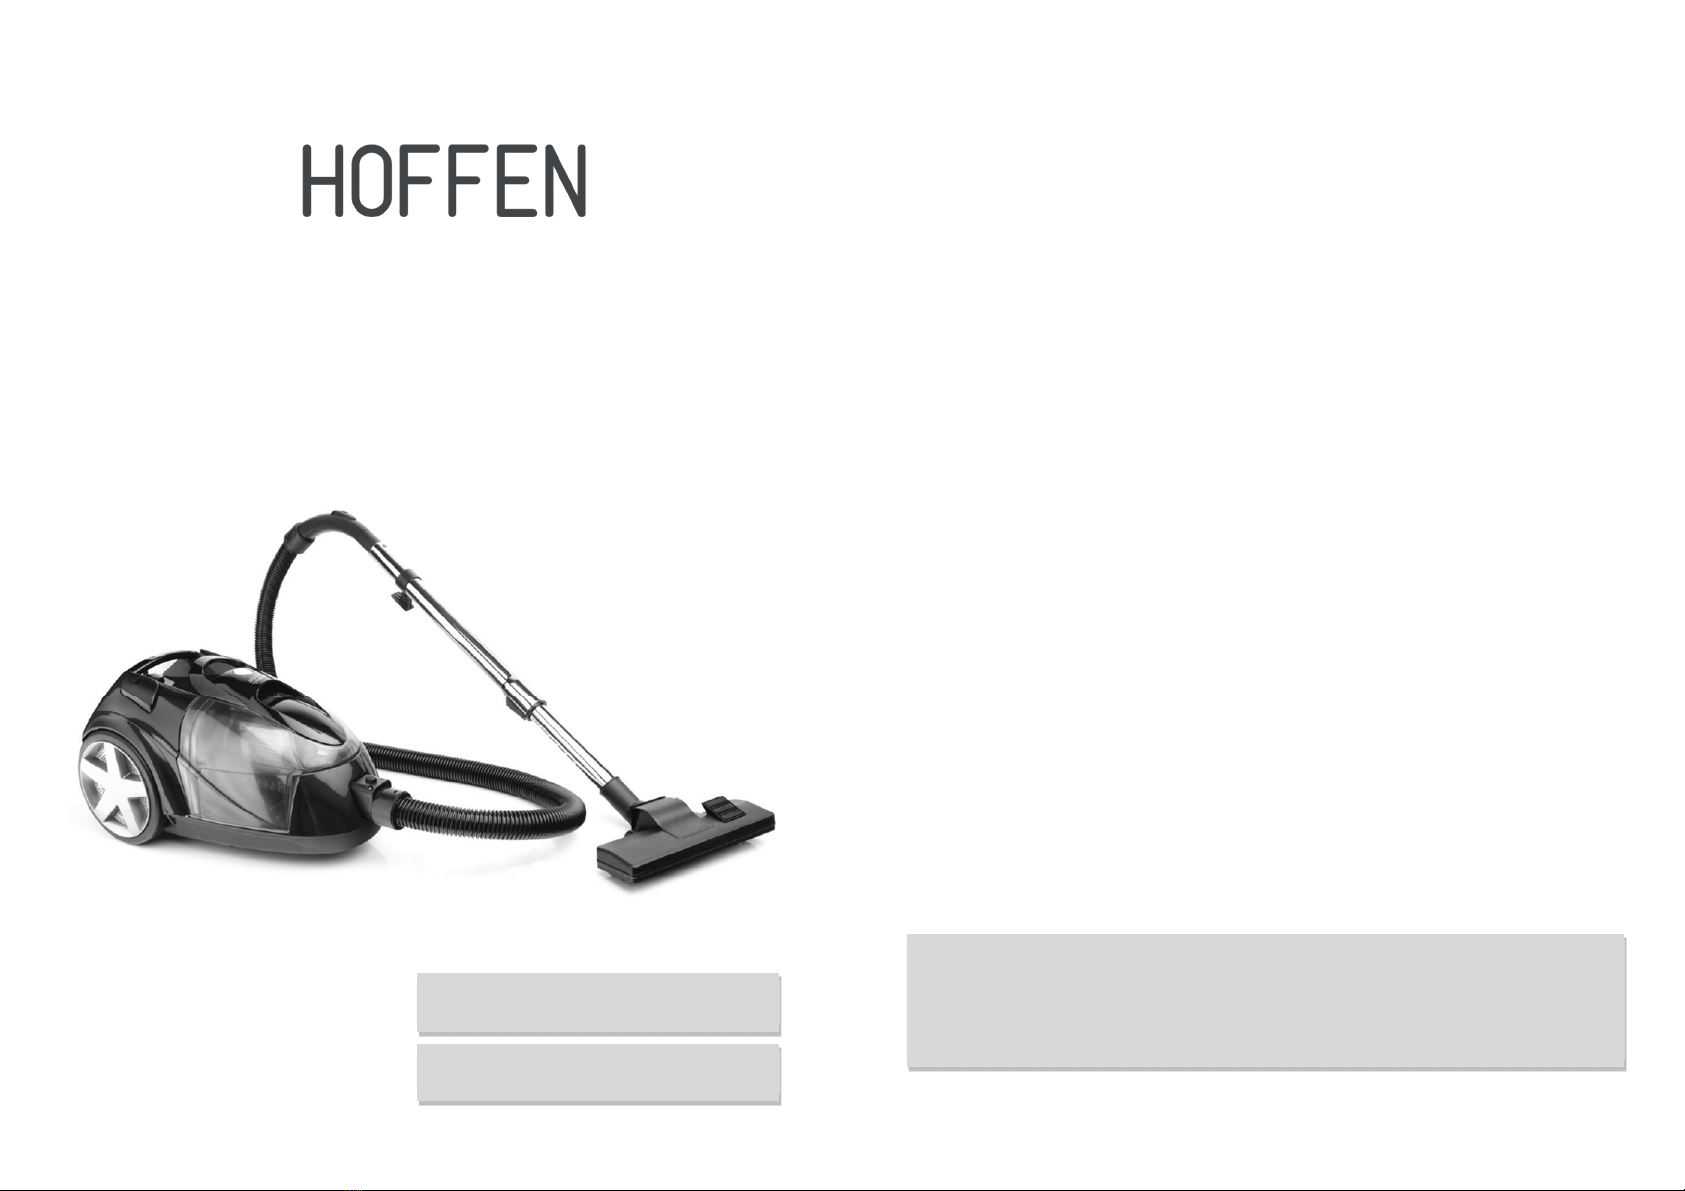
-Seleccione o acessório mais indicado (L, W ou X), dependendo do tipo de superfície a
limpar, e encaixe-o na extremidade do tubo extensível (J).
-Aconselha-se a utilização dos acessórios na limpeza das seguintes superfícies:
-Escova multifunções (L) - escova com dupla função, ideal para carpetes e soalhos;
-Bocal para fendas (W) - ideal para limpeza de fendas, cantos e superfícies de difícil
acesso.
-Escova para o pó (X) - ideal para a limpeza do pó em diversas superfícies, tais como,
móveis, persianas e candeeiros;
Funcionamento
-Desenrole o cabo de alimentação (S) até visualizar a marca amarela indicadora do
comprimento ideal, e ligue a ficha do aparelho a uma tomada.
Nota: não desenrole o cabo de alimentação (S) para além da marca vermelha, indicadora
de comprimento máximo, a partir da qual, poderá danificar o aparelho.
-Ligue o aparelho no botão ligar/desligar (E).
-Controle a potência de sucção na válvula para regular o fluxo de ar (H), existente no
punho (G). É recomendado que mantenha esta válvula (H) aberta quando aspirar cortinas,
de forma a evitar que estas sejam sugadas, e a feche para aspirar superfícies resistentes.
Para abrir a válvula (H), empurre-a para a frente e para a fechar
empurre-a para trás.
-Para transportar o aparelho segure-o pela pega de transporte (C).
-Para desligar o aparelho, pressione o botão ligar/desligar (E) e
retire a ficha da tomada.
-Depois de usar, retire o tubo flexível (P) do corpo do aparelho,
pressionando a patilha (Q) e puxando-o para o retirar.
-Recolha automaticamente o cabo de alimentação (S),
pressionando o botão (B).
Escova multifunções
-Na parte de cima da escova multifunções (L) existe o botão (M) que liberta ou recolhe as
cerdas e que devem ser libertadas ou recolhidas dependendo do tipo de superfície a limpar.
-Para soalhos utilize a escova com as cerdas, pois as cerdas evitam riscos nas superfícies
e permitem um deslizar mais suave.
-Para tapetes e carpetes utilize a escova multifunções (L) sem as cerdas para um deslizar
mais suave.
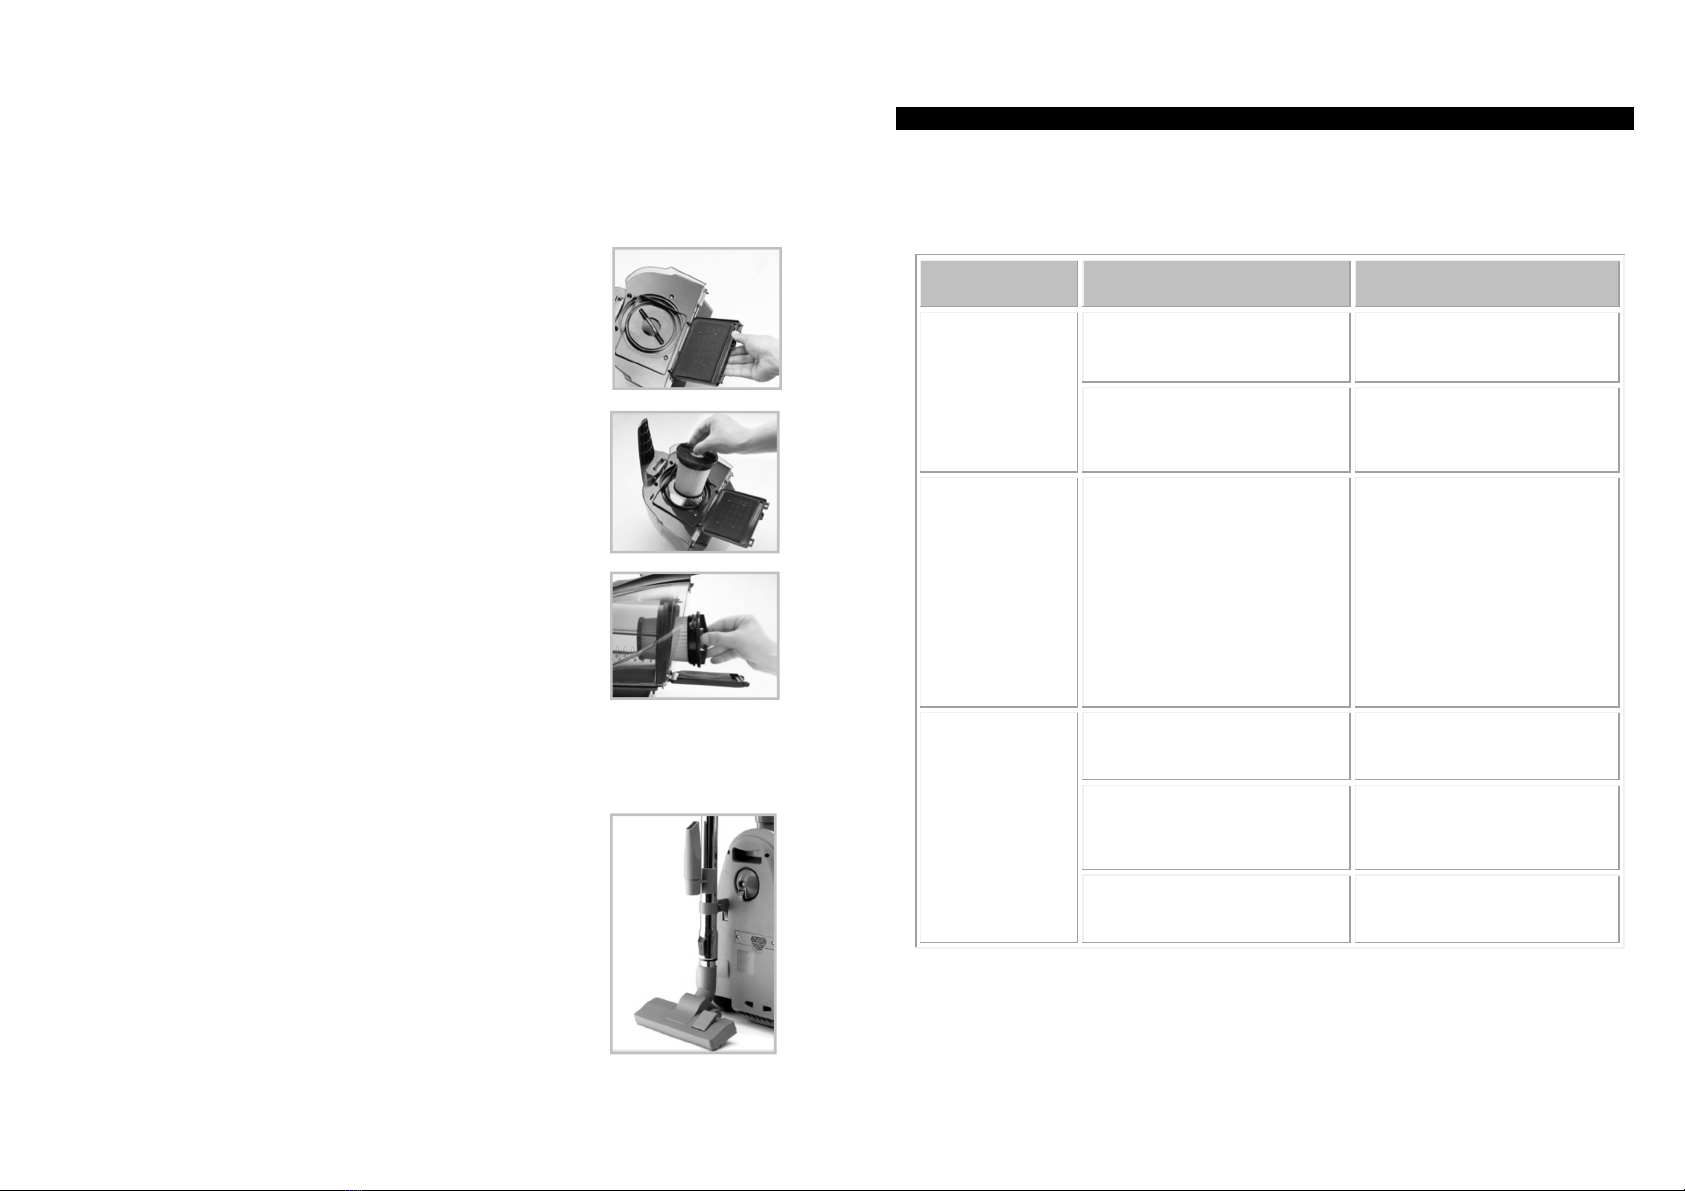
Esvaziar o depósito
-O depósito (N) é transparente para que possa verificar quando
está cheio até à marca de “MAX” e deve ser esvaziado.
-Antes de esvaziar o depósito (N), desligue o aparelho no botão
ligar/desligar (E) e retire a ficha da tomada.
14
-Para retirar o depósito (N), pressione o botão (F) e retire-o puxando-o pela pega (D).
-Para esvaziar o depósito (N) coloque-o sobre um caixote do lixo
e pressione o botão que se encontra na parte de baixo da entrada
de ar.
-Uma vez vazio, feche o depósito (N) e coloque-o novamente no
aparelho, certificando-se que fica devidamente encaixado.
Nota: é recomendado que limpe o filtro HEPA (U) sempre que proceder ao esvaziamento do
depósito (N) (ver secção relativa à Limpeza e Arrumação).
Substituir o filtro de protecção do motor
Este filtro (T) encontra-se na parte de trás do depósito (N).
-Antes substituir o filtro (T), desligue o aparelho no botão ligar/desligar (E) e retire a ficha
da tomada.
-Destaque o depósito (N), puxe a grelha do filtro pelo encaixe superior e retire
completamente o filtro (T) do motor.
-Coloque um filtro novo, certificando-se que fica bem encaixado e feche novamente a
grelha.
-Volte a colocar depósito para o lixo (N) no corpo do aparelho.
-Sempre que o filtro (T) estiver demasiado sujo, enrijecido e a perder a capacidade de
filtração, é recomendado que o substitua por um novo.
NOTA: pode adquirir o kit de acessórios para este aspirador da marca Electric Co /
HOFFEN. O kit inclui 1 filtro HEPA (U), 1 filtro de protecção do motor (T) e 1 filtro de saída
de ar, que se encontra debaixo da grelha traseira (R).
Substituir o filtro da saída de ar
-O filtro da saída de ar encontra-se na parte de trás do aparelho,
sob a grelha (R).
-Antes substituir o filtro, desligue o aparelho no botão
ligar/desligar (E) e retire a ficha da tomada.
-Destaque a grelha (R) pressionando as duas patilhas e puxando-
a para fora, expondo o filtro.
-Retire o filtro usado.
-Coloque o novo filtro certificando-se que fica devidamente
encaixado e volte a colocar a grelha (R).
-Sempre que o filtro de saída de ar estiver demasiado sujo,
enrijecido e a perder a capacidade de filtração, é recomendado que