manuals.online logo
Brands
  1. Home
  2. •
  3. Brands
  4. •
  5. Honeywell
  6. •
  7. Switch
  8. •
  9. Honeywell PK 81590 User manual

Honeywell PK 81590 User manual

Installation Instructions for the
ISSUE 3
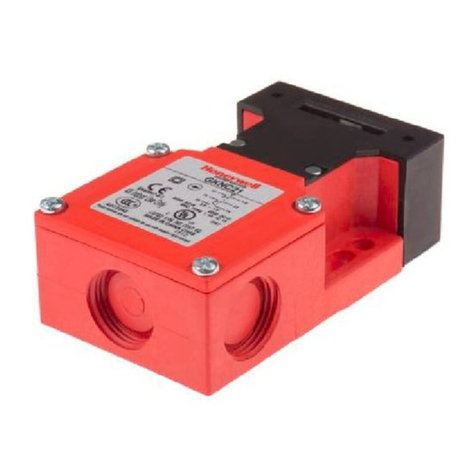
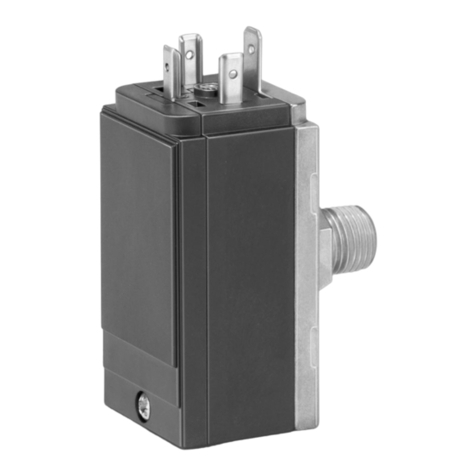
Key Operated Safety Interlock Switch
PK 81590
Sensing and Control
ELECTRICAL DATA
Rated thermal current Ith: 10 A
1AC Designation: A300/A600
2AC Utilization Category: AC15
3DC Designation: Q300
4DC Utilization Category: DC13
Rated Impulse Withstand Uimp: 2500 VDC
Maximum fuse rating: 10 A quick acting
Degree of protection:
IP67; NEMA/UL types 1,4,12,13
Permissible Temperature Range:
Operating: -25° to 85°C (-13°to 185°)
Storage: -40° to 120°C (-40° to 248°)
Conductor cross section (screw connection):
Stranded: 0.75 mm² to 2.5 mm²,
18 to 14 AWG
Solid: 0.75 mm² to 1.5 mm²,18 to 16 AWG
NOTICE
Use 90° C wire when ambient is over 75°C.
This product complies with Machinery Directive
(89/392/EEC as amended by Directive
91/369/EEC) and complies with EN60947-5-1.
Improper installation of this device can cause
personal injury to operating personnel. Strictly
adhere to the following instructions.
RECOMMENDED TIGHTENING TORQUE AND
SCREW SIZES
• Switch enclosure to mounting surface: 4.9-5.9
Nm (43-52 in./lb) M5 or #10
• Cover to switch enclosure: 1.2-1.4 Nm (10-12
in./lb) M4
• Connector to secure cable to enclosure (if
required): 1.8-2.2 Nm (16-19 in./lb.)
• Operating head to switch enclosure (if
changed): 1,36-1,80 Nm (12-16 in./lb) M4
• Switch terminal screws: 0.8-1 Nm (7-9 in./lb.)
M3
• Ground Screw: .08-1 Nm (7-9 in./lb) M3
• Key to mounting surface: 2.4-2.8 Nm (21-25
in./lb) M5 or #10
CHANGE IN OPERATING HEAD KEY ENTRY
LOCATION
Head options “E and K”are shipped
unassembled from the switch housing and includes
(4) one-way screws for customer assembly:
Properly seat the factory-installed “O”ring in its
seal grove. Determine the required key-entry
location and-to prevent improper access to the
switch mechanism as well as to ensure proper
functioning of the switch-securely fasten the
operating head to the switch housing with the (4)
one-way screws provided and at the recommended
tightening torque shown above. Honeywell’s
MICRO SWITCH Division warranty does not cover
this version unless the one-way screws are
installed.
Operating heads are not available as
replacement parts.
INSTALLATION (See Figure 3)
Switch and key must be assembled together
before mounting to equipment. Provide mounting
holes as shown.
The key must travel to dimension X (Figure 3) to
ensure reliable switch contact transfer. For safety,
the operating mechanism must be moved to this
dimension to ensure the correct operation of the
positive break mechanism, which will ensure that a
contact gap on the switch will withstand the
insulation voltage of 2500V required by IEC 947-5-1
& UL508.
The positive break mechanism will come into
effect on the N.C. (normally closed) circuit when the
key is extracted from its full inward position to the
dimension noted above.
Key actuation force: 22,3 N (5 lb.) max. The
maximum force applied to the key must not exceed
100 N (22.4 lb.) to prevent mechanical damage that
could lead to failure of the switch.
Key extraction force: 2.2 N (0.5 lb.) max. Head
Codes F, G, H, J & K are adjustable up to 13,4 N (3
lb.). Max. key operating speed: 1 m (39 in) per
second.
The key is not intended as a stop for the door.
Ensure that the key is not traveled more than the
maximum total travel shown in Figure 3.
Key Operated Safety Interlock Switch
PK 81590
2Honeywell •Sensing and Control For application help: call 1-800-537-6945
NOTICE
Tamperproof screws must be used to mount the
switch and key.
Correct functioning of the positive break switch
must be checked during initial installation and
periodically thereafter, noting any wear or drift
which could occur in the application.
FIGURE 1
BASIC SWITCHES/WIRING
Basic switches are not available as replacement
parts. Circuitries in Figure 1 are shown with the key
inserted. M3 spade terminals, up to 6,35 mm (.25
in.) wide, may be used with all basic switches.
The positive break contact 21-22 and/or 11/12
must be correctly wired into the circuit to ensure
disconnection of the supply, should the switch
mechanism fail.
Before energizing associated equipment, always
check for correct functioning of the switch
mechanism and the positive break mechanism.
After installation and often thereafter, check if any
change or adjustment has been made to the switch
or to the associated installation and, if so, readjust.
INDICATORS (See Figure 2)
Diagrams are shown with key inserted; yellow
indicates door closed, green indicates power on.
Single LED, universal voltage, PLC-compatible,
LED leakage current < 1.5mA
Dual LED, average current draw = 7 mA per LED
Circuits are shown with MBB slow action basic
switch. Any basics shown in Figure 1 may be used
with indicators.
T=Terminal
R=Red wire
B=Black wire
FIGURE 2
YELLOW
GREEN
YELLOW
ROUTINE MAINTENANCE
The safe operation of the machine will depend
upon the safe working of all components and
switches. A regular maintenance routine for the
machine must be established, and that routine
should specifically cover the complete application
involving the switch. To enhance operator safety,
inspect often for any wear on the actuator
mechanism (including the key) operating the switch,
or on the switch itself, or for any appreciable drift in
the operating characteristics. Correct any such
wear or drift as soon as it is detected.
As part of the routine maintenance, attention
must be paid to that part of the machine which is in
any contact with the actuator (key) and to the
switch mounting, to ensure that the actuation is
maintained to the specified travel.
During the routine maintenance, check for correct
functioning of the positive break mechanism for
electrical operation, which shall be carried out by a
qualified person.
Periodic maintenance of the switch will ensure
that continued safe operation of the switch is
maintained. The frequency of maintenance will be
determined by the type of machinery, the frequency
of operation, the application and the local
environment.
Key Operated Safety Interlock Switch
PK 81590
For application help: call 1-800-537-6945 Honeywell •Sensing and Control 3
FIGURE 3 MOUNTING DIMENSIONS
(FOR REFERENCE ONLY)
KEY:
mm
in
16,0
.63
52,89
2.082
80,0
3.15 20,0
.79
15,0
.59
5,3
.21
28,0
1.10
3,0
.12 16,0
.63
KEY STYLE 1
52,89
2.082
16,0
.63
3,0
.12
52,0
2.05
40,0
1.57
17,7
.70
2x 5,30
.209
KEY STYLE 2
23,0
.91 MIN INSERTION DISTANCE
R 1500
59.1 MIN DOOR RADIUS
R 1000 MIN DOOR RAD
39.4
51,7
2.04 35,0
1.38
31,0
1.22
35,0
1.35
127,8
6.02
82,0
3.23
75,8
2.98
7,3
.29
60,0
2.36
5,3
.21
5,3
.21
30,0
1.18
42,0
1.65
42,6
1.08
DIMENSION X
Key Operated Safety Interlock Switch
PK 81590
Sensing and Control
Honeywell Inc.
11 West Spring Street
Freeport, Illinois 61032
Printed with Soy Ink
on 50% Recycled Paper
PK 81590 ISSUE 3 0303 Printed in USA
GENERAL GUIDELINES
Switch alignment and its operation must be
checked. The actuator (key) should move freely
with no jamming in the switch during operation.
Ensure that there are no liquids in the switch
enclosure. Check the sealing of the switch
enclosure and conduits for the source of
contamination and correct. Replace the switch, if
contaminated.
Test the switch for correct electrical operation,
which should only be carried out by a qualified
person.
Visually check for mechanical damage on the
body, actuator head or key. Damage could cause
the product to become a safety hazard, and thus a
damaged device must be replaced. Correct the
cause of damage to ensure it does not reoccur.
WARRANTY/REMEDY
Honeywell warrants goods of its manufacture as
being free of defective materials and faulty
workmanship. Commencing with date of shipment,
Honeywell’s warranty runs for 18 months. If
warranted goods are returned to Honeywell during
that period of coverage, Honeywell will repair or
replace without charge those items it finds
defective. The foregoing is Buyer’s sole remedy
and is in lieu of all other warranties, expressed
or implied, including those of merchantability
and fitness for a particular purpose.
For application assistance, current specifications,
pricing or name of the nearest Authorized
Distributor, contact a nearby sales office. Or call:
1-800-537-6945 USA
1-416-293-8111 Canada
1-815-235-6847 International
http://www.honeywell.sensing.com
[email protected]
Specifications not affecting form, fit or function
may change without notice. The information we
supply is believed to be accurate and reliable as of
this printing. However, we assume no responsibility
for its use.
While we provide application assistance,
personally and through our literature, it is up to the
customer to determine the suitability of the product
in the application.

Other Honeywell Switch manuals

Honeywell 88173 User manual

Honeywell

Honeywell 88173 User manual

Honeywell XP-4051 User manual

Honeywell

Honeywell XP-4051 User manual

Honeywell 968XTP User manual

Honeywell

Honeywell 968XTP User manual

Honeywell Limitless WGLA Series User manual

Honeywell

Honeywell Limitless WGLA Series User manual

Honeywell MICRO SWITCH BX Series User manual

Honeywell

Honeywell MICRO SWITCH BX Series User manual

Honeywell IP-AK2 Operator's manual

Honeywell

Honeywell IP-AK2 Operator's manual

Honeywell IDENT-KEY 3 User manual

Honeywell

Honeywell IDENT-KEY 3 User manual

Honeywell PK 80148 User manual

Honeywell

Honeywell PK 80148 User manual

Honeywell DG T Series User manual

Honeywell

Honeywell DG T Series User manual

Honeywell ZW2004 User manual

Honeywell

Honeywell ZW2004 User manual

Honeywell 272630D User manual

Honeywell

Honeywell 272630D User manual

Honeywell V15W2 Series User manual

Honeywell

Honeywell V15W2 Series User manual

Honeywell DPSL200 User manual

Honeywell

Honeywell DPSL200 User manual

Honeywell RXSM100A3 User manual

Honeywell

Honeywell RXSM100A3 User manual

Honeywell Krom Schroder DG B Series User manual

Honeywell

Honeywell Krom Schroder DG B Series User manual

Honeywell GKN Series User manual

Honeywell

Honeywell GKN Series User manual

Honeywell RPLS540A User manual

Honeywell

Honeywell RPLS540A User manual

Honeywell 39342 User manual

Honeywell

Honeywell 39342 User manual

Honeywell F300 Instruction Manual

Honeywell

Honeywell F300 Instruction Manual

Honeywell ZW4003 User manual

Honeywell

Honeywell ZW4003 User manual

Honeywell 39348 User manual

Honeywell

Honeywell 39348 User manual

Honeywell FF-SNC User manual

Honeywell

Honeywell FF-SNC User manual

Honeywell HBADZ600 User manual

Honeywell

Honeywell HBADZ600 User manual

Honeywell miniMAX User manual

Honeywell

Honeywell miniMAX User manual

Popular Switch manuals by other brands

IBM SAN48C-6 Installation, service and user guide

IBM

IBM SAN48C-6 Installation, service and user guide

nedis Zigbee ZBWS40WT quick start guide

nedis

nedis Zigbee ZBWS40WT quick start guide

ORiNG EN50155 Quick installation guide

ORiNG

ORiNG EN50155 Quick installation guide

HRT CP-200 user manual

HRT

HRT CP-200 user manual

Logik L4HUBC11 quick start guide

Logik

Logik L4HUBC11 quick start guide

GT KJD16 quick start guide

GT

GT KJD16 quick start guide

TP-Link TL-SG1200 installation guide

TP-Link

TP-Link TL-SG1200 installation guide

Comtech EF Data LCS-4 Installation and operation manual

Comtech EF Data

Comtech EF Data LCS-4 Installation and operation manual

BABBITT LS8000 owner's manual

BABBITT

BABBITT LS8000 owner's manual

Rose electronics QuadraVista Quick installation guide

Rose electronics

Rose electronics QuadraVista Quick installation guide

Sony DVS-9000 user guide

Sony

Sony DVS-9000 user guide

ANTAIRA LMX-0804G-SFP-T Quick installation guide

ANTAIRA

ANTAIRA LMX-0804G-SFP-T Quick installation guide

AETEK D51-084-30 Quick installation guide

AETEK

AETEK D51-084-30 Quick installation guide

Cisco Nexus 4005I Getting started guide

Cisco

Cisco Nexus 4005I Getting started guide

Cerio CS-2224-14P user manual

Cerio

Cerio CS-2224-14P user manual

PNI SafeHome PT101L WiFi user manual

PNI

PNI SafeHome PT101L WiFi user manual

Leviton 1221-2KL installation instructions

Leviton

Leviton 1221-2KL installation instructions

Raritan Domionion KX III Quick setup guide

Raritan

Raritan Domionion KX III Quick setup guide

manuals.online logo
manuals.online logoBrands
  • About & Mission
  • Contact us
  • Privacy Policy
  • Terms and Conditions

Copyright 2025 Manuals.Online. All Rights Reserved.