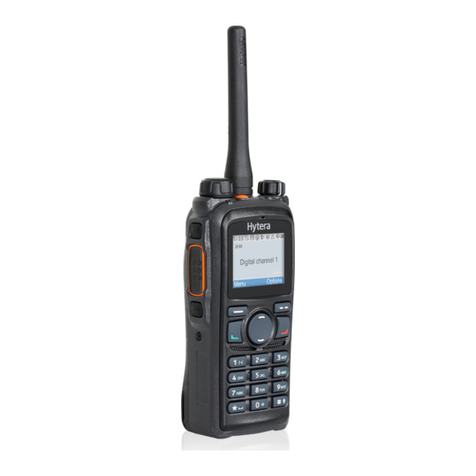
Hytera TC-320 User manual

8110032001300
www.hytera.com
http://www.hytera.com
инструкция по зксплуатации

Preface
Thank you for purchasing Hytera TC-320 Business Radio. TC-
320 is unique for its compact and delicate body. It is ergonomically
designed to give you exceptional experience of portability.
This easy-to-use radio will deliver you secure, instant and reliable
communications at peak efficiency. Please read this manual
carefully before use. The information presented herein will help you
to derive maximum performance from your radio.
MODELS COVERED IN THIS MANUAL
TC-320 UHF Two-way Radio
English

24
Contents
Safety Information------------------------------------------------------------ 1
Product Inspection---------------------------------------------------------------------2
Radio Overview -------------------------------------------------------------------------3
Battery Information --------------------------------------------------------------------5
Antenna Information-------------------------------------------------------------------9
Assembly and Disassembly --------------------------------------------------------9
Basic Operations -------------------------------------------------------------------- 13
Programmable Auxiliary Functions -------------------------------------------- 13
Advanced Operations --------------------------------------------------------------- 14
CTCSS/CDCSS------------------------------------------------------------------- 14
Battery Save ----------------------------------------------------------------------- 14
Power Adjust----------------------------------------------------------------------- 14
Time-out Timer (TOT) ----------------------------------------------------------- 14
Battery Strength Indicator ------------------------------------------------------ 14
Monitor ----------------------------------------------------------------------------- 15
Scan --------------------------------------------------------------------------------- 16
Busy Channel Lockout (BCL)-------------------------------------------------- 17
Low Battery Alert------------------------------------------------------------------ 18
(VOX)Voice Operated Transmit ---------------------------------------------- 18
Troubleshooting---------------------------------------------------------- 19
Care and Cleaning-------------------------------------------------------------------- 20
Optional Accessories --------------------------------------------------------------- 20

Safety Information
The following safety precautions shall always be observed during operation,
service and repair of this equipment.
◇ Thisequipmentshallbeservicedbyqualiedtechniciansonly.
◇Do not modify the radio for any reason.
◇Use only Hytera supplied or approved batteries and chargers.
◇ To avoid electromagnetic interference and/or compatibility conicts, turn
off your radio in any area where posted notices instruct you to do so. Turn
off your radio before boarding an aircraft. Any use of a radio must be in
accordance with airline regulations or crew instructions.
◇For vehicles with an air bag, do not place a radio in the area over an air
bag or in the air bag deployment area.
◇ Turnoffyourradiopriortoenteringanyareawithexplosiveandammable
materials.
◇Do not charge your battery in a location with explosive and flammable
materials.
◇Turn off your radio before entering a blasting area.
◇Do not use any portable radio that has a damaged antenna. If a damaged
antenna comes into contact with your skin, a minor burn can result.
◇Do not expose the radio to direct sunlight over a long time, nor place it
close to heating source.
◇When transmitting with a portable radio, hold the radio in a vertical position
with the microphone 3 to 4 centimeters away from your lips. Keep antenna
at least 2.5 centimeters away from your body when transmitting.
1
WARNING: If you wear a radio on your body, ensure the
radio and its antenna are at least 2.5 centimeters away from
your body when transmitting.
English

Antenna Li-ion Battery Switching Power (varying in
different countries and regions)
Note: Frequency band is marked on the label of antenna, if not, please refer
to the label on the radio unit for detailed frequency band information.
2
Product Inspection
Please unpack the package box carefully and check that all items shipped are
received; report any missing or damaged items to your dealer.
Accessories
Item Qty. (PCS)
Antenna 1
Nylon Strap 1
Belt Clip 1
Screw (Belt Clip) 2
Li-ion Battery 1
Switching Power 1
Owner’s Manual 1
Nylon Strap Belt Clip

3
Radio Overview
(1) PTT (Push-to-Talk) Key (2) SK (Side Key)
(3)Speaker (4) Volume Adjust Keys [+] / [-]
(5) Microphone (6) Nameplate
(7) Charging Terminal (8) Antenna
(9) Power Switch (10) Channel/Status Indicator
(11) Channel Selector Knob (12) Charge Indicator
(13) Accessory Jack Cover (14) Audio Accessory Jack
(15) Mini USB Jack (16) Strap Hole
(17) Screw (Belt Clip) (18) Belt Clip
(19) Rear Cover (20) Battery Latch

Radio Overview
PTT (Push-to-Talk) Key
Press and hold down the PTT key to transmit, and release it to receive.
SK (Side Key)
Side Key is a programmable key that can be assigned with long/short press
functions by your dealer.
Note: Short Press: Key press shorter than 1 second.
Long Press: Key press longer than 1 second.
Status Indicator
Status Status Indication and Alert Tone
Power on (to enter 1.When the radio is turned on, the power on alert tone
usermode) soundsandStatusIndicatorashesorangeonce.
2.When the current channel is a blank channel,
the radio sounds beep tone continuously.
Power off When the radio is turned off, the power off alert is heard.
Lowbatteryalert StatusIndicatorashesred,andalow-pitchedtone
sounds at intervals of 10 seconds.
Transmitting 1.Status Indicator glows red when transmitting.
2.When TOT timer expires, the radio sounds beep tone
continuously.
3.TOT pre-alert: A beep is heard.
Receiving Status Indicator glows green when carrier is present.
Scanning 1.StatusIndicatorashesgreenonceevery1second,
while scanning is in process.
2.Scan Start Alert Tone (programmable by your dealer):
A beep is heard.
Status indications and alert tones are shown in the table below:
4

5
Radio Overview
3.When signal is received on a certain channel, Status
Indicator solidly glows green.
4.Scan Exit Alert Tone (programmable by your dealer): A
beep is heard.
Power adjust 1.A low-pitched tone is heard when transmit power is
switched from high power to low power.
2.A high-pitched tone is heard when transmit power is
switched from low power to high power.
VOX 1.One beep sounds when the VOX feature is activated.
2.Two beeps sound when the VOX feature is disabled.
Battery Latch
Used to secure or remove the battery.
Audio Accessory Jack
Used to connect audio accessories such as earpieces.
Mini USB Jack
Used to connect accessories such as programming cable, cloning cable and
power cord.
Battery Information
Initial Use
New batteries are shipped not fully charged from the factory. Charge a new
battery for 5 hours before initial use. The maximum battery capacity and
performance is achieved after three full charge/discharge cycles. If you notice
the battery power runs low, please recharge the battery.
Applicable Battery Packs
To reduce the risk of injury, charge only the battery specified by the
manufacturer. Other batteries may burst, causing bodily injury and damage.

Battery Information
Caution:
1. Toavoidriskofpersonalinjury,donotdisposeofbatteriesinare!
2. Dispose of batteries according to local regulations (e.g. recycling). Do not
dispose as household waste.
3. Never attempt to disassemble the battery.
Battery Tips
1. When charging your battery, keep it at a temperature among 5℃- 40℃.
Temperature out of the limit may cause battery leakage or damage.
2. When charging a battery attached to a radio, turn the radio off to ensure a
full charge.
3. Do not cut off the power supply or remove the battery when charging a
battery.
4. Never charge a battery that is wet. Please dry it with soft cloth prior to
charge.
5. The battery will eventually wear out. When the operating time (talk-time
and standby time) is noticeably shorter than normal performance, it is time
to buy a new battery.
6. In case the radio shuts off automatically at low battery power, recharge the
battery promptly, or the battery could suffer damage.
7. Remove the battery before you store the radio for a long time, or the
battery could suffer damage.
To Prolong Battery Life
1. Battery performance will be greatly decreased at a temperature below
0℃. A spare battery is necessary in cold weather. The cold battery unable
to work in this situation may work under room temperature, so keep it for
later use.
2. The dust on the battery contact may cause the battery cannot work or
charge. Please use clean dry cloth to wipe it before attaching the battery
to the radio.
Battery Storage
1. Fully charge a battery before you store it for a long time, to avoid battery
damage due to over-discharge.
6

7
Battery Information
2. Recharge a battery after several months’ storage (Li-Ion & Li-polymer
batteries: 6 months), to avoid battery capacity reduction due to over-
discharge.
3. Store your battery in a cool, dry place under room temperature, to reduce
self-discharge.
Charging the Battery
WhentheStatusIndicatorashesredandanalerttonesoundsatintervalsof
ten seconds indicating the battery power runs low, please recharge the battery.
Use only the charger specified by the manufacturer. The Charge Indicator
indicates the charging progress.
Please follow these steps to charge your radio using the switching power
or charger:
Note: Make sure the radio is attached with a battery before charging, and is
powered off during charging.
1. Plug the AC connector of the switching power into the AC outlet socket.
2. Plug the Mini USB connector of the switching power into the Mini USB jack
of the radio or charger.
3. Place the radio with the battery attached in the charger when the charger
indicator glows green to indicate the power supplies normally. (Please skip
this step if you don’t use a charger)
4. Make sure the radio is connected to the switching power or the charger.
The charging process initiates when the Charge Indicator of the radio
glows orange.
5. The Charge Indicator glows green when the battery is fully charged.
Please remove the radio then.

Please follow these steps to charge a battery using the desktop charger:
1. Plug the AC connector of the switching power into the AC outlet socket.
2. Plug the Mini USB connector of the switching power into the Mini USB jack
of the charger. Indicator of the charger glows green.
3. Place the battery in the charger.
4. Make sure the battery is connected to the charger. The charging process
initiates when the charger indicator glows orange.
5. The charger indicator glows green when the battery is fully charged.
Please remove the battery then.
Status Charge Indicator of the Radio
Battery is charging. Charge Indicator solidly glows orange
Battery is fully charged. Charge Indicator solidly glows green.
Battery Information
Status Charge Indicator
Battery is charging. Charger Indicator solidly glows orange.
Battery is fully charged. Charger Indicator solidly glows green.
8

9
Antenna Information
◇Stubby antenna is durable, and is ideal for communication at low transmit
power.
◇ Communication range may vary with terrain and your operating conditions.
Rainy days or forest locations may narrow your communication range,
please make preparation in advance to avoid potential inconvenience.
Assembly and Disassembly
Attaching/Removing the Battery
Attaching the Battery
1. Hold the top part of the radio’s body, and slide the battery latch in the
direction of arrow ①Then lift the rear cover and remove it from the radio’s
body, as shown in Figure 1.
2. Align the discharging terminal of the battery with the radio’s charging
piece, and insert the tab at the top of the battery into the slot at the top of
the radio’s body. Then press the bottom of the battery towards the radio,
until the battery is securely inserted into the battery slot, as shown in
gure2.Note:ifthebatteryisnotwelllocked,pleaseremovethebattery
and attach it again.
3. Fit the two extensions at the top of the rear cover into the slots at the top
of the radio’s body, slightly press the bottom of the rear cover towards the
radio until a click is heard, and then the rear cover is securely attached to
the radio, as shown in Figure 3.
Fig.1 Fig.2

10
Assembly and Disassembly
Removing the Battery
1. Turn off the radio, if it is turned on. Then follow step 1 in the section
“Attaching the Battery”to remove the rear cover.
2. Hold the top part of the radio's body, and lift the battery in the direction of
arrow ①by the notch at its bottom, and then remove the battery from the
radio's body in the direction of arrow ②, as shown in Figure 4.
Attaching/Removing the Antenna
Attaching the Antenna
1. Align the threaded end of the antenna with the radio’s antenna connector.
2. Turntheantennaclockwisetofastenit,asshowningure5.
Note: If the rear cover is not well locked, please remove the rear cover and
attach it again.
Fig.3
Fig.4

11
Assembly and Disassembly
Attaching/Removing the Belt Clip
Attaching the Belt Clip
Align the two screw holes on the metal bracket of the belt clip with holes on the
elliptical protrusion on the back side of the radio. Then secure the belt clip on
the back side of the radio, as shown in Figure 6. Align the belt clip screws with
screw holes on the metal bracket of the belt clip, and then secure the screws.
Removing the Antenna
Turn the antenna counter-clockwise until you can remove it.
Removing the Belt Clip
Loosen the screw to remove the belt clip. Please refer to the operations for
attaching the belt clip.
Fig.5
Fig.6

12
Assembly and Disassembly
Attaching/Removing the Battery When the Belt Clip is Attached
When the belt clip is attached to the radio, please rst press the belt clip to
make its bottom up, and then attach/remove the rear cover and battery by the
stepsmentionedabove,asshowningure7.
Attaching/Removing the Earpiece/Mini USB
Attaching the Earpiece/Mini USB
1. Open (not remove) the accessory cover, plug the audio accessory rmly
into the accessory jack, and the Mini USB into the USB jack, as shown in
gure8.
Removing the Earpiece/Mini USB
Open the accessory cover, and then remove the earpiece or Mini USB.
Note: Use of audio accessory may affect the waterproof performance of the
radio.
Fig.7
Fig.8

13
Basic Operations
Turning the Radio On/Off
Long press the Power Switch until an alert tone is heard to turn the radio on.
To turn the radio off, do the same as you turn it on.
Adjusting the Volume
You may adjust the volume level through Volume Adjust Keys [+]/[-]. Press
the [+] key to increase the volume, or press the [-] key to decrease the volume.
Selecting a Channel
Turn the Channel Selector knob to select a channel. Make sure the desired
channel number points at the Channel Indicator.
Transmitting
To transmit, press and hold down the PTT key, and then speak into the
microphone at normal voice level. Hold the radio about 2.5 to 5 centimeters
away from your mouth.
Receiving
Release the PTT key to receive.
Programmable Auxiliary Functions
The SK key is a programmable function button. Your dealer may assign any of
the following auxiliary functions to a short or long programmable key-press.
None
Power Adjust
Monitor
Monitor Momentary
Scan
Scrambler
VOX (Voice-Operated Transmit)
Compandor
Squelch Off
Squelch Off Momentary
Battery Strength Indicator
Channel Lock (If you rotate the Channel Selector knob with Channel Lock
function enabled, the current channel number will remain unchanged. This
function will not be disabled after programming. )

Advanced Operations
The following functions are programmable by your dealer.
CTCSS/CDCSS
Set up talkgroups with unique CDCSS/CTCSS to prevent unwanted
conversations on the same frequency. If CTCSS/CDCSS has been set on the
current channel, CTCSS/CDCSS match is required for the radio to unmute
to an incoming signal. If CTCSS/CCSS is not set, the radio can receive calls
from all users operating on the same frequency. Your dealer may set CTCSS/
CDCSS for some channels.
This feature does not mean that your conversation will not be heard by others.
Radios with the same CTCSS/CDCSS or with no CTCSS/CDCSS, can receive
calls from you.
Battery Save
The Battery Save feature will be automatically activated once no activity is
present on the channel and no operation is performed (no key press and no
knob selection), for extended operation time.
Once the radio detects no activity on the channel and no operation performed
(no key press and no knob selection) during radio standby time, it will
automatically enter sleep mode ten seconds later. Pressing any key or
receiving a signal will cause the radio to exit from Battery Save and restore it
to normal operation.
Power Adjust
Users can switch the Tx power level between high and low power by pressing
the programmed Power Adjust key.
Time-out Timer (TOT)
The TOT timer limits the amount of time the radio can continuously
transmit on a channel. This can also protect your radio from damage due to
excessive transmission. If the user holds down the PTT key longer than the
preprogrammed time period, the radio will automatically stop transmitting and
generate a warning tone. To stop the warning tone, release the PTT key.
Your dealer may program the alert tone that sounds before the TOT timer
nearly expires.
Battery Strength Indicator
TC-320 allows you to simply press the programmed Battery Strength
14

15
Advanced Operations
Indicator key to illuminate the Status Indicator, which gives different
indications representing battery strength levels. To exit the indications, release
the key.
The Status Indicator gives the following indications to represent corresponding
battery strength levels:
The LED glows different colors to represent battery strength levels:
Monitor
Squelch Off
Purpose: In this mode, the speaker is unmuted in any condition so as to
receive any sound on the current channel. When audio signal is received on
the channel, audio will be heard. Otherwise, background noise will be heard.
Operation: Press the Monitor key to enter this mode, and press it again to exit.
Squelch Off Momentary
Purpose: Refer to Squelch Off.
When audio signal is received on the channel, audio will be heard. Otherwise,
background noise will be heard.
Operation: Hold down the programmed key continuously to enter this mode,
and release the key to exit.
Battery Strength Status Indication
70% - 100% Status Indicator solidly glows green.
50% - 70% Status Indicator solidly glows orange.
30% - 50% Status Indicator solidly glows red.
10% - 30% No indication is given when the programmable key is
pressed;Statusindicatorashesredwhiletheradiois
operating.
Less than 10% No indication is given when the programmed key is
pressed. While the radio is in standby mode, Status
Indicatorashesredandalow-pitchedtonesoundsat
intervals of ten seconds. If PTT key is pressed at
the moment, the radio will give an alert indicating that
transmission is prohibited.

16
Advanced Operations
Monitor
Purpose: In this mode, the receiving party can receive incoming calls from the
transmitting party regardless of CTCSS/CDCSS condition. If carrier condition
isnotsatised,thereceivingpartywillfailtoreceiveanyincomingcalls.
Operation: Press the Monitor key to enter this mode, and press it again to exit.
Monitor Momentary
Purpose: Refer to Monitor.
Operation: Hold down the programmed key continuously to enter this mode,
and release the key to exit.
Scan
The Scan feature enables a two-way radio to continuously scan each channel
for activity. Press the programmed Scan key to initiate scanning channels in
the order as they appear in scan list. Status Indicator ashes green during
the scan process, and solidly glows when activity is detected and signaling
conditionissatisedonachannel.Pressthekeyagaintoexitscanning.
When scanning is active, the radio will continuously scan for activity on scan
list members. Once activity is detected on a channel, scanning will pause
on the active channel for you to receive activity. The channels available for
scanning are programmed by your dealer.
No Priority Channel
Providing that there is a scan list with 6 channels and all channels are non-
prioritized, the normal scan operation would proceed in the following sequence,
asshowningure9.
Priority Channel Scan
If you prioritize Channel 2 as Priority 1, the scan operation would proceed in
thefollowingsequence,asshowningure10.
Fig.9 Fig.10

Advanced Operations
17
Scan On/Off
You can enter scan mode through any of the following two methods:
1. Key operation
Press the programmed Scan key to enter scan mode, provided that there’re
no less than 2 members in the scan list. Press Scan key again or power off to
exit.
2. Auto
If Auto Scan is enabled for a channel, the radio will automatically enter scan
mode when it is switched to this channel. When it is switched to other channels
or powers off, the radio will exit from scan mode.
Talk Back
This option defines whether users can talk back on the channel where
scanning pauses. When the option is checked, users can do so.
If the scanning does not pause on any channel, users may talk back on the
predenedchannel.
Priority Channel Scan
This function enables users to scan the most frequently used channel so
that messages will not be missed. The priority channel is programmed by the
dealer via programming software. Contact your dealer for details.
Note: Even though the radio remains on a non-priority channel, activities
on the priority channel are still under monitoring. The radio will switch to the
priority channel once any activity is detected.
Available Keys in Scan Mode
PTT key, Volume Adjust keys [+] / [-], and 4 programmable keys of Squelch
Off, Squelch Off Momentary, Monitor and Monitor Momentary.
Busy Channel Lockout (BCL)
This function can help avoid interference between radios operating on the
same channel. When the channel is already in use, the radio will sound a
continuous warning tone and return to Receive mode upon PTT press. To
cancel the tone, release the PTT key.
Other manuals for TC-320
1
Table of contents
Languages:
Other Hytera Radio manuals

Hytera
Hytera HM682 User manual

Hytera
Hytera TM-600 User manual

Hytera
Hytera MD785 User manual

Hytera
Hytera HP70X User manual

Hytera
Hytera Jupiter TETRA User manual

Hytera
Hytera PD562 User manual

Hytera
Hytera PD98X User manual

Hytera
Hytera HM782 User manual

Hytera
Hytera PD78X Series User manual

Hytera
Hytera PTC760 User manual

Hytera
Hytera MD78X User manual

Hytera
Hytera PNC380 User manual

Hytera
Hytera HM65X User manual
Hytera
Hytera PD562 User manual

Hytera
Hytera MD782 User manual
Hytera
Hytera RRU3800F080 User manual

Hytera
Hytera TM-610 User manual

Hytera
Hytera X1e User manual

Hytera
Hytera PD662 User manual

Hytera
Hytera HM78 Series User manual