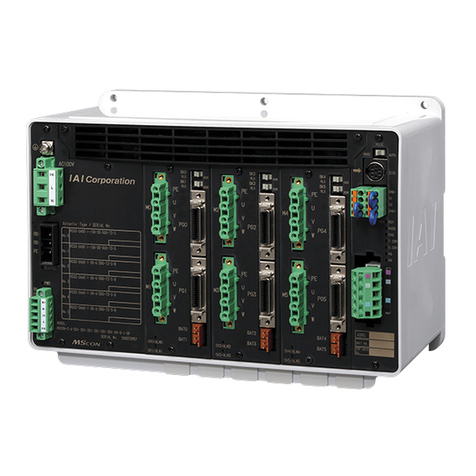
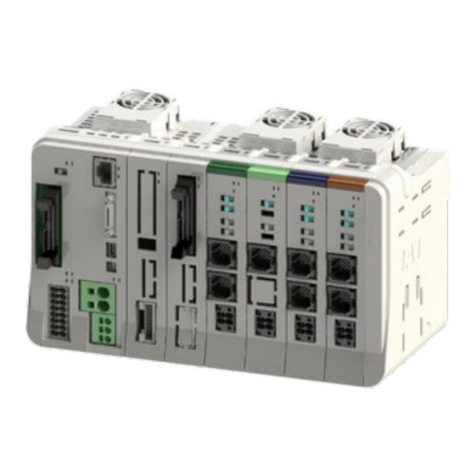
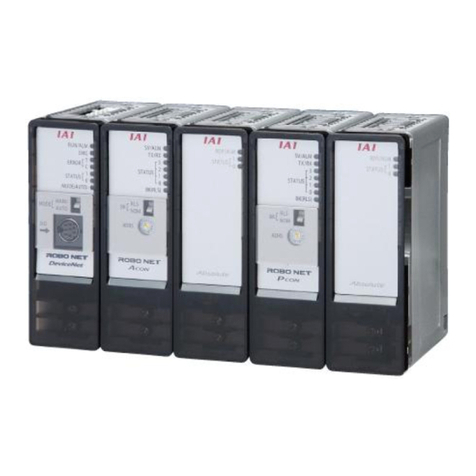
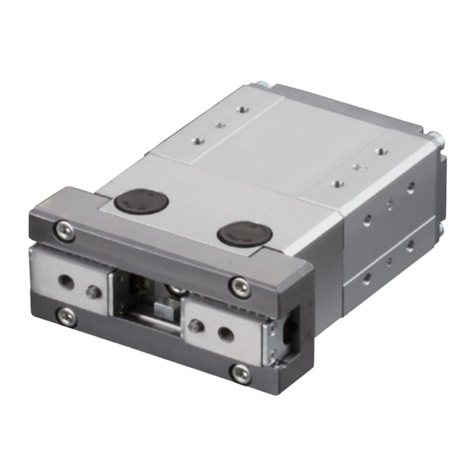
IAI Rcon User manual

System
Instruction Manual
Chapter 1 RCON Overview
Chapter 2
System Configuration and Specifications
Chapter 3 Gateway Unit
Chapter 4
24V Driver Unit, EC Conne ction Unit
Chapter 5
200V Driver Unit, 200V Power Supply Unit
Chapter 6 SCON Extension Unit
Chapter 7 Simple Absolute Unit
Specifications
Section
Chapter 1
Maintenance and Inspection
Chapter 2 Troubleshooting
Maintenance
Section
Chapter 1
Conforming to Safety Category
Chapter 2 Connectable Actuators
Appendix
Chapter 1 Overview
Chapter 2 Mounting and Wiring
Chapter 3 Absolute Reset
Chapter 4 Network Configuration
Chapter 5
Basic Operation Confirmation and Adjustment
Chapter 6 Parameter
Startup
Section
Third Edition ME0384-4A

ME0384-4A
Please Read Before Use
Thank you for purchasing our product.
This instruction manual explains the handling methods, structure and maintenance of this
product, providing the information you need in order to use the product safely.
Before using the product, be sure to read this manual and fully understand the contents
explained herein to ensure safe use of the product.
The DVD enclosed with the product contains instruction manuals for IAI products.
When using the product, refer to the necessary sections of the applicable instruction manual
by printing them out or displaying them on a PC.
After reading the instruction manual, keep it in a convenient place so that whoever is
handling the product can refer to it quickly when necessary.
[Important]
●This instruction manual is an original document dedicated for this product.
●This product cannot be used in ways not shown in this instruction manual. IAI shall not be
liable for any result whatsoever arising from the use of the product in any other way than
what is noted in the manual.
●The information contained in this instruction manual is subject to change without notice for
the purpose of product improvement.
●If any issues arise regarding the information contained in this instruction manual, contact our
customer center or the nearest sales office.
●Use or reproduction of this instruction manual in full or in part without permission is
prohibited.
●The company names, names of products and trademarks of each company shown in the
text are registered trademarks.

ME0384-4A
RCON System Instruction Manual Configuration
Product name Instruction manual name Control
number
RCON Gateway Unit First Step Guide ME0382
RCON 24V Driver Unit First Step Guide ME0383
RCON 200V
Power Supply / Driver Unit First Step Guide ME0397
REC System First Step Guide ME0395
RCON System Instruction Manual (this document) ME0384
REC System REC-GW/RCON-EC
Instruction Manual ME0394
SCON-CB Controller SCON-CB/CGB/LC/LCG
Instruction Manual ME0340
PC Software RCM-101-MW/RCM-101-USB
Instruction Manual ME0155
Touch Panel Teaching Pendant TB-02/02D Instruction Manual ME0355
Touch Panel Teaching Pendant TB-03 Instruction Manual ME0376
24V Power Supply Unit PSA-24 Instruction Manual ME0379
Calculator Calculator Instruction Manual ME0381
Network Startup Guide Quick Start Guide
Download from IAI
homepage

ME0384-4A
Contents
Safety Guide ·················································································· Intro-1
Precautions for Handling ··································································· Intro-8
Precautions for PC connection to RCON gateway unit
grounded at positive terminal of 24 VDC power supply ···························· Intro-13
International Standard Compliance······················································ Intro-15
Warranty························································································ Intro-16
Actuator Coordinate System ······························································ Intro-18
[Specifications Section]
Chapter 1 RCON Overview
1.1 Overview················································································ A1-1
1.2 Features ················································································ A1-2
Field network control operation mode ································································· A1-4
List of functions by operation mode ···································································· A1-5
Operation of ELECYLINDER············································································· A1-7
1.3 General Specifications ······························································ A1-8
Chapter 2 System Configuration and Specifications
2.1 System Configuration································································ A2-1
2.2 Configuration Unit List······························································· A2-3
2.3 Specifications·········································································· A2-7
General specifications ····················································································· A2-7
Power supply capacity ····················································································· A2-10
Power ON sequence ······················································································· A2-16
Inrush current ································································································ A2-18
Operating temperature range ············································································ A2-20
Installation conditions ······················································································ A2-21
Unit connection restrictions ··············································································· A2-25
2.4 External Dimensions································································· A2-27
Controller (24V Driver Unit 8-axis without fan) ······················································ A2-27
Controller (24V Driver Unit 8-axis with fan)··························································· A2-28
Controller (24V Driver Unit 16-axis without fan)····················································· A2-29
Controller (24V Driver Unit 16-axis with fan) ························································· A2-30
Controller (200V Driver Unit 1-axis with fan) ························································· A2-31
2.5 Connection Diagrams ······························································· A2-32
Power Supply and Stop Circuit / Drive Cutoff Circuit ·············································· A2-32
Driver Stop Circuit··························································································· A2-37
Motor/encoder circuit ······················································································· A2-43
AUTO/MANU mode switching circuit wiring ·························································· A2-49
Field network wiring ························································································ A2-50
Chapter 3 Gateway Unit
3.1 Overview················································································ A3-1
3.2 How to Read the Model Number ················································· A3-3
How to read the model nameplate······································································ A3-4
3.3 Gateway Unit and Accessories···················································· A3-5

ME0384-4A
3.4 Part Names/Functions and External Dimensions····························· A3-6
Part names···································································································· A3-6
LED display ··································································································· A3-8
Ethernet connector·························································································· A3-9
AUTO/MANU switch························································································ A3-9
SIO connector································································································ A3-10
USB connector······························································································· A3-11
System I/O connector ······················································································ A3-12
Motor power connector ···················································································· A3-13
Control power connector ·················································································· A3-14
Field network connector ··················································································· A3-15
Connectors···································································································· A3-15
Terminal unit ·································································································· A3-16
External dimensions ························································································ A3-17
3.5 Field Network General Specifications ··········································· A3-19
CC-Link ········································································································ A3-19
CC-Link IE Field ····························································································· A3-20
DeviceNet ····································································································· A3-21
EtherCAT ······································································································ A3-22
EtherNet/IP ··································································································· A3-23
PROFIBUS-DP ······························································································ A3-24
PROFINET IO································································································ A3-25
3.6 Operation Function List ····························································· A3-26
Field network control operation mode ································································· A3-26
List of functions by operation mode ···································································· A3-27
Operation of ELECYLINDER············································································· A3-29
3.7 Address Configuration······························································· A3-30
Overall address configuration example································································ A3-32
Gateway control/status signals ·········································································· A3-43
Power supply unit (PSA-24) status signal ···························································· A3-45
Position table ································································································· A3-48
Direct numerical control mode assignment··························································· A3-64
Simple direct mode assignment ········································································· A3-70
Positioner 1 mode assignment ·········································································· A3-74
Positioner 2 mode assignment ·········································································· A3-77
Positioner 3 mode assignment ·········································································· A3-78
Positioner 5 mode assignment ·········································································· A3-81
ELECYLINDER Position Table··········································································· A3-84
Assignment of EC Connection Unit····································································· A3-87
3.8 I/O Signals ············································································· A3-90
Timing of I/O signals························································································ A3-90
Function of I/O signals ····················································································· A3-91
Features of Input and Output Signals for EC Connection Unit ·································· A3-114
Caution when Connecting EC Connection Unit ····················································· A3-117
Timing of basic operation ················································································· A3-118
Other basic operations····················································································· A3-127
Basic Operations of ELECYLINDER ··································································· A3-143
Precautions for Rotary Type·············································································· A3-148
Precautions for Gripper Type············································································· A3-151
3.9 Gateway Parameter Configuration Tool········································· A3-153
Tool startup ··································································································· A3-153
Menu descriptions··························································································· A3-154
Special parameter setting function descriptions ···················································· A3-156
Explanations of Monitoring Menu Features ·························································· A3-162
Operation mode setting···················································································· A3-164
Operation mode individual setting ······································································ A3-166
Axis number assignment change ······································································· A3-167
Editing driver unit configuration·········································································· A3-168

ME0384-4A
3.10 Actuator Information Management Function··································· A3-180
Overview ······································································································ A3-180
Actuators with information management function supported ···································· A3-181
Actuator information management function ·························································· A3-182
Parameters for actuator information management function setting ···························· A3-185
Chapter 4 24V Driver Unit, EC Conne ction Unit
4.1 Overview················································································ A4-1
4.2 How to Read the Model Number ················································· A4-3
How to read the model nameplate······································································ A4-4
4.3 Components ··········································································· A4-5
4.4 Part Names/Functions and External Dimensions····························· A4-7
[24V Driver unit]
Part names·································································································· A4-7
LED display ································································································· A4-9
Jog switch ··································································································· A4-10
Brake release switch ····················································································· A4-11
Motor/encoder connector················································································ A4-11
Drive source shutoff connector ········································································ A4-15
Fan connector······························································································ A4-16
Connectors·································································································· A4-16
Fan unit ······································································································ A4-17
External dimensions (24V Driever unit, Fun unit) ················································· A4-19
[EC Connection Unit]
Part names·································································································· A4-21
LED display ································································································· A4-22
Brake release switch ····················································································· A4-24
onnectors for EC Connection ·········································································· A4-25
Drive source shutoff connector ········································································ A4-26
Connectors·································································································· A4-27
External dimensions ······················································································ A4-28
Chapter 5 200V Driver Unit, 200V Power Supply Unit
5.1 Overview················································································ A5-1
5.2 How to Read the Model Number ················································· A5-3
How to read the model nameplate···································································· A5-4
5.3 Components ··········································································· A5-6
5.4 Part Names/Functions and External Dimensions····························· A5-8
[200V Driver Unit]
Part names·································································································· A5-8
LED display ································································································· A5-9
Jog switch ··································································································· A5-10
Brake release switch ····················································································· A5-11
Motor connector ··························································································· A5-11
Encoder connector························································································ A5-12
Driver Stop Connector ··················································································· A5-13
Fan connector······························································································ A5-13
Connectors·································································································· A5-13
Fan Unit for 200V Driver Unit ·········································································· A5-14
External dimensions (200V Driver Unit, Fan Unit for 200V Driver Unit)····················· A5-16
[200V Power Supply Unit]
Part names·································································································· A5-18
External Regenerative Resistor Connector························································· A5-21
200V AC Input Connector ··············································································· A5-22

ME0384-4A
Fan connector······························································································ A5-22
Connectors·································································································· A5-23
Fan unit ······································································································ A5-23
External dimensions (200V Power Supply Unit, Terminal Unit) ······························· A5-25
Chapter 6 SCON Exte nsion Unit
6.1 Overview················································································ A6-1
6.2 How to Read the Model Number ················································· A6-3
How to read the model nameplate······································································ A6-3
6.3 SCON Extension Unit and Components········································ A6-4
6.4 Part Names/Functions and External Dimensions····························· A6-5
Part names···································································································· A6-5
SCON cable connector ···················································································· A6-7
Connectors···································································································· A6-8
External dimensions ························································································ A6-9
Chapter 7 Simple Abs olute Unit
7.1 Overview················································································ A7-1
7.2 How to Read the Model Number ················································· A7-3
How to read the model nameplate······································································ A7-4
7.3 Simple Absolute Unit and Components ········································· A7-5
7.4 General Specifications ······························································ A7-6
7.5 Part Names/Functions and External Dimensions····························· A7-10
Part names···································································································· A7-10
LED display ··································································································· A7-11
Actuator cable connector/driver unit cable connector ············································· A7-11
External dimensions ························································································ A7-12
7.6 Precautions ············································································ A7-13
[Startup Section]
Chapter 1 Overview
1.1 Checking the Product································································ B1-1
1.2 Tools to Use············································································ B1-5
1.3 Startup Procedure ···································································· B1-7
Chapter 2 Mounting and Wiring
2.1 Installation·············································································· B2-1
Requests/Precautions······················································································ B2-1
Unit connection ······························································································ B2-5
DIN rail mounting···························································································· B2-6
2.2 Wiring···················································································· B2-7
Controller wiring ····························································································· B2-7
Actuator wiring ······························································································· B2-12
CC-Link wiring ······························································································· B2-15
Wiring for External Regenerative Resistor Unit ····················································· B2-17

ME0384-4A
Chapter 3 Absolute Reset
3.1 Absolute Reset ········································································ B3-1
Overview ······································································································ B3-1
3.2 Simple Absolute Unit Wiring ······················································· B3-3
3.3 Parameter Setting ···································································· B3-6
3.4 Absolute Reset Procedure ························································· B3-7
3.5 Absolute Battery ······································································ B3-12
3.6 Precautions ············································································ B3-14
Chapter 4 Network Configu ration
4.1 How to Use the Gateway Parameter Configuration Tool ······················ B4-1
Installing ······································································································· B4-1
RCON setting: CC-Link (for PiC of PLC wiring / programming)································· B4-17
How to Connect Ethernet ················································································· B4-26
4.2 Master Side Setting ·································································· B4-29
PLC setting: CC-Link (for PiC of PLC wiring / programming)···································· B4-29
4.3 Installing PC software ······························································· B4-42
Installing ······································································································· B4-42
4.4 Address Configuration······························································· B4-46
Overall address configuration example································································ B4-48
Gateway control/status signals ·········································································· B4-59
Power supply unit (PSA-24) status signal ···························································· B4-61
Chapter 5 Basic Operation Confirmation and Adjust ment
5.1 Operation Confirmation with PC Software ····································· B5-1
Home return ·································································································· B5-10
Jog travel ······································································································ B5-12
Position travel ································································································ B5-13
Operation Check of ELECYLINDER ··································································· B5-16
Chapter 6 Parameter
6.1 Parameter ·············································································· B6-1
Parameter list ································································································ B6-1
Parameter details ··························································································· B6-6
Parameter list for ELECYLINDER ······································································ B6-53
Parameter Details of ELECYLINDER·································································· B6-54
Servo gain adjustment ····················································································· B6-61
6.2 Various Functions ···································································· B6-65
Vibration damping control function ····································································· B6-65
Collision detection function ··············································································· B6-72
Power-saving function ····················································································· B6-75

ME0384-4A
[Maintenance Section]
Chapter 1 Maintenance and Inspection
1.1 Periodic Inspection ··································································· C1-1
Periodic inspection items·················································································· C1-2
1.2 Requests When Replacing Units ················································· C1-4
1.3 Consumable Parts···································································· C1-5
1.4 Preventive Maintenance Function················································ C1-6
Driver unit ····································································································· C1-6
Gateway unit ································································································· C1-6
Maintenance Information ·················································································· C1-7
PSA-24 Status Data Monitor ············································································· C1-11
1.5 Predictive Maintenance Function················································· C1-14
Fan ··········································································································C1-14
Overload warning ··························································································C1-15
Chapter 2 Troubleshooting
2.1 Troubleshooting······································································· C2-1
2.2 Failure Diagnostics··································································· C2-2
Operation failure····························································································· C2-2
Low positioning and velocity accuracy (incorrect operation)····································· C2-3
Generation of abnormal noise or vibration···························································· C2-4
Communication failure ····················································································· C2-4
2.3 Gateway Unit Alarm Causes and Countermeasures························C2-5
Causes and countermeasures of individual alarms ················································ C2-5
2.4 Driver Unit/Simple Absolute Unit Alarm Causes and Countermeasures C2-9
Alarm levels··································································································C2-9
Simple alarm codes························································································C2-10
Causes and countermeasures of individual alarms ···············································C2-12
2.5 Causes and countermeasures for ELECYLINDER alarms················· C2-29
ELECYLINDER Alarm Group ···········································································C2-29
Troubleshooting for ELECYLINDER alarm groups ················································C2-30
[Appendix]
Chapter 1 Conforming to Safety Category
1.1 Conforming to safety category ···················································· D1-1
System configuration ······················································································D1-1
Wiring and Setting of Safety Circuit ···································································D1-2
Example of Safety Circuit ················································································D1-4
TP Adapter and Related Parts ··········································································D1-14
Chapter 2 Connectable Actuators
2.1 List of Actuator Specifications ····················································· D2-1
Specifications for Pulse Motor Type Actuator ·······················································D2-1
Specifications for 24V AC Servo Motor Type Actuator············································D2-40
Specifications for Brushless DC Electric Motor Actuator·········································D2-45
Specifications for 200V AC Servo Motor Type Actuator ··········································D2-46

ME0384-4A
2.2 Correlation Diagrams of Speed and Payload·································· D2-97
RCP6 slider type (High output effective) ·····························································D2-97
RCP6 slider type (High output effective / Motor-reversing type) ·······························D2-98
RCP6 wide slider type (High output effective) ······················································D2-99
RCP6 wide slider type (High output effective / Motor-reversing type) ························D2-100
RCP6 rod type (High output effective) ································································D2-101
RCP6 rod type (High output effective / Motor-reversing type)··································D2-102
RCP6 radial cylinder type (High output effective)··················································D2-103
RCP6 radial cylinder type (High output effective / Motor-reversing type)····················D2-104
RCP6 wide radial cylinder type (High output effective)···········································D2-105
RCP6 wide radial cylinder type (High output effective / Motor-reversing type)·············D2-106
RCP6W dust and drip proof rod type (High output effective) ···································D2-107
RCP6W dust and drip proof rod type (High output effective / Motor-reversing type) ·····D2-109
RCP6W dust and drip proof radial cylinder type (High output effective) ·····················D2-111
RCP6W dust and drip proof radial cylinder type (High output effective / Motor-reversing type)
···D2-113
RCP6W dust and drip proof wide radial cylinder type (High output effective) ··············D2-115
RCP6W dust and drip proof wide radial cylinder type (High output effective / Motor-reversing type)
···D2-117
RCP6 table type (High output effective)······························································D2-119
RCP6 table type (High output effective / Motor-reversing type)································D2-120
RCP6 table type (High output effective)······························································D2-121
RCP6 table type (High output effective / Motor-reversing type)································D2-122
RCP5 slider type (High output effective) ·····························································D2-123
RCP5 slider type (High output effective / Motor-reversing type) ·······························D2-124
RCP5 belt type (High output effective) ·······························································D2-125
RCP5 rod type (High output effective) ································································D2-125
RCP5 rod type ······························································································D2-126
RCP5 rod type (High output effective / Motor-reversing type)··································D2-127
RCP5 rod type (Motor-reversing type)································································D2-128
RCP5W dust and drip proof rod type (High output effective) ···································D2-128
RCP5W dust and drip proof rod type ·································································D2-129
RCP4 slider type (High output effective) ·····························································D2-131
RCP4 slider type (High output effective / Motor-reversing type) ·······························D2-132
RCP4W dust and drip proof slider type·······························································D2-133
RCP4 rod type (High output effective) ································································D2-134
RCP4 rod type (High output effective / Motor-reversing type)··································D2-135
RCP4W dust and drip proof rod type (High output effective) ···································D2-136
RCP3 slider type ···························································································D2-137
RCP3 slider type (Motor-reversing type) ·····························································D2-139
RCP3 rod type ······························································································D2-140
RCP3 table type ····························································································D2-141
RCP2 slider type ···························································································D2-142
RCP2 slider type (Motor-reversing type) ·····························································D2-144
RCP2 rod type ······························································································D2-146
RCP2 rod short type (Standard / Equipped with Guide) ·········································D2-148
RCP2W dust and drip proof type·······································································D2-150

ME0384-4A
2.3 Push Force / Gripping Force and Current Limit Value······················· D2-151
RCP6 Series (Slider type / Rod type / Table type)·················································D2-151
RCP6 Series (Gripper type) ·············································································D2-152
RCP5 Series (Slider type / Rod type) ·································································D2-154
RCP4 Series (Slider type / Rod type) ·································································D2-155
RCP4 Series (Gripper type) ·············································································D2-156
RCP3 Series (Slider type / Table type) ·······························································D2-157
RCP3 Series (Slim, compact rod type) RA2AC/RA2BC/RA2AR/RA2BR ···················D2-158
RCP2 Series (Slider type / Rod type) ·································································D2-158
RCP2 Series (2-finger gripper type)···································································D2-160
RCP2 Series (3-finger gripper type)···································································D2-161
RCL Series···································································································D2-161
RCD Series ··································································································D2-161
RCS2 Series·································································································D2-162
2.4 Rotational speed and Output torque / Allowable inertial moment ········ D2-163
RCP2 Series (Rotary type) ··············································································D2-163
2.5 List of Actuators That Support Information Management Function······· D2-165
Stepper motor specification actuators ································································D2-165
AC servo motor specification actuators ······························································D2-166
Revision history ·············································································· Post-1

ME0384-4A

Safety Guide
Intro-1
ME0384-4A
Safety Guide
The Safety Guide is intended to permit safe use of the product and thus to prevent risks and property
damage.
Be sure to read it before handling the product.
Safety Precautions for Our Products
Common safety precautions for the use of robots in various operations are indicated here.
No.
Operation
Precautions
1 Model
Selection
●This product is not intended or designed for applications where high levels of
safety are required, and so cannot guarantee that human lives will be
protected. Accordingly, do not use it in any of the following applications.
(1) Medical equipment used to maintain, control or otherwise affect human life
or physical health
(2) Mechanisms or machinery designed for the purpose of moving or
transporting people (vehicles, railway facilities, aviation facilities etc.)
(3) Machinery components essential for safety (safety devices etc.)
●Do not use the product outside the range of the specifications. Otherwise, the
product life may be drastically shortened, and product damage or facilities
stoppage may occur.
●Do not use it in any of the following environments.
(1) Locations with flammable gases, ignitable objects or explosives
(2) Locations with potential exposure to radiation
(3) Locations with ambient temperature or relative humidity exceeding the
specifications range
(4) Locations where radiant heat is applied by direct sunlight or other large heat
source
(5) Locations where condensation occurs due to abrupt temperature changes
(6) Locations with corrosive gases (sulfuric acid, hydrochloric acid etc.)
(7) Locations exposed to significant amounts of dust, salt or iron powder
(8) Locations subject to direct vibration or impact
●For an actuator used in vertical orientation, select a model with brake. If a
model without brake is selected, the moving parts may fall when the power is
turned OFF, causing accidents such as injury or workpiece damage.

Safety Guide
Intro-2
ME0384-4A
No.
Operation
Precautions
2 Transportation ●When transporting heavy objects, do the work with two or more persons or
utilize equipment such as a crane.
●When working with two or more persons, make it clear who is to be in charge
and communicate well with each other to ensure safety.
●During transportation, carefully consider the carrying positions, weight, and
weight balance, and be careful to avoid collisions or dropping.
●Use appropriate transportation measures for transport.
The actuators available for transportation with a crane have eyebolts attached
or tapped holes to mount bolts. Follow the instructions in the instruction
manual for each model.
●Do not climb onto the package.
●Do not put anything heavy that could deform the package on it.
●When using a crane with capacity of 1t or more, have an operator qualified for
crane operation and sling work.
●When using a crane or equivalent equipment, make sure not to suspend loads
exceeding the equipment's rated load.
●Use a hook that is suitable for the load. Consider the safety factor of the hook
in such factors as shear strength. Also, check to make sure that the hook is
free of damage.
●Do not climb on loads suspended from cranes.
●Do not leave loads suspended from cranes for long periods.
●Do not stand under loads suspended from cranes.
3
Storage and
Preservation
●For the storage and preservation environment, see the installation
environment. However, give especial consideration to the prevention of
condensation.
●Store the products so as to prevent them from falling over or down in the case
of natural disasters such as earthquakes.
4 Installation
and Startup
(1) Installation of robot body and controller, etc.
●Be sure to securely hold and fix the product (including the workpiece). If the
product falls over, is dropped, or operates abnormally, it may lead to damage
and injury.
Also, be equipped for falls over or down due to natural disasters such as
earthquakes.
●Do not climb on or put anything on the product. Otherwise, this may lead to
accidental falling, injury or damage to the product due to falling objects,
product loss of function or performance degradation, or shortening of product
life.
●When using the product in any of the places specified below, provide sufficient
shielding.
(1) Locations where electrical noise is generated
(2) Locations with strong electrical or magnetic fields
(3) Locations with mains or power lines passing nearby
(4) Locations where the product may come in contact with water, oil or
chemical spray

Safety Guide
Intro-3
ME0384-4A
No.
Operation
Precautions
(2) Cable wiring
●Use IAI genuine cables for connecting the actuator and controller, and for the
teaching tools.
●Do not scratch cables, bend them forcibly, pull them, coil them, snag them, or
place heavy objects on them. Otherwise, this may lead to fire, electric shock,
or abnormal operation due to leakage or conduction malfunction.
●Perform the wiring for the product after turning OFF the power to the unit, and
avoid miswiring.
●When wiring DC power (+24V), be careful with the positive/negative polarity.
Incorrect connections may lead to fire, product breakdown or abnormal
operation.
●Connect the cable connector securely so that there is no disconnection or
looseness. Otherwise, this may lead to fire, electric shock, or abnormal
operation of the product.
●Never cut or reconnect the cables supplied with the product for the purpose of
extending or shortening the cable length. Otherwise, this may lead to fire or
abnormal operation of the product.
(3) Grounding
●Grounding must be performed, in order to prevent electric shocks or
electrostatic charge, enhance noise-resistant performance and control
unnecessary electromagnetic radiation.
●For the ground terminal on the AC power cable of the controller and the
grounding plate in the control panel, be sure to use a twisted pair cable with
wire thickness 0.5mm2(AWG20 or equivalent) or more for grounding work. For
safeguard grounding, it is necessary to select an appropriate wire diameter for
the load. Perform wiring that satisfies the specifications (electrical equipment
technical standards).
●Perform Class D grounding (former Class 3 grounding, with ground resistance
100Ωor below).

Safety Guide
Intro-4
ME0384-4A
No.
Operation
Precautions
4 Installation
and
Startup
(4) Safety measures
●When working with two or more persons, make it clear who is to be in charge
and communicate well with each other to ensure safety.
●When the product is operating or in the ready mode, take safety measures
(such as the installation of safety/protection fences) so that nobody can enter
the area within the robot's movable range. Contact with an operating robot
may lead to death or serious injury.
●Be sure to install an emergency stop circuit so that the unit can be stopped
immediately in an emergency during operation.
●Take safety measures such that turning the power ON alone will not start up
the unit. Otherwise, this may cause the product to start unexpectedly, leading
to injury or product damage.
●Take safety measures such that emergency stop cancel or recovery after
power failure alone will not start up the unit. Otherwise, this may lead to injury
or equipment damage.
●When installation or adjustment operation is to be performed, display signs
such as "Operating: No Power ON!" etc. Sudden power input may cause
electric shock or injury.
●Take measures to prevent workpieces, etc. from falling during power failures or
emergency stop.
●Wear protection gloves, goggles and safety shoes, as necessary, to secure
safety.
●Do not insert fingers or objects into the openings in the product. Otherwise,
this may lead to injury, electric shock, product damage, or fire.
●When releasing the brake on a vertically oriented actuator, be careful that it
does not fall under its own weight, catching the operator's hand or damaging
workpieces.
5
Teaching
●When working with two or more persons, make it clear who is to be in charge
and communicate well with each other to ensure safety.
●Perform teaching operation from outside the safety/protection fence, if
possible. If operation must be performed within the safety/protection fence,
prepare "Work Regulations" and make sure that all the workers acknowledge
and understand them well.
●When operation is to be performed inside the safety/protection fence,
operators should have emergency stop switches available at hand so that the
unit can be stopped at any time if abnormalities occur.
●When operation is to be performed inside the safety/protection fence, have a
monitor standing by in addition to the operator(s) so that the unit can be
stopped at any time if abnormalities occur. Also, keep watch on the operation
so that a third party cannot operate the switches carelessly.
●Place a sign indicating "Operating" where it can be seen easily.
●When releasing the brake on a vertically oriented actuator, be careful that it
does not fall under its own weight, catching the operator's hand or damaging
workpieces.
* Safety/protection fence: If there is no safety/protection fence, the movable
range should be indicated.

Safety Guide
Intro-5
ME0384-4A
No.
Operation
Precautions
6 Trial
Operation
●When working with two or more persons, make it clear who is to be in charge
and communicate well with each other to ensure safety.
●After teaching or programming, carry out trial operation step by step before
switching to automatic operation.
●When trial operation is to be performed inside the safety/protection fence, use
the same work procedure, determined in advance, as teaching operation.
●Be sure to confirm program operation at safe speeds. Otherwise, this may lead
to accidents due to unexpected motion caused by program error, etc.
●Do not touch the terminal block or any of the various setting switches while the
equipment is live. Otherwise, this may lead to electric shock or abnormal
operation.
7
Automatic
Operation
●Check before starting automatic operation or restarting after operation stop
that there is nobody within the safety/protection fence.
●Before starting automatic operation, make sure that all peripheral equipment is
ready for automatic operation and that there is no alarm indication.
●Be sure to start automatic operation from outside the safety/protection fence.
●If the product produces abnormal heat, smoke, odor, or noise, immediately
stop it and turn OFF the power switch. Otherwise, this may lead to fire or
damage to the product.
●When a power failure occurs, turn OFF the power switch. Otherwise, this may
lead to injury or product damage due to unexpected product motion during
recovery from the power failure.

Safety Guide
Intro-6
ME0384-4A
No.
Operation
Precautions
8 Maintenance
and
Inspection
●When working with two or more persons, make it clear who is to be in charge
and communicate well with each other to ensure safety.
●Perform the work outside the safety/protection fence, if possible. If operation
must be performed within the safety/protection fence, prepare "Work
Regulations" and make sure that all the workers acknowledge and understand
them well.
●When work is to be performed inside the safety/protection fence, turn OFF the
power switch as a rule.
●When operation is to be performed inside the safety/protection fence,
operators should have emergency stop switches available at hand so that the
unit can be stopped at any time if abnormalities occur.
●When operation is to be performed inside the safety/protection fence, have a
monitor standing by in addition to the operator(s) so that the unit can be
stopped at any time if abnormalities occur. Also, keep watch on the operation
so that a third party cannot operate the switches carelessly.
●Place a sign indicating "Operating" where it can be seen easily.
●For the grease for the guide or ball screw, use appropriate grease according to
the Instruction Manual for each model.
●Do not perform dielectric strength testing. Otherwise, this may lead to damage
to the product.
●When releasing the brake on a vertically oriented actuator, be careful that it
does not fall under its own weight, catching the operator's hand or damaging
workpieces.
●The slider or rod may be misaligned from the stop position if the servo is
turned OFF. Avoid injury or damage due to unnecessary operation.
●Be careful not to lose the cover or any removed screws, and be sure to return
the product to the original condition after maintenance and inspection work.
Otherwise, this may lead to product damage or injury due to incomplete
mounting.
* Safety/protection fence: If there is no safety/protection fence, the movable
range should be indicated.
9
Modification
and
Disassembly
●Do not modify, disassemble/assemble, or use maintenance parts not specified
on your own discretion.
10 Disposal ●When the product exceeds its useful life or is no longer needed, dispose of it
properly as industrial waste.
●When removing the actuator for disposal, avoid dropping components when
detaching screws.
●Do not put the product in a fire when disposing of it. The product may rupture
or generate toxic gases.
11
Other
●If you are equipped with a medical device such as a pacemaker, do not
approach the product or its wiring, as the device may be affected.
●See the Overseas Standard Compliance Manual to check compliance with
overseas standards if necessary.
●For the handling of actuators and controllers, follow the dedicated instruction
manual of each unit to ensure safety.

Safety Guide
Intro-7
ME0384-4A
Precaution Indications
The safety precautions are divided into "Danger", "Warning", "Caution" and "Notice" according to the
warning level, as follows, and described in the Instruction Manual for each model.
Level Degree of risk to persons and property Symbol
Danger
This indicates an imminently hazardous situation which, if the product
is not handled correctly, will result in death or serious injury. Danger
Warning
This indicates a potentially hazardous situation which, if the product
is not handled correctly, could result in death or serious injury. Warning
Caution
This indicates a potentially hazardous situation which, if the product
is not handled correctly, may result in minor injury or property
damage.
Caution
Notice
This indicates a situation in which, while injury is not a likely result,
the precautions should be observed in order to use the
product
appropriately.
Notice

Precautions for Handling
Intro-8
ME0384-3A
Precautions for Handling
1. Make sure to follow the usage condition, environment and specification range of the product.
In case it is not secured, it may cause a drop in performance or malfunction of the product.
2. Use the correct teaching tool.
Refer to the following item and use compatible tools for PC software and teaching pendant
usable for this controller.
[Refer to Startup Section Chapter 1, 1.2 Tools to Use]
3. Back up data in order to be prepared for a breakdown.
Non-volatile memory is used for backup memory of this controller. Registered position data and
parameters are written in this memory and backed up. Therefore, these data will normally not be
lost even if the power is turned off. However, be sure to save the latest data to enable a quick
recovery process in case this controller needs to be replaced with a substitute due to breakdown,
etc.
How to save
(1) Save to an external memory or a hard disk using PC software
(2) Record position table and parameters in writing
4. Perform initial operation setting.
This controller is compatible with 7 types of field network to support various applications, and
provided with 6 types of operation modes (Note). These settings can be made during initial setting.
Set operation mode to suit the application at startup.
[Refer to Startup Section Chapter 4 Network Configuration]
Note: It is not available to select an operation mode in the EC connection unit.
Warning
●It is dangerous if operation settings of the control sequence and field network are not
matched, as it will not only prevent normal operation but can also lead to unpredictable
operation.
Table of contents
Other IAI Controllers manuals

IAI
IAI R-unit RSEL User manual

IAI
IAI ROBO Cylinder RCP2 Series User manual

IAI
IAI RCP4 User manual

IAI
IAI RA Series User manual

IAI
IAI ERC Series User manual

IAI
IAI Msep User manual

IAI
IAI ISDB Series User manual

IAI
IAI ELECYLINDER EC GD3 Instruction Manual

IAI
IAI ACON-C User manual

IAI
IAI PCON-CA User manual

IAI
IAI PSEL series User manual

IAI
IAI ASEP User manual

IAI
IAI ROBO Cylinder RA4C User manual

IAI
IAI XSEL-R User manual

IAI
IAI XSEL-P User manual

IAI
IAI RCP6 Series User manual

IAI
IAI PCON-CY User manual

IAI
IAI PCON-C User manual

IAI
IAI ROBO Cylinder RCS2 User manual

IAI
IAI ROBO Cylinder RCP2 Series User manual