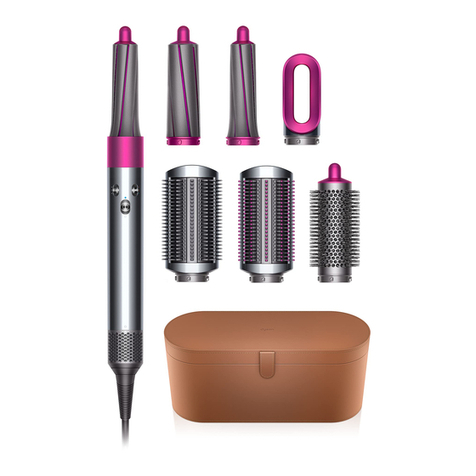
Imetec BELLISSIMA S4201 User manual

Istruzioni per l’uso
Instructions for use
Mode d’emploi
Bedienungsanleitung
Instrucciones de uso
Instruções para o uso
Οδηγίες χρήσης
Návod k použití
Návod na použitie
Használati utasítás
Instrukcja obsługi
Инструкции по применению
Қолдану бойынша
нұсқаулық
MODELLATORE AD ARIA
AIR STYLER
BROSSE SOUFFLANTE
MODELADOR DE AIRE
MODELADOR A AR
АУА СӘНДЕГІШІ
pagina
page
page
seite
página
página
σελίδα
strana
strana
oldal
strona
страница
беттер
1
9
17
25
33
41
49
57
65
73
81
89
97
IT
EN
FR
DE
ES
PT
EL
CZ
SK
HU
PL
RU
KK
MODELLATORE AD ARIA
TYPE S4201

I
BEBILDERTER LEITFADEN / GUÍA ILUSTRATIVA / GUIA ILUSTRATIVO
КӨРНЕКІ НҰСҚАУЛЫҚ
ТЕХНИКАЛЫҚ
ДЕРЕКТЕР
Rating TYPE S4201
50 x 20 mm
XST42820
TENACTA GROUP S.p.A
VIA PIEMONTE 5
IT - 24052 AZZANO S. P.
T
YPE S42
01
220-240 V 50/60 Hz
800 W
4
5
7
9
6
10
8
11
12

1
IT
Gentile cliente, La ringraziamo per aver scelto il nostro
prodotto. Siamo sicuri che Lei apprezzerà la sua qualità e
affidabilità in quanto progettato e prodotto mettendo in primo
piano la soddisfazione del cliente. Le presenti istruzioni per
l’uso sono conformi alla norma europea EN 82079.

2
IT
•
•
•
•
•

3
IT
•
•
•
•
•
•
•
•
•
•
•

4
IT
•
•
•
•
LEGENDA SIMBOLI
Avvertenza Divieto generico
Apparecchio di classe II Nota
Non adatto all’uso nella vasca da bagno, nella doccia
o in un contenitore riempito d’acqua
Guardare la Guida illustrativa pag. I per controllare il contenuto della
confezione.Tutte le figure si trovano nelle pagine interne della copertina.
1. Sede di aggancio degli
accessori
2. Interruttore e colpo d’aria fredda
0-1-2-
3. Corpo
4. Filtro di aspirazione
5. Anello d’aggancio
6. Dati tecnici
7. Tasto per il rilascio degli
accessori
8. Fermacavo elastico
9. Ferro arricciacapelli
10.Spazzola rotonda 20 mm
11.Concentratore
12.Custodia
Per le caratteristiche dell’apparecchio, fare riferimento alla confezione
esterna. Utilizzare unicamente con gli accessori forniti.

5
IT
• L’esperienza che presto acquisirà nell’usare il suo modellatore ad aria
le sarà utile per stabilire quanto tempo il suo tipo di capelli deve stare in
piega per ottenere l’eetto desiderato.
• Ogni volta che utilizza il suo apparecchio si assicuri che i capelli siano
puliti e liberi da qualsiasi traccia di lacca, mousse o gel.
• Durante l’uso, il riscaldamento ed il rareddamento, appoggi il
modellatore ad aria su superci liscie e resistenti al calore.
• Mentre realizza l’acconciatura presti attenzione a non avvicinare
eccessivamente il suo modellatore ad aria alle zone sensibili del viso,
alle orecchie, al collo ed alla cute.
• Dopo l’uso lasci rareddare completamente il suo modellatore ad aria
prima di riporlo.
• Lavare come d’abitudine i capelli.
Questo modellatore è ad aria, ciò signica che funziona in base allo stesso
principio di un comune asciugacapelli: l’aria calda esce dal corpo principale
e passa attraverso i fori degli accessori. Sia durante l’uso che nelle fasi di
riscaldamento e rareddamento appoggiare il modellatore su superci piane,
lisce e resistenti al calore.
Inserire l’accessorio selezionato nell’apposita sede d’aggancio, ruotare
in direzione oraria, risulterà perfettamente agganciato quando si sente un
«click».
Per sganciare l’accessorio premere il tasto di rilascio (7)
Collegare il modellatore ad aria alla rete di alimentazione.
utilizzare questo accessorio subito dopo aver lavato i
capelli per togliere l’umidità in eccesso.
• Prendere tra le dita una ciocca sottile di capelli; più sottili saranno le
ciocche, più tti saranno i ricci.
• Agire sulla leva della pinza e inserire la punta della ciocca tra il cilindro e
la pinza stessa.
• Rilasciare la pinza e avvolgere la ciocca intorno al ferro.
• Accendere il modellatore ad aria.
• Attendere che la ciocca prenda la piega desiderata prima di liberarla dal
ferro rilasciando la pinza.
• Assecondare il riccio ottenuto con le mani.

6
IT
Utilizzare questo accessorio per realizzare un liscio o ondulato morbido.
• Prendere tra le dita una ciocca sottile di capelli della stessa larghezza della
spazzola.
• Per un liscio morbido, accendere il modellatore e spazzolare la ciocca da
sotto dalla radice alle punte.
• Per un risultato ondulato avvolgere la ciocca intorno alla spazzola,
accendere il modellatore.
IMPIEGO
Impostare il usso d’aria e della temperatura con il tasto (2) nei seguenti livelli:
• 0=SPENTO
• 1= Flusso d’aria medio e Temperatura media
• 2= Flusso d’aria alto e Temperatura alta
•
= Colpo d’aria fredda
Portando il tasto su questa posizione si ssa la piega, l’aria calda si raredda.
Pulire l’apparecchio e gli accessori se necessario con un
panno umido. Non utilizzare solventi o altri detergenti aggressivi
o abrasivi. In caso contrario, si rischia di danneggiarne la
supercie. Controllare regolarmente l’apertura di aspirazione
dell’apparecchio e rimuovere la polvere e i capelli accumulatisi.

7
IT
SMALTIMENTO
L’imballaggio del prodotto è composto da materiali
riciclabili. Smaltirlo in conformità alla normativa di tutela
ambientale.
Ai sensi della direttiva 2012/19/UE sui rifiuti di
apparecchiatureelettricheed elettroniche(RAEE) il simbolo
del cassonetto barrato riportato sull’apparecchiatura o
sulla sua confezione indica che il prodotto alla fine della
propria vita utile deve essere raccolto separatamente dagli
altri rifiuti.
L’utente dovrà, pertanto, conferire l’apparecchiatura giunta
a fine vita agli idonei centri di raccolta differenziata dei rifiuti
elettrici ed elettronici. In alternativa alla gestione autonoma
è possibile consegnare l’apparecchiatura che si desidera
smaltire al rivenditore, al momento dell’acquisto di una nuova
apparecchiatura di tipo equivalente. Presso i rivenditori di
prodotti elettronici con superficie di vendita di almeno 400 m2
è inoltre possibile consegnare gratuitamente, senza obbligo di
acquisto, i prodotti elettronici da smaltire con dimensioni inferiori
a 25 cm. L’adeguata raccolta differenziata per l’avvio successivo
dell’apparecchiatura dismessa al riciclaggio, al trattamento
e allo smaltimento compatibile con il rispetto dell’ambiente
contribuisce ad evitare possibili effetti negativi sull’ambiente e
sulla salute e favorisce il reimpiego e/o riciclo dei materiali di cui
è composta l’apparecchiatura.
L’apparecchio è garantito per un periodo di due anni dalla data di
consegna. Fa fede la data riportata sullo scontrino/fattura (purché
chiaramente leggibile), a meno che l’acquirente non provi che la

8
IT consegna è successiva. In caso di difetto del prodotto preesistente
alla data di consegna, viene garantita la riparazione o la sostituzione
senza spese dell’apparecchio, salvo che uno dei due rimedi risulti
sproporzionato rispetto all’altro. L’acquirente ha l’onere di denunciare
a un Centro Assistenza autorizzato il difetto di conformità entro due
mesi dalla scoperta del difetto stesso.
Non sono coperte dalla garanzia tutte le parti che dovessero risultare
difettose a causa di:
a. danni da trasporto o da cadute accidentali,
b. errata installazione o inadeguatezza impianto elettrico,
c. riparazioni o modifiche operate da personale non autorizzato,
d. mancata o non corretta manutenzione e pulizia,
e. prodotto e/o parti di prodotto soggette a usura e/o consumabili,
f. mancata osservanza delle istruzioni per il funzionamento
dell’apparecchio, negligenza o trascuratezza nell’uso,
g. cavo di alimentazione attorcigliato o piegato per incuria o tirato,
h. presenza di capelli nella ventola,
i. mancata pulizia del filtro ingresso aria fredda che causa
surriscaldamento motore,
j. caduta accidentale durante l’uso,
k. ostruzione ingresso aria fredda e uscita aria calda (griglia
anteriore e posteriore),
l. utilizzo di accessori o componenti di manutenzione non originali,
m. utilizzo di prodotti chimici per la pulizia dell’apparecchio,
n. utilizzo di lacche o altri spray durante l’uso.
L’elenco di cui sopra è a titolo meramente esemplificativo e non
esaustivo, in quanto la presente garanzia è comunque esclusa per tutte
quelle circostanze che non possono farsi risalire a difetti di fabbricazione
dell’apparecchio. La garanzia è inoltre esclusa in tutti i casi di uso
improprio dell’apparecchio ed in caso di uso professionale. Si declina
ogni responsabilità per eventuali danni che possano direttamente
o indirettamente derivare a persone, cose ed animali domestici in
conseguenza della mancata osservanza di tutte le prescrizioni indicate
nel presente libretto in tema di installazione, uso e manutenzione
dell’apparecchio. Sono fatte salve le azioni contrattuali di garanzia nei
confronti del venditore.
La riparazione dell’ apparecchio deve essere effettuata presso
un Centro Assistenza autorizzato. L’apparecchio difettoso, se in
garanzia, dovrà pervenire al Centro Assistenza unitamente ad un
documento fiscale che ne attesti la data di vendita o di consegna.

9
EN
Dear customer, thank you for choosing our product. We
feel certain you will appreciate its quality and reliability as it
was designed and manufactured with customer satisfaction
in mind. These instructions for use are compliant with the
European Standard EN 82079.
INDEX

10
EN
SAFETY NOTES
•
•
•
•
•
•

11
EN
•
•
•
•
•
•
•
•
•
•
•

12
EN
•
•
•
SYMBOLS
Warning Prohibited
Class II equipment Note
Not suitable for use in the bath, shower or waterfilled
reservoir
Refer to page I of the Illustrative Guide to check the contents of the
package. All the figures are found on the inside pages of the cover.
1. Coupling seat for accessories
2. Switch and cool air blast
0-1-2-
3. Body
4. Intake lter
5. Attachment eyelet
6. Technical Data
7. Button to release the
accessories
8. Straightener Cleaning cloth
9. Curling tong
10.Round heated brush
20mm
11.Concentrator
12.Case
For the appliance features, refer to the external packaging. Use the
supplied accessories only.
USE

13
EN
USEFUL TIPS
• The experience you will soon acquire in using your air styler, will help
you determine how long your hair will take to achieve the desired eect.
• Every time you use the appliance, make sure the hair is clean and
without any trace of hairspray, hair mousse or gel.
• Always start from the nape of the neck, proceed on the sides and
nish on the forehead.
• When using the styler or while it is heating or cooling, place the
appliance on a smooth and heat resistant surface.
• When creating the hairstyle, be careful not to bring the air styler close
to sensitive parts of the face, ears, neck or skin.
• After use, allow the air styler to cool down completely before putting
it away.
• Wash hair as normal and comb to remove knots.
• Dry your hair and brush from the roots to the ends.
OPERATION
This styler works with air, which means it works according to the same
principle of a common hair dryer: the hot air comes out from the main
body and passes through the holes of the accessories. When using the
styler or while it is heating or cooling, place the appliance on a smooth
and heat resistant surface.
Inserire l’accessorio selezionato nell’apposita sede d’aggancio, ruotare
in direzione oraria, risulterà perfettamente agganciato quando si sente
un «click».
Per sganciare l’accessorio premere il tasto di rilascio (7)
Connect the air styler to the mains.
use this accessory immediately after washing your
hair to remove excess moisture.
• Take a thin lock of hair between your ngers; the thinner the lock, the
tighter the curls.
• Act on the lever of the clamp and insert the tip of hair between the
cylinder and the clamp itself.
• Release the clamp and wrap the strand around the tong.
• Switch the air styler ON.
• Wait for the lock to dry as desired before removing it from the tong by
releasing the clamp.
• Finish o the style of the curl with your hands.

14
EN
Use this accessory to create a straight or soft wavy look.
• Take a thin strand of hair between your ngers, of around the same
width as the brush.
• For a soft, straight style, switch on the styler and brush the strand from
underneath, from root to tip.
• For a wavy result, wind the strand round the brush and switch on the
styler.
USE
Set the air flow and temperature to the following levels with the (2) button:
0 = OFF
Move the button to this position to cool the air flow and hold your
styling in place.
on.
Clean the appliance and the accessories with a damp cloth, when
necessary. Do not use solvents or other aggressive or abrasive
detergents.Otherwise, the surface could be damaged. Check the
intake opening of the appliance regularly and remove all hair and
dust.
NOTE

15
EN
STORAGE
DISPOSAL
The packaging of the appliance is made of recyclable materials.
Dispose of it in accordance with the environmental protection
regulations.
Pursuant to Directive 2012/19/EU on waste electrical and
electronic equipment (WEEE), the crossed bin symbol on the
appliance or its packaging indicates that the appliance must
be disposed of separately from other waste at the end of its
useful life.
The user must therefore take the appliance to an appropriate
recycling centre for electrical and electronic equipment. Alternatively,
instead of handling the disposal, the user can hand over the appliance
to the retailer when a new, equivalent one is purchased.The user can
hand over electronic products measuring less than 25 cm to retailers
of electronic products having a sales area of at least 400 m2free of
charge and with no obligation to buy. Appropriate separate collection
for the subsequent procedure for the decommissioned appliance
for recycling, which includes treatment and environmentally friendly
disposal helps prevent adverse effects on the environment and health
and promotes reusing and/or recycling materials that the appliance
consists of.
The appliance is guaranteed for a period of two years from the date of
delivery. Evidence shall be taken as the date indicated on the receipt/
invoice (provided it is legible), unless the buyer can prove that the
delivery occurred later.
In the event of a defect in the product which existed prior to the date
of delivery, appliance repair or replacement is guaranteed free of
charge, unless one of the two solutions is disproportionate to the
other. The buyer has the obligation to notify an authorised Service
Centre of the non-conformity within two months from discovering the

16
EN
defect.
The warranty does not cover any part that may be defective due to:
transport damage or accidental drops,
incorrect installation or an inadequate electrical system,
repairs or alterations made by unauthorised personnel,
poor or incorrect maintenance and cleaning,
product and/or product parts subject to wear and/or
consumables,
failure to comply with the operating instructions and/or
negligent or careless use.
Twisted or bent power cord due to negligence or pulled,
Presence of hair in the fan,
Failure to clean the cold air inlet filter causing the motor to
overheat,
Accidental falling during use,
Obstruction at the cold air inlet and hot air outlet (front and
rear grid),
Use of non-original maintenance components or
accessories,
Use of chemical products to clean the appliance,
Use of hairspray or other sprays during use.
The list above is purely indicative and not exhaustive and in any
case, this warranty shall not cover all circumstances that cannot be
attributed to manufacturing defects of the appliance.
In addition, the warranty does not cover any case of improper use of
the appliance and professional use.
All liability is disclaimed for any damage that may directly or indirectly
be caused to persons, property and pets as a result of failure to comply
with all the instructions provided in the “Instructions and Warnings
Booklet” regarding appliance installation, use and maintenance.
This is without prejudice to any contractual warranty claims against
the seller.
Appliance repairs must be carried out by an authorised Service
Centre.If the faulty appliance is under warranty, it must be sent to the
Service Centre together with a fiscal document that can confirm the
date of sale or delivery.

17
FR
Cher client, nous vous remercions d’avoir choisi l’un de nos
produits. Nous sommes certains que vous apprécierez sa
qualité et sa fiabilité, puisqu’il a été conçu et fabriqué afin
de satisfaire le client. Le présent mode d’emploi a été rédigé
conformément à la norme européenne EN 82079.
INDEX
20
20
20
22
I
I

18
FR
•
•
•
•
•
Table of contents
Languages:
Other Imetec Hair Styler manuals

Imetec
Imetec Type E6506 User manual

Imetec
Imetec H1802 User manual

Imetec
Imetec P9701 User manual

Imetec
Imetec C7003 User manual

Imetec
Imetec Bellissima My Pro Magic Style PB 230 User manual

Imetec
Imetec Type E6506 User manual

Imetec
Imetec H3401 User manual

Imetec
Imetec C7003 User manual

Imetec
Imetec R9101 User manual

Imetec
Imetec N3301 User manual

Imetec
Imetec G5901 User manual

Imetec
Imetec I5801 Instruction manual

Imetec
Imetec I5901 User manual

Imetec
Imetec G0801 User manual

Imetec
Imetec E6501 User manual

Imetec
Imetec N6601 User manual

Imetec
Imetec G0801 User manual

Imetec
Imetec Type E6506 User manual

Imetec
Imetec N6601 User manual

Imetec
Imetec Bellissima My Pro Miracle Wave User manual