manuals.online logo
Brands
  1. Home
  2. •
  3. Brands
  4. •
  5. Ingenico
  6. •
  7. Payment Terminal
  8. •
  9. Ingenico Move 5000 User manual

Ingenico Move 5000 User manual

CREDIT SALE
IMPORTANT NOTE: Press F1 to access the MAIN MENU
and view all of your transaction options.
TERMINAL DISPLAYS: ACTION:
Press F1 to access
MAIN MENU
MAIN MENU Select Sale
Sale Select Credit
CREDIT SALE
Enter Amount
Key in the amount
of the Transaction,
then press Enter ( )
CREDIT SALE
Insert/Tap/Swipe Swipe, tap or insert the card
<Authorization> Terminal reaches out to Host for
Authorization and prints a Receipt.
Customer Copy
Yes No
If prompted, select Yes to
print Customer Copy
CREDIT SALE (KEYED)
TERMINAL DISPLAYS: ACTION:
Press F1 to access
MAIN MENU
MAIN MENU Select Sale
Sale Select Credit
CREDIT SALE
Enter Amount
Key in the amount of the
Transaction, then press Enter ( )
CREDIT SALE
Insert/Tap/Swipe
Key in the full card number,
then press Enter ( )
Card Present Select Ye s or No
CREDIT SALE
Enter Expiration Date
MMYY
Key in the Expiration date
in MMYY format,
then press Enter ( )
CREDIT SALE
Address
Key in the billing street address
number, then press Enter ( )
CREDIT SALE
Enter Zip Code
Key in the zip code,
then press Enter ( )
CREDIT SALE
Enter CVV2/CID
Key in the CVV code on card,
then press Enter ( )
<Authorization> Terminal reaches out to Host for
Authorization and prints a Receipt.
Customer Copy
Yes No
If desired, select Yes to
print Customer Copy
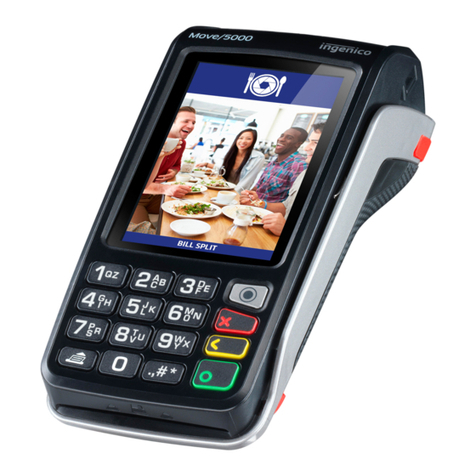
Move 5000
QUICK REFERENCE
GUIDE
HELP DESK AND CUSTOMER SUPPORT
Contact Support at 866-485-8999.
For self-service, support, statements, batch reports
and more visit www.paymentshub.com.
TRANS ADJUST
Used for corrections to already adjusted tip.
TERMINAL DISPLAYS: ACTION:
Press F1 to access
MAIN MENU
MAIN MENU Select Trans Adjust
Search Options Search using All or BRIC
If All was selected
then use arrows to
scroll to transaction
If BRIC was selected
— Enter last 4 of BRIC
will display
Press Select on transaction
requiring tip
Key in BRIC (found on receipt),
then press Enter ( )
Enter New Sale
Amount
Press Enter ( )
— this cannot be adjusted
Enter Tip Amount
Key in tip amount — $1.00
will be keyed in as 100, then
press Enter ( )
Tip conrmation will
display
Sale $X.XX
Tip $X.XX
Total $X.XX
Select Accept if correct or
Change to make correction
Accept will display Captured
briey on screen
Trans Adjust Add
Another Y/N
Selecting Ye s will take user to
Trans Search screen
Selecting No and terminal will
return to EPX screen saver
ADDING A TIP
TERMINAL DISPLAYS: ACTION:
Press F1 to access
MAIN MENU
MAIN MENU Select Tip
Tip Search Options Search using All or BRIC
If All was selected
then use arrows to
scroll to transaction
If BRIC was selected
— Enter Last 4 of
BRIC will display
Press Select on transaction
requiring tip
Key in Last 4 of BRIC (found on
receipt), then press Enter ( )
Enter Tip Amount Key in tip amount — $1.00 will be
typed as 100, then press Enter ( )
Tip conrmation will
display
Sale $X.XX
Tip $X.XX
Total $X.XX
Select Accept if correct or
Change to make correction
Accept will display‘Captured’
briey on screen
Tip Add Another Y/N
Select Yes will take user to
Tip Search Screen
Select No terminal will return
to EPX screen saver
*Note that tip can only be adjusted once via this menu. To
adjust a second time, refer to instructions for Trans Adjust.
GPRS REPAIR
IMPORTANT NOTE: The Move5000 must be sufficiently
charged for full wireless connectivity capabilities. If the
terminal is low on battery, these steps may not resolve
your connection issues. In that case, place the Terminal on
the charger until it is sufficiently charged.
TERMINAL DISPLAYS: ACTION:
Press F1 to access
MAIN MENU
MAIN MENU
Sale
Return
Void
Scroll down and select
Admin Menu
ADMIN MENU
Reports Menu
Server Menu
Batch Menu
Select GPRS Menu
GPRS MENU
APN
Username
Password
Repair
Select Repair
GPRS MENU
GPRS Disconnect…
Enabling GPRS…
Connecting GPRS...
Terminal will disconnect, re-
enable and re-connect GPRS
Repair Failed! No
Signal!
OR
Repair Successful
GPRS Connected!
If Repair Failed, it is likely that
your signal strength is not strong
enough to connect to the GPRS
network. Please move to another
location to get better signal
strength.
If Repair Successful, the terminal
is connected to the GPRS
network and ready to process.
BATCH SETTLEMENT
IMPORTANT NOTE: This must be done daily
to receive funding.
TERMINAL DISPLAYS: ACTION:
Press F1 to access
MAIN MENU
MAIN MENU Select Settlement,
Close Batch and
Deposit Funds?
Yes No
Select Ye s
BATCH TOTALS
< $X.XX >
Cancel Accept
Select Accept
Settle (Primary) Terminal prints a
Settlement Report.
WIFI NETWORK SETUP
The following steps outline how to connect
the Move5000 to a new WiFi Network.
TERMINAL DISPLAYS: ACTION:
Press the Functions
button ( )
Password Required
Enter Manager Password
Enter 3303 and then
press Enter
TSA
Control Panel
EPXPay
Select Control Panel
Applications Reports
Software Management
Terminal Information
Terminal Settings
Select Terminal Settings
General Settings
Human Interface
Eco Mode
Communication Means
Select
Communication Means
Bluetooth
WiFi
Mobile Networks
Ethernet
Modem PABX
Modem Settings
Select WiFi
Switch On Select Switch On
Switch O
Scan Networks
Status
Advanced Options
Select Scan Networks
Scanning...
The scan will result in a list
of networks being displayed.
Select the appropriate
network from the list.
WiFi Password
Enter Password:
Enter the WiFi network
prole’s password,
then press Enter ( )
New Prole
OK
This message displays if
the terminal successfully
connects to the WiFi network.
Switch O
Scan Networks
Status
Advanced Options
Press the Cancel button
to return to the EPX home
screen.
FOR SUPPLIES
For supplies please visit www.paymentshub.com.
Scan QR Code for Payments Hub website.
REFUND
IMPORTANT NOTE: Refunds must be run in the same
method that the Sale was run. Credit Refund for Credit,
Debit Refund for Debit, EBT Refund for EBT.
TERMINAL DISPLAYS: ACTION:
Press F1 to access
MAIN MENU
MAIN MENU Select Return
Enter Clerk
Password
Key in Clerk Password (1101),
then press Enter ( )
Return Select Credit, Debit or EBT
CREDIT RETURN
Enter Amount
Key in the amount of the refund,
then press Enter ( )
CREDIT RETURN
Insert/Tap/Swipe Swipe, tap or insert the card
CREDIT RETURN
Original Batch #
If prompted, key in Original Batch
# associated with the original
sale, then press Enter ( )
CREDIT RETURN
Original Item #
If prompted, key in Original Item
# associated with the original
sale, then press Enter ( )
Amount: $X.XX
Enter PIN
If prompted, enter in the PIN
number for the EBT or Debit card,
then press Enter ( )
<Authorization>
Terminal reaches out to
Host for Authorization and
prints a Receipt.
Customer Copy
Yes No
If desired, select Yes
to print Customer Copy
VOID
TERMINAL DISPLAYS: ACTION:
Press F1 to access
MAIN MENU
MAIN MENU Select Void
Void
Enter Clerk Password
Key in Clerk Password (1101),
then press Enter ( )
VOID Menu Select BRIC
Enter Last 4 of BRIC
Key in the last 4 alphanumeric
characters of the BRIC from the
receipt, then press Enter ( )
<Transaction Details>
Cancel Accept Select Accept
<Authorization>
Terminal reaches out to
Host for Authorization and
prints a Receipt.
Customer Copy
Yes No
If desired, select Yes to
print Customer Copy
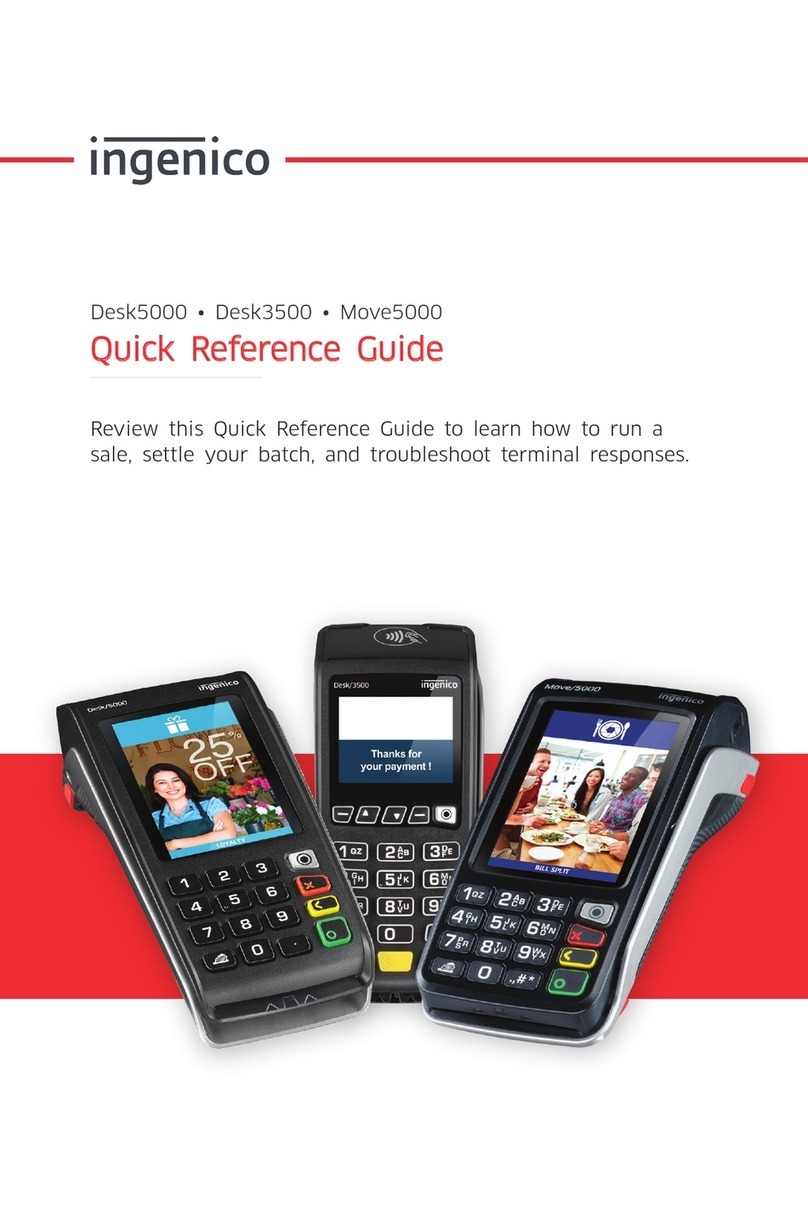
Other manuals for Move 5000

6

Other Ingenico Payment Terminal manuals

Ingenico iCT220, iCT250 User manual

Ingenico

Ingenico iCT220, iCT250 User manual

Ingenico 5100 User manual

Ingenico

Ingenico 5100 User manual

Ingenico ML30 Contactless User manual

Ingenico

Ingenico ML30 Contactless User manual

Ingenico iCT2 Series User manual

Ingenico

Ingenico iCT2 Series User manual

Ingenico iCT220, iCT250 User manual

Ingenico

Ingenico iCT220, iCT250 User manual

Ingenico iCT220, iCT250 User manual

Ingenico

Ingenico iCT220, iCT250 User manual

Ingenico Tetra Move/5000 User manual

Ingenico

Ingenico Tetra Move/5000 User manual

Ingenico iCT220, iCT250 User manual

Ingenico

Ingenico iCT220, iCT250 User manual

Ingenico iCT220, iCT250 User manual

Ingenico

Ingenico iCT220, iCT250 User manual

Ingenico 7910 User manual

Ingenico

Ingenico 7910 User manual

Ingenico DESK/5000 User manual

Ingenico

Ingenico DESK/5000 User manual

Ingenico iCT220, iCT250 Instruction and safety manual
Ingenico

Ingenico iCT220, iCT250 Instruction and safety manual

Ingenico iWL2 Series User manual

Ingenico

Ingenico iWL2 Series User manual

Ingenico Desk/2600 User manual

Ingenico

Ingenico Desk/2600 User manual

Ingenico Move 3500 MIX User manual

Ingenico

Ingenico Move 3500 MIX User manual

Ingenico IWL220 GPRS User manual

Ingenico

Ingenico IWL220 GPRS User manual

Ingenico AXIUM EX6000 User manual

Ingenico

Ingenico AXIUM EX6000 User manual

Ingenico FLEX IPP320 User manual

Ingenico

Ingenico FLEX IPP320 User manual

Ingenico Telium User manual

Ingenico

Ingenico Telium User manual

Ingenico i6550 User manual

Ingenico

Ingenico i6550 User manual

Ingenico Move 5000 User manual

Ingenico

Ingenico Move 5000 User manual

Ingenico Lane/5000 User manual

Ingenico

Ingenico Lane/5000 User manual

Ingenico PAYZONE iCT250 Original operating instructions

Ingenico

Ingenico PAYZONE iCT250 Original operating instructions

Ingenico CAD30 UCR User manual

Ingenico

Ingenico CAD30 UCR User manual

Popular Payment Terminal manuals by other brands

VeriFone VX 675 reference guide

VeriFone

VeriFone VX 675 reference guide

dejavoo Z Series Quick reference guide

dejavoo

dejavoo Z Series Quick reference guide

VeriFone MX800 Series installation guide

VeriFone

VeriFone MX800 Series installation guide

SmartPay EFTPOS Getting started guide

SmartPay

SmartPay EFTPOS Getting started guide

Symbol iPOS TX Product reference guide

Symbol

Symbol iPOS TX Product reference guide

VeriFone QX700 installation guide

VeriFone

VeriFone QX700 installation guide

CCV Fly Next FIRST SETUP GUIDE

CCV

CCV Fly Next FIRST SETUP GUIDE

Hypercom Optinum T4200 Series Quick reference guide

Hypercom

Hypercom Optinum T4200 Series Quick reference guide

Moneris iCT250 Getting Starded Guide

Moneris

Moneris iCT250 Getting Starded Guide

FEITIAN M200 introduction

FEITIAN

FEITIAN M200 introduction

VeriFone Vx 570 Training guide

VeriFone

VeriFone Vx 570 Training guide

Hypercom ICE 5700 installation guide

Hypercom

Hypercom ICE 5700 installation guide

Spectra Technologies T800 installation guide

Spectra Technologies

Spectra Technologies T800 installation guide

Moneris iCT250 reference guide

Moneris

Moneris iCT250 reference guide

VeriFone Vx Series Quick user guide

VeriFone

VeriFone Vx Series Quick user guide

Datalogic F725-E SERIES user manual

Datalogic

Datalogic F725-E SERIES user manual

adyen VX680 user manual

adyen

adyen VX680 user manual

First Data FD130 quick start guide

First Data

First Data FD130 quick start guide

manuals.online logo
manuals.online logoBrands
  • About & Mission
  • Contact us
  • Privacy Policy
  • Terms and Conditions

Copyright 2025 Manuals.Online. All Rights Reserved.