manuals.online logo
Brands
  1. Home
  2. •
  3. Brands
  4. •
  5. Ingenico
  6. •
  7. Touch Terminal
  8. •
  9. Ingenico DESK/3500 User manual

Ingenico DESK/3500 User manual

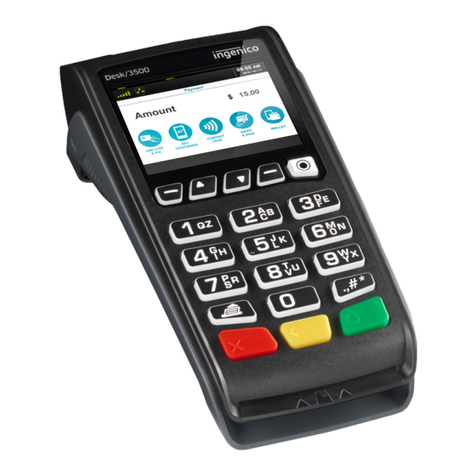
DESK/3500
INGENICO TETRA
Ready to start accepting payments with
your DESK/3500?
What’s in the box
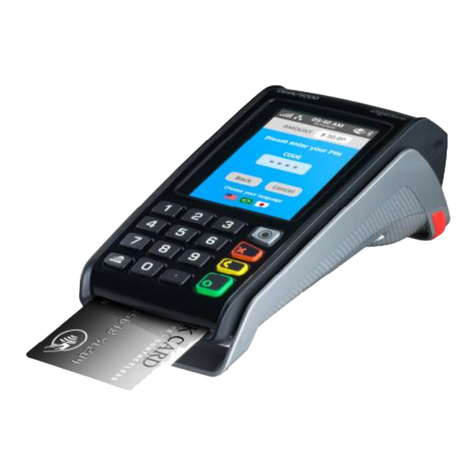
Get to know your DESK/3500
How to perform basic transactions
Need help?
SET UP YOUR HARDWARE
Plug the power cord into the Magicbox.
Plug the other end into a power outlet.
Power your device
Press and hold ENTER [ O]to power on
your device and display the main menu.
Go to main menu
WHAT’S IN THE BOX
Thank you for selecting Elavon Payment Solutions for your
payment processing needs. To get started, you’ll need:
Ingenico DESK/3500 device
Magicbox (connects cables to power and ethernet)
Power cord
Ethernet cable (6 ft. blue cable)
Receipt paper
Phone cable (for optional backup dial connection)
The DESK/3500 provides an enhanced payment experience
with an easy-to-use applications menu, built-in thermal
printer, color screen, and full support for EMV chip, swipe,
and NFC (contactless) payments.
Keep this reference guide handy for simple steps to help you
start accepting payments right away.
INGENICO DESK/3500
Plug the Ethernet cable into the Magicbox.
Plug the other end into the router or modem.
Connect to the internet
© 2023 Elavon, Inc. All rights reserved. Elavon is a trademark in the United States and/or other countries. This information is prepared by Elavon
as a service for its customers. All features and specications are subject to change without notice.
Your DESK/3500 payment device will be shipped to you
with the receipt roll already installed. We also run a test
transaction to validate that the device is working properly.
Setting up your hardware is as easy as 1-2-3.
GET TO KNOW YOUR DESK/3500
Your DESK/3500 o󰀨ers intuitive buttons and a touchscreen
interface for easy navigation and use.
The silver button allows you to access the
di󰀨erent application menus.
HOME
The red [ x] button cancels the transaction
or function in progress.
BASIC TRANSACTION TYPES
In the following sections, we’ve provided simple steps to help you start
using your new payment device. Please note that transaction ow may
vary, depending on your account services.
CANCEL
BACKSPACE
The yellow [ <]button deletes the last
character entered.
ENTER / ACCEPT
The green [ O] button accepts or conrms
an action. It is also used to turn on the device.
Ethernet cable Receipt paper*
2.8 inch backlit QVGA
color display
Color coded buttons
with raised symbols for
touch navigation
Receipt paper compartment*
(lift catch and insert with end
pulled out from under the roll)
PAPER FEED
The button on the lower left allows you to
advance the receipt roll.
CREDIT CARD SALE
For card present credit transactions, follow these steps:
1. From the idle screen, press ENTER [ O] and select
Sale on the screen.
2. Key in the sale amount and press ENTER [ O].
3. When prompted, insert/swipe/tap the card on the
reader. Press ENTER [ O] to conrm the amount.
4. The screen will indicate if the transaction is approved.
The receipt will print automatically.
For card present debit transactions, follow these steps:
DEBIT CARD SALE
1. From the idle screen, press ENTER [ O] and select
Sale on the screen.
2. Key in the sale amount and press ENTER [ O] .
3. When prompted, insert card into reader and DO NOT
REMOVE. Press ENTER [ O] to conrm the amount.
4. When prompted, have the customer key in the PIN
number and press ENTER [ O].
5. The screen will indicate if the transaction is approved.
The receipt will print automatically.
Contactless card entry
© 2023 Elavon, Inc. All rights reserved. Elavon is a trademark in the United States and/or other countries. This information is prepared by Elavon as
a service for its customers. All features and specications are subject to change without notice.
POUND / PUNCTUATION
The button on the lower right opens the login
screen for the Admin menu.
X
<
.,#*
▲
* New devices are shipped with the receipt roll installed.
Magicbox
VOIDING A SALE
To void a sale, locate the reference number of the transaction
on the sales receipt and follow these steps:
1. From the idle screen, press ENTER [ O] and select
Void on the screen.
2. Select Reference Number as your search option.
3. When the transaction appears on the screen, press
ENTER [ O].
4. Press YES on the screen to conrm that you wish to
proceed with the void.
5. The receipt will print automatically.
To manually enter a sale (i.e. where the card is not present),
follow these steps:
MANUAL ENTRY SALE
1. From the idle screen, press ENTER [ O] and select
Sale on the screen.
2. Key in the sale amount and press ENTER [ O].
3. When prompted, key in the card number and press
ENTER [ O].
4. Key in the card expiration date and press ENTER [ O].
5. If the card is present, click YES on the touchscreen. If the
card is not present, click NO.
6. Press ENTER [ O] to conrm the amount.
7. Key in the CVV code from the back of the card and press
ENTER [ O].
8. Key in the billing street number and press ENTER [ O].
9. Key in the billing zip/postal code and press ENTER [ O].
10. The display will indicate if the transaction is approved.
The receipt will print automatically.
To return funds to a customer after a credit transaction
has settled, follow these steps:
CREDIT CARD RETURN
1. From the idle screen, press ENTER [ O] and select
Return on the screen.
2. Key in the refund amount and press ENTER [ O].
3. When prompted, insert card into chip reader and press
ENTER [ O].
4. Press ENTER [ O] to conrm the amount.
5. The receipt will print automatically.
DEBIT CARD RETURN
To return funds to a customer after a debit transaction
has settled, follow these steps:
1. From the idle screen, press ENTER [ O] and select
Return on the screen.
2. Key in the refund amount and press ENTER [ O].
3. When prompted, insert card into chip reader and DO
NOT REMOVE. Press ENTER [ O] to conrm.
4. When prompted, have the customer enter the PIN for
the card and press ENTER [ O].
5. The receipt will print automatically.
VOID OR RETURN?
When you VOID a sale, you are preventing the original sale from being
captured. A REFUND is an o󰀨setting sale that runs separately for a sale
that has already settled.
© 2023 Elavon, Inc. All rights reserved. Elavon is a trademark in the United States and/or other countries. This information is prepared by Elavon as
a service for its customers. All features and specications are subject to change without notice.
MANUAL SETTLEMENT
To set a time to auto-settle your batches, follow these steps:
AUTO SETTLEMENT
WHY SETTLE?
Batch settlement must occur for funds to be deposited
into your bank account. If auto settlement is enabled,
the system will settle at a set time each day. If
auto settlement is disabled, you must perform your
settlement requests manually.
1. From the idle screen, press ENTER [ O].
2. Use the arrow key to scroll down and select
SETTLEMENT.
3. When the terminal prompts you to close the batch and
deposit funds, select YES.
4. When prompted, review and conrm the settlement total.
Select Accept on screen or by pressing ENTER [ O].
5. The DESK/3500 will automatically print the settlement
report.
1. On the keypad, press the pound/punctuation [.,#*] button.
2. Key in the passcode and press ENTER [ O].
3. Select SETUP MENU on your touchscreen display.
4. Next, select TRANS OPTIONS.
5. Select SETTLEMENT.
6. Select AUTO SETTLE.
7. Set the time of day to settle your batches, using a 24-hour
HHMM clock format (e.g. 9:00 pm = 2100 hours).
8. Press ENTER [ O].
Note: To turn “o󰀨” auto settlement and settle batches manual-
ly, follow the steps above and set the time of day to “0000”.
Activation assistance & training
1-866-451-4007
M-F 8:30-9:00 PM ET
Need help getting started?
© 2023 Elavon, Inc. All rights reserved. Elavon is a trademark in the United States and/or other countries. This information is prepared by Elavon as
a service for its customers. All features and specications are subject to change without notice.
Our Customer Activation team will walk you through the
steps for setting up your device and getting the most
from your payments account.
Customer care
Please call the number
on your billing statement

Other manuals for DESK/3500

3

Other Ingenico Touch Terminal manuals

Ingenico Move 5000 User manual

Ingenico

Ingenico Move 5000 User manual

Ingenico UOB User manual

Ingenico

Ingenico UOB User manual

Ingenico Tetra Move/5000 User manual

Ingenico

Ingenico Tetra Move/5000 User manual

Ingenico iUI120 Quick setup guide

Ingenico

Ingenico iUI120 Quick setup guide

Ingenico iCT220, iCT250 Reference guide

Ingenico

Ingenico iCT220, iCT250 Reference guide

Ingenico Tetra Move/5000 User manual

Ingenico

Ingenico Tetra Move/5000 User manual

Ingenico AXIUM DX8000 User manual

Ingenico

Ingenico AXIUM DX8000 User manual

Ingenico iCMPsi User manual

Ingenico

Ingenico iCMPsi User manual

Ingenico Tetra Move/5000 User manual

Ingenico

Ingenico Tetra Move/5000 User manual

Ingenico AMEX iCT220 User manual

Ingenico

Ingenico AMEX iCT220 User manual

Ingenico iwl255 User manual

Ingenico

Ingenico iwl255 User manual

Ingenico PAYZONE iCT250 Instruction sheet

Ingenico

Ingenico PAYZONE iCT250 Instruction sheet

Ingenico iCT Series User manual

Ingenico

Ingenico iCT Series User manual

Ingenico iWL258 User manual

Ingenico

Ingenico iWL258 User manual

Ingenico i5100 User manual

Ingenico

Ingenico i5100 User manual

Ingenico Move 2500 User manual

Ingenico

Ingenico Move 2500 User manual

Ingenico iCT 250 User manual

Ingenico

Ingenico iCT 250 User manual

Ingenico Link/2500 User manual

Ingenico

Ingenico Link/2500 User manual

Ingenico Lane/7000 User manual

Ingenico

Ingenico Lane/7000 User manual

Ingenico FLEX IPP320 User manual

Ingenico

Ingenico FLEX IPP320 User manual

Ingenico iCT220, iCT250 User manual

Ingenico

Ingenico iCT220, iCT250 User manual

Ingenico iCMP User manual

Ingenico

Ingenico iCMP User manual

Ingenico IWL 250 User manual

Ingenico

Ingenico IWL 250 User manual

Ingenico Link 2500 User manual

Ingenico

Ingenico Link 2500 User manual

Popular Touch Terminal manuals by other brands

Pioneer BD-V1000 Series operating instructions

Pioneer

Pioneer BD-V1000 Series operating instructions

PSC Falcon 510 user guide

PSC

PSC Falcon 510 user guide

Allen-Bradley PanelView 2711P-RW1 installation instructions

Allen-Bradley

Allen-Bradley PanelView 2711P-RW1 installation instructions

takepayments Your A920 Pro Installation and user guide

takepayments

takepayments Your A920 Pro Installation and user guide

C2STek FL-2000G user manual

C2STek

C2STek FL-2000G user manual

Wincor Nixdorf BEETLE installation guide

Wincor Nixdorf

Wincor Nixdorf BEETLE installation guide

takepayments Desk 3500 installation guide

takepayments

takepayments Desk 3500 installation guide

First Data VeriFoneVX820 Duet Quick setup guide

First Data

First Data VeriFoneVX820 Duet Quick setup guide

Mitsubishi Electric GT1685 Connection manual

Mitsubishi Electric

Mitsubishi Electric GT1685 Connection manual

Advantech HIT-W101C Quick start manual

Advantech

Advantech HIT-W101C Quick start manual

Carel pGD Series user manual

Carel

Carel pGD Series user manual

StarTech.com DuraView RACKCONS1708 user manual

StarTech.com

StarTech.com DuraView RACKCONS1708 user manual

Tellermate T-iX Series user guide

Tellermate

Tellermate T-iX Series user guide

CopperOptics Pairain PG-Plus PCS-719 manual

CopperOptics

CopperOptics Pairain PG-Plus PCS-719 manual

Burkert FreeLINE 8645 Supplementary instructions

Burkert

Burkert FreeLINE 8645 Supplementary instructions

Telic NT910G user manual

Telic

Telic NT910G user manual

Clearfield YOURx-Aerial installation manual

Clearfield

Clearfield YOURx-Aerial installation manual

Custom Audio Electronics Vision15 Turbo user manual

Custom Audio Electronics

Custom Audio Electronics Vision15 Turbo user manual

manuals.online logo
manuals.online logoBrands
  • About & Mission
  • Contact us
  • Privacy Policy
  • Terms and Conditions

Copyright 2025 Manuals.Online. All Rights Reserved.