www.insigniashowers.com Last Modied: 08/12/2021
06
All connecons MUST be carried out by an approved part P
electrician and a minor works cercate must be issued upon
compleon. This product is NOT designed for DIY install and
improper installaon could be fatal.
Please use correct size and type to meet electrical codes.
Leave 2 feet of slack wire at generator locaon for nish hook-
up. Connect the generator to a dedicated circuit breaker.
A. Route the supply wire through the hole marked
POWER.
B. Connect the supply wires to terminals marked L1, L2
& L3 and N. Please see Diagram for 240v Conversion
C. Connect the ground to the ground screw marked
accordingly.
Electrics
We recommend a BAR pressure between 2.5 and 3.4 BAR.
If you have a combi boiler system no problem should be
experienced. If you have a gravity feed older type
installaon (hot water tank type usually less than 1 BAR)
you will almost certainly need a pump. We cannot advise
on which type of pump is used, locaon or design because
all house plumbing layouts vary. This is a job for your
installer/plumber. The end delivery however must fall
within the scope above.
Important Note Do not exceed 3.4 BAR pressure under any
circumstances. Warranty is void if so as damage will occur.
If you have a combi supply, please use a pressure reducing
valve if required to lower the BAR pressure to the shower.
Please Remember that this product is free standing and is
designed to be pulled away from the wall.
The waste hose must be of a exible type (Supplied. Note:
Not suitable for solvent type joints)
The water supply pipes must be that of a exible braided
type (not supplied).
DO NOT OVERTIGHTEN THE BRAIDED HOSES AS IT CAN
CAUSE THE CONNECTION TO POP AFTER A FEW WEEKS OF
USE.
Always t easy to get to isolaon taps on both hot and cold
water supply (not supplied). Just like a dishwasher or
washing machine, this product MUST be isolated when not
in use.
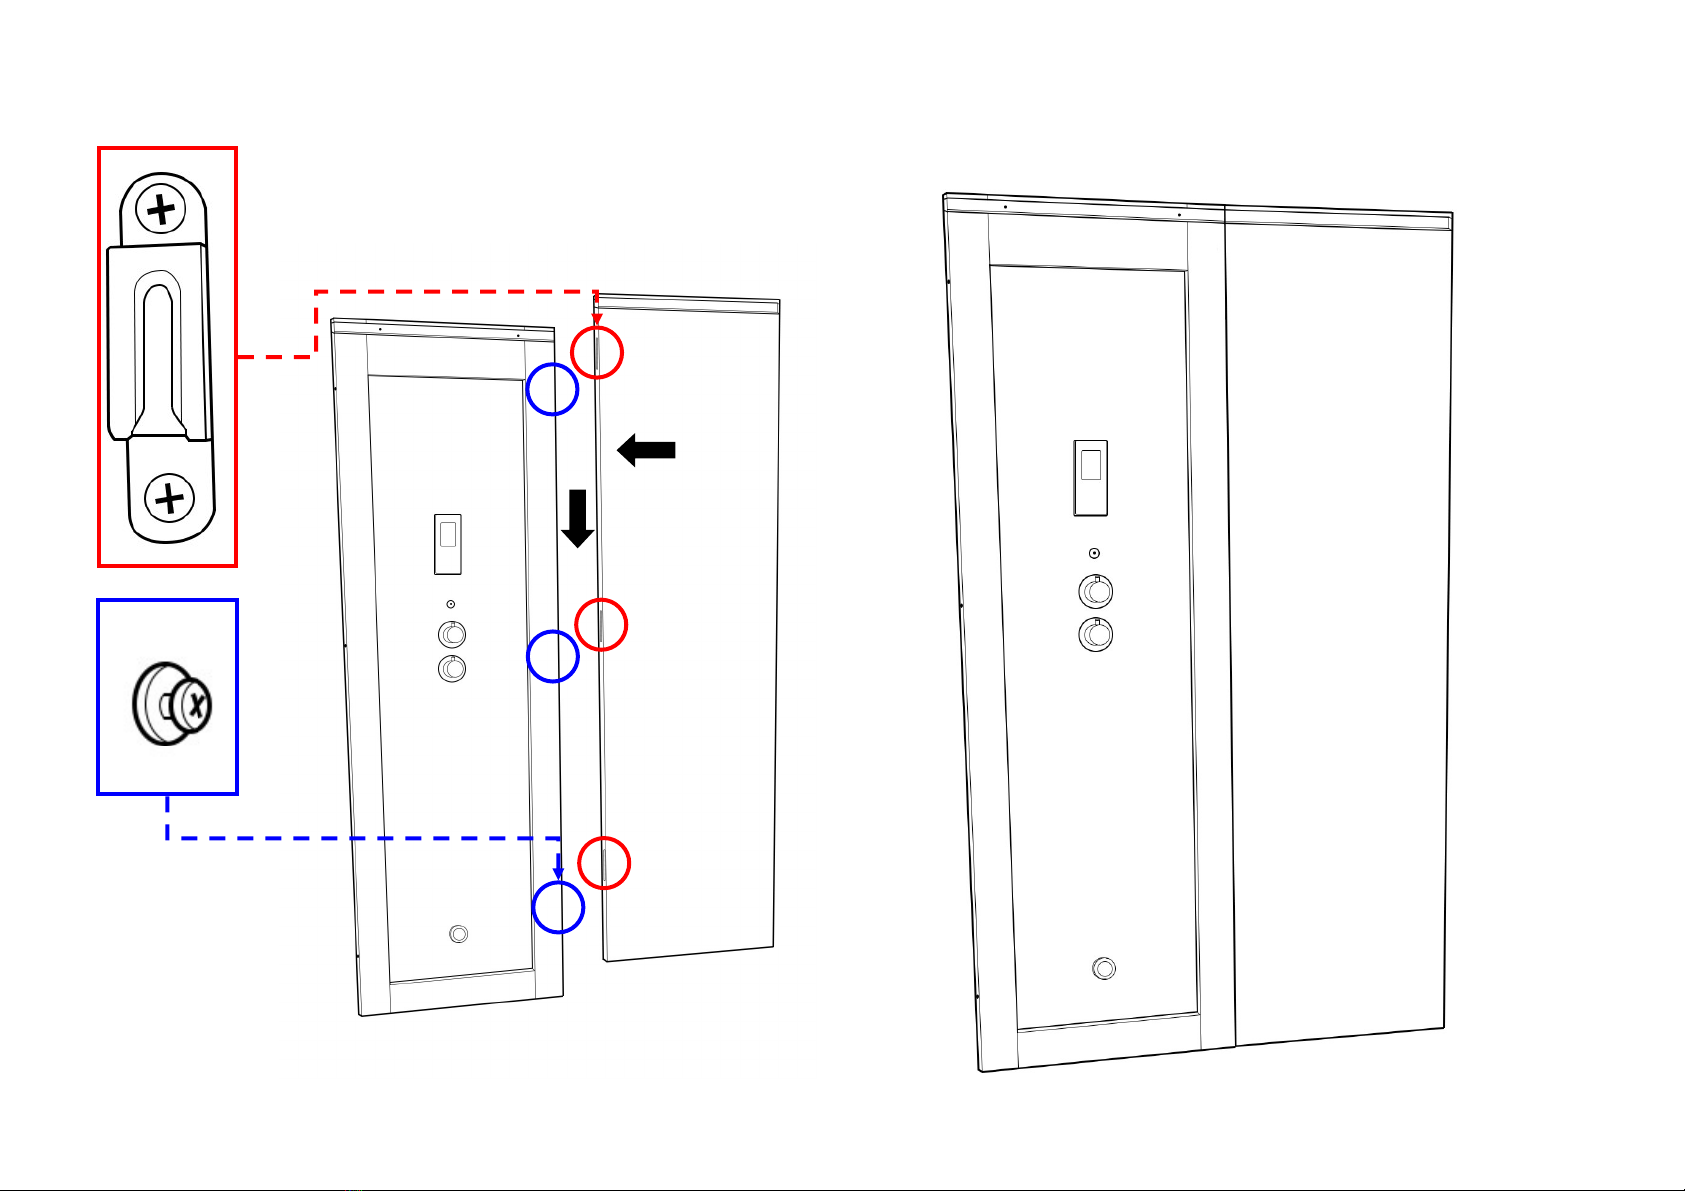
• Scissors
• Knife
• Spirit Level
• Tape Measure
Pressure/Water Requirements Tools Required
• RubberGum (supplied)
• Plumbers Mait (not supplied)
• Hot and cold isolaon valves (not supplied)
• Suitable McAlpine type 40 mm compression
coupling for waste to house connecon.
• 3x Braided hoses (not supplied). If you haven’t
purchased these already, simply click the following
link below or copy in to any web browser. For ease
we have listed the required pack below for your
install.
• Shower cabins with steam require pack 2
hps://www.insigniashowers.com/wras-approved-
braided-hoses.html
Parts Required
You will require:
• Philips Screwdriver
• Electric Drill
• Safety Gloves
• Safety Glasses
Single Phase 220/240v
Connect 3 x live wires
in to (L1) then (L2) and
(L3). Connect the 1
neutral Cable in to
posion (N) & nally 1
x Earth Cable to the
earth screw on the
plate.
Connect 1 x live wire in to
(L1) then bridge (L1+L2)
and (L2 + L3) as show in
the picture above. Connect
the 1 neutral Cable in to
posion (N) & nally 1 x
Earth Cable to the earth
screw on the plate.
3 Phase 380v