5/120
WARNING!
Read all safety warnings and all instructions. Failure to follow the instructions and warnings may result in
electrical shock, re and/or serious injuries.
1. Safety precautions
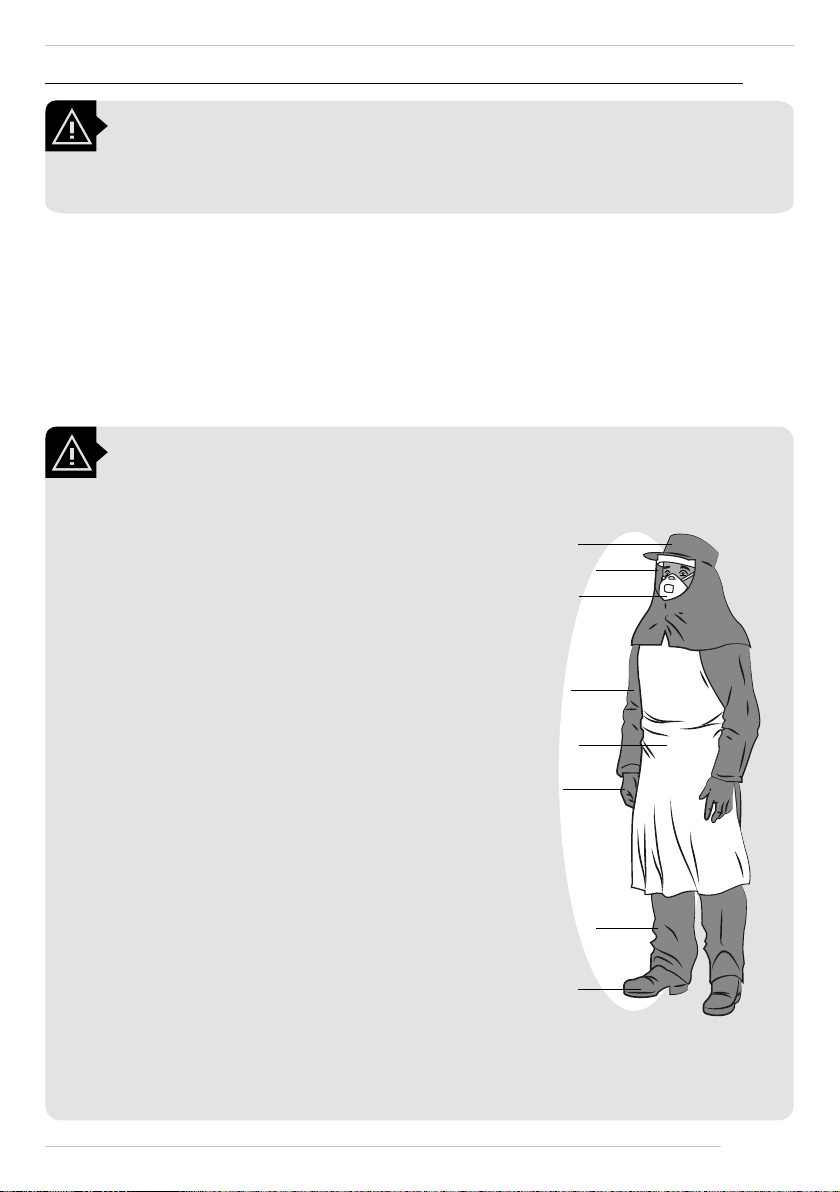
1.2. Personal Safety
Boots
Head protection
Eye protection
Mask
Long sleeve shirt
Apron
Gloves
Pants
1.1. Working area safety
• Keep the work area clean and well lit. Disorganized or dark work areas may cause accidents more easily.
• Keep children and bystanders away from when operating the sprayer. Distractions may cause you to lose control.
• Do not spray areas near bystanders or animals;
• Do not operate the sprayer in enclosed locations – such as sheds, garages, buildings, etc.;
WARNING!
• Read this manual closely. Make sure you understand
how to operate the sprayer correctly before using it.
• Wear the recommended individual protective
equipment (PPE): facial shield, dusk mask, long
sleeveshirt,apron, gloves,pantsandno-slipsole
boots,hearingprotectors (ear mus),etc. aswell
as any other equipment the activity performed
requires.FailuretowearPPEmayresultinseriouslong
and short-term problems to your health;
• Do not spray for long periods of time. Take short
breaks during work.
• Do not use the sprayer if you are tired or under
the inuence of drugs, alcohol or medications;
A moment of inattention during work may result in
personal injuries and serious damages to the sprayer.
• Do not overdo. Keep secure footing and balance
atall times.This allowsbetter controlofthe knapsack
sprayer in unexpected situations;
• Wear proper clothing. Do not wear loose-tting
clothesorjewelry.Keepyourhair,clothingandgloves
clearof movingparts.Loose-tting clothing,jewelryor
long hair may get entangled in moving parts.
• Never modify the sprayer. This may pose real risk to
both the operator and void the warranty;
• Never try to use an incomplete sprayer or one
which has been modied without the manufac-
turer’s authorization;
• After work, take a shower in running water and
use plenty of soap;
• Any clothing and PPE worn during applications
must be washed separately from everyday
clothing.