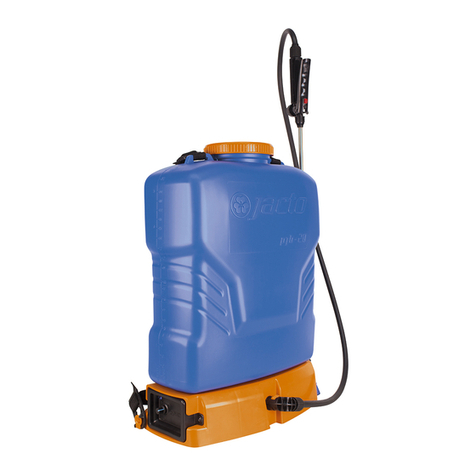
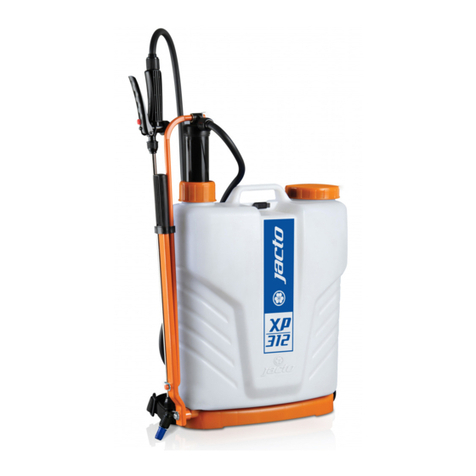
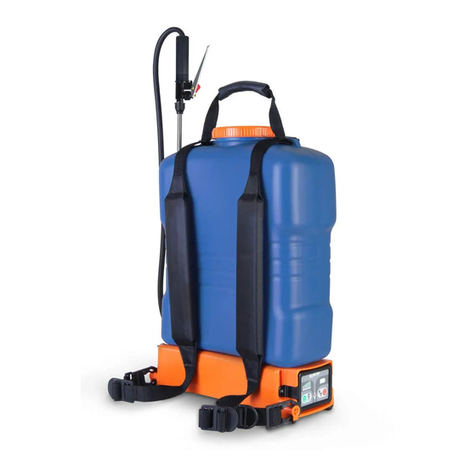
Jacto PJ-16 User manual

MÁQUINAS AGRÍCOLAS JACTO S.A.
Rua Dr. Luiz Miranda, 1650
17580-000 - Pompeia - SP - Brasil
Phone: +55 (14) 3405-2100
Fax: +55 (14) 3452-1012
Email: [email protected]om.br
Home page: www.jacto.com.br
Customer attendance: Dr. Luiz Mi-
randa, 1650, 17580-000 – Pompeia
– SP – Brazil.
Phone: +55 14 3405 2113. Email:
assistencia.tecnicajsfs@jacto.com.br
Opening Hours: Monday to Friday
7:00am to 11:30am and 13:00pm to
17:18pm (Brazilian time zone).
Manual de Instruções - Português (15)
Manual del Operador - Español (27)
Manuel du Operateur - Français (40)
Edition 1: 12/17 - code 1247720
Operator’s Manual - English
CAUTION: IT IS MANDATORY
TO READ AND THOROUGHLY
UNDERSTAND THE OPERATOR’S
MANUAL BEFORE USINGTHE
EQUIPMENT.
Knapsack Sprayer Jacto

SUMMARY ÍNDICE
1. Introduction 4
2. Specifications 4
3. Preparing the Product For Use 4
3.1. Unpacking 4
3.2. Installing the shaft 4
3.3. Installing the lever on the shaft
and the rod on the chamber top 5
3.4. Attaching the lance to the trigger
valve (starting and stopping) 5
3.5. Adjusting the strap 5
3.6. Tightening 5
3.7. Loosening 5
3.8. Inverting the lever
operating side 6
3.9. Storage 6
4. Operation of Product 6
4.1. Recommendations for use 6
4.1a. Best spraying practices 6
4.1b. Application 7
4.2. Calibration of manual
knapsack sprayer 7
4.3. Choosing nozzle type 8
4.4. Influence of climatic conditions 8
4.5. Disposal of waste products 9
5. Information Needed by User 10
5.1. Troubleshooting 10
5.2. Maintenance of the product 10
5.3. Cleaning the sprayer 10
5.4. Drainage 10
5.5. The consequences of
improper service 10
5.5a. In case of clogged nozzle 10
5.6. Cylinder maintenance 10
5.7. Triple rinse of empty agrochemicals
containers 11
6. Critical Safety and
Health Information 12
7. Statement Of Limited Warranty 14
8. Parts list 52
1. Introdução 15
2. Especificações 15
3. Preparando o produto para o uso 15
3.1. Desembalando 15
3.2. Montagem do eixo 16
3.3. Montagem da alavanca no eixo
do embasamento e na câmara 16
3.4. Montagem da lança e fixação da
mangueira no registro
(Ligar e Desligar) 16
3.5. Ajuste da cinta 17
3.6. Apertar a cinta 17
3.7. Afrouxar a cinta 17
3.8. Alteração no posicionamento
da alavanca 17
3.9. Armazenamento 17
4. Operando o Produto 18
4.1. Recomendação de uso 18
4.1a. Melhores práticas de
pulverização 18
4.1b. Aplicação 18
4.2. Calibração do pulverizador 18
4.3. Escolhendo o tipo de bico 19
4.4. Influência de condições climáticas 21
4.5. Eliminação de resíduos 21
5. Informações Importantes
para o usuário 22
5.1. Procedimentos para identificação
de deficiência de pressão 22
5.2. Manutenção 22
5.3. Limpeza do pulverizador 22
5.4. Drenagem 22
5.5. As consequências do
uso incorreto 22
5.5a. Em caso de bico entupido 23
5.6. Manutenção do cilindro 23
5.7. Tríplice lavagem de embalagens
vazias de defensivos 23
6. Recomendações de Segurança 24
7. Termo de Garantia Limitada 26
8. Peças de reposição 52

TABLA DE CONTENIDO TABLE DES MATIÈRES
1. Introducción 27
2. Especificaciones Técnicas 27
3. Preparo del Equipo para Utilización 27
3.1. Desembalar 27
3.2. Montaje del eje 28
3.3. Montaje de la palanca 28
3.4. Fijación de la manguera en
el registro (inicio y detención) 28
3.5. Ajuste de la cinta 28
3.6. Apretar la cinta 29
3.7. Aflojar la cinta 29
3.8. Alteración en la posición
de la palanca 29
3.9. Almacenamiento 29
4. El Funcionamiento Del Producto 30
4.1. Recomendaciones
para la utilización 30
4.1a. Mejores prácticas
de pulverización 30
4.1b. Aplicación 30
4.2. Calibración del pulverizador 31
4.3. Seleccione la boquilla correcta 31
4.4. Influencia de
condiciones climáticas 33
4.5. Eliminación de los desechos
de los productos 34
5. Información Necesaria por
Parte del Usuario 34
5.1. Procedimiento para identificación
de deficiencia de presión 34
5.2. Mantenimiento 35
5.3. Limpieza del pulverizador 35
5.4. Drenaje 34
5.5. Las consecuencias de una
utilización inadecuada 35
5.5a. Em caso que la boquilla se obstrua 35
5.6. Mantenimiento del cilindro 35
5.7. Triple lavado de envases
vacíos de defensivos 36
6. Recomendaciones de seguridad 37
7. Instrucciones de Seguridad
Importantes para Devolución 39
8. Catálogo de pieza 52
1.1. Introduction 40
2. Spécifications 40
3. Préparation du produit
pour utilisation 40
3.1. Déballage 40
3.2. Montage de l’essieu 41
3.3. Montage du levier sur l’essieu
de la base du réservoir 41
3.4. Montage de la lance sur le robinet
révolver (activer / désactiver) 41
3.5. Inversion de la position du levier 41
3.6. Réglement de la courroie 42
3.7. Pour la serrer 42
3.8. Pour la détendre 42
3.9. Stockage 42
4. L’exploitation du produit 42
4.1. Recommandation d’utilisation 42
4.1a. L’utilisation efficace du
pulvérisateur à dos 43
4.1b. Application 43
4.2. Calibrage des pulvérisateurs à dos 43
4.3. Mode d’emploi 44
4.4. Influence des conditions
météorologiques 45
4.5. L’élimination des déchets 46
5. Informations requises par l’utilisateur 46
5.1. Procédés d’identifier de
déficit de pression 46
5.2. Entretien 47
5.3. Nettoyage du pulvérisateur 47
5.4. Drainage 47
5.5. Les conséquences de
l’utilisation incorrecte 47
5.5a. En cas de buse bouchée 47
5.6. Entretien du cylindre 47
5.7. Laver trois fois les récipients
phytosanitaires vides 48
6. Recommandations de Sécurité 49
7. Garantie 51
8. Pièces détachées 52

4/53
SAVE THESE INSTRUCTIONS: This manual contains important
safety instructions for the proper use and maintenance of this
product.
1. Introduction
SAFETY GUIDELINES DEFINITIONS
This manual contains information for the proper assembly, op-
eration and care of your sprayer. Carefully read and follow the
instructions contained in this manual before using your sprayer.
This equipment was designed for spraying plants protection
products approved by regulatory authorities to be used in knap-
sack sprayers.
It is important for you to read and understand this manual. The infor-
mation it contains relates to protecting YOUR SAFETY and PREVENTING
PROBLEMS. The symbols below are used to help you recognize this in-
formation.
2. Specifications
Notice: Used without the safety alert symbol indicates a potentially haz-
ardous situation which, if not avoided, may result in property damage.
DANGER!
Indicates an imminently hazardous situation which, if not avoid-
ed, will result in death or serious injury.
WARNING!
Indicates a potentially hazardous situation which, if not avoided,
could result in death or serious injury.
CAUTION!
Indicates a potentially hazardous situation which, if not avoided,
may result in minor or moderate injury.
3.1. Unpacking
3. Preparing the Product For Use
Take out of the sprayer carton the following parts:
CAUTION!
Be careful when taking out the sprayer out
of the carton because the lever is loose and
can cause damage or personal injury. Note
that the agitator is loose inside the tank and
must be properly assembly.
NOTE: Carton can be discarded in recyclable waste.
NOTE: Minimum space needed for use, maintenance and repair
is 1,5 m².
Model PJ-16
Net weight 4.9 kg
Gross weight 5.3 kg
Spray lance length 600 mm
Hose length 1350 mm
Chemical tank
Capacity 16 l
Filling opening diameter 105 mm
Material Polyethylene
Pump
Type Piston
Maximum working pressure 6.8 bar
Nozzle installed Blue adjustable cone
Material Brass
• Open the tank lid and visualize the agitator;
• With one hand pull up the chamber, but without removing
it from the tank, up to the level it will be possible to t the
agitator in its body (Image A). With the other hand, t the ag-
itator and make sure it is rm and tight;
• Lower the chamber with the agitator assembled until it ts in
the cylinder (image B).
(A) (B)
Rod
Tank
Lance
Accessories plastic bag
Contents of the plastic bag
Lever
Manual
Trigger Valve
3.2. Installing the shaft
• Fit the shaft (1) into the free orice on the
• sprayer base (chamber side).
• Use a plastic hammer to strike the shaft smoothly until the
hole on the shaft end matches the hole on the base reinforce-

5/53
3.3. Installing the lever on the shaft and the
rod on the chamber top
• Grease slighty the lever orice and instal it on the rod. Fit a
at washer before the locked ring.
• Grease slighty the orice on the chamber top.
• Fit a at washer on the shaft and rod.
• For easy assembly, install the lever on the shaft and the rod
on the chamber top at the same time.
• Install the other at washers on the shaft and rod and lock
with the locked ring.
Base
reinforcement
Hammer
1
2
Rod
locked ring
Lever
Shaft
Washers
locked ring
3.4. Attaching the lance to the trigger valve
(starting and stopping)
• Push the lance into the trigger valve and secure it with the
screw cap.
WARNING!
Do not overtighten the screw cap.
Lance Trigger
valve
Hose
Trigger
valve
Screw cap
3.5. Adjusting the strap
• The tank is contoured for the operator comfort. The shoulder
straps can be quickly adjusted to properly position the spray-
er on the operator’s back.
Handle
Buckle
A
3.6. Tightening
• Hold the strap buckle rmly with one hand, and pull the han-
dle downward with the other hand.
3.7. Loosening
• Hold the buckle rmly with one hand, and pull the strap up-
ward with the other hand.
ment.
• Lock the shaft with the cotter pin (2).

6/53
Buckle
B
3.8. Inverting the lever operating side
This sprayer is shipped assembled for installing the pumping
lever for left hand operation. In case you wish to invert to right
hand operation, proceed as follows:
• Remove the locked ring (1), washers and rod (2) from the
compensation chamber.
• Next, give the compensation chamber a 180º turn.
• Reinstall the rod (2) on the chamber and secure it with the
cotter pin again.
• Remove locked rings (4), cotter pin (5) and washers.
• Remove the pumping lever (6).
• Retire o eixo (7) e a cinta (8).
• Remove the shaft (7) and detach the shoulder straps (8) from
both sides.
• Invert the positions as shown in the gure below (To install
the shaft, follows instructions of the item 05). Install the
washers and pumping lever on the rod so as to be operated
with the right hand.
Locked ring (1)
(8)
(6)
(4)
Rod (2)
(7)
(5)
• Invert the shoulder straps position as shown below.
3.9. Storage
The sprayer should be stored in secure and ventilated place.
Do not store equipment with syrup in the tank. The chemicals
can cause dierent reactions and damage components of the
equipment and the health of the operator. Store sprayers mainly
in harsh winter locations.
CAUTION!
TRANSPORTATION: The sprayers can not be
carried along with food, beverages, pharma-
ceuticals, feed, animals and people without
adequate equipment (PPE).
4.1. Recommendations for use
This equipment must be used only with products to protect
plants approved for knapsack sprayers.
Do not use acids or ammable liquids. After assembling the
sprayer, ll the tank with clean water and check for leakage on
the following parts. After the use of herbicides clean the equip-
ment before using other formulations.
4. Operation of Product
Correct proportion of product
Correct volume of water
4.1a. Best spraying practices
Constant pressure
Correct nozzle

7/53
Constant walking speed Uniform spray height
Wear appropriate protective clothing
Do not contaminate water
Spray downwind and avoid drift Keep constant height
4.2. Calibration of manual knapsack sprayer
Using calibrator bottle (optional).
• Hold the lance at the working height and spray to measure
the application band width.
• Based on the band width, calculate the total walking dis-
tance required to spray the desired area. Use the chart below.
Band
width
Band width
(m) 0.5 0.7 1.0 1.2 1.5
Distance to
walk (m) 50.5 35.7 25.0 20.8 16.7
Attach the calibrator bottle to the lance as shown:
Lance
Cover
Filter
Nozzle
Nozzle cap
Calibrator
bottle
1. Remove the cap, nozzle and lter.
2. Mount the calibrator cover to the lance.
3. Reinstall the lter, nozzle and cap.
4. Screw the calibrator onto the cover.
Record the time it takes to
walk 25 m²
Simulate the spraying of 25 m²
• Hold the lance at the normal working height and spray into
the bottle while walking the distance required to spray an
area corresponding to 25 m².
• Place the bottle on a level surface and observe the liquid level
visible through the side of the bottle. Match the liquid level to
the corresponding scale on the calibrator bottle.
• Empty the bottle and repeat this operation to determine the
average of two or more readings.
4.1b. Application

8/53
NOTE: For the volume in liters per bushel (L / alk), simply multiply
the value obtained in liters per hectare (L / ha) by 2.42.
4.3. Choosing nozzle type
Seven main nozzle designs are used on knapsack sprayers. Each
nozzle design is available in a range of sizes to optimize the use
of product to be applied. The nozzle choice will be based on the
agrochemical type to be used and the droplet size recommend-
ed (table):
WARNING!
Wear a protective clothes to do the mainte-
nance and parts replacement.
NOTE: This sprayer is packaged with Blue Adjustable Cone noz-
zle tted in the lance. Other nozzles mentioned in this manual
are optional, so they do not accompany this sprayer.
IDENTIFICATION
(Part no. - Description)
FILTER (Mesh)
NOZZLE
TYPE
(1197536) JEF 11002
YELLOW
(1197476) JSF 11002
YELLOW
(1197535) JEF 110015
GREEN
80 (Zinc yellow)
50(Gentian blue)
50(Gentian blue)
80 (Zinc yellow)
50(Gentian blue)
50(Gentian blue)
50(Gentian blue)
50(Gentian blue)
50(Gentian blue)
50(Gentian blue)
50(Gentian blue)
50(Gentian blue)
80 (Zinc yellow)
80 (Zinc yellow)
50(Gentian blue)
(1197475) JSF 110015
GREEN
(1197537) JEF11003
BLUE
(1197477) JSF11003
BLUE
Herbicides
30
30 0.49
0.49
30
30 0.65
0.65
30
30 0.58
0.98
APPLICATION PRESSURE
(psi)
FLOW RATE
(l/min)
(1197565) JHC 8002
YELLOW 45 0.80
(1198892) JHC 8004
RED 45 1.60
(1198893) JHC 8005
BROWN 45 2.00
(1197486) JDF 04
RED
(1197497) JAI 120015
GREEN
(1197488) JDF 06
GREY
(1197501) JAI 12003
BLUE
(1197487) JDF 05
BROWN
(1197499) JAI 12002
YELLOW
15
20
0.92
0.42
15
20
1.15
0.57
15
20
1.39
0.85
Fungicide,
insecticide
and
foliar
fertilizers
Herbicides
and
foliar
fertilizers
Herbicides
Herbicides
Recommended Acceptable Not recommended
Nozzle Herbi-
cide
Fungi-
cide
Insec-
ticide
Code Name Picture
1197571 JHC
217174 JD-12
1197537 JEF
1197477 JSF
325787 J ADJ
1197486 JDF
1197486 JAI
Prevent the ow rate to be higher than 10% of the nozzle nom-
inal ow rate.
It is recommended to use the pressure and ow rate regulating
valve (ECOVALVE) in order to achieve a more accurate spraying
method.
Code:1197162
Code:1197163
Code:1197159
Code:1197164
0.8 Bar (0.8 kgf/cm²)
1.0 Bar (1.0 kgf/cm²)
1.2 Bar (1.2 kgf/cm²)
1.3 Bar (1.3 kgf/cm²)
1.5 Bar (1.5 kgf/cm²)
1.7 Bar (1.7 kgf/cm²)
1.8 Bar (1.8 kgf/cm²)
2.0 Bar (2.0 kgf/cm²)
2.3 Bar (2.3 kgf/cm²)
2.8 Bar (2.8 kgf/cm²)
3.0 Bar (3.0 kgf/cm²)
3.2 Bar (3.2 kgf/cm²)
4.4. Influence of climatic conditions
During application, some factors may determine the interrup-
tion of the spraying. Wind currents, for example, can drag drops
to a greater or lesser distance in terms of its size or weight. The
temperature and especially the relative humidity contribute to
the rapid evaporation of the droplets.
The ideal conditions for spraying are:
• Relative humidity: minimum 50%;
• Wind speed: 3-10 km / h;

9/53
Air velocity around the nozzle
height Description Visible signs Visible signs
Up to 2km/h Calm Smoke rises vertically Recommended only with thick,
very thick drops
2 to 3 km/h Nearly calm The smoke is tilted
3 to 7 km/h Light breeze The leaves range. Feel the light
wind Ideal for spraying
7 to 10 km/h Light wind Leaves and thin branches in
constant motion
We recommend only the drift
reduction technique
10 to 15 km/h Moderate wind
Movement branches. Dust and
pieces of paper are carried by
the wind
Improper for spraying
Factors Classes of drops according to weather conditions
Very thin or thin Thin or medium Medium or thick
Temperature below 25º C 25 to 28º C above 28º C
Relative humidity above 70% 60 to 70% below 60%
4.5. Disposal of waste products
The elimination of waste resulting from the dismantling of
equipment during service, maintenance or end of life (disposal)
should be carried out respecting the environment, preventing
pollution of air, soil and water. If necessary, the waste should be
stored in appropriate locations and then transported by quali-
ed and trained people and companies.
Disposal of used sprayer should be done at appropriate points
and approved for receiving such material. If there isn’t an appro-
priate nearby site, please contact the Customer attendance: Dr.
Luiz Miranda, 1650, 17580-000 – Pompeia – SP – Brazil. Phone:
+55 14 3405 2113. Email: assistencia.tecnicajsfs@jacto.com.br
Opening Hours: Monday to Friday 7:00am to 11:30am and
13:00pm to 17:18pm (Brazilian time zone).
• Temperature below 30 C.
These limits should be considered according to technology ap-
plication that will be used, adopting the safest class drops within
the boundaries of each situation.

10/53
5.1. Troubleshooting
• Put about 2 liters of water in the tank.
• While operating the lever, look into the tank to see how the
problem arises.
• Refer to the table and diagram below.
5. Information Needed by User
DESCRIPTION CAUSES CORRECTIONS
Leakage through the cylinder upper part. Worn or dried out
piston cup.
Replace or lubricate
the pump.
After pumping and
pressurizing the chamber, as you operate the
lever it drops fast.
Cylinder valve
not sealing properly
due to wear or impurities.
Clean or replace
the valve.
After pumping and
pressurizing the chamber, the lever rises
quickly when released.
Chamber valve
not sealing properly
due to wear or impurities.
Clean or replace
the valve.
5.2. Maintenance of the product
Every 40 hours, clean the chamber and lubricate all the com-
ponents. Use a pliers to disassemble the parts and a brush with
nylon bristles clean and neutral detergent. Always use personal
protective equipment (PPE).
5.3. Cleaning the sprayer
After nishing the spray application, clean and wash all equip-
ment in an approved decontamination area.
Operate the lever for the internal cleaning of the camera.
Lubricate the parts according to the image below
Remove the chamber and lubricate the piston.
5.4. Drainage
You must drain it when you nish the use.
5.5. The consequences of improper service
Do not change the sprayer components. Always check for leaks
or malfunction. Follow the maintenance instructions and use
original parts provided by Jacto.
Failure to follow the instructions may cause damage to the oper-
ator’s health and the environment.
Clean nozzles and lters Clean nozzles with brush
5.5a. In case of clogged nozzle
Do not use metal instruments. Use a brush with nylon bristles
clean and neutral detergent.
5.6. Cylinder maintenance
DISASSEMBLING
• Remove the chamber from the cylinder.
• Remove the nuts (1) from the cylinder.

11/53
5
6
7
1
4
2
1
8
3
5.7. Triple rinse of empty agrochemicals
containers
NOTICE: Even the containers considered empty contain chemi-
cal residues. Therefore, discarding the containers without wash-
ing out the residues is extremely dangerous to man, animals and
environment. In the case of metal, plastic and glass chemical
containers, each container must be rinsed three times to ensure
the residues are completely removed. This manual describes
how to make the triple rinse in a correct, safe and eective way.
1. Immediately after emptying the container, you must keep
it with the opening upside down over the sprayer tank
opening or over the bucket that you are using to prepare
the chemical mixture for at least 30 seconds, until no res-
idue is left in the container, when the drops are falling in
long intervals.
2. Hold the container in the upright position and ll it with
water up to 1/4. For example: in a 1000 ml container, put
250 ml of water.
3. Install the container cap and tight it enough to avoid leak-
age during the agitation.
4. Agitate the container strongly in all ways (horizontal and
vertical), for approximately 30 seconds to remove the resi-
dues that are on the container internal walls.
• Remove the cylinder (2).
• Loosen the bolts (3), and remove the cylinder body (4).
• Remove the valve seat (5) and loosen the valve (6).
• Clean or replace the parts that show wear.
ASSEMBLING
• Mount the valve (6) on the valve seat (7) and put into the cyl-
inder (4) guided by the groove.
• Mount the cylinder on the base (8) and fasten it with the
screws (3).
• Install the assembly in the sprayers and fasten it with the nuts
(1).
• Mounth the compensation chamber.
5. Take the container cap o and carefully pour the rinse wa-
ter into the spray tank.
6. Keep holding the container over the spray tank opening
for approximately 30 seconds to the last drop.
7. Repeat this operation twice more.This way, you complete
the triple rinse.
8. Make the plastic and metallic containers useless by pierc-
ing the container bottom with a pointed instrument. This
way, their labels are not damaged for identication pur-
poses.

12/53
6. Critical Safety and Health Information
• Put 5 liters of water in a bucket and add the chemical prod-
uct.
• Stir until it becomes an homogeneous mixture.
• Pour the solution into the tank while lling with water.
WARNING!
Read carefully the chemicals manufacturer’s
labels.
WARNING!
Wash hands and other parts of the body
that have touched chemicals before starting
to spray.
• After nishing the spray application, take a shower with
plenty of water and soap.
• Put on clean clothes.
CAUTION!
Do not use the sprayer when tired, ill or under
the inuence of alcohol or other drugs or
medication.
WARNING!
Use of individual protective clothing and
safety equipment is obligatory.
boot
head protector
eyes protector
dust mask
long-sleeved shirt
smock
gloves
long pants
NOTE:The clothing used during the application must be washed
separate from other clothes of ordinary use.

13/53
WARNING!
In case of poisoning, immediately seek
medical attention and show the label of the
product used.
WARNING!
The spray can not suer any modication,
can cause risks operator safety and lost of
its warranty.
WARNING!
In case of accidents remove the sprayer immediately as the illustration below.
DANGER!
Do not eat, drink or smoke while spraying. Serious risk of poisoning.
CAUTION!
Keep the products out of reach of children
and animals.
WARNING!
Do not pollute the environment. Principles
to preserve the environment, to recycle
and dispose of any equipment, its parts and
components correctly must be respected,
taking in consideration the legislation in
eect (municipal, state and federal) as well
as the manufacturer instructions about the
parts, components or any other equipment
item that is disposed of.

14/53
WARNING!
Lock up the chemical products to prevent
untrained persons to handle them.
7. Statement Of Limited Warranty
MÁQUINAS AGRÍCOLAS JACTO S.A. shall warrant the equipment
described in this manual and shall repair or replace parts and
components which, under normal operation and wear, in accor-
dance with technical recommendations, show DEFECTS IN MA-
TERIAL OR WORKMANSHIP, based on the following conditions.
WARRANTY PERIOD
• 03 (three) years from the date of sale to the original purchas-
er.
WARRANTY APPLICATION
• JACTO shall honour this warranty, free of charge, if any part
or component shows defect in MATERIAL OR WORKMANSHIP,
after nal analysis at the factory.
THIS WARRANTY SHALL BE NULL & VOID IN CASE OF:
• Misuse of the equipment against specications in the OPERA-
TOR’S MANUAL, overwork or accidents.
• Preventive/remedial maintenance performed by unautho-
rized people.
• Use of parts and components not supplied by JACTO.
• Modication of the equipment or any characteristic of the
original design.
THIS WARRANTY SHALL EXCLUDE:
• Parts which show wear and tear due to use, UNLESS THEY
SHOW DEFECTS IN WORKMANSHIP, ASSEMBLY OR MATERIAL.
• Damages resulting from accidents.
• Transportation or freight of the equipment, parts and com-
ponents in case such warranty is not approved.
• Transportation and mobilization of technicians.
GENERAL INFORMATION:
• Parts replaced within the warranty period shall be property
of JACTO.
• The warranty on replaced parts and components shall expire
together with the equipment warranty period.
• Eventual delays in performing services shall not give the
owner right either to indemnity or to extension of the war-
ranty period.
• JACTO reserves the right to modify its products or to interrupt
the manufacture without prior notice.

15/53
GUARDE ESTAS INTRUÇÕES: Este manual contém informa-
ções importantes sobre o uso adequado e manutenção do
produto
1. Introdução
DIRETRIZES DE SEGURANÇA - DEFINIÇÕES
Este manual contém todas as informações necessárias para
montagem e funcionamento de seu equipamento. Leia-o com
atenção e siga rigorosamente suas instruções de uso.
Este equipamento foi projetado para pulverização de produtos
para proteção de plantas aprovados pelas autoridades regula-
doras para uso em pulverizadores costais.
É importante que você leia e compreenda este manual. As informações
nele contidas estão relacionadas à proteção de SUA SEGURANÇA e à PRE-
VENÇÃO DE PROBLEMAS. Os símbolos abaixo são utilizados para ajudá-lo
a reconhecer esta informação.
2. Especificações
Observação: A utilização sem o símbolo de alerta de segurança indica
uma situação potencialmente perigosa que, se não for evitada, pode re-
sultar em danos à propriedade.
PERIGO!
Indica uma situação de perigo iminente que, se não for evitada,
resultará em morte ou ferimentos graves.
ATENÇÃO!
Indica uma situação potencialmente perigosa que, se não for evi-
tada, pode resultar em morte ou ferimentos graves.
CUIDADO!
Indica uma situação potencialmente perigosa que, se não for evi-
tada, pode resultar em ferimentos leves ou moderados.
3.1. Desembalando
3. Preparando o produto para o uso
Retire de dentro da embalagemda máquina as seguintes peças:
NOTA: A caixa de papelão é reciclável.
• Abra a tampa do tanque e visualize o mexedor;
• Com uma das mãos, suba a câmara, mas sem tirá-la do de-
pósito, até que seja possível encaixar o mexedor no seu cor-
po (imagem A). Com a outra mão, proceda o encaixe e cer-
tique-se de que esteja rme e justo;
CUIDADO!
Cuidadoaoretirarodepósitocomaalavanca,
pois ela pode estar solta e causar acidente.
Note que o agitador vem solto dentro do
tanque e deve ser montado com cuidado.
NOTA: Espaço mínimo para uso, manutenção e reparo é de 1,5
m².
Modelo PJ-16
Peso líquido 4,9 kg
Peso bruto 5,3 kg
Comprimento da lança 600 mm
Comprimento da mangueira 1350 mm
Depósito
Capacidade 16 l
Diâmetro do bocal 105 mm
Material Polietileno
Bomba
Tipo Pistão
Pressão de trabalho 6.8 bar
Bico instalado Cone regulável azul
Material Latão
Saco plástico com
alguns acessórios
Manual
Registro
Peças acondicionadas
dentro do saco plástico
Lança Depósito
Alavanca
Haste
Manual de Instruções (Edição 1: 12/17 -
código 1247720)
Dr. Luiz Miranda, 1650, 17580-000 – Pompeia – SP – Brasil.
Telefone: 14 3405 2113. Email: [email protected].
br
Horário de Atendimento: Segunda a sexta das 7:00 às 11:30 e
das 13:00 às 17:18.
MÁQUINAS AGRÍCOLAS JACTO S.A.
Rua Dr. Luiz Miranda, 1650
17580-000 - Pompeia - SP - Brasil
Telefone: +55 (14) 3405-2100
Fax: +55 (14) 3452-1012
Email: [email protected]
Site: www.jacto.com.br
Fabricação
Assistência Técnica

16/53
3.3. Montagem da alavanca no eixo do em-
basamento e na câmara
• Passe uma na camada de graxa no orifício da alavanca e
monte-a na haste, usando uma arruela lisa antes de instalar
a trava de xação.
• Passe uma na camada de graxa no orifício da câmara.
• Coloque uma arruela lisa no eixo do embasamento e na
haste.
• Para facilitar a montagem, instale a alavanca no eixo e na
câmara simultaneamente.
• Instale a outra arruela no eixo e na haste e prenda com a trava
de xação.
3.4. Montagem da lança e fixação da
mangueira no registro (Ligar e Desligar)
• Monte a lança no registro e aperte as porcas o suciente para
que não haja vazamento.;
• Retire o cabo do registro;
• Retire a trava;
• Passe a mangueira pelo interior da trava e conecte-a no cor-
po do registro;
• Monte novamente o cabo do registro.
ATENÇÃO!
Não aperte excessivamente as peças.
1
2 Reforço da base
Martelo
3.2. Montagem do eixo
• Introduza o eixo (1) no orifício que está livre na base da
máquina (lado que se encontra a câmara).
• Bata suavemente no eixo (com martelo plástico) até que o
furo existente na extremidade coincida com o furo existente
no reforço da base.
• Trave o eixo com o contrapino (2).
Anel trava
Eixo
da base
Arruelas
Anel trava
Haste
Alavanca
Registro
Mangueira
Registro
Trava
(A) (B)
• Abaixe a câmara com o mexedor montado até encaixá-la no
cilindro (imagem B).

17/53
O depósito da máquina possui formato anatômico, proporcio-
nando maior comodidade ao operador. O posicionamento cor-
reto da máquina no corpo do operador pode ser obtido com um
simples ajuste da cinta.
3.5. Ajuste da cinta
3.9. Armazenamento
O pulverizador deve ser armazenado em um local seguro e ven-
tilado. Não armazene o pulverizador com produtos químicos no
tanque. Produtos químicos podem causar diferentes reações e
danicar os componentes do equipamento, e a saúde do ope-
rador. Armazene o pulverizador principalmente em locais com
invernos rigorosos
CUIDADO!
TRANSPORTE: O pulverizador não deve ser
transportado junto com comidas, bebidas,
remédios, rações, animais ou pessoas sem
equipamento de proteção individual.
3.6. Apertar a cinta
3.7. Afrouxar a cinta
Fixador
intermediário
• Segure rme o xador intermediário da cinta. Com a outra
mão, puxe a alça para baixo.
• Segure rme o xador intermediário da cinta. Com a outra
mão, puxe a cinta para trás.
Alça A
Fixador
intermediário
3.8. Alteração no posicionamento da ala-
vanca
A máquina sai de fábrica preparada para receber a alavanca
para acionamento com a mão esquerda. Caso queira mudar esta
posição, proceda da seguinte forma:
Anel trava (1)
(8)
(6)
(4)
Haste (2)
(7)
(5)
• Troque a cinta de lado conforme mostra a gura abaixo.
• Retire o anel trava (1), as arruelas e retire a haste (2) da câmara
de compensação.
• Em seguida, dê um giro de 180º na câmara de compensação.
• Monte a haste (2) na câmara e prenda novamente com o anel
trava.
• Retire os anéis travas (4 e 5) e as arruelas.
• Retire a alavanca (6).
• Retire o eixo (7) e a cinta (8).
OBS: A cinta deve ser retirada de ambos os lados.
• Inverta as posições: instale a cinta conforme indicam as g-
uras abaixo (Para montagem do eixo, siga as instruções do
item 05).
• Instale as arruelas e monte a alavanca na haste de forma a ser
acionada com a mão direita.

18/53
4.1b. Aplicação
Utilize vestimentas de proteção apropriadas
Não contamine água
Pulverize a favor do vento e
evite a deriva
Mantenha a altura constante
4.2. Calibração do pulverizador
Uso do calibrador (opcional).
• Posicione a lança na altura de trabalho e meça a largura da
faixa de aplicação
4.1a. Melhores práticas de pulverização
Pressão constante
Proporção correta de produto
Volume correto de água
Bico correto
Velocidade de avanço constante Altura uniforme de pulverização
Limpeza e manutenção do
equipamento
4.1. Recomendação de uso
Este equipamento deve ser utilizado exclusivamente e apenas
com produtos de proteção de plantas aprovados para pulveri-
zadores costais.
Não o utilize com ácidos ou líquidos inamáveis. Após montar
o pulverizador, encha o tanque com água limpa e verique se
há vazamentos. Após o uso de herbicidas, limpe o equipamento
antes de utilizar com outros produtos.
4. Operando o Produto

19/53
Faixa 4.3. Escolhendo o tipo de bico
Sete modelos principais de bicos são utilizados no pulverizador.
Cada modelo de bico está disponível em uma variedade de ta-
manhos para otimizar a utilização do produto a ser aplicado. A
escolha do bico será em função do tipo de defensivo que será
utilizado e tamanho de gotas (tabela).
NOTA: Acompanha a máquina o Bico Regulável Azul (instalado).
Os demais bicos constantes deste material, são opcionais e NÃO
ACOMPANHAM O PRODUTO.
IDENTIFICAÇÃO
(Nº - descrição)
FILTRO (Mesh)
TIPO DE
BICO
(1197536) JEF 11002
AMARELO
(1197476) JSF 11002
AMARELO
(1197535) JEF 110015
VERDE
80 (amarelo zinco)
50 (azul genciano)
50 (azul genciano)
80 (amarelo zinco)
50 (azul genciano)
50 (azul genciano)
50 (azul genciano)
50 (azul genciano)
50 (azul genciano)
50 (azul genciano)
50 (azul genciano)
50 (azul genciano)
80 (amarelo zinco)
80 (amarelo zinco)
50 (azul genciano)
(1197475) JSF 110015
VERDE
(1197537) JEF11003
AZUL
(1197477) JSF11003
AZUL
Herbicidas
30
30 0.49
0.49
30
30 0.65
0.65
30
30 0.58
0.98
APLICAÇÃO PRESSÃO
(psi)
TAXA DE
FLUXO
(l/min)
(1197565) JHC 8002
AMARELO 45 0.80
(1198892) JHC 8004
VERMELHO 45 1.60
(1198893) JHC 8005
MARROM 45 2.00
(1197486) JDF 04
VERMELHO
(1197497) JAI 120015
VERDE
(1197488) JDF 06
CINZA
(1197501) JAI 12003
AZUL
(1197487) JDF 05
MARROM
(1197499) JAI 12002
AMARELO
15
20
0.92
0.42
15
20
1.15
0.57
15
20
1.39
0.85
Fungicidas,
Insecticidas
e adubos
foliares
Herbicidas
e adubos
foliares
Herbicidas
Herbicidas
Largura da
faixa (m) 0,5 0,7 1,0 1,2 1,5
Distância a
percorrer (m) 50,5 35,7 25,0 20,8 16,7
Lança
Tampa
Filtro
Bico
Capa do bico
Calibrador
• Fixe o calibrador à tampa como segue:
1. Remova a capa, o bico e o ltro;
2. Monte a tampa do calibrador;
3. Reinstale o bico, o ltro e a capa;
4. Rosqueie o recipiente na tampa.
Marque o tempo para percorrer
a área de 25 m²
Simular a pulverização pela
área de 25 m²
1. Segure a lança na posição normal de trabalho e pulverize
o recipiente até cobrir a área correspondente a 25 m²;
2. Mantenha o recipiente no nível e faça a leitura. O nível do
líquido indicará o volume na escala correspondente;
3. Esvazie o recipiente e repita a operação, obtendo assim a
média de duas ou mais medições
OBS: Para obter o volume em litros por alqueire (L/alq), basta
multiplicar o valor obtido em litros por hectare (L/ha) por 2,42.
ATENÇÃO!
Use o EPI para fazer a manutenção e repo-
sição de peças.
• Conforme a largura da faixa de aplicação, deve-se percorrer
uma distância que corresponda a 25m².

20/53
Evitar que a vazão ultrapasse 10% da vazão nominal do bico.
É recomendável o uso da válvula reguladora de uxo e pressão
(ECOVALVE) para alcançar um método mais preciso de pulveri-
zação.
Código:1197162
Código:1197163
Código:1197159
Código:1197164
0.8 Bar (0.8 kgf/cm²)
1.0 Bar (1.0 kgf/cm²)
1.2 Bar (1.2 kgf/cm²)
1.3 Bar (1.3 kgf/cm²)
1.5 Bar (1.5 kgf/cm²)
1.7 Bar (1.7 kgf/cm²)
1.8 Bar (1.8 kgf/cm²)
2.0 Bar (2.0 kgf/cm²)
2.3 Bar (2.3 kgf/cm²)
2.8 Bar (2.8 kgf/cm²)
3.0 Bar (3.0 kgf/cm²)
3.2 Bar (3.2 kgf/cm²)
Recomendado Aceitável Não recomendado
Bicos Herbi-
cidas
Fungi-
cidas
Inceti-
cidas
Código Nome Imagem
1197571 JHC
217174 JD-12
1197537 JEF
1197477 JSF
325787 J ADJ
1197486 JDF
1197486 JAI
Table of contents
Languages:
Other Jacto Paint Sprayer manuals