68/72
8 1220920 ROBINET COMPLÈTE LP 601 1
9 530626 LANCE 600 1
10 1220929 LOQUET DE LA BASE 1
11 1220977 AGITATEUR COMPLET 1
12 1220629 ANNEAU O-RING OR1-11 3
13 1223766 JOINTS DE L’AGITATEUR 1
14 1220622 VIS DE TÊTE FLANGE 5 X 12 MM 10
15 1220623 TABLEAU ELECTRIQUE JEP 2016 1
16 1220624 KIT PIEDS EN CAOUTCHOUC (4) 1
17 1220625 KIT DES TUYAUX 1
18 1220925 COLLIER SIMPLEX D 12-14 ACIER INOXY-
DABLE 11
19 1220628 BATTERIE JB 1660 1
20 1220631 COUDE 3/8 3
21 1220632 KIT FILTRE DE LA POMPE PJB 1
22 1220634 FILTRE DE LIGNE 1
23 1220934 ANNEAU O 20,34 1,78 NITR 70 OR1-19 1
24 1168544 COUVERCLE DU REGISTRE AVEC JOINT 1
25 1220635 CONNECTEUR DU TUYAU 1
26 1220636 ECROU DU CONNECTEUR 1
27 1220979 AIGUILLE COMPLET EM ACIER INOXYDABLE 1
28 1220638 CORPS DE LA VALVULE DU AGITATEUR 1
29 1220639 POMPE JP 0402X 1
30 1220640 COUVERCLE DE LA BASE 1
31 1220947 VISTÊTE RONDE M 5X0,8X 12 1
32 1220641 BASE DU PULVÉRIZATEUR ÉLECTRIQUE 1
33 1220642 CHARGEUR JBC 1602X 1
34 1220951 LEVIER DU ROBINET 1
35 996058 CAPUCHON DU ROBINET 1
36 1220962 POIGNÉE DU ROBINET 1
37 1220965 AIGUILLE DU ROBINET 1
38 1220966 FERMETURE 1
39 1220968 CORPS DU REGISTRE LP 601 1
40 1220969 BOULON CONIQUE 2
41 1220971 JUNCTION 11/16 1
42 1220984 TUBE DE PULVÉRISATION 600 1
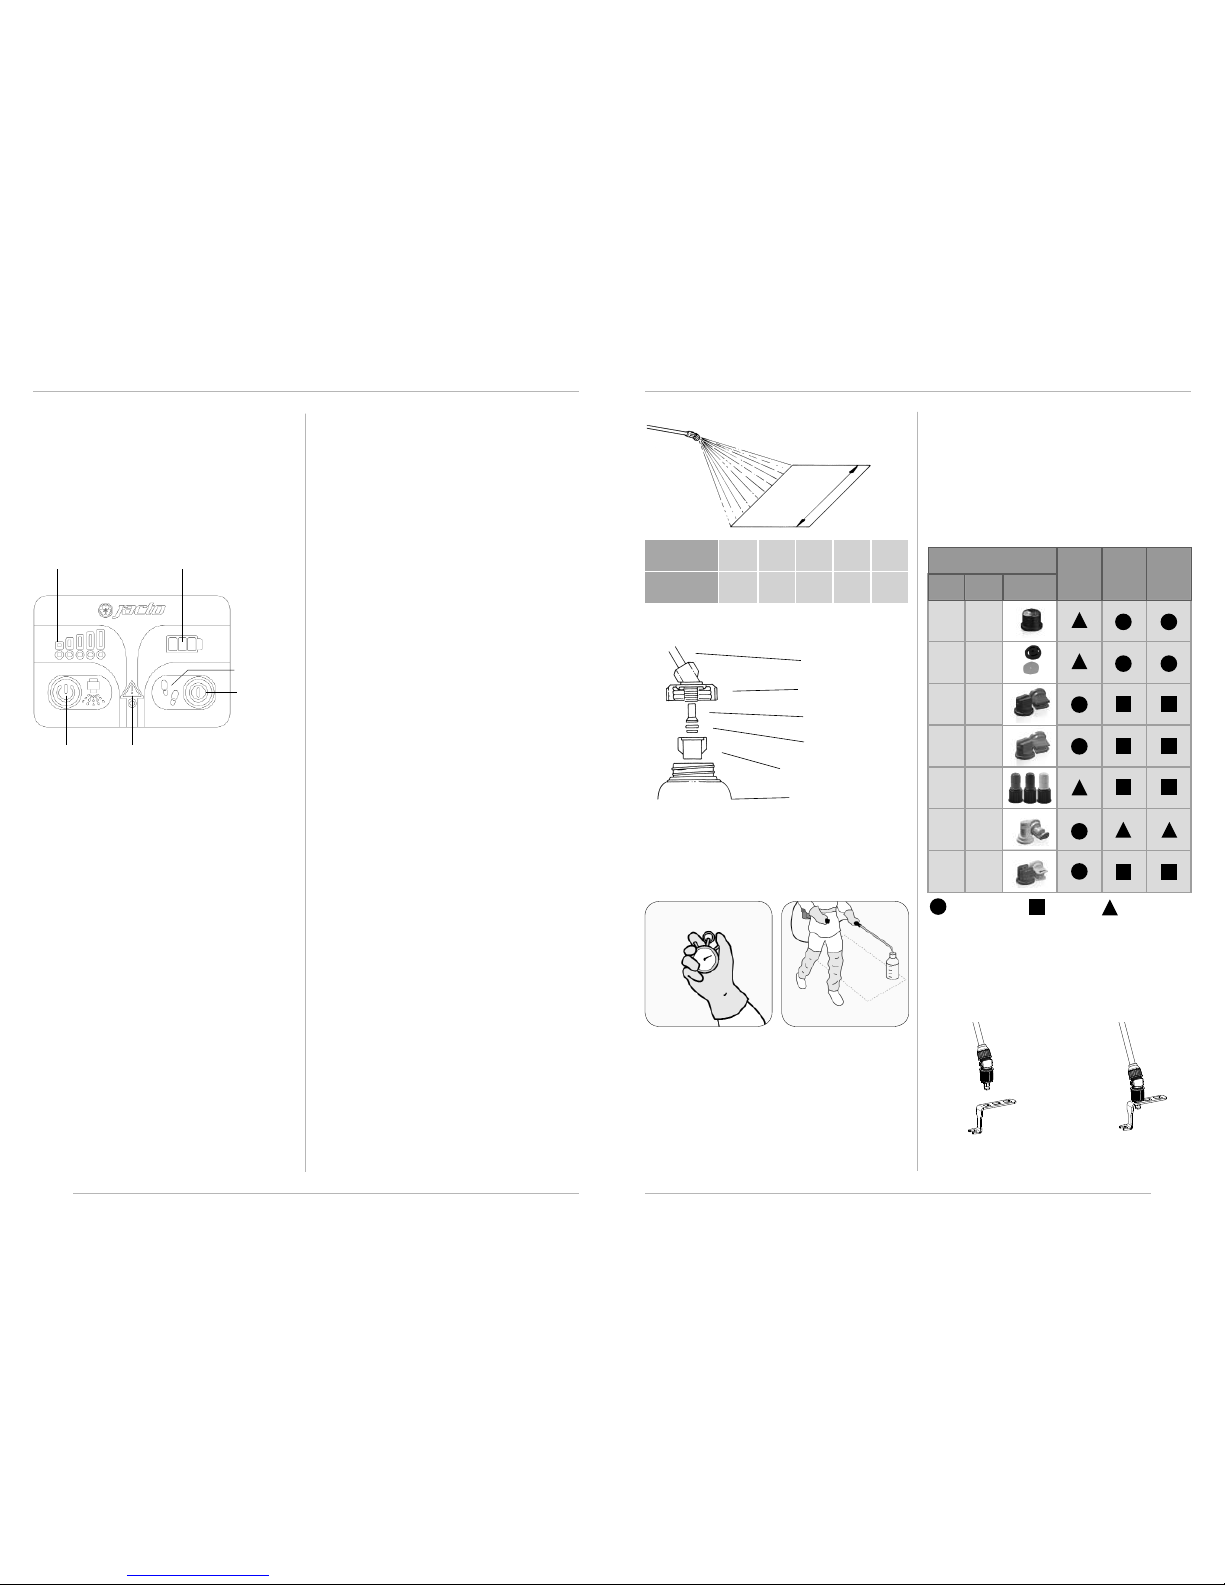
43 1168545 FILTRE DE LA BUSE M50/60 1
44 217174 BUSE JD 12 1
45 1220972 JOINT CONIQUE 1
46 1220983 ANNEAU 10,83x1,78 NITR. 70 OR1-13 1
47 1168546 COUVERCLE DE LA BUSE 2
48 1223850 CLÉ ENTRETIEN PJB 1
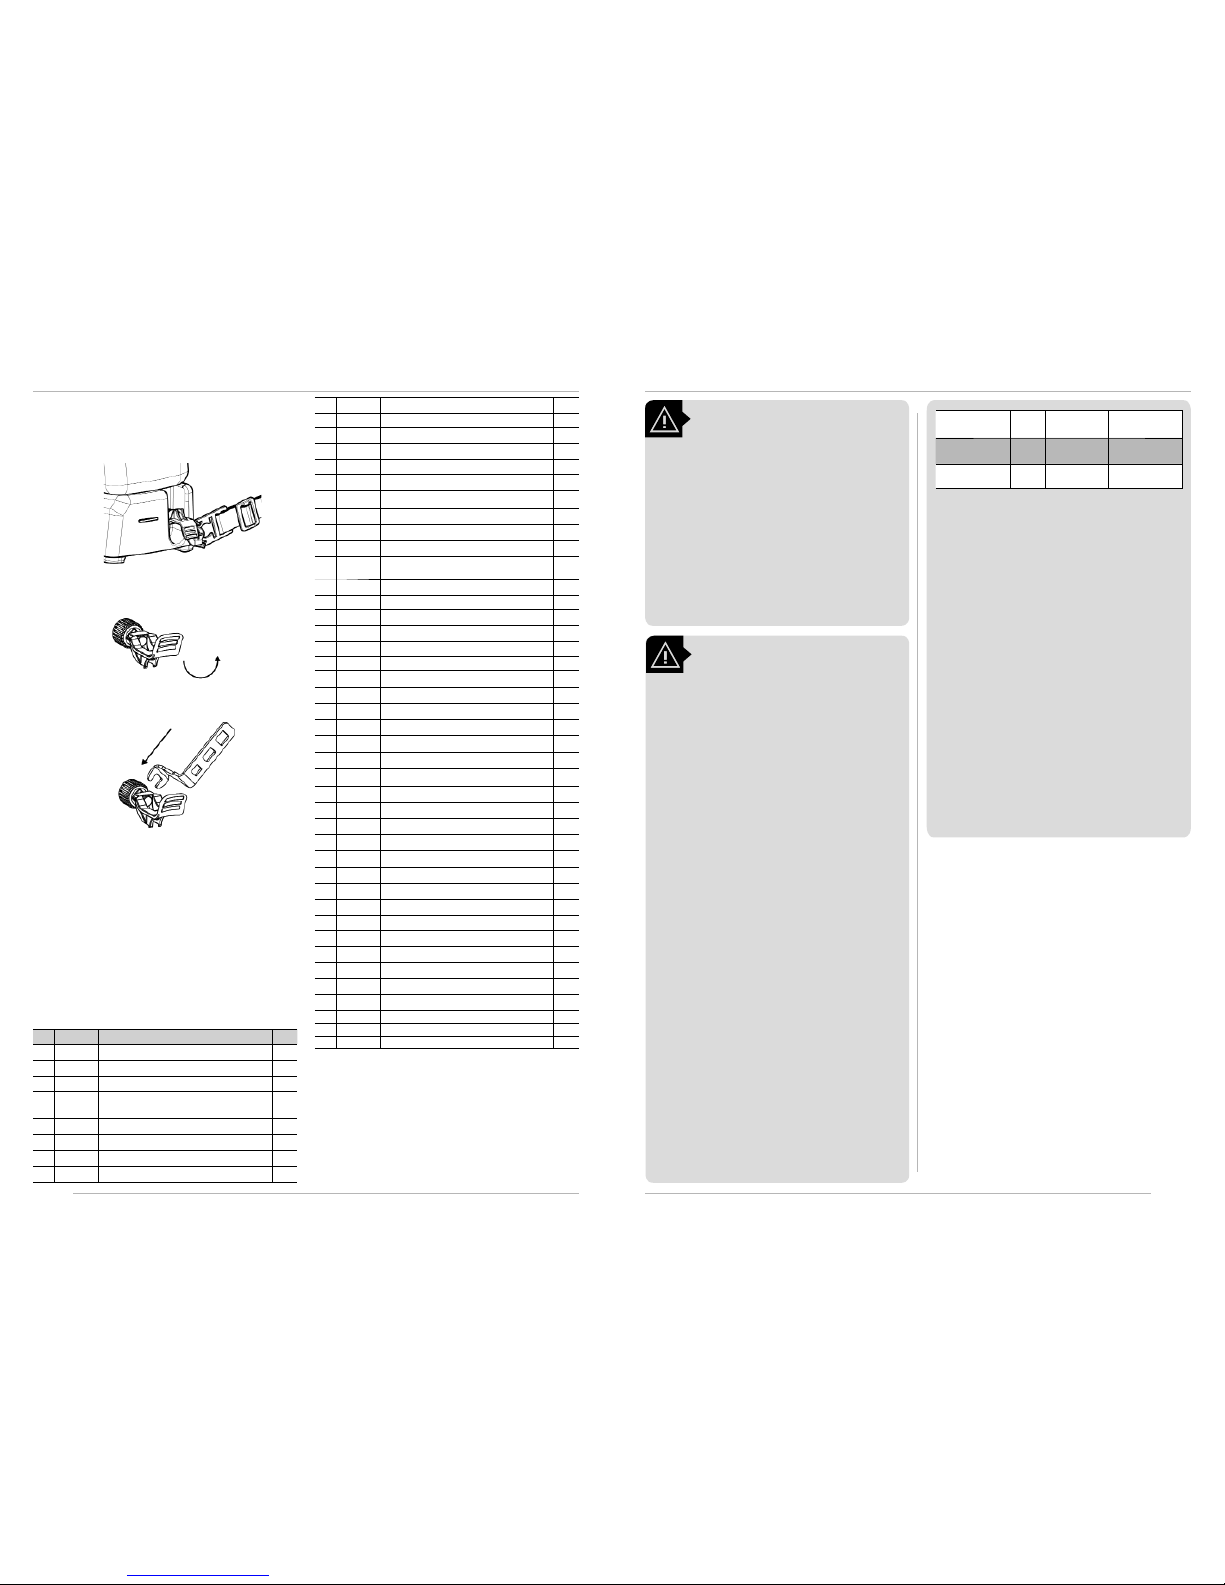
9.1. La maintenance du système d’agitation
• Avec la pulvérisation éteint, déplacer le levier d’agitation à la
position horizontale comme gure A;
• Tourner à 180 degrés comme dans la gure B;
• Introduisez la clé de maintenance comme indiqué sur la -
gure C;
• Après l’insertion dévisser dans le sens antihoraire jusqu’à ce
que le levier sort complètement;
• Ajouter 5 litres d’eau dans le réservoir et démarrer pour net-
toyer le système;
NOTE: Jeter l’eau de nettoyage dans un endroit approprié.
• Vériez l’état de l’aiguille et en cas de besoin, remplacer la
pièce (voir la liste des pièces de rechange);
• Après le nettoyage du système, exécutez la procédure inverse
pour remplacer le système d’agitation, puis se assurer qu’il n’y
ait pas de fuite.
A)
B)
C)
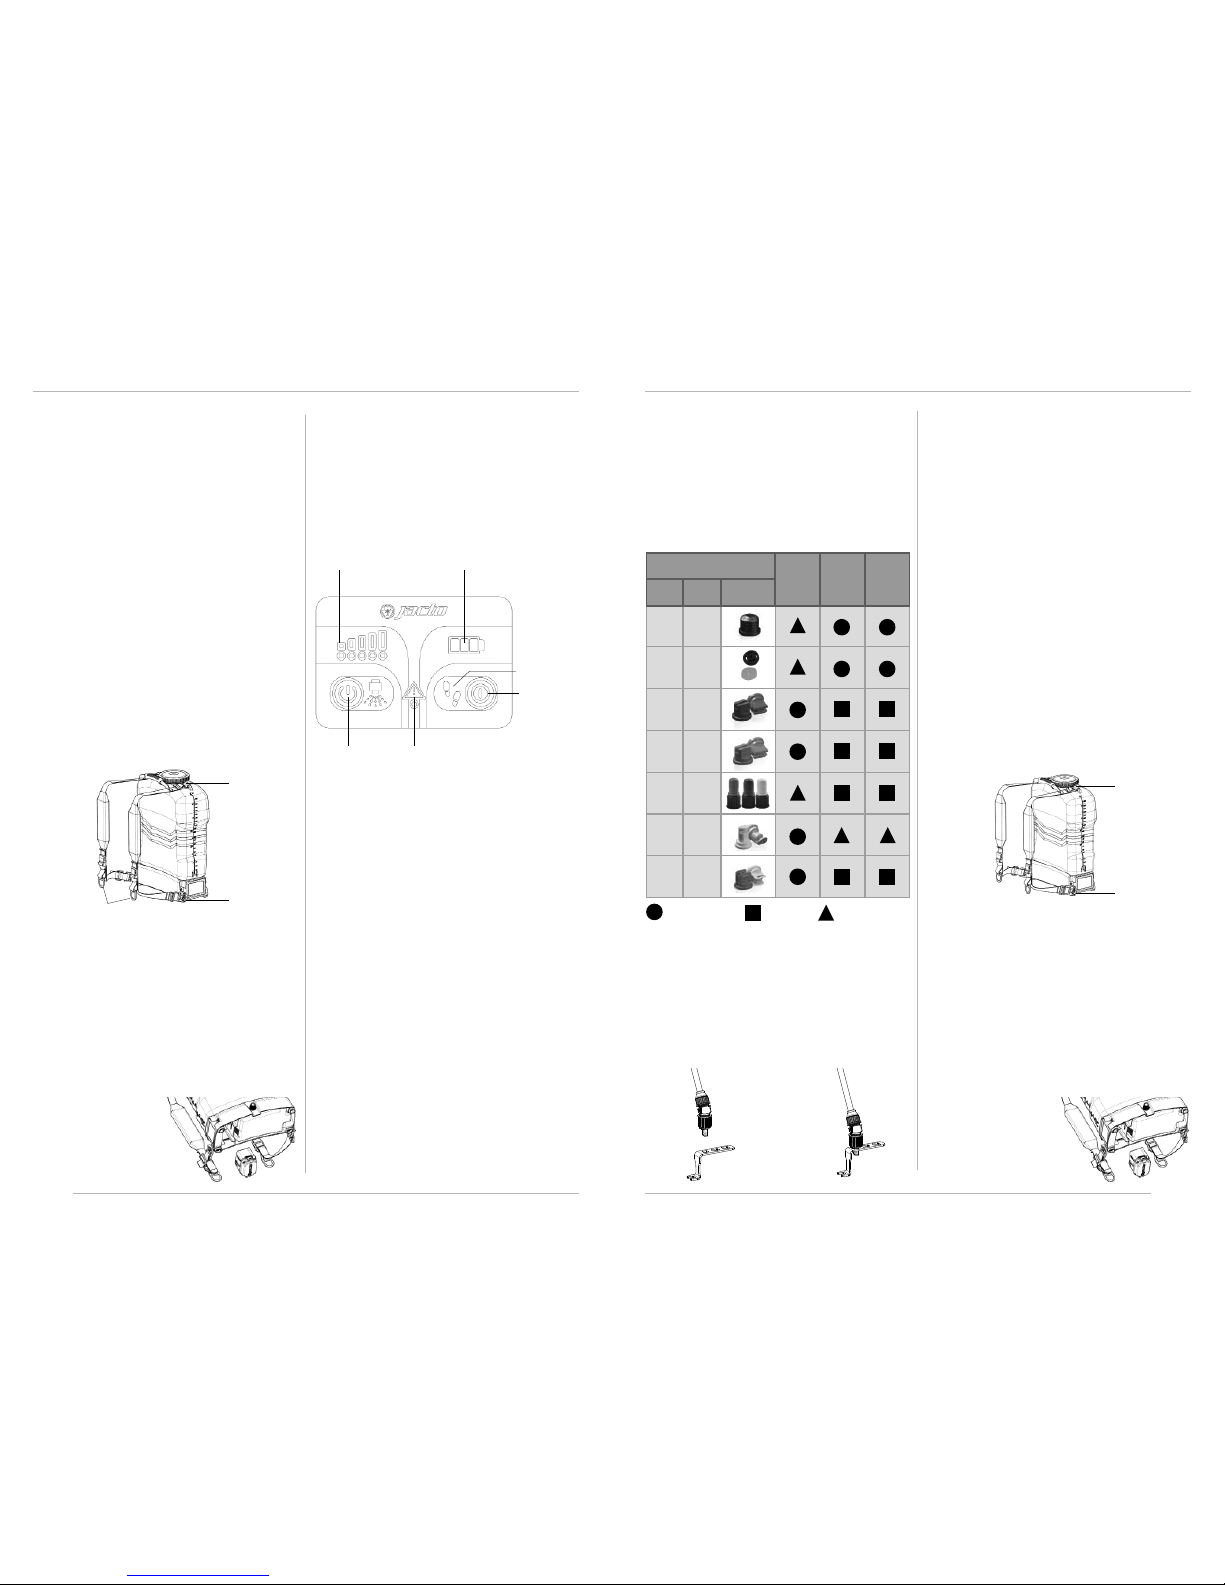
Nº Code Dénomination Qté.
1 1220918 COUVERCLE AVEC DIAPHRAGM (ORANGE) 1
2 1220924 DIAPHRAGM DE LA COUVERCLE (nitrile) 1
3 1220919 TAMIS (PJ) 1
4 1220618 COURROIE COMPLÈTE AVEC POIGNÉE DE
TRANSPORT 1
5 1220973 BOUCLE HD (INJECTÉ)-REMPLACEMENT 2
6 1220619 RÉSERVOIR 20L 1
6a 1223765 RÉSERVOIR 16L 1
7 1220981 TUYAY COMPLET / LP605 ET LP601 1
5/72
WARNING!
• DO NOT attempt to charge the battery
pack with any chargers other than the
ones in this manual.
The charger and
battery pack are specifically designed to
work together.
• Thesechargersare not intendedforany
uses other than charging designated
JACTO lithium rechargeable batteries.
Any other uses may result in risk of fire,
electric shock or electrocution.
• Do not expose charger to rain or snow.
• Pull by plug rather than cord when dis-
connectingcharger.
Thiswill reducerisk of
damage to electric plug and cord.
• Make sure that cord is located so that it
will not be stepped on, tripped over, or
otherwisesubjectedtodamageorstress.
• Do not use an extension cord unless it
is absolutely necessary.
Use of improper
extension cord could result in risk of fire,
electric shock, or electrocution.
• An extension cord must have adequate
wiresize (AWG orAmericanWireGauge)
for safety.
When using more than one
extension to make up the total length, be
sure each individual extension contains at
least the minimum wire size. When using
an extension cord, be sure to use one heavy
enoughto carrythecurrentthatproductwill
draw. An undersized cord will cause a drop
in line voltage resulting in loss of power and
overheating. The following table shows the
correctsizeto use dependingoncord length
andnominal currentpresentedinthelabelof
the charger mentioned in this manual. If in
doubt, use the next heavier gauge.
CAUTION!
• Burn hazard. To reduce the risk of injury,
charge only designated JACTO batteries.
Other types of batteries may burst causing
personal injury and damage.
• Under certain conditions, with the charger
pluggedintothepowersupply,thecharger
canbeshortedbyforeign material.Foreign
materialsof aconductivenaturesuchas,but
not limited to, steel wool, aluminum foil, or
any buildup of metallic particles should be
kept away from charger contacts. Always
unplug the charger from the power supply
whennotchargingbattery.Unplugcharger
before attempting to clean.
• Do not mount charger on wall or perma-
nently ax charger to any surface.
The
charger is intended to use on a flat, stable
surface (i.e., table top, bench top).
• Do not operate charger with damaged
cord or plug -
have them replaced imme-
diately.
• Donot operatechargerifithasreceiveda
sharp blow, been dropped, or otherwise
damaged in any way.
Take it to an autho-
rized service center.
• Do not disassemble charger;
take it to
an authorized service center when service
or repair is required. Incorrect reassembly
may result in a risk of electric shock, electro-
cution or fire.
• Disconnect the charger from the outlet
before attempting any cleaning.
This will
reducetheriskofelectricshock.Removingthe
battery pack will not reduce this risk.
• NEVER attempt to connect 2 chargers
together.
• The charger is designed to operate on
standardhousehold electricalpower.Do
notattempttouseitonanyothervoltage.
• Batterychargerscontainelectronicparts.
Dispose of properly.
Extension Cord
Total Length
Up to
15.2 m
From 15.2 m
and up to 30 m
More than 30 m
Wire Size (AWG) 16 14
Not recommended
Wire Size (mm2)
1.5 2.5
Not recommended
5.1. Charging procedure
JACTO charger provided with this sprayer is designed to charge
JACTO battery pack model JB1660 in 4 hours.
1. Remove the battery from the sprayer.
2. Plug the charger into an appropriate outlet before con-
necting the battery pack. Make sure the AC cord is well
attached to the charger.
3. Connect the charger plug to the battery pack connector.
4. The charge light will remain red/orange while charging.
5. When battery pack is fully charged, charge light will
change its color to green.
6. As soon as the battery is fully charged, disconnect the bat-
tery from the charger.
7. Unplug charger cord from outlet.
Recharge discharged batteries as soon as possible or bat-
tery life may be greatly diminished. For longest battery life,
do not discharge batteries fully. It is recommended that the
batteries be recharged after each use.
5.2. Important charging notes