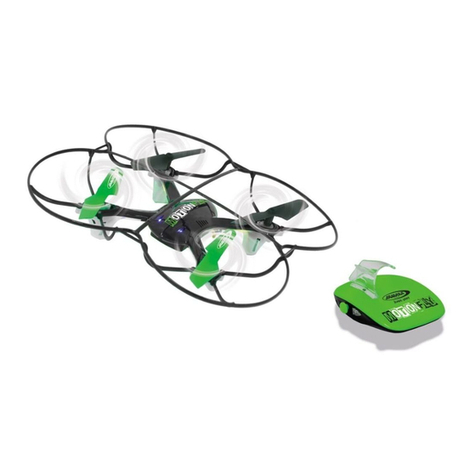
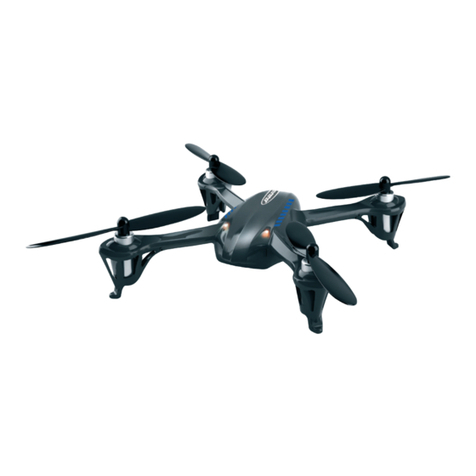
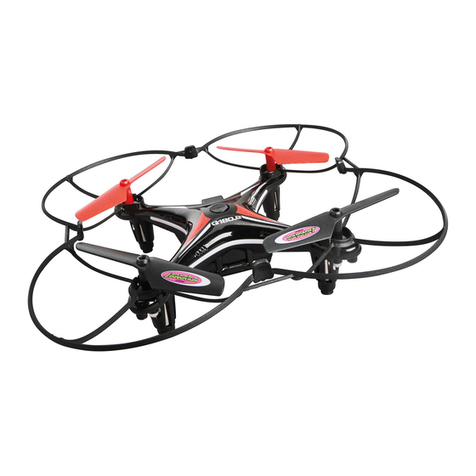
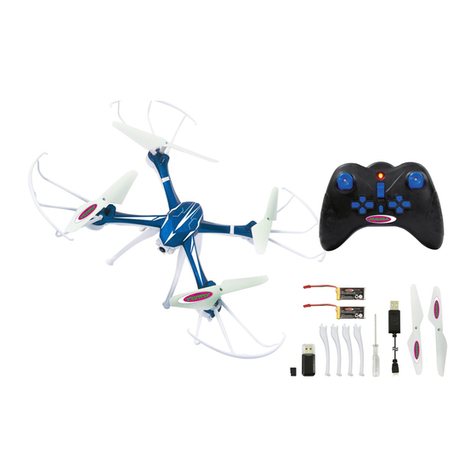
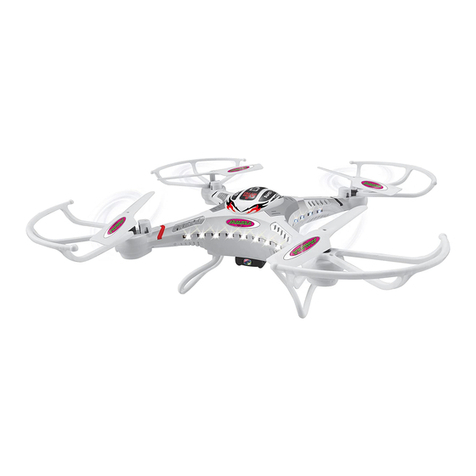
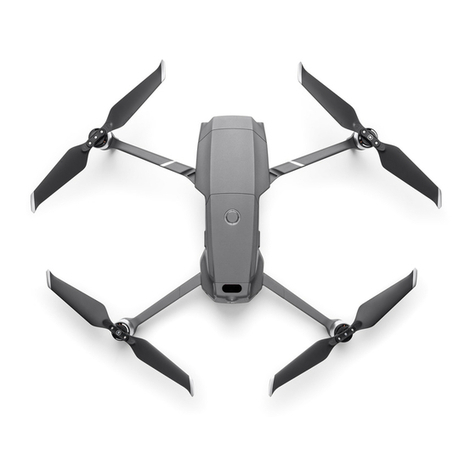
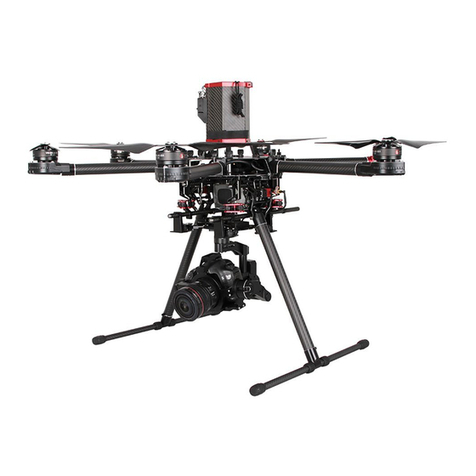
Jamara Payload Altitude GPS 2,4 GHz User manual

22/17
DE - Gebrauchsanleitung
GB - Instruction
FR - Notice
IT - Istruzione
ES - Instrucción
Payload Altitude
GPS 2,4 GHz
No. 42 2024
No. 42 2025 Wi FPV HD Kamera
No. 42 2026 FHD Wi Action Camara HD Pro
No. 42 2035 Wi FPV Kamera mit VR-Brille
DE - Allgemeine Hinweise
Jamara e. K. übernimmt keine Haftung für Schäden, die an dem Produkt selbst oder durch dieses
entstehen, sofern diese auf falsche Bedienung oder Handhabungsfehler zurückzuführen sind. Der
Kunde allein trägt die volle Verantwortung für die richtige Bedienung und Handhabung; dies umfasst
insbesondere die Montage, den Ladevorgang, die Verwendung bis hin zur Wahl des Einsatzberei-
ches. Bitte beachten Sie hierzu die Bedienungs- und Gebrauchsanleitung, diese enthält wichtige
Informationen und Warnhinweise.
GB - General information
Jamara e.K. is not liable for any damage caused to the product itself or through this, provided this
is due to improper operation or handling errors. The Customer alone bears the full responsibility for
the proper use and handling, including without limitation, the assembly, the charging process, the
use and choice of the operation area. Please refer to the operating and user instructions, it contains
important information and warnings.
FR - Remarques générales
La société Jamara e. K. n’est pas responsable de dommages, que ce soit au niveau du modè-
le ou causé par celui-ci, résultant d’une utilisation non appropriée. Seul le client est responsable
concernant la mise en oeuvre et l’utilisation conforme du matériel; cela va de l’assemblage, en
passant par la charge des accus et allant jusqu’au choix du lieu d’utilisation. Pour cela, veillez à lire
attentivement la notice d’utilisation, elle contient d’importantes informations ainsi que les consignes
de sécurité.
IT - Informazioni generali
Jamara e. K. non e´responsabile per danni, sostenute al prodotto stesso o attraverso questo, dovuti
ad una gestione non corretta del articolo. Solo il cliente si assume la piena responsabilità per la
manutenzione e l´utilizzo corretto dello stesso; questo include il montaggio, la ricarica, l´utilizzo,
noallasceltadellaaereadiapplicazione.Sipregadinotareerispettareleistruzionid´uso,questi
contengono informazioni e avvertimenti molto importanti.
ES - Información general
Jamara K. no se hace responsable de los daños causados al producto en sí o por medio de esto,
a menos que esto se debe al mal funcionamiento o errores de manejo. El cliente solo tiene la re-
sponsabilidad completa para el uso y manejo adecuado, incluyendo, sin limitaciones, el montaje,
el proceso de carga, el uso de hasta la elección de la zona de aplicación. Por favor, consulte las
instrucciones de uso y funcionamiento, contiene información y avisos importantes.
DE - Konformitätserklärung
Hiermit erklärt JAMARAe.K., dass sich das Modell‚ “PayloadAltitude GPS 2,4 GHz,
No. 422024, No. 422025, No. 422026, No. 422035“ in Übereinstimmung mit den
grundlegenden Anforderungen und den anderen relevanten Vorschriften der Richtli-
nien2014/53/EUund2011/65/EUbendet.
WeitereInformationenndenSieauchunter:www.jamara-shop.com/Konformitaet
GB - Certi cate of Conformity
JAMARA e.K. hereby declares that the model “Payload Altitude GPS 2,4 GHz, No. 422024, No.
422025, No. 422026 No. 422035 “ follow the regulations and requirements as well as any ther
relivant directives of the EEC directive 2014/53/EU and 2011/65/EU.
Furtherinformationcanalsobefoundat:www.jamara-shop.com/Conformity
FR - Déclaration de conformité
Par la présente, la société Jamara e.K. déclare que le modèle réduit “Payload Altitude GPS 2,4 GHz,
No. 422024, No. 422025, No. 422026 No. 422035 “ est conforme en tous points avec les exigences
fondamentales et les autres dispositions concernées des directives 2014/53/EU et 2011/65/UE .
VospourrezégalementtrouverdesinformationssurnotresiteInternet:
www.jamara-shop.com/Conformity
IT - Dichiarazione di conformita’
Jamara e. K. dichiara qui di seguito che il modello “Payload Altitude GPS 2,4 GHz,
No. 422024, No. 422025, No. 422026 No. 422035 “ è in linea con le norme ed altre rilevanti dispo-
sizioni comunitarie 2014/53/EU e 2011/65/EU.
Piuinformazioni:www.jamara-shop.com/Conformity
ES - Declaración de conformidad
Por medio de la presente, la empresa Jamara e. K. declara que el modelo “Payload Altitude GPS
2,4 GHz, No. 422024, No. 422025, No. 422026 No. 422035 “ de conformidad con los requisitos
esenciales y otras disposiciones pertinentes de la Directiva 2014/53/EU y 2011/65/EU se encuentra.
Encontrarámásinformaciónen:www.jamara-shop.com/Conformity
DE - Dieses ferngesteuerte Modell ist kein Spielzeug!
Geeignet für Personen ab 14 Jahren.
Achtung: Kinder unter 36 Monaten unbedingt fernhalten. ERSTICKUNGSGEFAHR!
Enthält verschluckbare Kleinteile.
GB - This model is not a toy!
Not suitable for people under 14 year.
Warning: Keep away necessarily children under 36 months. RISK OF SUFFOCATION!
Contains small parts which can be swallowed.
FR - Ce modèle réduit n‘est pas un jouet!
N‘est pas adapté pour les personnes de moins de 14 ans.
Attention: Garder loin nécessairement enfants de moins de 36 mois.
DANGER D‘ETOUFFEMENT! Contient de petites pièces facilement avalables.
IT - Questo modello non é un giocattolo!
Sconsiliato per persone inferiori di 14 anni.
Attenzione: Tenere lontano assolutamente i bambini inferiori ai 36 mesi.
PERICOLO DI SOFFOCAMENTO!!
Contiene pezzi piccoli.
ES - Este modelo no es un juguete!
No apropriado para menores de 14 años.
Atención: Mantenga necesariamente lejos de niños menores de 36 meses. ASFIXIA!
Contiene piezas pequeñas.
DE
ACHTUNG!
Bei Film-/Fotoaufnahmen:
Machen Sie niemals Foto- und Film-
aufnahmen von Personen, ohne
dass diese eingewilligt haben. Das
unerlaubte Anfertigen verletzt die
Privatsphäre und Persönlichkeits-
rechte des Abgebildeten und kann
strafbar sein!
ACHTUNG!ModellugistSichtug.
Flugmodelle dürfen nur geogen
werden, wenn der PILOT selbst das
Flugmodell sieht. Das Flugmodell
darf nur in Sichtweite des Piloten
geogenwerden.
● InmanchenLändernistesunter
bestimmten Voraussetzungen
erlaubt, das Modell mit Hilfe von
FPV (z.B. Videobrille) zu steuern.
● InmanchenLändern(z.B.in
Deutschland) benötigt man für
den Betrieb von Flugmodellen
eineModellughalterhaftpicht-
versicherung.
GB
ATTENTION!
Video and photo recording:
Nevertakephotoandlmfootageof
people without their permission. The
unauthorised recordings violate the
privacy and rights of the person and
may be punishable by law!
ATTENTION! Model ying is visual
ying. Models can only be own if
the PILOT can see the model. The
model can only be own in visual
range.
●Insomecountriesitisallowedto
control the model with the help of
FPV (e.g. video glasses) under
certain circumstances.
●Insomecountries(e.g.Germany)
a liability insurance is required to
operate models.
FR
ATTENTION!
Lors de prises de vues
photo / vidéo:
Ne faites jamais de prises de vue
photo ou vidéo de personnes sans
que celles-ci vous en donnent
l’autorisation. Un enregistrement
non autorisé porte atteinte à la vie
privée des personnes concernées et
est considéré comme intrusion dans
leur intimité, cela est punissable par
la loi! ATTENTION! Faire voler un
avion en modèle réduit est un vol à
vue. Les modèle réduit ne doivent
être mis en usage que quand le pilo-
te voit le modèle. Le modèle ne doit
être volé que dans les limites de la
portée de vue du pilote.
●Dans certains pays, il est
autorisésous certaines
condtions,de piloter un modèle
en utilisant des lunettes FPV
(par ex. Lunettes de vidéo)
● Dans certains pays (en Allema
gneparex.)ilfaut,andepiloter
un modèle réduit, une assurance
responsabilité civile.
IT
ATTENZIONE!
Durante i Vostri servizi fotogra ci
o di lmati:
Nonscattarefotograeolmati,sen-
za che le persone coinvolte hanno
dato il loro consenso. La realizzazio-
ne non autorizzata viola la privacy e
idirettidellapersonarafgurataedè
legalmente punibile!
ATTENZIONE! Il volo di modellismo
e volo a vista! I modelli possono
essere volati solo quando il proprio
pilota vede il modello di volo. Il mo-
dello può essere volato solo in vista
del pilota.
●Inalcunipaesièconsentitoin
determinate circostanze, control-
lare il modello utilizzando il FPV
(ad esempio, occhiali di video).
● In alcuni paesi (ad esempio
Germania) è necessario per il
funzionamento dei modelli una
assicurazione di aeromodellismo
e responsabilità civile.
ES
Atencion!
En Film-/Fotografía:
Nunca toma una fotografía y lma-
ciones de personas, que no los han
aceptado. La fabricación no auto-
rizada viola la privacidad y los de-
rechos de la personas representan-
da y puede ser penado por ley.
ATENCIÓN! El vuelo de modelis-
mo es un vuelo a vista. Los mode-
los sólo se pueden volar cuando el
propio pilota ve el modelo de vuelo.
El modelo debe volar solo a la vista
del pilota.
●En algunos países se permite
bajo ciertas circustancias, cont-
rolar el modelo usando el FPV
(por ejemplo, gafas de vídeo).
● En algunos países (por ejemplo,
en Alemania) es necesario para
el funcionamiento de los modelos
un seguro de aeromodelismo y la
responsabilidad civil.
DE
Bitte lesen Sie die komplette Bedie-
nungsanleitung und Sicherheitshin-
weise sorgfältig durch bevor Sie das
Modell in Betrieb nehmen.
GB
Read the complete instructions and
security instructions carefully before
using the model.
FR
Veuillez lire attentivement et entière-
ment la notice et les consignes de
sécurités avant tout utilisation de ce
produit!
IT
Vi preghiamo di leggere attentamen-
te la istruzione completa e Istruzioni
per la sicurezza prima di usare il
modello.
ES
Lea atentamente la instruccion com-
pleta y seguridad antes de poner el
modelo en funcionamiento!
Only 42 2035
2
DE - Achtung!
Vor dem Betrieb:
Erst das Modell und dann den Sender einschalten.
Bei Beendigung:
Erst das Modell und dann den Sender ausschalten.
● Betreiben Sie Ihr Modell niemals in Distanzen die außer-
halb Ihrer Sichtweite liegen. Sowohl die max. Sichtweite
als auch die max. Reichweite Ihres Modells hängen von
vielen Faktoren wie Witterung, Einsatzort und vorhan-
denen Störfrequenzen ab. Führen Sie deshalb vor jedem
Einsatz unter sicheren kontrollierbaren Bedingungen ei-
nen Reichweitentest durch und prüfen Sie auch wie sich
das Modell während des Betriebs bei einem Signalausfall
wie z.B. bei leeren Senderbatterien oder ausgeschaltetem
bzw. ausgefallenem Sender verhält. Quadrocopter mit
Altitude-Technologie sollten bei einem Funktions-
oder Reichweitentest nicht festgehalten werden da die
Höhenkontrolle so lange Vollgas gibt bis ein Höhenan-
stieg registriert wird. Statt dessen emp ehlt es sich das
Modell von unten an einem Seil zu xieren das nicht auf
Spannung gebracht wird sondern locker gelassen wird.
● Überschreiten Sie im Betrieb auf keinen Fall die unter
Optimalbedingungen erreichbare Maximal-Reichweite von
50 Metern im Wlan-Modus und 200 Metern im
Sender-Modus.
GB - Attention!
Before operating:
Switch the model on rst then the transmitter.
When nished:
First switch off the model then the transmitter.
● Never operate your model beyond sight. Both the
maximum visibility as well as the max. range of your
model will depend on many factors such as weather,
location and interfering frequencies. Before each use,
perform a range test under safe, controllable conditions,
and also check how the model is operating during a
signal failure e.g. in the case of empty transmitter
batteries or switched-off or failed transmitter.
Quadrocopters with Altitude technology should not be
held in your hand during a functional or range test, as the
altitude control will give full throttle until a rise in altitude
is registered. Instead it is recommended to x the model
from below on a rope which is not put on tension, but is
left loose.
● In operation and under optimal conditions never exceed
the maximum range of 50 meters in Wlan mode and 200
meters in RC mode.
FR - Attention!
Avant l’utilisation:
Allumez en premier modèle puis seulement votre l’émetteur.
Après utilisation:
Arrêtez le modèle en premier puis votre radiocommande.
● N’utilisez jamais le modèle à une distance hors de votre
visibilité. La visibilité maximale ainsi que la ortée
maximale dépendent de plusieurs facteurs tels que le
temps, le lieu d’utilisation et les présentes fréquences
perturbatrices. Effectuez pour ce faire avant utilisation un
test de portée dans des conditions contrôlées et véri ez
comment le modèle se comporte en cas de perte de
signal. Les drones équipés d’altimètre ne devraient pas
être tenus pendant le test. Ces derniers tendent à
accélérer jusqu’à ce qu’une monté soit enregistrée par le
drone. Il est donc plutôt recommandé de xer le drone à
un l non tendu a n de faire un test approprié.
● Ne pas dépasser en aucun cas, au-dessus des conditions
optimales accessibles d´une portée maximale de 50
mètres en mode WLAN et de 200 mètres en mode RC.
IT - Attenzione!
Prima dell‘uso:
Accendete prima il modello e poi la trasmittente.
Dopo l‘uso:
Spegnere prima il modello e poi la trasmittente.
● Non utilizzare il suo modello fuori della distanzia di vista.
Sia la visibilità come la portata massima del vostro
modello dipendono da molti fattori, come il tempo,
disturbo di frequenza e il luogo di utilizzo. Prima di ogni-
utilizzo, eseguire un test di portata sotto sicurezza,
condizioni controllabili e anche controllare come il
modello funziona in caso di mancanza si segnale ad
esempio nel caso di batterie vuote della trasmittente o la
trasmittente spenta o fallita. Quadrocopter con
tecnologia Altitude non devono essere tenuti in mano
durante un test funzionale o test di portata, perché il
controllo d´altezza da tutto gas no a quando viene
registrato un aumento d´altezza. Invece, si raccomanda
di ssare il modello dal basso su una corda che non viene
messa in tensione, ma lasciato sciolto.
●Non superare durante il funzionamento in condizioni ot-
timali la portata massima di 50 metri in modalità WiFi e
200 metri in modalità RC.
ES - ¡Atención!
Antes del uso:
Encender primero el modelo, y después la emisora.
Después del uso:
Apagar primero el modelo, y después la emisora.
● No utilizar su modelo fuera de la distancias de visibilidad.
Tanto la visibilidad como la capacidad máxima de su
modelo depende de muchos factores, tales como el
tiempo, frecuencia de interferencia y el lugar de
utilización. Antes de cada uso, realizar una prueba de
alcance bajo de seguridad, condiciones controlables y
compruebe tambien cómo funciona el modelo durante
una falla de señal por ejemplo en el caso de baterías
vacías de emisora, emisora apagada o fallada.
Quadrocopter con la tecnología Altitude no se deben
tener en la mano durante una prueba de alcance, porque
el control de altura va a dar todo el gas has que se registra
un aumento de altura. En lugar de ello, se recomienda
para fijar el modelo desde el bajo en una cuerda que no se
tiene que tensar, pero se deja suelto.
● No sobrepasar durante el funcionamiento en condiciones
óptimas el alcance máximo de 50 metros en el modo WiFi
y 200 metros en modo RC.
DE
Bezeichnung der
Komponenten
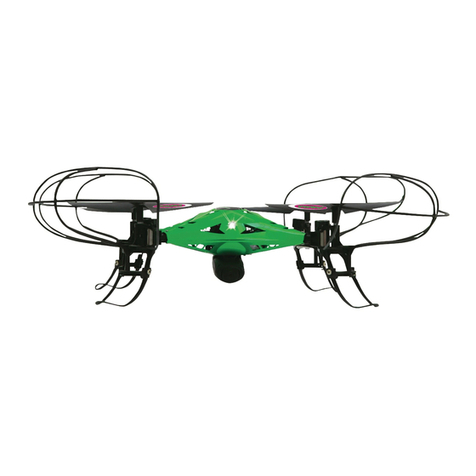
1. Rotorblätter vorne
2. Rotorblätter hinten
3. Rotorschutz
4. Landegestell
5. Ein-/Ausschalter
6. Anschluß Kamera
7. Akkufach
8. GPS Sensor / Kabel
GB
Component Description
1. Rotor blades, front
2. Rotor blades, rear
3. Protecting ring
4. Landing gear
5. On-Off Switch
6. Camera connection
7. Battery compartment
8. GPS Sensor / Cable
FR
Désignations des différentes
pièces
1. Pales du rotor avant
2. Pales du rotor arrière
3. Protection contre les pales du
rotor
4. Patin d‘atterrissage
5. Interrupteur On/Off
6. Connexion pour caméra
7. Compartiment de la batterie
8. Détecteur GPS / Câble
IT
Denominazione dei
componenti
1. Pale di rotore davanti
2. Pale di rotore posteriore
3. Protezione dei rotori
4. Carello
5. Interruttore ON/OFF
6. Collegamento per fotocamera
7. Vanno batterie
8. Senosore GPS / Cavo
ES
Descripción de las diferentes
partes
1. Palas de rotor frente
2. Palas de rotor atrás
3. Protección de las palas del rotor
4. Patines de aterrizaje
5. Interruptor On/OFF
6. Conexión para la cámara
7. Compartimento de la batería
8. Sensor GPS / Cable
DE - VR-Brille (nur 42 2035)
Anleitung VR-Brille ab Seite 25
GB - VR glasses (only 42 2035)
Instructions VR glasses from page 25
FR - Lunettes VR (seulement 42 2035)
Notice Lunettes VR à partir de la page 25
IT - Occhiali VR (solo 42 2035)
Le istruzioni per occhiali VR da pagina 25
ES - Gafas VR (solamente 42 2035)
Las Instrucciones para las gafas VR a partir de la página 25
1
2
3
4
7
8
56

3
DE - Fernsteuerung
1. ohne Funktion
2. GPS
3. Einsteiger-/Fortgeschrittenen-/
Pro-Modus|Not-Stop
4. Autolanding
5. Power LED
6. Gasknüppel /Gieren
7. Steuerhebel Nick/Roll
(links/rechts,
vorwärts/rückwärts)
8. Trimmung A
9. Kompass-/
Coming Home-Funktion
10. Trimmung B
11. Trimmung C
12. Ein-/Ausschalter
13. Batteriefach
Batterien in Sender einlegen
Auf Polarität achten.
GB - Transmitter
1. without function
2. GPS
3. Speedselect|Emergency-stop
4. Autolanding
5. Power LED
6. Speed control stick/Rudder
7. Nick/Roll control stick
(left/right, forward/backward)
8. Trim slider A
9. Compass /
Coming Home function
10. Trim slider B
11. Trim slider C
12. Power switch
13. Battery cover
Fitting the transmitter batteries
Observe the polarity.
FR - Emetteur
1. sans fonction
2. GPS
3. Débutant/Avancé/Expert|
Arrêt d‘urgence
4. Atterrissage automatique
5. Power LED
6. Gaz-/manche d’anti-couple
7. Manche Roll-/Nick
(droite/gauche, avant/arrière)
8. Trim A
9. Fonction boussole /
Coming Home
10. Trim B
11. Trim C
12. Interrupteur On/Off
13. Compartiment pour piles
Mise en place des piles dans
l‘émetteur
Respectant la polarité.
IT - Trasmittente
1. senza funzione
2. GPS
3. Modalità Principiante/Avanzato/
Esperto/Spegnimento di eme
genza
4. Autolanding
5. Power LED
6. Leva del gas/timone
7 Leva di controllo Roll/Nick
(destra/sinistra, avanti/indietro)
8. Trim A
9. Funzione Bussola /
Coming Home
10. Trim B
11. Trim C
12. Interruttore ON/OFF
13. Vanno batterie
Inserimento delle batterie nella
trasmittente.
Prestare attenzione alla polarità.
ES - Emisora
1. sin función
2. GPS
3. Principiante/Avanzado/Experto
Parada de emergencia
4. Autolanding
5. Power LED
6. Palanca de gas/timón
7. Palanca de control Roll-/Nick
(izquierda/derecha, delante/
atrás)
8. Trim A
9. Función brújula / Coming Home
10. Trim B
11. Trim C
12. Interruptor ON/OFF
13. Compartimento de la batería
Insertar las baterías en la emiso-
ra. Prestar atención a la polaridad
1
3
5
6
8
9
7
10
11
12
4
2
6x AA
13
DE - Flugakku au aden
Trennen Sie die Steckverbindung vom Modell zum Akku. Schlie-
ßen Sie das Steckernetzteil (A) an eine Wechselsstromsteckdo-
se an und stecken Sie die Ausgangsleitung des 12 V Netzteils
in die Eingangsbuchse des Lagegeräts (B). Die rote (Power)
und die grüne LED (Laden) leuchten auf, sie zeigen Ladebe-
reitschaft an. Die Power LED signalisiert, dass das Ladegerät
Strom bekommt, die Lade-LED zeigt an das der Ladevorgang
läuft. Schließen Sie den LiPo-Akku (C) mit seinem Balanceran-
schluss (3-polig) am Ausgang der Ladebox an, die Lade LED
wechselt die Farbe. Wenn der Ladevorgang beendet ist, wech-
selt die LED erneut die Farbe. Sollte die Power LED beim An-
schluss des Akkus nicht die Farbe wechseln, ist der Akku bereits
voll aufgeladen.
Nach etwa 180 min. ist der Ladevorgang abgeschlossen, die
Flugzeit bei vollgeladenen Akku beträgt ca. 7 - 10 Min.
Wichtig!
Lassen Sie dem Modell nach jedem Einsatz genügend Zeit
um abzukühlen bevor Sie es wieder in Betrieb nehmen.
Beim Verwenden eines etwaigen Tauschakkus muss zwi-
schen jedem Akkuwechsel mindestens eine Abkühlphase
von 8 Minuten eingehalten werden bis das Modell wieder
betrieben wird. Bei Überhitzung kann Beschädigung der
Elektronik oder Brandgefahr die Folge sein.
Wichtige Hinweise:
Wenn sich der Akku während des Ladevorgangs erwärmt,
trennen Sie ihn bitte umgehend vom Ladegerät, damit der
Akku nicht zerstört wird. Setzen Sie niemals ein anderes La-
degerät ein, der Akku könnte zerstört werden Nach einem
Flug ist der Akku u.U. stark erwärmt. In diesem Fall muss
der Akku erst ca. 30 Min. lang abkühlen bevor er wieder auf-
geladen wird. Bringen Sie einen LiPo-Akku niemals mit einer
offenen Flamme in Berührung, es besteht Explosionsgefahr.
Achtung!
Das Modell ermöglicht eine sehr hohe Zuladung und kann
mit verschiedenen Geräten (Tragevorrichtungen etc.) be-
stückt werden. Die max. Zusatztraglast beträgt bis zu 350
Gramm. Die Zuladung sollte an der Unterseite des Modells
befestigt werden und muß gut ausbalanciert werden. Beach-
ten Sie dass sich die max. Akkulaufzeit ansteigend zur Trag-
last deutlich verringert.
GB - Recharging the ight battery
Disconnect the connector from the model to the battery. Plug the
charger (A) into an AC outlet and the 12 V output from the con-
verter into the charger box (B). Both of the red (power) and green
(charger) indicators will illuminate indicating that the charger is
ready. The Power Indicator indicates that the power supply is
connected and the Charger Indicator shows the output voltage
Connect the LiPo battery (C) to the balancer socket (3 pole) of
the charger. The charging indicator will change the color to show
it is charging. Once the charging indicator changin the color
again, charge has been completed. In case the charging indi-
cator on the charger does not change the color once you have
connected the battery pack, then the battery pack is already fully
charged.
The charging process should take approx. 180 min. and should
giveyouapprox.7-10min.yingtime.
Important!
Let the model cool off suf ciently after each use before put-
ting it back into operation. When using an additional batte-
ries let it cool off for minimum 8 minutes until the model is
operated again. Overheating can damage the electronics or
may result in re.
Note:
If the battery heats up during charging, disconnect it. Failure
to do so may destroy the battery. After ying the battery will
be hot, allow it to cool for app. 30 minutes before charging.
Never allow batteries to come into contact with open re as
this may cause the batteries to explode.
Attention
The model allows a very high payload. Various devices
such as support devices, carriage supports etc can be as-
sembled. The max. additional load are up to 350 grams. The
load should be fastened to the underside of the model, and
must be well balanced. Note that the max. battery life will be
reduced signi ca
FR - Respectant la polarité.
Charge de l’accu de propulsion Coupez le connecteur de
l’modèle à l’accu. Branchez l‘alimentation du chargeur (A) sur
une prise secteur. Branchez la sortie de l‘alimentation 12V sur
l‘entrée du chargeur (B). La LED rouge (power) et la LED ver-
te (chargeur) s‘allument, elles indiquent que le chargeur est
près. Branchez votre accu Lipo (C) sur le chargeur par la prise
d‘équilibrage (3 pôles). L‘intensité lumineuse de la chargeur LED
change, celle-ci est plus ou moins claire en fonction de l‘état
de charge de votre accu. Le processus de charge est terminé
lorsque la LED de charge passe à nouveau dans sa couleur initi-
ale.SilacouleurdelaLEDnedevaitpaschangée,celasignie
que l’accu est déjà complètement chargé.
La charge est complète après environ 180 minutes et la durée de
vol est de l‘ordre de 7 - 10 minutes.
Important!
Après chaque utilisation, avant de remettre le+ modèle en
marche, laissez-le suf samment le temps de refroidir. Lais-
sez une phase de 8 minutes de refroidissement lorsque
vous utilisez une batterie de rechange pour redémarrer
le modèle de nouveau. En cas de surchauffe, les compo-
sants électroniques peuvent être endommagés ou un risque
d´incendie peut survenir.
Remarque importante:
Si votre accu venait à chauffer fortement lors du processus
de charge, séparez celui-ci immédiatement du chargeur a n
que l‘accu ne soit pas détruit. Après un vol, votre accu est
chaud. Dans ce cas, laissez le refroidir environ 30 minu-
tes avant de le recharger. N‘utilisez jamais un amme vive
dans les environs immédiats de votre accu LiPo et sur-
tout ne rentrez pas en contact avec celui-ci, il y a danger
d‘explosion.
Attention!
Le modèle permet une charge très élevée et peut être char-
gé avec différents dispositifs (chargement, etc.) La charge
maximale est de 350 grammes. La charge doit être xée à
la partie inférieure du modèle, et doit être bien équilibré. A
noter que la durée de la batterie (autonomie) diminue, en
augmente la charge.
A
B
C

4
DE - Achtung.
Trennen Sie immer unmittelbar nach Beenden des Ladevor-
gangs den Akku vom Ladegerät. Trennen Sie das Ladege-
rät immer unmittelbar nach Abstecken des Akkus von der
Spannungsversorgung. Ein eingesteckt lassen des Akkus
bzw. des Ladegeräts nach Beenden des Ladevorgangs kann
zu Beschädigungen an Akku, Ladegerät oder der Span-
nungsversorgung führen (Brandgefahr).
GB - Danger.
Always disconnect the battery from the charger immediate-
ly after charging. Always disconnect the charger from the
power supply immediately after disconnecting the battery.
Inserting the rechargeable battery or charger after charging
will result in damage to the battery, charger or the power
supply ( re hazard).
FR - Attention!
Débranchez toujours après chaque arrêt la batterie du char-
geur. Débranchez aussi toujours le chargeur immédiatem-
ment après avoir débranché la batterie de l´alimentation.
Laissez brancher la chargeur ou la batterie peuvent causer
des dommages à la batterie, à votzre chargeur ou câble
d´alimentation ( risque d´incendie).
IT - Attenzione!
Dopo ogni carica e importante di: Scollegare sempre subito
la batteria dal caricatore ed il caricatore dalla rete elettrica.
Se dopo la carica si lascia collegato l’uno o l’altro può cau-
sare danni alla batteria, al caricatore o addirittura alla rete
elettrica (pericolo di incendio).
ES - ¡Atención!
Después de cada carga es importante de: Desconectar
siempre la batería del cargador y el cargador de la fuente
de alimentación. Si después de la carga se deja conectado a
uno o otra puede causar daños a la batería, cargador o a la
fuente de alimentación (peligro de incendio).
A
B
C
IT - Carica della batteria di potenza
Sconnettere il collegamento tra la batteria e il modello. Collegare
il caricabatterie (A) alla presa di correnteCollegate l‘ uscita dell‘
alimentatore (12 V) sull‘ entrata del caricabatteria (B):siillumi-
neranno sia il LED power o che LED carico, indicando così che il
caricabatteria è pronto. Il led rosso (power) indica che il ca-rica-
batteria è alimentato, mentre il ed verde (carico) indica a tensio-
ne d‘ uscita. Collegate la vostra batteria LiPo (C) sulla presa a tre
uscite dell‘equilibratore di tensione, il LED cambia colore. Il cari-
camento è completato quando il LED cambia di nuovo il colore.
Se il LED non cambia colore, la batteria è già carica.
La ricarica é completata in 180 min‘ e la durata del volo é media-
mente di 7 - 10 min.
Importante!
Lasciate che il modello dopo ogni utilizzo il tempo suf cien-
te per raffreddarsi prima di rimetterlo in funzione. Quando
si utilizza delle batterie per cambio deve essere rispettato
una fase di raffreddamento di 8 minuti tra ogni cambio della
batteria prima di rimetterlo in funzione. Il surriscaldamento
può danneggiare l’elettronica o pericolo d’incendio posso-
no esssere le conseguenze.
Nota importate:
Se notate che la vostra batteria appena collegata per la ri-
carica riscalda fortemente, staccatela immediatamente! Per
evitarne la distruzione. Lasciate raffreddare la batterie dopo
un volo prima di ricaricarle. Evitate di avvicinare amme li-
bere alle batterie LiPo evitando assolutamente di avvicinarle
a forti fonti di carore, perché potrebbero esplodere.
Attenzione!
Il modello consente un carico molto alto e può essere cari-
cato con vari dispositivi (dispositivi di carico, ecc). Il carico
massimo aggiuntivo no a 350 grammi. Il carico deve essere
ssato alla parte inferiore del modello, e deve essere ben
bilanciata. Si noti che la durata della batteria (l‘autonomia)
diminuisce, aumentando il carico.
ES - Cargar la batería principal
Desconecte el conector del modelo a la batería. Conecte el en-
chufe de alimentacion (A) en una toma de corriente y conecte el
alimentacion de 12 V en el enchufe de entrada del cargador (B).
La LED rojo (power) y verde (carga) se iluminan, indicando que
está listo para cargar. El LED power indica que la alimentación
funciona, el LED carga muestra que esta en funcion la carga.
Conecte la batería LiPo (C) con su conexion de equilibrador (3
polos ) a la salida de la caja de carga, el LED de carga va a
cambiar el color. Cuando la carga se ha completado el LED va
a cambiar de nuevo el color. Si cando conecetes la bateria no
cambia el color, signi ca que la bateria esta completamente
cargada.
Tempodecarga:180min.,
Tempodevuelo:7-10min
¡Importante!
Deje que el modelo después de cada uso el tiempo su ci-
ente para enfriarse antes de volver a ponerlo en funciona-
miento. Cuando se utiliza baterías para cambiar se tiene que
respetar una fase de enfriamiento de 8 minutos entre cada
cambio de las baterías antes de ponerlo de nuevo en funcio-
namiento. El sobrecalentamiento puede dañar la electrónica
o peligro de incendio puden ser la consecuencia.
Aviso importante:
Si la batería se calienta demasiado durante la carga, desco-
néctelas rápidamente del cargador, así evitará que se estro-
pee. Normalmente, tras volar la batería se habrá calentado.
En esto casos, se debe dehar enfriar la batería durante 30
minutos antes de bolber a cargarla. Nunca exponga una ba-
tería LiPo a una llama, podría provocar una exprosión.
Atención!
El modelo permite una muy alta capacidad de carga y pue-
den ser ensamblados con diferentes aparaos (soporte, etc).
El max. carga adicional es 350 gramos. La carga debe jarse
a la parte inferior del modelo y debe estar bien equilibrado.
Tenga en cuenta que la máx. duración de la batería cada vez
mayor reduce signi cativamente la carga.

5
DE - Zusammensetzen der einzelnen Komponenten
GB - Assemble the individual components
FR - Composition des composants individuels
IT - Assemblare i singoli componenti
ES - Montaje de los componentes individuales
DE - Montieren der Rotorblätter
1. Achten Sie darauf welches Blatt (A + B) links und rechts
montiert wird! Orientieren Sie sich dabei an der
Abbildung (Bild 1) und den Beschriftungen oben an den
Rotoblättern (Bild 2).
2. Bei falsch montierten Rotorblättern wird das Modell
unkontrollierbar sein!
Achtung! Bei Modell 422035 sind die Rotorblätter
bereits vormontiert.
GB - Mounting the rotor blades
1. Be sure which blade (A + B) is mounted on the left and
right side! Refer to the illustration (Fig. 1) and the la-
bels on the top of the rotor blades (Fig. 2).
2. If the rotor blades are incorrectly mounted, the
model will be uncontrollable!
Caution! The model 422035 has the rotor blades already pre-
assembled.
FR - Montage des pales de rotor
1. Faites attention quelle pale sera montée à gauche et
laquelle à droite (A + B) Veuillez regardez attentivement
l’image (image 1) et les étiquettes sur la face bas des
pales de rotor (image 3).
2. Le modèle sera ingérable en cas des pales de rotor
ont montées mal!
Attention pour le modèle 422035, les pales de rotor sont déjà
prémontées
IT - Montaggio delle pale del rotore
1. Assicurarsi quale pala (A + B) viene montata a destra e
a sinistra! Orientarsi all’immagine (Immagine 1)
e la scrittanella parte superiore delle pale (Immagine 2)
2. Se si montano le pale del rotore non correttamente,
il modello sarà incontrollabile!
Attenzione! Nel modello 422035, le pale del rotore sono già
premontatet.
ES - Montaje de las palas del rotor
1. Asegurarse cual pala (A + B) vien montado a la derecha
y izquierda! Orientarse a la imagen (Imagen 1) y las eti
quetas en la parte superior de las palas (Imagen 3).
2. Se se monta las palas incorrecto, el modelo será
incontrolable!
Atención! En el modelo 422035, las palas del rotor son
premontado.
12A
A
A
A
B
B
B
B
vorne
front
3
DE
3. Setzen Sie das Rotorblatt auf die Motorwelle. Achten
Sie darauf dass das Messinglager (3.2) in der Mitte des
Rotorblatt eingesetzt ist
GB
3. Place the rotor blade on the motor shaft. Make sure that
the brass bearing (3.2) is inserted in the middle of the
rotor blade
FR
3. Fixez une pâle de rotor sur l´axe du moteur. Assurez-
vousqueleroulementàressort(3.2)soitbienxéau
milieu de la pâle de rotor.
IT
3. Posizionare la pala sull’albero motore. Assicurar
si che il cuscinetto di ottone (3.2) viene inserito nel cen
tro della pala del rotore.
ES
3. Posicionar la pala del rotor en el eje del motor.
Asegúrese de que el cojinete de latón (3.2) se inserte
en el centro de la pala del rotor.
Messinglager
Brass Bearing
3.2
DE
4. Setzen Sie den Rotorblatthalter über das Rotorblatt.
5. Führen Sie den Sicherungsstift in das Loch an der
Motorwelle ein.
GB
4. Place the rotor blade holder over the rotor blade
5. Insert the retaining pin into the hole on the motor shaft
FR
4. placezlessupportsdexationsurlespâlesderotor.
5. insérez la goupille de sécurité dans le trou de l´axe
du moteur.
IT
4. Inserire il supporto del rotore sopra la pala del rotore.
5. Inserire il perno di bloccaggio nel foro al albero
motore.
ES
4. Coloque el soporte del rotor sobrre la pala del rotor.
5. Inserir el perno de bloqueo en el agujero en el eje
del motor.
Sicherungsstift
Retaining pin
45

6
DE
1. Enfernen Sie sie Schutzkappe (Abb. 1+1.1)
2. Stecken Sie den Rotorschutz in die Halterung
3. Schrauben Sie den Rotorschutz von unten mit zwei
Schrauben fest.
GB
1. Removetheprotectivecap(g.1+1.1)
2. Insert the rotor protection into the holder
3. Using two screws, secure the rotor guard from below
FR
1. Retirez les couvercles de protection (image 1+1.1)
2. Insérez la protection du rotor dans le support
3. Vissez la protection du moteur avec deux vis vers le bas
IT
1. Rimuovere la protezione del tappo (Immagine 1+1.1)
2. Inserire la protezione rotore nel supporto
3. Avvitare la protezione dal basso con due viti.
ES
1. Quitar la protección de la tapa (Imagen 1+1.1)
2. Insertar la protección en el soporte
3. Atornillar la protección desde abajo con dos tornillos.
DE -
6. Drehen Sie den Rotorblatthalter bis der Sicherungsstift
fest einrastet.
7. Drücken Sie nun die Abdeckung oben drauf
GB -
6. Rotate the rotor blade holder until the retaining pin enga
gesrmly
7. Press the top cover
FR -
6. tournezlessupportsdexationjusqu´àquelesgoupil
les de sécurité s´emboîteront solidement.
7. appuyez maintenant sur le couvercle du dessus.
IT -
6. Girareilsupportorotorenoacheilpernodi
bloccaggio si incastra.
7. Ora premere il coperchio sulla parte superiore.
ES -
6. Girar el soporte del rotor hasta que el perno de
bloqueo se encaje.
7. Ahora presione la tapa en la parte superior
6
1
2 3
7
1.1
DE - Zusammensetzen der einzelnen Komponenten
GB - Assemble the individual components
FR - Composition des composants individuels
IT - Assemblare i singoli componenti
ES - Montaje de los componentes individuales
DE - Montieren des Rotorschutz
GB - Mounting the rotor protection
FR - Montage de la protection des Rotor
IT - Montaggio della protezione rotore
ES - Montaje de la protección del rotor

7
DE - Montieren des Landegestells und GPS- Sensor
GB - Mounting the landing skid and GPS-Sensor
FR - monter le train d‘atterrissage
IT - Montaggio del carrello e il sensore GPS
ES - Montaje del tren de aterrizaje y el sensor GPS
DE
1. Starten Sie mit dem Fuß in dem der GPS-Sensor einge
baut ist.
2. Ziehen Sie das Kabel, welches aus dem Rumpf schaut
(Abb. 1) durch das Loch an dem Fuß (Abb. 2)
GB
1. Start with the foot in which the GPS sensor is installed
2. Pull the cable out of the hull (Figure 1) through the hole
on the foot (Figure 2)
FR
1. Commencez par le pied où le détecteur GPS est intégré
2. Retirez le câble, qui est dans la coque (image 1), à
travers le trou dans le pied (image2)
IT
1. Inizia con il piede in cui é installato il sensore GPS.
2. Tirare il cavo che guarda fuori dalla fusoliera
(Immagine 1) attraverso il foro al piede (Immagine 2).
ES
1. Comenzar con el pie donde está instalado el
sensor GPS.
2. Tirar el cable que mira hacia fuera del fuselaje
(Imagen1) a través del agujero en el pie (Imagen 2).
DE
3. Stecken Sie die Kabel zusammen.
GB
3. Plug the cables together
FR
3. Branchez les câbles ensemble
IT
3. Collegare i cavi insieme.
ES
3. Conectar los cables juntos.
DE
4. Setzen Sie den Fuß auf dem Rumpf auf.
5. Schrauben Sie den Fuß mit zwei Schrauben am Rumpf
fest.
6. Befestigen Sie die anderen 3 Füße am Rumpf wie bei 4.
und 5. beschrieben.
GB
4. Place the foot on the fuselage
5. Screw the foot with two screws on the fuselage
6. Attach the other 3 feet to the fuselage as described in
4 and 5
FR
4. Posez le pied sur le fuselage.
5. Vissezlepiedavecdeuxvisxementsurlefuselage
6. Fixez les 3 autres pieds sur le fuselage comme précisé
dans les points précédents 4 et 5.
IT
-4. Posizionare il piede sulla fusoliera.
5. Avvitare il piede con due viti alla fusoliera.
6. Fissare gli altri 3 piedi sulla fusoliera come descritto in
4. e 5.
ES
4. Posiciónar el pie en el fuselaje.
5. Atornillar el pie con dos tornillos en el fuselaje.
6. Fijar los otros 3 pies en el fuselaje como se describe
en 4. y 5.
1 2
3
4 5

8
4 5
DE
4. Schalten Sie den Sender ein. (Kurz drücken schaltet den
Sender ein, 3 Sek. drücken schaltet den Sender aus)
5. Schalten Sie den GPS - Hebel (Abb.5) oben rechts am Sen
der auf OFF bevor Sie den Bindevorgang starten.
GB
4. Turnonthetransmitter.(Pressbrieyswitchesonthetrans
mitter, press 3 sec. to switch off)
5. Turn the GPS switch (Fig.5) on the upper right of the trans
mitter to OFF before you start the binding process.
FR
4. Allumez l´émetteur. (Appuyez brièvement sur l´émetteur
pourl´allumer,unappuide3secondesestsufsantpour
l´éteindre)
5. Activez le GPS- avant de commencer le processus de
liaison, tournez le levier (image5) en haut à droite sur le OFF
IT
4. Accendere la trasmittente. (Premere brevemente, si accen
de la trasmittente, premere 3 secondi la trasmittente si
spegne)
5. Accendere il GPS – posizionare la leva in alto a destra della
radio su OFF prima di avviare il processo di binding.
ES
4. Encender la emisora. (Pulsar brevemente, se enciende
la emisora, pulsar 3 segundos la emisora se se apaga.)
5. Encender el GPS – posiciónar la palanca arriva a la
derecha en la emisora en OFF antes de iniciar el proceso
de biding.
123
DE
1. Legen Sie den Akku ins Akkufach des Modells ein.
2. Achten Sie darauf, dass das Modell ausgeschalten ist.
Verbinden Sie den Akkuanschluss mit dem Anschluss im
Modell und verschließen das Akkufach.
3. Schalten Sie das Modell ein und stellen es auf eine waag-
rechteOberäche.
GB
1. Insert the battery into the battery compartment of the model.
2. Make sure the model is switched off. Connect the battery
connector to the connector in the model and close the
battery cover.
3. Turn on the model. Place it on a horizontal surface
FR
1. Insérez la batterie à l´intérieur du compartiment de la batte
riedu modèle.
2. Assurez-vous que le modèle soit bien éteint. Branchez
le connecteur de la batterie au connecteur du modèle et
fermer le compartiment de la batterie.
3. Placez l’modèle sur une surface horizontale plane. Allumez
le modèle
IT
1. Inserire la batteria nel vano batteria del modello.
2. Assicurarsi che il modello è spento. Collegare il connettore
della batteria con il connettore al modello e chiudere il
vanno batterie.
3. Accendereilmodelloeposizionarlosuunasupercie
orizzontale.
ES
1. Inserir las baterías en el compartimiento de la batería del
modelo.
2. Asegúrese de que el modelo está apagado. Conectar
el conector de la batería al conector en el modelo y cerrar
el compartimiento de batería.
3. Encenderelmodeloyposiciónarsobreunasupercie
horizontal.
6
DE - Binden Sie Sender und Modell
6. Zum binden schieben Sie den Gashebel ganz nach
oben und wieder zurück, dabei ertönt ein akustisches Signal.
Wenn die LEDs am Modell dauerhaft brennen ist der Binde-
vorgang abgeschlossen. Sollte es nicht funktionieren,
wiederholen Sie den Prozess..
GB - Binding transmitter and model
6. For instalation put the gas pedal to the top and back, now an
acoustic voice. If the LEDs on the model permanently light,
the binding process is completed. After the radio binding is
done, you don‘t need to re-bind it anymore.
FR - Normal Mode Operation
6. Pour l’initialisation, poussez le manche des gaz
complètement en avant puis retour, un signal acoustique se
fera entendre. Les lumières LEDs sur le modéle brûlent en
permanence. L’modèle est maintenant utilisable. Si la LED
recommence à clignoter il faut réitérer le process.
IT - Binding della radio e modello
6. Perinizializzarepremerelalevadelgasnosopraetuttoil
tragitto indietro. Durante questa manovra si sente un segnale
acustico. Se i LED sono accesi sul modello è completato il
processo di associazione. In caso che il LED lampeggia,
ripetete la procedura.
ES - Binding de la emisora y modelo
6. Para iniciar, presione la palanca de gas hacia arriba y nueve
mente hacia atrás, te va a suenar un señal acústico. Si los
LED en el marco queman de forma permanente el proceso
de unión se ha completado. Si el LED vuelve a parpadear
o sigue parpadeando, repita el proceso de combinación.
DE - Kalibrierung von Kompass X & Y Achse
• Diese Kalibrierung muss unbedingt vor
der ersten Inbetriebnahme vorgenom-
men werden.
• Sie muss jedesmal wiederholt werden,
wenn sie sich outdoor weiter als 500m
vom letzten Einsatzort entfernt haben.
GB - Calibration of Compass X & Y axis
• This calibration must be carried out be
fore the rst ight
• It has to be repeated every time you
move 500m from the last place of use
FR - Calibrage du compas axes X & Y
• Ce calibrage doit toujours être fait
avant la première utilisation.
• Il doit être renouvelé à chaque fois
lorsque la dernière utilisation est faite
à l´extérieur avec une portée de plus de
500m.
IT - Calibrazione dalla bussola X & Y asse
• Questa calibrazione deve essere semp
re effettuata prima del primo utilizzo.
• Deve essere ripetuta ogni volta se
in outdoor siete lontano più di 500m
dall’ultimo posizione.
ES - Calibración de la brújula X & Y eje
• Esta calibración se debe realizar siemp
re antes del primer uso.
• Hay que repitir cada vez si estas más
lejos de 500 m outdoor de la última
posición.

9
DE
Video unter
https://www.youtube.com/watch?v=7E4Ci5MO6ZM
GB
Video under
https://www.youtube.com/watch?v=7E4Ci5MO6ZM
FR
Video via
https://www.youtube.com/watch?v=7E4Ci5MO6ZM
IT
Video sotto
https://www.youtube.com/watch?v=7E4Ci5MO6ZM
ES
Siguiento vídeo
https://www.youtube.com/watch?v=7E4Ci5MO6ZM
7 8
DE
7. Um die horizontale Kompasskalibrierung zu starten, drücken
Sie die Kompasstaste für 3 Sekunden nach oben. Der
Sender gibt einen Piepton von sich und die LEDs am Modell
beginnen zu blinken.
8. Drehen Sie das Modell horizontal solange in eine Richtung,
bis die LEDs aufhören zu blinken.
Achtung! Drehen Sie das Modell immer in die gleiche
Richtung.
GB
7. To start the horizontal compass calibration, press the com
pass key upwards for 3 seconds. The transmitter beeps and
theLEDsonthemodelstarttoash.
8. Rotate the model horizontally in one direction until the LEDs
stopashing
Attention! Always turn the model in the same direction.
FR
7. Pour commencer le calibrage du compas horizontal, tirez la
touche compas 2 secondes vers le haut. L´émetteur émet
ainsi un Bip et les voyants LED du modèle commencent à
clignoter.
8. Tournez le modèle horizontalement aussi longtemps que
dans une direction jusqu´à que les LED ne cessent de
clignoter.
Attention ! tournez le modèle toujours dans la même
direction.
IT
7. Per iniziare la calibrazione della bussola orizzontale, preme
re il pulsante bussola per 3 secondi verso l’alto. La radio
emette un segnale acustico e i LEDs al modello iniziano a
lampeggiare.
8. Girareilmodelloorizzontalmenteinunadirezionenoa
quando i LED smettono di lampeggiare.
Attenzione! Girare il modello sempre nella stessa
direzione.
ES
7. Para empezar la calibración de la brújula horizontal, presio
ne el botón de brújula para 3 segundos hacia arriba. La
emisora emite un pitido y los LEDs en el modelo empiezan
a parpadear.
8. Girar el modelo horizontalmente en una dirección hasta que
los LEDs dejan de parpadear.
Atención! Girar el modelo siempre en la misma
dirección.
10
7
9
DE
9. Um die vertikale Kompasskalibrierung zu starten, drücken
Sie die Kompasstaste für 3 Sekunden nach unten. Der
Sender gibt einen Piepton von sich und die LEDs am Modell
beginnen zu blinken.
10. Halten Sie Ihr Modell senkrecht und drehen es solange um
die vertikale Achse bis die LEDs am Modell aufhören zu
blinken.
Achtung! Auch hier gilt, immer in eine Richtung drehen!
GB
9. To start the vertical compass calibration, press the compass
key downwards for 3 seconds. The transmitter beeps and
theLEDsonthemodelstarttoash.
10. Take your model upright and rotate it around the vertical
axis until the LEDs on the model stop blinking
Attention! Again, always turn in one direction!
FR
9. pour commencer le calibrage du compas en mode vertica
le, tirez le bouton de compas pendant 3 secondes vers le
bas. L´émetteur émet ainsi un Bip et les voyants LED du mo
dèle commencent à clignoter.
10. Prenez votre modèle verticalement et tourner- le autour de
l‘axe vertical jusqu‘à que les voyants LED du modèle ne ces
sent de clignoter.
Attention ! Tournez encore une fois le modèle toujours
dans la même direction.
IT
9. Per iniziare la calibrazione della bussola verticale, premere
il pulsante bussola per 3 secondi verso il basso. La radio
emette un segnale acustico e i LEDs al modello iniziano a
lampeggiare.
10. Tenere il modello in verticale e ruotarlo intorno all’asse verti
calenoaquandoiLEDsdelmodellosmettonodi
lampeggiare.
Attenzione! Anche qui vale, ruotare sempre in una
direzione!
ES
9. Para empezar la calibración de la brújula verticales,
presione el botón de brújula durante 3 segundos hacia
abajo. La emisora emite un pitido y los LEDs en el modelo
empiezan a parpadear.
10. Mantenga su modelo en vertical y girarlo en su propio eje
vertical hasta que los LEDs en el modelo dejan de
parpadear.
Atención! Tambien aquí se aplica, simpre girar en una
dirección!

10
DE
3. Um zu überprüfen ob GPS-Empfang vorhanden ist, schal-
ten Sie das GPS oben rechts am Sender an.
4. Wenn die der Empfang in Ordnung ist, blinken die LEDs
am Modell. Sollten die LEDs am Modell nicht blinken,
Ist das GPS-Signal zu schwach.
GB
3. To check if GPS reception is available, turn on the GPS at
the top right of the transmitter.
4. Whenthereceptionissufcient,theLEDsonthemodel
ash.IftheLEDsonthemodeldonotash,theGPSsignal
is too weak.
FR
3. PourvérierlaprésencedevotreGPS,allumezleGPS
en haut à droite de l´émetteur.
4. Si la réception est en ordre, les lumières de votre modèle
commenceront à clignoter. Si les voyants LED de votre mo
dèle ne clignotent pas, le signal GPS est ainsi très faible.
IT
3. Per controllare se la ricezione GPS è disponibile, accendere
il GPS in alto a destra della trasmittente.
4. Se la ricezione è in ordine, lampeggiano i LEDs sul modello.
Se i LED non lampeggiano sul modello, il segnale GPS
è troppo debole.
ES
3. Para comprobar si la recepción GPS está disponible,
encender el GPS en la parte superior derecha de la
emisora.
4. Si la recepción está ok, parpadean los LEDs en el modelo.
Si los LEDs no parpadean en el modelo, el señal GPS es
demasiado débil.
.
DE - Kalibrierung von Gyro und Coming-
Home Punkt:
Diese Kalibrierung muss unbedingt vor
jedem Betrieb vorgenommen werden.
GB - Calibration of Gyro and Coming-Home
Point:
This calibration must be performed
before each operation.
FR - Calibrage du Gyro et Coming-Home
Punkt :
Ce calibrage doit être impérativement
fait avant chaque opération.
IT - Calibrazione del punto Gyro é
Coming-Home:
Questa calibrazione deve essere semp
re eseguita prima di ogni operazione.
ES - Calibración del punto Gyro y
Coming-Home:
Esta calibración debe realizarse siempre
antes de cada operación.
DE
1. Nehmen Sie die Schritte 1 - 6 von der Kalibrierung von
Kompass der X & Y Achse.
2. Bringen Sie beide Steuerhebel für 3 Sekunden um 45 Grad
nach links/unten um den Gyro zu kalibrieren.
Bringen Sie beide Steuerhebel für 3 Sekunden um 45 Grad
nach rechts/unten, um den Coming-Home Punkt zu erfas
sen. Dafür darf das Modell nicht bewegt werden.
GB
1. Move both control sticks 45 degrees to the left/ bottom for
3 seconds to calibrate the gyro.
2. Move both control sticks 45 degrees to the right/ bottom for
3 seconds to capture the coming home point. Do not move
the model.
FR
1. Rejoignez les deux leviers de commandes pendant 3
secondes à 45° vers la gauche / le bas pour calibrer le Gyro.
2. Rejoignez les deux leviers de commande pendant 3
secondes à 45° vers la droite / le bas pour effectuer le
Coming-Home Punkt. Pour cela, votre modèle ne doit
pas être déplacé / votre modèle doit être stable.
IT
1. Prendere i passaggi 1 – 6 della calibrazione della bussola
del asse X & Y.
2. Portare entrambi le leve di controllo per 3 secondi a 45
gradia sinistra/in basso per calibrare il Gyro.
Portare le due leve di controllo per 3 secondi a 45 gradi
a destra/in basso, per prendere il punto Coming-Home.
Per questo, il modello non deve essere spostato.
ES
1. Tomar los pasos 1 – 6 de la calibración de la brújula del
eje X & Y.
2. Llevar ambos palancas de control durante 3 segundos para
45 grados a la izquierda/abajo para calibrar el Gyro.
Llevar las dos palacas de control durante 3 segundos
para 45 grados a la derecha/abajo, para encontrar el punto
Coming-Home. Para esto, el modelo no se puede mover.
12

11
1.1 1.2 2
3 4
DE -
1. Starten und Landen des Modells.
•Starten
Drücken Sie beide Steuerhebel 45 Grad nach unten/
außen 1.1 oder innen 1.2, die Rotoren beginnen sich zu
drehen. Drücken Sie den Gashebel langsam nach oben
und das Modell wird abheben.(Bild 2)
•Das Modell landen:
Möglichkeit 1 Ziehen Sie den linken Steuerknüppel für
einige Sekunden nach unten (Bild 3).
Die Rotoren werden langsamer und das
Modell landet.
Möglichkeit 2 Autolanding:
Wenn Sie die Taste (Bild 4.1) im Flug kurz
drücken reduziert das Modell im Flug
automatisch so weit die Höhe bis es auf-
setzt und zum Stillstand kommt. Während
dessen muss das Modell weiterhin
gesteuert werden. Der Assistent über-
nimmt nur die Höhenkontrolle.
2. Notfallabschaltung:
Sollte sich eine Situation ergeben in der das Modell schnellst-
möglich abgeschaltet werden muss, können Sie dies indem
Sie 3 Sekunden die linke obere Taste am Modell, wie auf Bild
4 (4.2) dargestellt, drücken. Die Rotoren werden sofort ge
stoppt, das Modell stürzt ab. Um das Modell wieder starten zu
können, müssen Sie das Modell und den Sender neu starten.
GB -
1. Start/Stop operating method of the aircraft.
•Start the aircraft:
To unlock the model press both control sticks 45 degree
down and outwards (pic. 1), the rotors begin to rotate
Push upward the throttle lever, the aircraft will take off.(2)
• Stop the aircraft:
Way 1 Keep the left lever in the down position for
a few seconds (pic3), the aircraft will slowly
landing pack to earth. Hold the left lever down,
the rotors stop.
Way 2 Land/ Start Assistant
If you press the button (pic. 4.1) when the model
ying,automaticallyreducedthemodellaltitude
duringightuntilittouchesdownandwillthen
come to a standstill. You will have to continue
stearing the model. The assistant only takes
control of the height.
2. Emergency Stop:
In the case that it is fallen off by accident or meeting the
dangerduringthecourseofying,pleasepresstheleftupper
button for 30 seconds to start the emergeny stop, as the
picture 4 (4.2) shown. The rotors are stopped immediately,
the model crashes. To restart the model, you must restart
the model and transmitter.
FR -
1. Démarrage et arrêt du modèle.
• Démarrage du modèle:
Déplacer les deux leviers de commande jusqu´à 45° vers
le bas et extérieur (gure1), les hélices commencent par
tourner. Poussez le levier d‘accélérateur lentement vers le
haut,lemodèlecommenceàdécoller.(gure2)
• Atterrissage du modèle:
1èrepossibilité: Appuyersurlelevierdecommande
vers le bas pour un petit moment
(gure3). Les rotors commencent à
tourner plus lentement et le modèle
atterrit lentement.
2èmepossibilité: Atterrissageetdécollage
automatique
Si vous appuyez cette touche en plein
vol (gure4.1), l’altitude se réduira
automatiquement jusqu’à ce que le
modèle atterrisse tout seul. Pendant
ce processus, vous pouvez toutefois
contrôler la direction.
2. Arrêt d´urgence :
Si une situation de risque se présente pour laquel le modèle
doit être arrêté aussi vite que possible, appuyez 3 secondes
surleboutonduhautdumodèle,commelemontrelagure
4 (4.2). Les rotors sont arrêtés immédiatement et le modèle
se bloquera ainsi. Pour redémarrer le modèle, vous devez
remettre en marche le modèle et l´émetteur.
IT -
1. Decollare e stoppare del modello.
• Decollare il modello:
Portare le due leve di controllo di 45° a sinistra o destra in
basso nel esterno (Figura 1), i rotori cominciano a girare.
Premere la leva del gas lentamente verso l’alto e il
modello decollerà. (Figura 2)
• Atterrare il modello:
Opzione1: Tirarelalevadell‘acceleratoreposteriore
(3), il modello viene ridotto
ed èterreno. I rotori si fermano.
Opzione2: Assistenteperl’atterraggio/decollo:
Se si preme il pulsante in volo (4,1)
riduce automaticamente il modello in volo
perquantoriguardal‘altezzanoa
toccare il basso e si ferma. Nel frattempo,
il modello deve essere ulteriormente
controllato. L´assistente prende solo il
controllo .
2. Sconnession d`emergenza:
Se emerge una situazione in cui il modello deve essere
spento immediatamente, e possibile farlo premendo il
pulsante in alto a sinistra per 3 secondi, come mostrato in
Figura 4 (4.2). I rotori vengono fermati immediatamente e il
modello si blocca. Per avviare nuovamente il model lo e
necessario riavviare il modello e la trasmittente.
ES -
1. Despegar y detener del modelo
• Despegar el modelo
Llevar las dos palancas de control de 45° hacia izquierda
o bien derecha abajo en exterior (imagen 1), los rotores
comienzan a girar. Presione la palanca de gas lentamente
hacia arriba y el modelo va a despegar. (imagen2)
• Aterrizar el modelo:
Opción1: Tiredelapalancadelacelerador(imagen
3), el modelo se reduce y aterrizará. Los
rotores se detienen.
Opción2: Asistentedeaterrizar/despegar:
Si pulsa el botón en vuelo (imagen 4.1) el
modelo se reduce en vuelo
automáticamente por lo que la altura
hasta que toque hacia abajo y se detiene.
Mientras tanto, el modelo se tiene que
controlar ulteriormente. El asistente sólo
toma el control de altura.
2. Desconexión de emergencia:
Si surge una situación en la que el modelo debe ser
apagado inmediato, es posible hacerlo pulsando el botón
superior de la izquierda durante 3 segundos, como se
muestra en la imagen 4 (4.2). Los rotores se detienen
inmediatamente y el modelo se bloque. Para reiniciar el
modelo es necesario reiniciar el modelo y la emisora.
4.2
4.1
DE - Anfänger/Fortgeschritten/Pro Modus
Durch kurzes drücken des Knopfes links oben an der Fern-
steuerung, können Sie zwischen 3 Flug-Modi wählen.
A. Einsteiger-Modus (1 x Peep)
Das Modell hat geringe Ausschläge, Steuerbefehle werden
sanft ausgeführt.
B. Fortgeschrittener-Modus (2 x Peep)
Die Ausschläge des Modells sind größer, Steuerbefehle
werden direkter ausgeführt.
C.Pro-Modus(3xPeep)
Volle Ausschläge am Modell, Steuerbefehle werden agresiv
umgesetzt.
GB - Beginners/advanced/expert mode
By pressing the speed control stick on the transmitter you will
beabletochoosefrom3ightmodes.
A. Beginner mode (1 x beep)
Themodelhassmalldeexions,controlsareperformed
smoothly.
B. Advanced mode (2 x beep)
Thedeexionsarehigher,controlsareperformeddirectly.
C. Expert mode (3 x beep)
Fulldeexiononmodel,controlsareperformedaggressi
vely.
FR - Mode débutant/avancé/professionnel
En appuyant sur la manette des gaz de la télécommande,
vous pouvez choisir entre trois modes de vol.
A. Mode débutant (1 x beep)
Lemodèleadesdéviationsinsigniantes,commandesde
contrôle sont accomplis doucement.
B. Le mode avancé (2 x beep)
Les déviations sont plus grandes, commandes de contrôle
sont accomplis plus direct.
C. Le mode professionnel (3 x beep)
Déviations entières au modèle, commandes de contrôle
sont accomplis agressivement.
IT - Modus principiante/avanzato/expert
Premendo il leva gas sulla radio è possibile scegliere tra 3
modalità di volo
A. Modus principiante (1 x beep)
Il modello reagisce molto docile e “morbido” ai comandi.
B. Modus avanzato (2 x beep)
La reazione del modello e più preciso.
C. Modus expert (3 x beep)
Reazione molto precisa ai comandi.
ES - Modo Principiante/Avanzado/Experto
Presionando el gas palanqua de la emisora se puede elegir
entre 3 modos de vuelo.
A. Modo principiante (1 x beep)
El modelo tiene pequenas erupciones, los comandos de
control vienen efectuado delicado.
B. Modo avanzado (2 x beep)
Los erupciones son más grandes, los comandos de control
vienen efectuado directamente.
C. Modo experto (3 x beep)
Erupciones completos sobre el modelo, comandos de
controls son agresivos.

12
DE - Der Betrieb mit GPS
• Fliegen Sie niemals mit aktiviertem GPS in ein nicht GPS
versorgtes Gebiet wie z.B. unter Brücken, in Hallen durch
Unterführungen oder in einen Wald. Sollte es zu einem
GPS-abbruch kommen deaktivieren sie sofort das GPS
(Hebel Rechts oben am Sender) Das Modell wird sonst
unkontrolierbar
•Bei aktiviertem GPS hat ihr Modell einen Position-Hold-
Mode
d.h. das Modell bleibt auf einer Stelle in der Luft stehen
(abweichend ca 1m) und Sie müssen es nicht steuern auch
bei leichtem Wind wird es seine Position halten.
Anfangs kann die Position noch leichte abweichungen ha
ben, dies pendelt sich in der Regel nach ein paar Minuten
ein und Ihr Modell wird ziemlich ruhig auf einer Stelle stehen.
• Die Coming-Home-Funktion (nur bei aktivierter GPS-
Funktion)
Ihr Modell verfügt über eine Coming - Home - Funktion. Das
heißt es ist in der Lage automatisch an seinem Startpunkt zu
landen.Es ist wichtig, dass das GPS den Start-/Landepunkt re-
gistriert, damit die Coming-Home-Funktion funktionieren kann.
Den Start-/Landepunkt speichert das Modell beim Kalibrieren
(Siehe Seite 9).
Die Coming-Home-Funktion kann nur in Verbindung mit GPS
aktiviert werden. Ist das Modell weiter als ca. 5m von Ihnen ent-
fernt, wird das Modell bis ca. 20-30m in die Höhe steigen und
kommt dann an Seinen Start-/Landepunkt und senkt sich auf den
Landepunkt, dieser kann bis zu ca. 1-2m abweichen.
Das Modell fliegt im Coming-Home-Modus den direkten Weg zu-
rück, nicht die geflogene Flugbahn.(Bild 1) Achten Sie deshalb
immer darauf dass sie nicht über Häuser, Bäume oder ähnliches
fliegen, da es sonst beim Coming-Home-Modus zu Unfällen
kommen kann.
•Sinkt die Spannung des Modell-Akkus bzw. sind die
Batterien des Senders zu schwacht, kommt das Modell
automatisch zum Ausgangspunkt zurück.
• Betätigen Sie während des Coming- Home fluges den rech
ten Steuerknüppel wird die Coming-Home
Funktion abgeschalten und Sie müssen Ihr Modell
wieder selbstständig steuern.
•Aus Gründen der Sicherheit und um zufriedenstellende Flug-
ergebnisse zu erzielen, ist auf einen ausreichend großen
freien Raum zu achten, es dürfen keine Häuser, Strommas-
ten oder Bäume in der nähe sein.
•Stellen Sie sicher, dass das GPS Kabel richtig verbunden
ist,
•Für die Achseneinstellung bei der Kompasskalibrierung
muss das Modell mit der Hand gehalten werden. Durch das
drehen auf demBoden können Störungen verursacht
werden.
GB - Operation with GPS
• NeverywithGPSenabledinanon-GPSarea,suchasun
der bridges, in halls through underpasses or in a forest. If
GPS crashes, disable the GPS immediately (stick at top
right of the transmitter) otherwise the model will become
uncontrollable.
• WhentheGPSisactivated,themodelhasaposition-hold
mode, e.g. the model remains in the air in a position (devi
ating about 1m) and you do not have to control it even in
lightwinditwillholditsposition.Atrst,thepositionmaystill
have slight deviations; this usually settles after a few
minutes and your model will stand quite calmly in one place.
• The Coming-Home function (only when the GPS
function is activated).
Your model has a Coming-Home function. This means it is
able to land automatically at its starting point. It is important
that the GPS registers the start/ land point so that the Coming
Home function can work.
The start/ end point is stored by the model during calibration (see
page 9).
The Coming-Home function can only be activated in conjunction
with GPS. If the model is more than 5m away from you, the mo-
del will rise up to about 20-30m and then comes to its start/ land
point and descends to the land point, which can differ up to about
1-2m.ThemodeliesthedirectwaybackintheComing-Home
mode,nottheownpath(Fig.1).Alwayskeepinmindthatthey
donotyoverhouses,treesorsimilar,otherwiseaccidentsoccur
in Coming Home mode.
• Ifthevoltageofthemodelbatterydropsorthebatteriesof
the transmitter are too weak, the model automatically
returns to the starting point.
• IfyoupresstherightstickduringtheComingHomeight,
the Coming Home function will be switched off and you will
have to control your model independently.
• Forreasonsofsafetyandtoachievesatisfactoryightre
sults,ensureasufcientlylargefreespace,nohouses,
electricity masts or trees should be in the near by.
• MakesuretheGPScableisproperlyconnected.
• Themodelmustbeheldinyourhandduringtheaxis
adjustment/compasscalibration.Rotatingontheoorcan
cause interference.
FR - Fonctionnement avec GPS
•Ne pilotez jamais votre modèle en mode GPS dans les
lieux GPS non autorisés tels que sous les ponts, dans les
Halls des passages souterrains ou dans les forêts. Si un
arrêt GPS apparaît, désactivez immédiatement votre mode
GPS (Levier de droite, en haut de l´émetteur). Votre modèle
deviendra sinon incontrôlable.
•Avec l´activation de votre GPS, votre modèle maintiendra
doncla«Position-Hold-Mode»celasigniequelemodèle
maintiendra sa position via un point précis dans l´air
(déviant d´environ 1m) et même avec de vents légers,
vous n´aurez pas le besoin de contrôlé le modèle, il
maintiendra sa position. Lors des premières utilisations, la
position pourrait avoir de légères différences. Après quel
quesminutesd´utilisation,votremodèlesexeraautomati
quement assez calmement sur un seul endroit.
•La fonction « Coming-Home-Punkt » est mis en service
avec uniquement avec l´activation de la fonction GPS.
Votre modèle dispose d´une fonction «Coming-Home-Punkt ».
Celasigniequevotremodèlereviendraautomatiquementàsa
position de départ. Il est strictement important que votre GPS
enregistrevotrepointdedécollageetd´atterrissage,anquela
fonction «Coming-Home-Punkt » puisse fonctionner. Le point de
décollage et d´atterrissage est enregistré dans votre modèle lors
de la calibration (voir page 9). La fonction «Coming-Home-Punkt
» peut-être essentiellement activer avec la combinaison GPS de
votre modèle. Si le modèle est à 5mètres loin de vous, le modèle
peut voler jusqu´ à environ 20 à 30mètres dans l´air et vient ainsi
à son point de départ / d´atterrissage, et descend ainsi au point
d’atterrissage, cela peut varier entre 1 à 2m. Vote modèle volera
en mode « Coming-Home-Modus » via une trajectoire directe
et non avec la trajectoire parcourue (image1). Veuillez toujours
donc à veillez qu´il n´y ai pas de maison, arbres ou obstacles
similaires, qui pourrais conduire á des accidents avec le mode
«Coming-Home-Modus ».
•Si la tension de la batterie du modèle, ou bien la batterie ou
voir même les piles de l´émetteur sont faible, le modèle revi
endra automatiquement au point de départ.
•Si vous appuyez À droite sur le levier de commande pen
dant le « Coming-Home », la fonction « Coming-Home »
sera ainsi désactivé, vous devrez ainsi de nouveau
contrôlervotre modèle indépendamment.
• Pourdesraisonsdesécuritéetand´obtenirdesrésultats
satisfaisant de vol, faites attention à piloter votre modèle
dansunespacesufsammentgrand,avecaucunemaison,
arbre ou lignes électriques à proximités de votre lieu de vol.
•Assurez-vous que vos câbles GPS soient correctement
connectés.
•Pour le paramétrage du calibrage du Compas, le modèle
doit absolument être conservé dans vos mains.
En tournant sur le sol, votre modèle pourrait être
endommagé.
IT - Funzionamento con GPS
• MaivolareconilGPSattivatoinunazonanonattrezzata
di GPS ad esempio, come sotto i ponti, capannoni, sotto
passaggi o in un bosco. Se ce una demolizione GPS disat
tivare immediatamente il GPS (Leva superiore a destra
della radio). Il modello è altrimenti incontrollabile.
• QuandoilGPSeattivato,ilmodellohaunaModalità-Posi
tion-Hold, vuole dire che il modello rimane ad un certo pun
to nell’aria (deviando ca. 1m) e non deve controllarlo anche
con vento leggero mantiene la sua posizione. Inizialmente,
la posizione può avere piccoli deviazioni, questo si riprende
in genere dopo pochi minuti e il vostro modello rimane ab
bastanza tranquilla in un’unica posizione.
• La funzione Coming-Home (solo con funzione GPS
attivata)
IltuomodellohaunafunzioneComing-Home.Ciòsignicache
e in grado di atterrare automaticamente al punto di partenza. E
importante che il GPS registra il punto di decollo/atterraggio, in
modo che la funzione Coming-Home può funzionare. Il punto di
decollo/atterraggio il modello lo memorizza durante la calibra-
zione (Vedi pagine 9). La funzione Coming-Home può essere
attivata solo in combinazione con il GPS. Se il modello e più di
5mdidistanza,il modellosialzerà noaca.20-30min altoe
poi viene al suo punto di decollo/atterraggio e scende al punto di
atterraggio,questopuòdeviarenoaca.1-2m.Ilmodellovola
in modalità Coming-Home la via diretta indietro, non la traiettoria
volata. (Immagine 1). Assicurarsi che non si vola sopra le case,
alberi o simile, perché in modalità Coming-Home può causar dei
incidenti.
• Selatensionedellabatteriadelmodelloscendeolebatte
rie della radio sono debole, il modello ritorna automatica
mente al punto di partenza.
• PremereduranteilvoloComing-Homelalevadicontrollo
destra, la funzione Coming-Home viene spenta ed e neces
sario controllare il modello di nuovo in modo indipendente.
• Permotividisicurezzaeperrisultatidivolosoddisfacenti,
prestareattenzioneadunsufcientementeampiospazio
libero, non ci possono essere case, pilone dell’alta tensione
o alberi nelle vicinanze.
• AssicurarsicheilcavoGPSsiacollegatocorrettamente.
• Perlaregolazionedell’assenellacalibrazionedellabussola,
il modello deve essere mantenuto in mano. Girando a terra
può causare disturbi.
ES - Funcionamiento con GPS
• NuncavolarconelGPSactivadoenunáreanoequipado
de GPS por ejemplo, bajo de los puentes, pabellónes, a tra
vés paso inferior o en un bosque. Se hay una demoliciones
GPS descativar inmeditamente el GPS (Palanca superior
derecha de la emisora). El modelo es de otra manera
incontrolable.
• ConelGPSactivadosumodelotieneunMododePosition-
Hold, es decir que el modelo se mantiene en un cierto pun
to en el aire (desviación de aprox. 1m) y no debe controlar
lotambién con vientos ligeros mantendrá su posición. Inci
almente, la posición todavía puede tener ligeras discrepan
cia, esto se establece en general al cabo de unos minutos y
su modelo será bastante tranquilo en una posición.
• La función Coming-Home (sólo con la función GPS
activado)
SumodelotieneunafunciónComing-Home.Estosignicaque
es capaz de aterrar automáticamente a su punto de partida. Es
importante que el GPS registra el punto de despegue/aterriza-
je, de modo que puede funciónar la Función- Coming-Home. El
punto de despegue/aterrizaje el modelo lo memoriza durante la
calibración (ver la página 9).
La función Coming-Home se puede activar sólo en combinación
con el GPS. Si el modelo está más de 5m de distancia, el modelo
va a subir hasta aprox. 20-30m en el aire y luego llega a su punto
de despegue/aterrizaje y desciende al punto de aterrizaje, esto
puede diferir de aprox. 1-2m.
El modelo vuela en el modo Coming-Home la ruta directa hacia
atrás, no la trayectoria volada (Imagen 1). Asegúrese siempre de
que no vuelan sobre las casas, árboles o similares, porque en el
modo Coming-Home puede causar accidentes.
• Sielvoltajedelabateríadelmodelobajaolasbateríasde
la emisora son débil, el modelo volverá automáticamente
al punto de partida.
• PulseduranteelvueloComing-Homelapalancadecontrol
derecha, la función Coming-Home se desactiva y es necesa
rio controlar el modelo de nuevo de forma independiente.
• Porrazonesdeseguridadypararesultadosdevuleosatis
factorios,prestaratenciónaunsucientementegrandees
pacio libre, no pueden estár cerca casas, torre eléctricas o
árboles.
• AsegúresedequeelcabledelGPSestáconectado
correctamente.
• Paraelajustedelejeenlacalibracióndelabrújula,elmo
delo se debe mantener con la mano. Girando en el suelo
puede causar problemas.
Your ight
Coming-Home
1

13
◄
A
DE - Kompassfunktion:
Ihr Modell verfügt über eine Kompassfunktion (A). Das heißt es
ist in der Lage trotz einer Drehung (der Rumpf zeigt nicht mehr
in Flugrichtung) die ursprüngliche Flugrichtung beizubehalten.
Zuerst sollten Sie sich Gedanken machen welche Richtung Sie
im Kompass des Models abspeichern wollen. Diese Richtung
wird beim aktivieren des Kompassmodus automatisch zur ab-
gespeicherten Flugrichtung. Möchten Sie also z.B. einen Weg
entlangiegen undwährenddessen den Kompassmodus ver-
wenden wählen Sie die Richtung in die der Weg führt als Grund-
richtung für den Kompass. Die Grundrichtung des Kompass wird
bei der Kalibrierung (Seite 8) eingestellt. In die Richtung wie Sie
das Modell bei der Kalibrierung stehen haben ist dann die Kom-
passrichtung. Wenn Sie nun das Modell im Kompassmodus um
die eigene Achse drehen lassen müssen Sie sich keine Gedan-
ken um die Flugrichtung an der Fernsteuerung machen. Wenn
Sie den rechten Steuerknüppel nach vorne drücken wird das
ModelinRichtungdesWegesvonihnenwegiegen.WennSie
den rechten Steuerhebel zu sich herziehen wird sich das Model
den Weg entlang auf Sie zu bewegen.
GB - Compassfunction
Your model has a Compass function. This means it is able to
keepthedesiredybackdirectionevenifitturnsinanotherdi-
rectionduring ight(the front does notface the ightdirection
anymore)andiesbacktoyou
First of all you should choose the direction that you want to save
in the compass of the model. This direction is used by the com-
passasthemain ightdirection.Forexample,youyalong a
straight path and would like to use the compass mode; you have
tochoosethedirection ofthepathas themainightdirection.
Now if you are using the compass mode (page 8) to follow a
movingobjectyoudonothavetowasteathoughtontheying
direction of the model. If you push the steering stick to the front
themodelwillyawayfromyou.Ifyoupullthesteeringstickto
thebackthemodelwillybacktoyoufollowingthedirectionof
the path (Compass function).
FR - Fonction boussole
Votre modèle a une fonction boussole. Cela signie qu´il peut
garder sa direction de vol initiale malgré une rotation (le fuselage
nesetrouveplusendirectionduvol.).D’abordvousdevriezré
échir à la direction dans laquelle vous
voulez sauvegarder la boussole du modèle. Diese Richtung wird
beim aktivieren des Kompassmodus automatisch zur ab- ge-
speicherten Flugrichtung. Si vous voulez voler le long de cette
voie et au même moment prendre le mode boussole, choisissez
la direction dans laquelle mène le chemin comme direction de
base pour la boussole. Quand vous tournez le modèle en mode
compas(page8)sursonaxe,pourlmerunobjetquisetrouve
àcôtédevotremodèle,ilnefautpasrééchirsurladirectionde
vol à la radiocommande. Si vous pressez le levier de commande
droit an avant, le modèle va s’envoler de vous en direction cette
voie. Quand vous rapprochez le levier de commande à vous, le
modèle va se diriger le long de ce chemin vers vous.
IT - Funzione di bussola:
Ilvostromodellohaunafunzionebussola(A).Ciòsignicacheè
in grado nonostante una rotazione (la fusoliera non è in direzione
di volo) di mantenere la direzione originale del volo.
Per primo deve aver una idea in quale direzione desidera memo-
rizzare la bussola del modello. Questa direzione quando attiva
il modo bussola e automaticamente la nuova direzione di volo.
Quindi, se volete ad esempio volare lungo il percorso e usare la
modalità bussola scelga la direzione in cui il percorso conduce
come la direzione di base della bussola. La direzione di base
della bussola viene impostata alla calibrazione (pagina 8). Nella
direzione in qui ha il modello durante la calibrazione è poi la dire-
zione della bussola. Se ora deve far ruotare il modello attorno al
proprio asse in modalità bussola non ce bisogno di preoccuparsi
per la direzione di volo sulla radio. Se preme la leva di controllo
destro in avanti il modello volerà in direzione del percorso via da
voi. Se preme la leva di controllo destro verso di voi il modello
volerà in direzione della percorso verso di voi.
ES - Función de brújula:
Sumodelotiene unafunciónbrújula(A).Esto signicaque es
capaz no obstante de una rotación
(fuselaje no está en la dirección de vuelo) mantener la dirección
original de vuelo.
En primer lugar, usted debe pensar en la dirección que desea
almacenar en la brújula del modelo. Esta dirección cuando se
activa el modo de brújula es automáticamente la nueva dirección
del vuelo. Así que si quieres, por ejemplo volar a lo largo del
camino y utilizar el modo de brújula selecciona la dirección en la
que el camino conduce como la dirección básica de la brújula. La
dirección básica de la brújula se establece durante la calibración
(página 8). En la dirección que usted tiene durante la calibraci-
ón es entonces la dirección de la brújula. Si ahora hace girar
el modelo alrededor de su propio eje en el modo de brújula no
tiene que preocuparse de la dirección de vuelo en la emisora. Si
presiona la palanca de control derecha hacia adelante el modelo
va a volar en la dirección del el camino lejos de usted. Si tire la
planca de control derecha hacia usted el modelo va a volar en la
dirección del el camino hacia usted.
DE - Achtung.
Sofern Ihr Modell einen Ein/Aus-Schal-
ter besitzt, schalten Sie das Modell im-
mer unmittelbar nach jedem Einsatz
aus. Besitzt Ihr Modell einen heraus-
nehmbaren Akku bzw. eine trennbare
Steckverbindung zum Akku, sollte un-
mittelbar nach jedem Einsatz der Akku vom Modell getrennt
werden. Durch versehentliches eingeschaltet lassen oder
Akku angesteckt lassen kann der Akku tiefenentladen wer-
den. Durch Tiefenentladung verliert der Akku an Leistung
bzw. kann so stark beschädigt werden, dass ein Laden bzw.
Entladen nicht mehr möglich ist bzw. der Akku beim Lade-
oder Entladevorgang selbstentzünden kann (Brandgefahr).
Versuchen Sie niemals tiefenentladene Akkus zu Laden bzw.
zu Entladen.
Die Spannung des Akkus sollte niemals unter 6 Volt fallen
um eine Tiefenentladung zu vermeiden. Der vollständig
geladene Akku hat eine Spannung von ca. 8,4 Volt. Nach
dem Gebrauch sollte der intakte Akku umgehend nach ei-
ner Abkühlphase von min. 10 Minuten aber spätestens nach
12h vollgeladen werden um eine anschließende Tiefenent-
ladung durch Selbstentladung zu vermeiden. Bei längerem
Nichtbenutzen des Akkus bzw. Einlagerung sollte der Akku
min. alle 3 Monate auf Spannung (min. 8 Volt) bzw. Beschä-
digung überprüft und gegebenenfalls aufgeladen bzw. ent-
sorgt werden.
GB - Danger.
If your model has an on/ off switch, always turn off the mo-
del immediately after each use. If your model has a remo-
vable battery or a disconnectable connector to the battery,
the battery should be disconnected from the model immedi-
ately after each use.
The battery can be deep-discharged by accidentally turning
it on or by leaving the battery plugged in.
By deep discharge the battery it loses power, can be da-
maged so much that charging or discharging is no longer
possible and the battery can ignite itself during charging
or discharging ( re hazard). Never attempt to charge or di-
scharge deep-discharge batteries.
The voltage of the battery should never be under 6 volt to
avoid a deep discharge. The fully charged battery has a
voltage of 8,4 volt. After usage, the intact battery has to be
fully charged after a cooling phase of at least 10 min but
not longer than 12 hrs. This is to avoid a deep discharge
caused by a self-discharge. When not using or storing the
battery it has to be checked at least every three months for
voltage (min. 8 volt) or damage and if necessary charged
or disposed.
FR - Attention!
Attention: dans la mesure où votre modèle dispose d´un
interupteur marche / arrêt, eteignez votre modèle aprés
chaque utilisation. Si votre modèle dispose d´une batterie
amovible et un connecteur séparable pour la batterie, ap-
rès chaque utilisation la batterie doit être déconnectée du
modèle immédiatement. La batterie peut-être totalement dé-
chargée si celui-ci reste allumé lors du chargement et peut
être contaminé. Une décharge profonde peut entrainer une
perte de la puissance de la batterie et peut ainsi endommagé
celle-ci, une charge ou décharge est plus possible lorsque
la batterie est en charge ou peut entainer une combustion
spontanné ( risque d´incendie). Ne tentez jamais de déchar-
ger profondément les batteries à charger ou à décharger.
La tension de la batterie ne doit jamais être sous 6 Volt pour
éviter une décharge profonde. La batterie complètement
chargée a une tension d‘environ 8,4 Volt. Après utilisation,
la batterie intacte doit immédiatement être complètement
chargées après une phase de refroidissement de min. 10
minutes, mais au plus tard au bout de 12 heures pour évi-
ter une décharge profonde travers l’auto-décharge. En cas
d‘inutilisation de la batterie ou du stockage, est nécessaire
de véri er ou rechargés la batterie tous les 3 mois, tension
(8 volts min.). En cas de dommages disposer correctement.
IT - Attenzione!
Se il suo modello ha un interruttore On/Off e importante
spegnere il modello direttamente dopo ogni utilizzo. Se il
modello ha una batteria rimovibile oppure un connettore
alla batteria, si deve scollegare subito dopo ogni utilizzo dal
modello. Se la batteria rimane accesa oppure rimane colle-
gata essa si può scaricare. Una volta andata in sotto carica
la batteria perde potenza o può essere gravemente dann-
eggiata. In questo caso la batteria non si lascia più caricare
o scaricare ed esiste il pericolo d’in ammazione (pericolo
di incendio). Non provi mai a caricare o scaricare delle bat-
teria sotto carice. La tensione della batteria non deve mai
essere sotto 6 Volt per evitare la scariche profonda. La bat-
teria completamente carica ha una tensione di circa 8,4 Volt.
Dopo l‘uso, la batteria intatta deve essere immediatamente
completamente caricata, dopo una fase di raffreddamento
di min 10 minuti ma al più tardi dopo 12 ore, per prevenire
la scarica profonda attraverso l‘auto-scarica. Se la batteria
non viene usata oppure messa in stoccaggio è necessario
controllare o ricaricata la batteria ogni 3 mesi, tensione (volt
8 min.). In caso di danneggiamento della batteria smaltire
correttamente.
ES - ¡Atención!
Si su modelo tiene un interruptor On/Off es importante apa-
gar el modelo directamente después de cada uso. Si el mo-
delo tiene una batería extraible o un conector en la batería,
se debe desconectar inmediatamente después de cada uso
del modelo. Si se deja encendida la batería o conectada, la
batería se puede descargar. Una vez que está descargada
la batería pierde la potencía o se puede dañar grave. En este
caso la batería ya no puede ser cargada o descargada y hay
un peligro de in amación (peligro de incendio). Nunca in-
tentar de cargar o descargar baterías descargadas profun-
damente. El voltaje de la batería nunca debe estar bajo 6
Voltios para evitar descargas profundas. La batería comple-
tamente cargada tiene una tensión de aproximadamente 8,4
Voltios. Después de su uso, la batería intacta se debe car-
gar inmediatamente completamente, después de una fase
de enfriamiento de al menos 10 minutos pero a más tardar
después de 12 horas, para evitar una descarga profunda a
través del auto-descarga. Si la batería no se utiliza o se pone
en el almacenamiento es necesario comprobar o recargar la
batería cada 3 meses, tensión (voltios 8 min.). En caso de
daños a la batería de disponer correctamente.
Kompassrichtung A
Flugrichtung
B
A
B
A
FRONT
FRONT
FRONT
FRONT

14
DE - Trimmen der Fluglage
Lassen Sie das Modell ruhig auf einer Stelle
schweben und beobachten Sie die Veränder-ungen
beim Betätigen der jeweiligen Trimmregler.
1. Trimmen der Nicklage, rückwärts / vorwärts
2. Trimmen der Roll-Lage, links / rechts
3. Trimmen der Gierachse, links / rechts
Akkubedingt müssen Sie das Modell regelmäßig
je nach Akkustand austrimmen, um eine stabile
Fluglage zu erhalten
GB - Trimming the model
Let the model hover in one spot and watch the
changes by pressing the respective trim controls.
1. Trimming the pitch, backward / forward
2. Trim the roll position, left / right
3. Trimming the rudder, left / right
Depending on the condition of the battery you
need to get the model regularly trimmed to get
a stable ight.
FR - Trimmage du vol
Mettez le modèle réduit en vol stationnaire et
observez les changements quand vous actionnez
les régulateurs du trimmage.
1. Trim nick, arrière / avant
2. Trim du roulement, gauche / droite
3. Trim de l’axe vertical, gauche / droite
Pour des raisons liées aux accus, il faut réguli-
èrement remettre le modèle dans une position
stable en fonction du niveau de charge des
accus.
IT - Trim del modello
Fare volare il modello ad una certa altezza e os-
servare i cambiamenti quando si preme i regolatori
dei trim.
1. Trim nick, indietro / avanti
2. Trim roll, sinistra / izquierda
3. Trim dell’asse verticale, sinistra / destra
Tramite i trim e anche possibile regolare il mo-
dello così, che resta praticamente fermo durante
il volo. Queste regolazione sono da effettuare
ogni volta che si collega la batteria, dato che si
tratta di regolazioni dipendenti dalla tensione
della batteria.
ES - Trim del modelo
Flotar tranquilamente el modelo y observar los
cambios mientras pulses el regulador de trim.
1. Trim nick, atrás / adelante
2. Trim roll, izquierda / derecho
3. Trim del eje vertical, izquierda / derecho
A través del trim es posible regular el modelo
para obtener un vuelo estable durante el vuelo.
Esta regulación se tiene que hacer cada vez que
se conecta la batería, ya que esta regulación
depende de la tensión de la batería.
1
3
1
2 4
DE - Flugübungen
Die Drehzahl der Rotoren wird nicht klassisch über den linken Steuerhebel (Gas) gesteuert sondern
über eine Barometergesteuerte automatische Höhenkontrolle. D.h. Sie wählen am linken Steuer-
hebel (Gas) nur noch ob das Modell steigen oder sinken soll. So bald Sie den Hebel wieder in
die Mittelstellung bringen hält das Modell automatisch die nötige Drehzahl bereit um die Höhe zu
halten. Beachten Sie das die Höhenkontrolle Barometergesteuert ist. D.h. bei wechselnden
Verhältnissen (Luftdruck, Temperaturunterschiede durch Sonneneinstrahlung) können Ab-
weichungen von der eingestellten Höhe vorkommen. Ebenso benötigt der Barometer unter
Umständen einige Sekunden um die Rotordrehzahl anzupassen um z.B. in einen Sink ug
überzugehen. Wichtig ist das Sie bei einer Verzögerung den Befehl nicht von neuem starten
sondern den Gashebel so lange in der gewünschten Stellung halten bis der Barometer die
Rotordrehzahl anpasst.
BevorSiemitdemModelliegen,informierenSiesichzuerstüberseineSteuerfunktionenundfüh-
ren einige Übungen durch. Platzieren Sie das Modell mit der Hinterseite zu Ihnen zeigend auf einer
ebenenFläche.ÜbenSiezuerstdenSchwebeug.AnschließendversuchenSiediePositiondes
Modells mit Hilfe des rechten Steuerknüppels zu verändern (vorwärts, rückwärts und seitwärts) und
gegebenenfalls abzufangen. Zuletzt sollten Sie das Drehen des Modells um die eigene Achse mit
dem linken Steuerknüppel üben. Wenn Sie die Grundfunktionen des Models beherrschen, können
Sie sich an Ihren ersten kontrollierten Flug machen.
GB - Practice simulation ight
The motor revolution is not controlled via the throttle stick (left control stick), it is controlled via a
barometer controlled automatic height control. This means you only decide if the model should lift or
lower. Once you bring the left control stick back into neutral the model will hold the height. Please
be aware that the height control is controlled via a Barometer. This means any changes (to
air pressure or temperature) will in uence the predetermined height. The barometer might
require a few seconds to the rotor speed to adapt as move into a descent.
It is important that you start with a delay not command again but the throttle so long in the
desired position to hold the barometer which adjusts rotor speed. Beforeyingwiththemodel
checkrstaboutitscontrolfunctionsandperformsomeexercises.Placethemodelwiththeback
facingtoyouonaatsurface.Practiceonlytohover.Then,youtrytochangethepositionofthe
modelusingtherightstick(forward,backward,sideways)andpossiblycorrecttheight.Atlast,you
should practice turning the model around its own axis with the left stick. If you have mastered the
basicfunctionsofthemodelyoucanperformyourrstcontrolledight.
FR - Exercices
La fréquence de rotation des hélices n´est pas contrôlée comme il est couramment le cas par le
levier de commande gauche (Accélération) plutôt par un altimètre équipé d’un baromètre; c’est-à-
dire que vous ne sélectionnez plus que par le biais du levier d’accélération (levier gauche) si le
modèle doit monter ou descendre. Une fois que vous retournez le levier de commande à sa position
initiale (centre), le modèle maintient automatiquement la fréquence de rotation nécessaire pour
l’altitude souhaitée. Notez que le maintien de l’altitude est contrôlée par le baromètre intégré
c’est-à-dire que dans des conditions différentes (pression atmosphérique, les différences
de température via rayons solaires) un changement d’altitude peut indépendamment être
effectué par le modèle. De même le baromètre prend quelques secondes à adapter la rotation
convenable pour descendre par exemple.
Il est important de ne pas réessayer le processus dans ce cas, mais plutôt de maintenir le
levier d’accélération dans la position souhaitée jusqu’à ce que le baromètre adapte la rotati-
on appropriée. Avant de faire voler le modèle, informez-vous de toutes ses fonctions de contrôle
et faites quelques essais. Placez le modèle réduit sur une surface plane et placez-vous derrière lui.
Essayez de le mettre et de le maintenir en vol stationnaire avec la manette des gaz. Ensuite, es-
sayez de changer la position du modèle à l’aide de la manette droite (marche avant, marche arrière,
surlescôtés)et,lecaséchéant,delerattraper.Enn,entraînez-vousàfairepivoterl’appareilsur
son axe avec la manette de gauche. Si vous contrôlez toutes les fonctions de base du modèle, vous
pouvez faire les premiers vols.
IT - La pratica
La velocità dei rotori non viene controllato classicamente attraverso la leva di gas sinistra (Gas) ma
attraverso un controllo automatico di altezza (basato su parametri di barometro). Questo vuole dire
selezionare alla leva di controllo sinistra (Gas) solo se il modello deve salire o scendere. Appena
porta la leva in posizione centrale, il modello mantiene automaticamente la velocità necessario per
mantenere l’altezza. Si noti che l’altezza e controllata tramite i parametri del barometro che
varia alle condizioni atmosferiche come per esempion: pressione aria, differenze di tem-
peratura dovuti ai raggi solari, ecc. Questi cambiamenti possono in uenzare la deviazioni
dalla altezza. Analogamente, il la funzione del barometro potrebbe richiedere alcuni secondi
per cambiare la velocità del rotore in modo da adattarsi. E ‚importante non reagire in modo
brusco al cambiamento di altezza, ma mantenere la leva del gas così a lungo nella posizione
desiderata per tenere l’altezza desiderata.
Prima di volare il modello, consigliamo fare conoscenza con tutte le funzioni di controllo e di effettu-
areiprimivoliditest.Posizionareilmodellosuunasuperciepiatta,davantialpilota.Provareprima
il volo hovering. Le eliche del modello devono essere in posizione posteriore. Per primo, provare ad
alzare il modello in volo, e tenerlo “fermo” in volo. Poi provare a cambiare la posizione del modello
utilizzando la levetta destra (per farlo andare in avanti/indietro e destra/sinistra). Appena imparato le
funzioni di base, procedere ad effettuare i primi voli.
ES -Volando en la práctica
La velocidad de los rotores no se controla clásicamente a través de la palanca de control izquierda
(Gas)(pero)/sinoa travésdeun controlautomáticode laaltura.Esto signicaqueseleccione(r)
en la palanca de control izquierda (Gas) sólo si el modelo tiene que subir o bajar. Tan pronto que
posiciona(s) la palanca en la posición central el modelo mantiene automáticamente la velocidad ne-
cesaria para mantener la altura. Tenga en cuenta que el control de altura vien/es controlado del/por
unbarómetro(parámetro).Estosignica,encondicionescambiantes(presión,lasdiferenciasde
temperatura por la luz del sol) se pueden producir discrepancias de la altura establecida. Además el
barómetro necesita eventualmente unos segundos para adaptar la velocidad de giro, para descen-
der. Es importante que usted en el caso del retraso no inicia el comando de nuevo sino mantiene la
palanca en la posición hasta el barómetro ha adaptado la velocidad de giro. Antes de volar con el
modelo, se recomienda conocer todas la funciones de control y hacer el primero vuelo de prueba.
Posicionarelmodeloenunasupercieplana,enfrentedelpilota.Primeroejercitaotarconelmo-
delo. Las palas del modelo deben estar en la posición trasera. En primo lugar, pruebe a despegar el
modeloenvuelo,ytenerjoenelvuelo??.Acontinuación,intenteacambiarlaposicióndelmodelo
usando la palanca derecha (para que vas hacia adelante/atrás y izquierda/derecha). Cuando se ha
aprendido las funciones básico, proceda con los primero vuelos.
UP
forward
turn left turn right
left right
DOWN
3
2

15
DE
1. Kombination von Gas, Gieren, Roll und Nick
Nach dem Sie sich mit den verschiedenen Steuermethoden
des Modells vertraut gemacht haben versuchen Sie nun die
verschiedenen Steuerungen zu kombinieren.
2. Ändern der Flugperspektive
A.ImNormalfalliegtdasModellvonIhnenwegunddas
Fliegen wird mit dem Sender für Sie leicht zu steuern
sein.
B. Wenn Sie seitlich vom Modell stehen und das Modell
steuern, verändert sich Ihre Sichtweise (vorwärts/rück-
wärts ist aus Ihrer Sicht nun links/rechts).
C.WenndasModellaufSiezuiegt,denkenSiedaran,dass
Sie zum Teil invertiert (umgekehrt) steuern müssen.
GB
1. Combination of gas, rudder, roll and pitch
After you are into the different control methods of the model
now you can try to combine the various controls.
2. Change of ight perspective
Changeoftheightperspective
A. Usuallythemodelwillyawayfromyouandtheyingwill
be easy to steer with the transmitter.
B. When you stand sideways to the model and steer the model,
the perspective will change (forwards /backwards is from your
view now left/right.)
C. Whenthemodeliestowardsyou,pleaserememberyou
have to steer inverted (reversed) to some extent.
FR
1. Combinaison entre le gaz, le trim, le roulement
et le nick
Si vous contrôlez toutes les différentes fonctions de contrôle,
vous pouvez combiner plusieurs fonctions entre-elles.
2. Modi cation de la perspective de vol
A. Le modèle vol normalement via un parcours de vol
perspective et la volée controlée par l´émetteur sera plus
simple pour vous.
B. Si vousvous positionnez sur le côté de votre modèle et
pilotez celui-ci, celà vous permet de changer votre point
de vue (avant / arrièr selon votre vue à gauche/ à droite).
C. Si votre modèle vol vers votre direction, ne pas oublier en
partie de contrôler les parties inversés ( et vice versa)
IT
1. Combinazione dei comandi (gas, rotazione, roll e nick)
Appena imparato i singoli comandi, provate a combinarle
l’uno con l’altro.
2. Cambio della prospettiva di volo
A. Nel caso normale, il modello vola lontano da voi e volare
sarà facile da controllare con la trasmittente.
B. Se si trova lateralmente dal modello e controlla il
modello, cambia la sua prospettiva di vista (avanti/indietro,
secondo la vostra prospettiva di vista e ora sinistra/
destra).
C. Se il modello vola verso di voi, ricordate che è necessario
controllarlo in parte in modo invertito (all’incontrario).
ES
1. Combinacion de los controles (gas, rotación,
roll y nick)
Después de que haya familiarizado con los diferentes
métodos de control del modelo, probar ahora de combinar
los diversos controles
2. Cambio de la prespectiva de vuelo
A. En el caso normal, el modelo vuela lejos de usted y volar
será fácil de controlar con la emisora.
B. Si se pone al lado del modelo y controlas el modelo, se
cambia su prespectiva de vista (adelante/atrás, según la
vuestra prespectiva de vista es ahora izquierda/derecha).
C. Si el modelo vuela hacia usted, recuerda que es necesario
controlar en parte en modo invertido (al revés).
forward forward
DE - Installation der Kamera
1. Stecken Sie die Speicherkarte korrekt in die Kamera
ein. Setzen Sie die Karte leicht schräg an (Bild 1A) und
richten Sie dann gerade aus (Bild 1B). Drücken Sie die
Speicherkarte ein, bis sie einrastet. Entfernen Sie die
Speicherkarte aus der Kamera, indem Sie leicht auf die
Micro-SD-Karte drücken. Die Speicherkarte springt ein Stück
heraus und Sie können die Speicherkarte leicht heraus-
ziehen.
2. Stecken Sie den Stecker der Kamera in die “PLUG“
Buchse unten am Modell, bis er ganz einrastet.
3. Schieben Sie die Kamera in die Halterung, bis Sie einrastet.
GB - Installation of the Camera
1. Insert the memory card the correct way around
into the camera. Insert the card at a slight angle
and then align it straight (pic. 1A). Press the memory card
until it clicks (pic.1B). To view recording remove the Micro SD
Card from the the camera, by slightly depressing the Micro
SD Card and allowing it to then spring out enough to grab it
and pull it out of the slot.
2. Insert the plug of the Camera in the „PLUG“ socket below
the model, until it complete snaps.
3. Connect the Camera to the model
FR - Installation de la caméra.
1. Insérez la carte mémoire correctement dans
l´appareil photo. Penchez d’abord la carte (photo 1A) en
l’introduisant puis réajustez-la en la poussant jusqu’à ce
qu’elle ne s’enclenche (photo 1B). La carte mémoire peut être
échangée par une carte équivalente. Enlevez la carte
mémoire par appuyer sur la carte SD micro à la caméra. La
carte mémoire disjoncte et vous pouvez la puiser facilement.
2. Branchez l´appareil photo dans le « PLUG »
connecteur sur la partie inférieure du modèle, jusqu‘au
déclic.
3. Fixer la caméra sur le modèle
IT - L’installazione della telecamera
1. Inserire la scheda di memoria in modo corretto
(nella telecamera. Inserire la scheda con
una leggera angolazione (Immagine 1A) e allineare poi verso
l’esterno(Immagine1B).Premerelaschedadimemorian
ché non si incastra. Rimovere la scheda di memoria dalla
telecamera, premendo leggermente sulla scheda Micro SD.
La scheda di memoria fuoriesce, ora può facilmente estrarre
la scheda di memoria.
2. Inserire la spina della telecamera nella presa “PLUG“ nella
parteinferioredelmodello.nchesiincastra.
3. Montare la telecamera al modello.
ES - La instalación de la cámara
1. Inserte la tarjeta de memoria correctamente en la cámara.
Inserte la tarjeta con una ligera angulación
(Imagen 1A) y despues alinear (Imagen 1B). Presione la
tarjeta de memoria hasta que se encaje. Remover la tarjeta
de memoria de la cámara, presionando ligermente en la
tarjeta Micro SD. La tarjeta de memoria saldrá ligeramente,
ahora se puede fácilmente sacar la tarjeta de memoria.
2. Inserte el conector de la cámara en el buje „PLUG“ en la
parte inferior del modelo, hasta que se encastre.
3. Monte la cámara en el modelo.
1A
12
A
1B 2
DE - Installation der Action-Kamera (No. 422026)
1. Montieren Sie die Action-Kamera mit der Halterung.
2. Hängen Sie die Action-Kamera unten an das Modell.
Sie können nun Bild- bzw. Videoaufnahmen wärend des
Fluges machen.
3. Zum abmontieren der Action-Kamera, drücken Sie die Taste
und ziehen die Kamera ab.
GB - How to install camera HD (No. 422026) 1.
Assemble the action camera together with holder.
2. Hang the action camera on the modell.
Usetheactioncamerafortakingphoto/videowhileying
3. Press the button down and then get the action camera out.
FR - Installation d‘Action Camera (No. 422026)
1. Monter la caméra d‘action avec le support.
2. La caméra d‘action vers le bas pour le modèle
Vous pouvez maintenant enregistrements du moment image
ou vidéo lors de Maquillage de vol.
3. Pour démonter l‘appareil d‘action, appuyez sur la touche
et débranchez l‘appareil
IT - Fissare l‘azione della telecamera (No. 422026)
1. Montare la fotocamera l‘azione con il supporto.
2. Montare la telecamera sul modello.
Ora è possibile effettuare immagine o il video durante il volo.
3.Perrimuoverelamacchinafotogracadiazione,tenere
scollegare la fotocamera.
ES - Monte la cámara de la acción (No. 422026)
1. Monte la cámara de la acción con el soporte.
2. Monte la cámara en el modelo.
Ahora puede hacer imagen o video durante el vuelo.
3. Para desmontar la cámara de acción, pulse el botón y
desconecte la cámara.
1 2 3
3
BC

16
DE - USB
1. Stecken Sie die Speicherkarte in den USB-Adapter und
diesen in den USB-Anschluß ihres PCs oder Laptop.
2. Der USB-Adapter sollte von ihrem Computer automatisch
erkannt werden und wird als Laufwerk angezeigt. Das
Anschauen der Videos sollte mit verschiedenen Media-
Playern möglich sein.
Achtung!
● SolltenSieProblemebeimabspielenderDatenhaben,
probieren Sie es mit einem anderen Mediaplayer. Sie
können Online nach einem kostenlosen Download eines
Players suchen.
● MitderVideofunktionkönnennurVideosaufgenommen
werden. Tonaufnahmen sind nicht möglich.
GB - USB
1. Insert the memory card into the USB adapter and these in
the USB port of your PC or laptop.
2. The USB adapter should be automatically detected by your
computer and appears as a drive. The viewing of the video
should be possible with different media players.
Attention!
● IfyouhavetroubleplayingthefileswithQuicktimetryyour
other media players. You can also look online for
recommended free downloadable player.
● Videocameradoesnotrecordsound.
FR - USB
1. Engagez la carte mémoire dans le lecteur USB puis
branchez l’ensemble sur un des ports USB de votre PC ou
ordinateur portable.
2. L‘adaptateur USB doit être automatiquement détecté par
votre ordinateur et apparaît comme un lecteur. En regardant
la vidéo devrait être possible avec des joueurs de différents
médias.
Attention!
● Sivousavezdessoucispourlirevosenregistrements,
veillez changer de lecteur media. Vous pouvez télécharger
Online des lecteurs non payants.
● Aveclafonctionvidéovousnepouvezenregistrerquedes
vidéos sans son. L’enregistrement de son n’est pas
possible.
IT - USB
1. Inserire la scheda di memoria nel adattatore USB e poi nella
porta USB del suo PC o del portatile.
2. L‘adattatore USB dovrebbe essere rilevato
automaticamente dal computer e appare come un disco.
Guardareil video dovrebbe essere possibile con vari
Media-Player.
Attenzione!
● Seavetedifficoltàaguardareidati,provareautilizzareun
altro Mediaplayer. È possibile cercare online per il download
gratuito di Players.
● Conlafunzionevideosololeimmaginipossonoessere
registrate. Non é possibile registrare l’audio.
ES - USB
1. Inserir la tarjeta de memoria en el adaptador USB y este en
la conexion USB de su ordenador o portátil.
2. El adaptador USB debe ser detectado automáticamente por
el ordenador y aparece como una unidad. Mirando el vídeo
debe ser posible con con varios Media Players.
Atención!
● Sitieneproblemasenverlosdatos,tienesqueusarunotro
Mediaplayer. Puedes buscar online para descargar
gratuitivamente un Player.
● Conlafuncióndevídeosólosepuedengrabarlas
imágenes. La grabación de sonido no es posible.
DE - Unterspannung
Blinken die LED´s an ihrem Modell doppelt, zeigt es Ihnen an dass es nun in Unterspannung ist.
• BendetsichdasModellimGPS-ModuswirdesautomatischindenComing-Home-Modus
(Seite 12) wechseln.
•Ist das Modell nicht im GPS-Modus startet das Modell automatisch die Autolanding Funktion.
(DasModelllandetdortwoesgeradeiegt).SiesolltendieComing-HomebzwAutolanding
funktion nur in Notfällen unterbrechen. wird das Modell nach doppel Blinken der LED´s nicht
innerhalb ca. einer Minute gelandet kann es unkontrolierbar werden und wird abstürzen. Dies
bringt eine hohe Unfall gefahr mit sich. Das Modell kann bei einem Absturz zerstört werden.
GB -Undervoltage
If the LEDs blink twice on your model, it indicates that it is now under voltage.
•IfthemodelisinGPSmode,itwillautomaticallyswitchtoComingHomemode(page12).
•IfthemodelisnotinGPSmode,themodelautomaticallystartstheautolandingfunction.(The
modellandswhereitisyingatthatmoment).YoushouldinterrupttheComing-HomeorAuto
landing function only in emergencies. If the model is not landed after approx. one minute once
thedoubleashingoftheLEDsisobserved,itcanbecomeuncontrollableandwillcrash.This
entails a high risk of accident. The model can be destroyed in a crash.
FR - Sous-tension
Si lumières LED de votre modèle commence à clignoter, cela signie que votre modèle est en
sous-tension.
•Lorsque votre modèle est en mode GPS et une sous-tension apparait, votre modèle passera
automatiquement en mode «Coming-Home » (page12)
•Si votre modèle n´est pas en mode GPS, s´active automatiquement sur votre modèle la fonction
d´atterrissage automatique. (Le modèle atterrit ainsi à l´endroit exacte où il avait volé). Vous
devez interrompre la fonction « Coming-Home » ou fonction d´atterrissage automatique essenti
ellement en cas d´urgence. Les lumières LED du modèle ne doivent clignoter doublement pen
dant le vol, celui-ci doit au sein d´une minute effectuer son atterrissage. Au cas contraire, votre
modèle sera incontrôlable et risque de se bloquer. Cela porte un risque important d´ accident. Le
modèle peut aussi être détruit lors de cette accident.
.
IT - Sottotensione
Lampeggiano i LEDs sul modello due volte, le mostra che e in sottotensione.
• SeilmodellositrovainmodalitàGPScambiaautomaticamenteinmodalitàComing-Home
(pagina 12).
• SeilmodellononeinmodalitàGPS,ilmodelloavviaautomaticamentelafunzioneAutolanding.
(Il modello atterra dove al momento vola). Si dovrebbe interrompere solo in caso di emergenza
la funzione Coming-Home o Autolanding. Se il modello dopo che ha lampeggiato due volte le
LEDs non si atterra entro 1 minuto può diventare incontrollabile e cadrà.
ES - Baja tensión
Parpadean los LEDs en su modelo dos veces, le muestra que está en baja tensión.
• SielmodeloestáenmodoGPScambiaautomáticamenteenmodoComing-Home(página12).
• SielmodelonoestáenmodoGPS,elmodeloseiniciaautomáticamenteenlafunciónAutlan
ding. (El modelo aterriza donde al momento vuela). Se debe interrumper el Coming-Home o
Autolanding sólo en situaciones de emergenica. Si el modelo después de parpadear dos veces
los LEDs no se aterriza durante de 1 minuto puede llegar a ser incontrolable y caer.

17
DE - Foto / Video / Steuerung
GB - Photo / video / control
FR - Photo / vidéo / contrôle
IT - Foto / video / comando
ES - Foto / vídeo / control
3
2
1
iOS /Android
App Download
DE - Die App ermöglicht die Steuerung Ihres Modells mit ei-
nem Smartphone oder Tablet. Zu den Funktionen gehören die
Steuerung der Kamera (Foto und Video) (nur für 422035 und
422025)., die Steuerung des Modells und vielem mehr.
GB - The app allows you to control your model with a smart-
phone or tablet. Functions include control of the Camera (photo
and video) (Only for 422035 and 422025), control of the model
and much more.
FR - L‘application vous permet de contrôler votre modèle avec
un smartphone ou une tablette.
Parmi les options fournis, comprennent la gestion / comman-
de de la caméra (Photo/vidéo) (Seulement pour les modèles
422035 et 422025), ainsi que le pilotage du modèle et beaucoup
plus encore.
IT - L’applicazione consente di controllare il suo modello con uno
Smartphone o Tablet. Tra le caratteristiche sono incluso il cont-
rollo della camera (foto e video) (Solo per 422035 e 422025). il
controllo del modello e altro ancora. und vielem mehr.
ES - La aplicación le permite de controlar su modelo con un
Smartphone o Tablet. Entre las características incluyen el control
de la cámara (foto y vídeo) (Sólo 422035 y 422025), control del
modelo y mucho más.
DE - Software Download und Installation
GB - Software Download and Installation
FR - Software Download et Installation
IT - Software Download e installazione
ES - Software Download y instalación
DE -
1. Downloaden & Installieren Sie die kostenlose App auf Ihr
Smart Phone. Stecken Sie Ihr Handy
in die Halterung.
2. Schalten Sie das Modell und den Sender ein und führen
den Bindevorgang (Seite 8) durch.
Öffnen Sie auf Ihrem Smartphone die „Einstellungen“ und
schalten das Wlan ein. Um Ihr
Smartphone/Tablet mit dem Modell zu koppeln müssen Sie
eine WLAN-Verbindung mit dem
Modell aufnehmen (Jamara Payload). Sie benötigen kein
Passwort und können sich
direkt damit verbinden.
3. Öffnen Sie nun die “Payload GPS“ APP (2) und starten Sie
das Programm mit der „Play“-Taste.
4. Es öffnet sich das Live-Bild der Kamera. Fotos und
Videos können über die App erstellt werden. Diese
werden auf Ihrem Smartphone/
Tablet und Speicherkarte abgespeichert.
GB-
1. Download & Install the free App on your mobile phone.
Insert the mobile phone holder on top of
the antenna of the remote control.
2. Turn on the model, then transmitter and perform the
binding process – see page 8. Only
available if operated via remote control. Open the
„Settings“ in your mobile phone/ tablet and
turn the Wifi on. To pair your mobile phone/tablet with
the model you need to establish a WLAN
connection with the model (Jamara Payload). You do
not need a password and can directly
connect to it.
3. Now open the „Payload“ App and press the „Setting“
button for the App tools to open. Copy the
settings you see in figure 4. Now activate the Altitude
Hold function. The arrow in top left corner
will enable you to move back tot he start menu. Start
the program with the „Play“ button.
4. This will open the live image of the camera. Photos (A)
and videos (B) can be taken via the App
and Transmitter (see page 9). Footage is stored on the
storage space of your mobile/ cell phone
or tablet.
FR -
1. Télécharger et installer l´application App sur votre
Smartphone. Insérez votre téléphone dans le support
téléphone.
2. Tournez le modèle et effectuer le processus de liaison
(page 8) (seulement pendant le
Fonctionnement de la télécommande. Allumez votre
Smartphone / Tablette « avec le modèle » et reliez-les
via Wilan. Afin de connecter votre Smartphone/ Tablette
avec votre modèle, vous avez besoin de faire le lien avec
un modèle (Jamara Payload). Vous ne devez pas saisir
de mot de passe pour la connexion, celle-ci se fera donc
automatiquement.
3. Activer maintenant l´application « Payload GPS » APP (2)
et démarrer le touche avec « Play »
4. L´image de la caméra va s´ouvrir maintenant en directe. Les
Photos et videos peuvent être visualisés via l´application
APP. Celles-ci seront sauvgardés sur votre Smartphone /
Tablet et carte de mémoire.
IT -
1. Scaricare e installare l’app gratuita sul tuo Smartphone.
Inserire il cellulare nel supporto.
2. Accendere il modello e la radio ed eseguire il processo
di binding (Pagina 8). Aprire sul su
Smartphone „l’impostazioni“ e attivare il Wifi. Per collegare
il suo Smartphone/Tablet con il suo
modello avete bisogno di una connessione wireless con
il modello (Jamara Payload). Non ha
bisogno di una password e si può collegare direttamente.
3. Ora aprire la APP „Payload“ e premere il pulsante
„SETTING“, si apre l´impostazione-app.
Applicare le impostazione que vedete nella imaggine 4.
Attivare la funzione di controllo
dell’altezza (Altitude Hold). Con la freccia in alto a sinistra
del display, si torna al menu d’avvio.
Avviare il programma con il tasto „Play“.
4. Si aprira l’immagine dal vivo della telecamera. Foto (A) e
video (B) possono essere creati
attraverso l’applicazione, cosi come la radio
(vedi pagina 9). Questi vengono memorizzati sullo
Smartphone/Tablet e scheda di memoria.
ES -
1. Descargar y instalar la aplicación gratuita en su
Smartphone. Inserte el teléfono en el soporte.
2. Encienda el modelo y la emisora y realizar el proceso
binding (Pagina 8). Abrir en su Smartphone los „Ajustes“
y activar el Wifi.
Para conectar su Smartphone/Tablet con su modelo
debe tener una conexión wireless con su modelo
(Jamara Payload). No se
necesita una contraseña y se puede conectar directamente.
3. Ahora abrir la APP „Payload“ y pulse el botón „SETTING“,
se abrirá los ajustes de la aplicación. Aplicar los ajustes de
la imagen
4. Ahora activar la función de control de altura (Altitude Hold).
Con la flecha en la parte superior izquierda de la pantalla,
se vuelve
al menú de inicio. Iniciar el programa con el botón „Play“.
4. Se abrirá la imagen en directo de la cámara. Fotos (A) y
vídeo (B) se pueden construir a través de la aplicación
asì como con la
emisora (ver página 9). Estos se almacenan en su
Smartphone/Tablet y la tarjeta de memoria.

18
DE - Die App
GB - The App
FR - l‘appli
IT - La App
ES - La App
DE -
A Foto
B Video
C Galerie
Über den Galleriebutton in der App können Sie die Videos/
Photos abrufen.
D Einsteiger-/Fortgeschrittenen-/Expert-Modus
Langsam (30%) - Mittel (60%) - Schnell (100%)
E Aktivierung der Sensorsteuerung
Drücken Sie den Button für die Sensorsteuerung. Nun ist
die links/rechts Steuerfunktion
deaktiviert und das Modell lässt sich über das Schwenken
des Smartphone steuern. Um die
links/rechts Steuerfunktion wieder zu aktivieren, drücken
Sie den Button für die Sensorsteue-
rung erneut.
F Track-following
Sie geben eine Flugbahn vor, die Ihr Modell automatisch
nachiegenwird.
G Einschalten der Steuerelemente
Der Sender muss dazu ausgeschaltet sein.
ACHTUNG! Nur am Boden - niemals während dem Flug
den Sender ausschalten.
H Zusatzmenü
GB -
A Photo
B Video
C Gallery
You can use the Gallery button in the app to view the
videos / photos.
D Beginner / Advanced / Expert mode
Slow (30%) - Medium (60%) - Fast (100%)
E Activation of the sensor control
Press the button for sensor control. Now the left / right
control function is deactivated and the
model can be controlled by pivoting the smartphone. To
reactivate the left / right control function,
press the button for sensor control.
F Flight Pivot Mode
You specify a trajectory that your model will search for
automatically
G Activating the control elements
The transmitter must be switched off.
ATTENTION! Only on the ground - never switch off the
transmitter during flight.
H Additional menu
FR -
A Photo
B Vidéo
C Galerie
Avec la touche galerie disponible dans l´application, vous
avez la possibilité de visionner vos photos / Vidéos
D Débutant/ niveau avancé/ Mode-expert
Lentement (30%)- Milieu (60%)- rapide (100%)
E Activation du détecteur de contrôle
Appuyez sur la touche du détecteur de contrôle. Votre tou
che gauche/droite est maintenant désactivée et votre modè
le peut ainsi être commandé par le pivotement intelligent
via votre smartphone. Pour réactiver la fonction de
commande gauche/droite, veuillez appuyer sur la touche
du détecteur de contrôle.
F Mode- Trajectoire de vol- programmation
Vous définissez une trajectoire de vol, dont votre modèle
volera automatiquement par la suite.
G Mis en marche des éléments de commande
Votre émetteur doit être absolument désactivé
ATTENTION ! Uniquement que sur le sol – ne jamais
effectuer cette procédure pendant le vol.
H Menu supplémentaire
IT -
A Foto
B Video
C Galleria
Attraverso il Button-Galleria nella App può visualizzare i
video/foto.
D Modalità Principiante/Avanzato/Expert
Lentamente (30%) - Medio (60%) - Veloce (100%)
E Attivazione del controllo del sensore
Premere il button del controllo del sensore. Ora e disattiva
to la funzione di controllo sinistra/
destra e il modello si lascia controllare attraverso la rotazio
ne del Smartphone. Per attivare la
funzione di controllo sinistra/destra, premere il button per il
controllo del sensore nuovamente.
F Modalità Traiettoria di volo-Pianificazione
Si specifica una traiettoria che il suo modello volerà auto
maticamente .
G Accendere gli elementi di controllo
La trasmittente deve essere spenta.
ATTENZIONE! Solo per terra – mai spegnere la trasmit
tente durante il volo.
H Menu aggiuntivo
ES -
A Foto
B Video
C Galería
A través del Button-Galería en la aplicación puede ver los
vídeos/fots.
D Modo Principiantes / Avanzado / Expert
Lentamente (30%) - Medio (60%) - Rápidamente (100%)
E Activación del control del sensor
Presione el button para el control del sensor. Ahora
está desactivado la función de control izquierdo/derecho
y el modelo se
puede controla a través la rotación del Smartphone. Para
activar la función de control izquierda/derecha, presione
el botón para
el control del sensor de nuevo.
F Modo de planificación de trayectorias
Se especifica una trayectoria que va a volar de forma
automática su modelo
G Encender los elementos de control
La emisora debe estar apagada.
ATENCIÓN! Sólo en el suelo – nunca apagar la emisora
durante el vuelo.
H Menú adicional
DE -
J Lande-Button
K Take Off Leerlauf
L Heben/Senken|Gierenlinks/rechts
M Links / Rechts
N Trimmung
GB -
J Land Button
K Take Off idle
L Lifting/lowering|Yawingleft/right
M Left / Right
N Trimming
FR -
J Touche-Pays
K Décollage vitesse au ralenti
L Monter / Descendre // Convoiter vers la gauche / droite
M Gauche / Droit
N Trimmung
IT -
J Pulsante-Atterraggio
K Take Off Marcia in folle
L Decollare/Atterrare|Ruotareattornoalproprioasse
sinistra / destra
M Sinistra / Destra
N Trimming
ES -
J Button-Aterrar
K Take Off Estado libre
L Despegar/Aterrar|Giraratravéssupropioejeizquierda/
derecha
M Izquierda / Derecha
N Trimming
2
1

19
DE - Modell über die APP FPV steuern
GB - control your model via the FPV App
FR - Pilotage via l´application APP FPV
IT - Modello controllabile attraverso la APP FPV
ES - Modelo controlable a través de la APP FPV
DE -
1. Um das Modell über die App zu fliegen müssen Sie zuerst
den Sender ausschalten und das
Handy aus der Halterung entnehmen. Anschließend aktivie
ren Sie die Steuerelemente (G).
Es öffnet sich das Steuermenue (Bild 2),
2. Legen Sie fest ob Sie über die Sensorsteuerung (E) oder
über die virtuellen Steuerknüppel (L+M)
steuern möchten. Wählen Sie ob das Modell schnell oder
langsam reagieren soll (D).
Drücken Sie nun den Take Off Button (K) und die Rotoren
beginnen sich zu drehen. Das
Modell nimmt nun Befehle über den virtuellen Höhensteuer
knüppel (L) an und hebt ab.
Landen können Sie in dem Sie den virtuellen Höhensteuer
knüppel (L) ganz nach unten ziehen
oder in dem Sie den Landing Button (J) drücken. Das
Modell beginnt dann selbstständig zu
sinken bis es gelandet ist. Während dessen müssen Sie
das Modell weiterhin an die ge
wünschte Landeposition steuern.
Über die Trimmtasten (N) können Sie die Feinabstimmung
des Modells vornehmen.
ACHTUNG! Der Wechsel von Smartphone / Tablet zum
Sender und anderstherum während des fluges ist verbo-
ten. Das Modell kann unkontrollierbar werden und zum
Modell verlust führen. Daher den Wechsel nur am Boden
vornehmen.
GB -
1. In order to fly the model via the App, you must first turn off
the transmitter and remove the phone
from the holder. Then activate the App - Control (G). The
Steering menu will open (image 6).
2. Now activate the height control function (J). Specify
whether you want to control through the tilt
control (F) or via the virtual stick (K). Select whether the
model is to respond quickly or slowly
(E). Now press the Take Off button (I) and the rotors begin
to rotate. The model now takes
control input on the virtual height control stick (L) and
takes off. To land the model use the virtual
height stick (L) and pull it down or use the landing Button
(I). The model will then begin to decline
autonomously until it has landed. Meanwhile, you need
to continue controlling to the desired
landing position. Above the trim buttons (M, N, O), you can
fine-tune the model.
ATTENTION! It is forbidden to switch from smartphone/ ta-
blet to the transmitter and other devices during flight. The
model can become uncontrollable and lead to loss of the
model. Therefore make the change only on the ground.
FR -
1. Pour piloter votre modèle via l´application, vous devez
tout d´abord éteindre l´émetteur et retirer votre téléphone
du support. Activer maintenant les éléments de contrôle
(G). cela ouvre maintenant le menu de commande / contrô
le (image 6)
2. Indiquez maintenant si vous désirez effectuer le contrôle
via le capteur de commande ou via le levier de commande
virtuel (L+M). Choisissez si votre modèle doit réagir rapi
dement ou lentement (D).Appuyez maintenant sur la
touche « Take off » et les rotors commencent ainsi à
tourner. Le modèle réceptionne désormais les commandes
par l‘intermédiaire du levier de commande de la hauteur
vir tuelle (L) et décolle. Vous pouvez atterrir en tirant sur
la touche d´ hauteur de la manette de commande virtuelle
(L) vers le bas ou dans la touche d‘atterrissage (J). Le mo
dèle commence ainsi à descendre jusqu’à que celui –ci
atterrit. Pendant ce temps, vous devez encore contrôler le
modèle jusqu´´à son atterrissage. Avec la touche
« Trimm » (N), vous pouvez effectuer un réglage de fin de
votre modèle.
ATTENTION ! Le changement entre Smartphone/ Tablet à la
radiocommande et vice versa, est strictement interdit pen-
dant le vol. Le modèle sera incontrôlable et peut conduire à
une perte du modèle. Par conséquent, veuillez effectuer le
changement lorsque votre modèle est au sol.
IT -
1. Per poter volare il modello attraverso l’app é necessario
prima spegnere la radio e rimuovere il
cellulare dal supporto. Dopo di che attivare gli elementi
di controllo (G). Si apre il menu di
controllo (Immagine 6)
2. Specificare se si desidera controllare attraverso il controllo
sensore (E) o tramite il la leva di
controllo virtuale (L+M). Selezionare se il modello deve
reagire rapidamente o lentamente (D).
Ora premere il pulsante Take Off (K) e i rotori cominciano
a girare.
Il modello ora prende
comandi tramite la leva di controllo d’altezza viertuale (L)
e decolla. Atterrare si può attraverso
tirare verso il basso la leva di controllo d’altezza virtuale (L)
o attraverso il pulsante Landing (J).
Il modello inizia as abbasarsi automaticamente finche e
atterrato. Nel frattempo é necessario
continuare a controllare il modello nella posizione di
atterraggio desiderato. Attraverso il tasto
trimming (N) é possibile fare gli aggiustamenti di
prescisione.
ATTENZIONE! Il passaggio dal Smartphone / Tablet alla
radio e viceversa durante il volo e proibito. Il modello può
essere incontrollabile e portare alla perdita del modello.
Pertanto, effettuare il passaggio solo sulla terra.
ES -
1. Para volar el modelo a través la aplicación es necesario
primero apagar la emisora y sacar el teléfono del soporte.
A continuación
activar los elementos de control (G). Se abre el menú
de control (Imagen 6).
2. Especificar si desea controlar a través del control del
sensor (E) o a través la palanca de control virtual (L+M).
Seleccione si el
modelo tiene que responder rápidamente o lentamente
(D). A continuación, pulse el botón Take Off (K) y los
rotores empiezan a
girar. Ahora el modelo toma comandos a través la
palanca de control de altura (L) y despega. Aterrar se
puede a través tirar la
palanca de control de altura (L) hacia abajo o a través
pulsar el botón Landing (J). El modelo comenzará bajar
automáticamente
hasta que aterrizó. Durante estó, se debe continuar a
controlar el modelo a la posición de aterrizaje deseada.
A través el botón
trimming (N) puede afinar el modelo.
ATENCIÓN! El cambio del Smartpone / Tablet desde la
emisora y al revés durante el vuelo está prohibido. El
modelo puede ser incontrolable y con la consecuencia de
la pérdida del modelo. Por lo tanto, hacer el cambio sólo
en el suelo.
4
DE - Die Bedienung der Camara HD Pro und der dazugehö-
rigen App entnehmen sie bitte bei der Kamera beiliegenden
Anleitung.
http://camarav2.jamara.com/
GB - The operation of the camera HD Pro and the correspon-
ding App, please refer to the camera instructions included.
http://camarav2.jamara.com/
FR - Pour le fonctionnement de la caméra HD Pro et l‘App,
veuillez vous référer aux instructions de l‘appareil photo
comme indiqué ci-dessous.
http://camarav2.jamara.com/
IT - Per il funzionamento della fotocamera Pro HD e l‘App,
si prega di fare riferimento alle istruzioni della fotocamera
come descritto di seguito.
http://camarav2.jamara.com/camera
ES - Para el funcionamiento de la cámara Pro HD y la App,
por favor, consulte las instrucciones de la cámara incluidos.
http://camarav2.jamara.com/
DE -
O Bildschirmdrehung 180°
P Splitscreen (für VR-Brille)
Q Kompass- / Headless-Modus
Durch Drücken kommen Sie in den Kompass-/ Headless-
Modus.
R Autokalibrierung
GB -
O Screen rotation 180 °
P Splitscreen (for VR glasses)
Q Compass / Headless mode
Press to entre Compass / Headless mode.
R Autocalibration
FR -
O Rotation de l´écran à 180°
P Splitscreen (pour lunette VR)
Q Compas / Mode- Headless
Appuyez pour entrer en Mode Compas / Mode-Headless
R Calibrage automatique
IT -
O Rotazione dello schermo 180°
P Splitscreen (per gli occhiali VR)
Q Bussola-/ Modalita-Headless
Premere per entrare in modalità Bussola- /Headless
R Autocalibrazione
ES -
O Rotación de la pantalla 180°
P Splitscreen (para las gafas VR)
Q Brújula- / Modo-Headless
Pulse para entrar en el Modo Brújula-/ Headless
R Autocalibración
3

20
DE - Problembehebung und Lösungen
Das Modell blinkt.
1. Das Modell empfängt kein Signal.
- Überprüfen Sie ob das Modell gebunden ist und der Sender
eingeschaltet ist.
2. Der Akku ist nicht geladen. (Doppel-Blinken)
- Laden Sie den Akku.
Das Modell reagiert nicht.
1. Sie sind ausser Reichweite.
- Verringern Sie die Distanz zum Modell
2. Die Senderbatterien sind zu schwach.
- Erneuern Sie die Senderbatterien.
Die Rotoren machen ungewöhnliche Geräusche.
1. Ein Rotorblatt oder Hauptzahnrad ist beschädigt.
- Wechseln Sie das Rotorblatt / Hauptzahnrad.
2. Der Messingring oder Sicherungsstift sind nicht richtig einge
legt.
- Siehe Seite 5
Nach dem Blatt-Tausch iegt das Modell nicht richtig.
1. Die Blätter sind falsch montiert.
- Montieren Sie die Blätter richtig.
Nach dem Laden hebt das Modell nicht ab.
1. Akku oder Ladegerät sind defekt.
- Akku oder Ladegerät ersetzen.
2. Der Akku ist nicht voll aufgeladen.
- Laden Sie den Akku immer vollständig auf.
Die Kamera blinkt und eine Aufnahme ist nicht möglich.
1. Die Speicherkarte ist voll oder nicht eingelegt.
- Bereinigen Sie die Speicherkarte bzw. legen Sie die
Speicherkarte ein.
Das Modell Kippt zu einer Seite ab Beim iegen
1. Das Modell ist nicht richtig Kalibriert.
- Kalibrieren Sie das Modell neu.
Bei drücken der Coming-Home Taste sinkt das Modell nur
zu Boden
1. Sie sind nicht im GPS-Modus
- schalten Sie GPS an
GB - Problems and solutions
The model is blinking.
1. The receiver don´t recieve a signal.
- Check the binding of the model and make sure that the
transmitter is turned on.
2. The battery are empty.
- Fully charge the battery
The model don´t recognize.
1. You are out of reach.
- Decrease the distance to the model.
2. The transmitter batterys are to low.
- Put new batterys into the transmitter.
The rotor is making strange noises.
1. The rotor blade or main gear is damaged.
- Replace the rotor / main gear.
2. The brass ring or securing pin is not properly inserted
- See page 5
After changing the blades the model don´t ies properly.
1. The blades are not installed properly.
- Install the blades properly
The model don´t rise up after charging.
1. Battery or charger are damaged.
- Replace battery or charger.
2. The battery was not charged enough.
- Always charge the battery till it is full charged.
The camera is blinking.
1. The memory card is full or not inserted.
- Emtying the memory card resp. Insert the memory card.
The model tilts to one side during ight
1. The model is not calibrated correctly.
- Re-calibrate the model.
Pressing the Coming-Home button will only decrease the
model to the ground
1. You are not in GPS mode
- turn on GPS
FR - Problèmes possibles et solutions
L‘modèle clignote.
1. Le modèle ne reçoit pas de signal
-Vériezsilemodèleestconnectéetl‘émetteurestmisen
marche.
2. L‘accu n‘est pas chargé.
- Chargez l‘accu toujours.
Le Modèle ne réagit pas.
1. Vous êtes hors d‘atteinte
- Diminuez la distance au modèle
2. Les piles de l‘émetteur sont trop faibles
- Renouvelez les piles de l‘émetteur.
Les rotors font des bruits inhabituels.
1. Un rotor ou roue dentée principal est abîmé.
- Remplacez la pale / roue dentée principal.
2. L´anneau de laiton ou la goupille de sécurité ne sont pas
insérées correctement
- Image Page 5
Après l‘échange de pale le modèle ne vole pas
correctement.
1. Les pales sont montées mal.
- Montez les pales correctement.
Le modèle ne décolle pas.
1. L‘accu ou le chargeur sont en panne.
- Remplacez l‘accu ou le chargeur.
2. L‘accu n‘est pas chargé complètement.
- Chargez l‘accu toujours totalement.
La caméra clignote et une prise n’est pas possible.
1. La carte de mémoire est pleine ou pas mis en place.
- Videz la carte de mémoire ou mettez la en place.
Le modèle bascule vers un côté lors du vol
1. votre modèle n´a pas été correctement calibré
-Veuillez effectuer à nouveau le calibrage du modèle.
Avec l´appui de la touche « Coming-Home », le modèle re-
descend au sol
1. Vous n´êtes pas en mode GPS
-Activer votre mode GPS
IT - Soluzione del problema
La modello lampeggia.
1. Il modello non riceve alcun segnale
-Vericareseilmodelloestatofattoilbindingelaradiosia
accesa.
2. La batteria non e caricata.
- Caricare la batteria
Il modello non risponde.
1. Siete fuori della autonomia.
- Ridurre la distanza dal modello.
2. Le batterie della radio sono deboli.
- Cambiare le batterie della radio.
I rotori fanno rumori insoliti
1. Una pala o corona centrale e danneggiate.
- Cambiare la pala / corona centrale.
2. L’anello di ottone o perno di bloccaggio non e inserito
correttamente.
– Vedere pagina 5
Dopo aver cambiato la pala, il modello non vola
correttamente.
1. Le pale sono montate non correttamente.
- Montare le pale correttamente.
Dopo la carica, il modello non decolla.
1. Batteria o caricatore sono difettosi.
- Sostituire la batteria o caricatore
2. La batteria non e completamente caricata.
- Caricare la batteria sempre completamente
La fotocamera lampeggia e la registrazione non è possibile.
1. La scheda di memoria é piena o non inserita.
- Pulire la scheda di memoria e inserire la scheda di memoria.
Il modello si inclina a una parte durante il volo
1. Il modello non e calibrato correttamente.
-Calibrare il modello nuovamente.
Se sI preme il pulsante Coming-Home il modello si abbassa
a terra
1. Non e in modalità GPS
– attivare il GPS
Il modello lampeggia due volte.
1. La batteria e debole / vuota
-Cambiare la batteria
ES - Solución de problemas y soluciones
La modelo parpadea.
1. El modelo no recibe ninguna senal.
- Comprobar si el modelo está echo el binding y la emisora
encendida.
2. La batería no esta cargada.
- Cargar la batería.
El modelo no responde.
1. Usted está fuera de su alcance.
- Reduzca la distancia en su modelo.
2. La baterías son débiles.
- Reemplace las baterías de la emisora.
Los rotores hacen ruidos inusuales.
1. Una pala de rotor o engrenage principal está dañada.
- Cambiar la pala o engrenage principal
2. El anillo de latón e el perno de bloqueo no se ha insertado
correctamente.
-Ver la página 5
Después de sustituir la pala, el modelo no vuela
correctamente.
1. Las palas no estan montado bien.
- Montar las palas correctamente.
Después de la carga, el modelo no esta despegando.
1. Batería o el cargador estan defectuoso.
- Cambiar la batería o el cargador.
2. La batería no esta cargada completamente. Cargar la batería
siempre completamente.
La cámara parpadea y la grabación no es posible.
1. La tarjeta de memoria está llena o no insertada.
- Limpiear la tarjeta de memoriay inserte la tarjeta de
memoria.
El modelo se inclina hacia un lado durante el vuelo
1. El modelo no está calibrado correctamente
-Calibrar el modelo de nuevo.
Pulsando el botón Coming-Home el modelo se baja al suelo
1. No estás en modo GPS
– activar el GPS
This manual suits for next models
4
Other Jamara Quadcopter manuals

Jamara
Jamara Q 180 Series User manual

Jamara
Jamara QCR 038300 User manual

Jamara
Jamara FlyScout 03 8561 User manual

Jamara
Jamara CamAlu FPV AHP+ 2,4 GHz User manual

Jamara
Jamara Triefly AHP 2 User manual

Jamara
Jamara Compo AHP 2,4 GHZ User manual

Jamara
Jamara Alien Attack V2 User manual

Jamara
Jamara Triefly AHP 2 User manual

Jamara
Jamara CYANOS Altitude User manual

Jamara
Jamara Motion Fly 2,4 GHz User manual