KDDI W51H Installation guide

Basic
Manual
EZ・FM
PC Site Viewer
Phone Call
Address Book/
Pair Function
Mail/
Hello Messenger
Simple Mode/
Teens Mode
EZweb
EZ Navi
EZ FeliCa
Other Functions
Troubleshooting/
Remote Auto Lock
Index
Contents/Ready
Camera
Inputting
Characters

Introduction
Thank you for purchasing the W51H.
Before using it for the first time, be sure to read the W51H Basic Manual (this PDF manual)
so as to know how to use it correctly. After you finish reading this manual, store it and the
printed materials that come with the phone in a safe place for future reference.
Printed Manuals for the W51H (Japanese)
The W51H comes with a Basic Manual and an Instruction Manual.
The following information is also available on the au website.
•To download the Basic Manual or Instruction Manual
(http://au-pro.kddi.com/phone/torisetu/index.html)
•To access a keyword searchable au online manual
(http://www.au.kddi.com/manual/index.html)
You can also access the au online manual using EZweb.
EZweb Access
EZトップメニュー(EZ Top Menu)
→auお客さまサポート(au Customer Support)
→調べる(Information)
→オンラインマニュアル(Online Manual)
For information about basic
operation
W51H Basic Manual
Refer to this English PDF manual.
For detailed information
about each function
W51H Instruction Manual
English version not available.
EZ・FM
PCサイトビュー ア ー
通話
アドレス帳/
ペア機能
メール/
HelloMessenger
かんたんモード/
ティーンズ モ ード
EZweb
EZナビ
EZFeliCa
その他機能
困ったときは/
遠隔オートロック
English(英語)/
(中国語)
索引
目次/準備
カメラ
文字入力
W51H
by HITACHI
取扱説明書
目次
ご利用の準備
auICカード
基本操作
ペア機能
メール
HelloMessenger
カメラ
データフォルダ
microSD
TM
カード
EZweb
EZニュースフラッシュ
EZナビ
auMusic
EZアプリ
(BREW®)
auMyPage
EZFeliCa
EZ・FM
PCサイトビュ ーアー
PCドキュメントビューアー
かんたんモード
ティーン ズ モ ード
便利な機能
赤外線通信
機能設定
auのネットワ ーク
サービス
付録/索引
クイックガイド
The typeface, fonts, and colors of the texts on the screens shown in this manual may differ from
the actual contents. Also, certain icons and the scroll bars may be omitted.

1
Mind your manners!
A cellphone always emits weak radio waves while it is turned on.
Enjoy operation of your cellphone without forgetting to be considerate
of those around you.
Some locations do not allow the use of
cellphones.
■Using a cellphone while driving is dangerous and
prohibited by the Traffic Control Law.
■Using a cellphone inside of an aircraft is prohibited
by law. Be sure to turn off your cellphone before
takeoff.
Watch out where you use your cellphone,
and keep your voice down.
■Do not make calls at cinemas, theaters, museums,
libraries, or other similar locations. Turn off the
cellphone or use Manner Mode to ensure that the
ring tone does not disturb others.
■When in public, move to a location where you will
not be blocking traffic.
■On the Shinkansen, in a hotel lobby, or in other similar locations, move
to a location where you will not disturb others.
■Take care to avoid talking on the phone in a loud voice.
■Before taking the picture of others, be sure to obtain permissions first.
Cellphone radio waves may interfere with
electrical medical equipment.
■On a train or in other crowded locations, there is
always the possibility that someone nearby may be
wearing a pacemaker. Turn off your cellphone when
you are in a crowded area.
■Follow the rules of hospitals and other medical
facilities prohibiting the use or possession of cellphones.
Cellphone Etiquette

2
Camera
63
Shoot photos and
record movies, and
send them by e-mail.
Page
EZ Navi
Page 80
EZ FeliCa
Use the cellphone for
shopping by using
e-money, or use it as
member’s cards,
point cards, and so
on.
84
Page
EZ・FM
FM radio can be
listened to.
Page 88
Security Setup
Select either “Safety
Buzzer” or “Hot Dial”
as reliable setting
function.
Page108
Mail
PC Site Viewer
View WEB sites
created for viewing
on PCs.
PC Document Viewer
Display Word files,
Excel files or PDF
files, and so on.
Page
92
Hello Messenger
Enjoy meeting with the
members using our
original cartoon-like
characters.
Page 59
EZ Navi Walk,
Passenger Seat Navi,
and Safety Navi
allow you to get
various kinds of
location information.
They are all built-in
functions.
Smart Sensor
Fingerprint data can
be registered/edited
or tap setup can be
done.
Mail
EZweb
110
Page
Download
“
Chaku-Uta®
”
,
wallpaper, and other
data.
Send mail messages
to other cellphones or
to PCs.
Page 49
Page 72
Features
Cellphone Basics

3
Manner Mode and Easy Voice Memo
Checking Power, Signal
Strength, and Battery Level
Normally leave the phone turned on.
The phone needs to be turned on to make and receive
calls.
Hold down Ffor at least 1.5 seconds to turn on W51H.
After a while, W51H turns on with tone and the standby
screen appears.
Manner Mode
Use Manner Mode to turn off the
ring tone so as not to bother
others around you.
While the standby
screen is displayed,
hold down (for
about one second.
Shhhhhhh!
Page 35
Power
on
Page 14
Keep an eye on the battery level.
You cannot talk on the phone
if it is unable to receive a signal.
The phone may not function properly if battery
power is low.
indicates the current battery level.
Signal strength is low in some areas, even if
they are within the service area.
indicates the current signal strength.
Page 14
Page 14
Easy Voice Memo
If you cannot answer a call, Easy
Voice Memo plays an answering
message and records the caller’s
message.
While the standby
screen is displayed,
hold down Cfor
about one second.
Page
36

4
Holding a cellphone in your hand, talking on a cellphone, or
looking at a cellphone display to send mail or to perform any
other operation while driving is prohibited by Japanese law.
(Revised Traffic Control Law, effective November 1, 2004)
×Reading mail or looking
at the display.
×Holding a cellphone in
your hand to talk.
Drive Mode
I
’
m
d
r
i
v
i
n
g
r
i
g
h
t
n
o
w
.
.
.
In Drive Mode, the phone will play the messageただいま車を運転
しています。・・・(I am driving right now...), and then ask the caller
to leave a message using Easy Voice Memo.
While the standby screen is displayed, press
(
,
and then press
1
(ON). Next, press
2
(Drive
Mode) to enter Drive Mode.
Never use your cellphone while
driving!
Turn off your cellphone or use Drive Mode while
driving.

5
How to Combat Spam
・未承諾広告フィルター
(unsolicited advertisement filter)
・アドレスフィルター
(address filters)
−指定拒否設定
(blocks specific mail)
−指定受信設定
(receives specific mail)
Beware of One-ring Calls!
A “One-ring Call” (wan-giri in Japanese)
rings your phone only once, in an attempt
to make you call back to a service that
automatically bills you very high charges.
If W51H received a
“
One-ring Call
”
, the
icon appears at the
head of an incoming record.
Page
56
Page
31
You can set up mail filters to block specific
mail or mail identified as “未承諾広告※”
(unsolicited advertisement), which often
includes spam.
Your cellphone has the following filters to
block spam.
O
n
e
-
r
i
n
g
c
a
l
l
!
Beware of spam and One-ring
Calls!

6
Registering
the safety
information
◆When a major disaster strikes, you can use your au
cellphone to access the “
災害用伝言板
” (Disaster Message
Board) on EZweb and register your current condition,
comments, and other information about your well-being.
◆After you register information, it can be sent by mail to
family, friends, and other individuals you have registered
as a recipient of your Disaster Message Board information.
R Top Menu 災害用伝言板
(Disaster Message Board)
◆Disaster Message Board information can be accessed by
inputting the phone number of an individual over EZweb or
the Internet.※
※
Disaster Message Board information can be accessed
from another type of cellphone, PHS, or PC at
http://dengon.ezweb.ne.jp/.
Disaster Message Board
The Disaster Message Board lets you use EZweb to register
information about your well-being in case of a major disaster. The
information you register can be accessed from anywhere in Japan
over EZweb or the Internet.
Checking
the safety
information
Access
method http://dengon.ezweb.ne.jp/
O
K
.
I
’
m
Disaster Message Board Service

7
Disaster Message
Board top screen
Registration
Access
※Registration contents are retained for up to 72 hours.
※You can register up to 10 entries per phone number. Registering a new entry while there are already 10
registered entries, automatically overwrites the oldest entry.
※You can view a Disaster Message Board demonstration at:
R→TopMenu→auお客さまサポート →調べる →災害用伝言板(デモ版)
(au Customer Support) (Information) (Disaster Message Board (Demo))
※To view the Disaster Message Board in English, select the “English” option on the Disaster Message Board
top screen.
Information screen
Information registration
screen

8
Contents
Cellphone Etiquette 1
Mind your manners! ..................................... 1
Cellphone Basics 2
Features ...................................................... 2
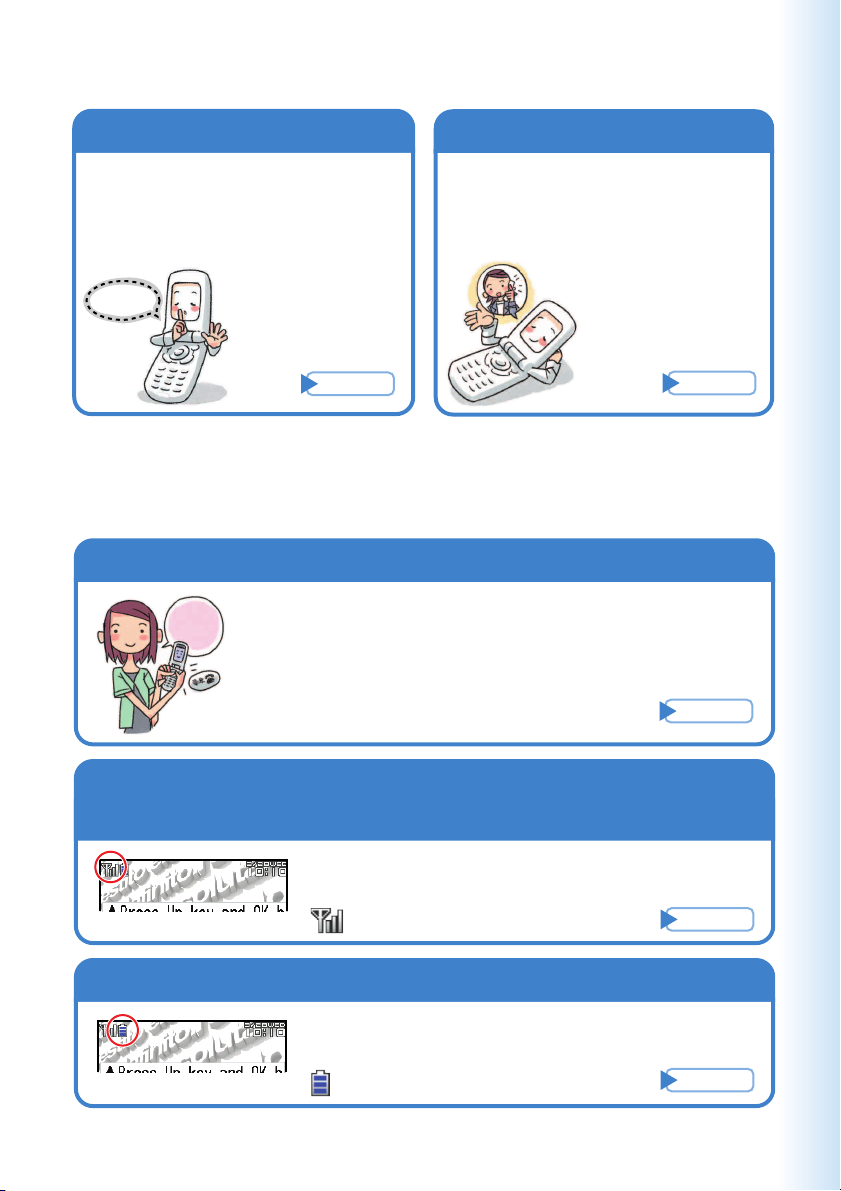
Manner Mode and Easy Voice Memo .......... 3
Checking Power, Signal Strength, and
Battery Level ............................................ 3
Never use your cellphone while driving! ...... 4
Beware of spam and One-ring Calls! ........... 5
Disaster Message Board Service ................ 6
Contents 8
Ready 10
Checking the Contents of the Package ..... 10
Names of Parts ........................................... 11
Charging the Battery Pack......................... 12
Turning On Power ..................................... 14
Initial Values .............................................. 14
Security Code and Passwords .................. 15
Selecting English as the Display Language
............................................................... 16
Operation Basics ....................................... 18
Display Indicators ...................................... 19
Main Menu ................................................. 20
Viewfinder Position and Self-portrait
Position ................................................... 22
Basic Operations in Viewfinder Position .... 23
Initializing E-mail and EZweb .................... 24
Looking Up Your Current Phone Number
and E-mail Address ................................ 25
Changing Your E-mail Address .................. 26
Phone Call 28
Making a Call ............................................. 28
Making an International Call ...................... 29
Answering a Call ........................................ 30
Redialing (Outgoing Records/Incoming
Records) ................................................. 31
One-ring Calls ............................................ 31
Changing the Ring Tone ............................ 32
Adjusting the Ring Tone Volume ................ 34
Adjusting the Earpiece Volume during
a Call ...................................................... 35
Turning On Manner Mode ......................... 35
Turning On Easy Voice Memo ................... 36
Playing an Easy Voice Memo .................... 37
Inputting Characters 38
Inputting an E-mail Address....................... 39
Inputting Pictographs and Useful Sentences
............................................................... 40
Address Book 42
Registering an Address Book .................... 42
Editing an Address Book Record ............... 44
Adding Outgoing or Incoming Record Data
to the Address Book ............................... 45
Dialing from the Address Book .................. 46
Pair Function 47
Registering a Pair Partner ......................... 47
Making a Phone Call, Sending Mail, Inviting
a Pair Partner to a Hello Messenger
Meeting ................................................... 48
Mail 49
Using E-mail .............................................. 49
Using C-mail .............................................. 50
Creating and Sending E-mail Messages ... 51
Reading Received E-mail Messages ......... 53
Reading an E-mail Message with an
Attached Photo or Movie ........................ 54
Replying to a Received E-mail Message ... 55
Avoiding Spam .......................................... 56
Creating and Sending C-mail Messages ... 57
Reading Received C-mail Messages ........ 58

9
Contents
Hello Messenger 59
Display the Hello Messenger Menu ........... 60
Invite the Members to the Meeting ............ 61
When You Get an Invitation Message to
Join ......................................................... 62
Camera Features 63
Camera 65
Shooting a Photo ....................................... 65
Recording a Movie ..................................... 66
Shooting Photos and Recording Movies in
Viewfinder Position ................................. 68
Viewing Photos and Movies ...................... 70
Attaching a Photo or Movie to an E-mail
Message ................................................. 71
EZweb 72
Using EZweb ............................................. 72
Displaying the EZ Top Menu ...................... 73
Bookmarking Sites You Frequently Access
............................................................... 74
Viewing a Bookmarked Site ....................... 75
Downloading Chaku-Uta®.......................... 76
Downloading Chaku-Uta-Full®................... 77
Checking Charges ..................................... 78
EZ Channel-Plus/EZ Channel ................... 79
EZ Navi Features 80
Safety Navi Features 82
EZ FeliCa 84
Communicating with Reader/Writer ........... 85
Setting FeliCa Lock ................................... 86
Using FeliCa-supported EZ Apps .............. 87
Using au Keitai Coupon ............................. 87
EZ•FM 88
Before using an antenna ........................... 88
Listening to the EZ·FM .............................. 89
Listening to the EZ·FM as a BGM/Stopping
the EZ·FM ............................................... 90
PC Site Viewer Features 91
PC Site Viewer 92
Mastering Operation Basics ...................... 92
Using PointCast ......................................... 93
Simple Mode 95
Entering Simple Mode ............................... 95
Exiting Simple Mode .................................. 96
Using the Simple Mode Main Menu ........... 97
Adding Data to the Address Book in
Simple Mode .......................................... 98
Using the Address Book in Simple Mode
............................................................. 100
Creating and Sending E-mail Messages
in Simple Mode ..................................... 101
Shooting a Photo in Simple Mode ........... 103
Viewing Photos in Simple Mode .............. 104
Teens Mode 106
Using Teens Mode ................................... 106
Turning on Teens Mode ........................... 107
Other Functions 108
Security Setup Features .......................... 108
Extension Mode ....................................... 109
Smart Sensor Features ............................ 110
Troubleshooting 113
If you lose your W51H .............................. 114
Index 116

10
●Battery pack
(51HIUAA)
●
Desktop holder
(51HIPUA)
●Casio round-type
earphone jack
conversion adaptor
01 (01CAQNA)
●Casio USB cable 01
(01CAHUA)
●Warranty (Japanese)
●Osaifu Keitai®Basic
Manual (Japanese)
●
LISMO Install Guide (Japanese)
●
Basic Manual (Japanese)
●Operating Precautions
(Japanese)
●Global Expert Owner’s
Guide (Japanese)
●
Instruction Manual (Japanese)
●CD-ROM
●W51H
EZ・FM
PCサイトビュ ー ア ー
通話
アドレス 帳/
ペア機能
メール/
HelloMessenger
かんたんモード/
ティーンズ モ ード
EZweb
EZナビ
EZFeliCa
その他機能
困ったときは/
遠隔オートロック
English(英語)/
(中国語)
索引
目次/準備
カメラ
文字入力
W51H
by HITACHI
取扱説明書
目次
ご利用の準備
auICカード
基本操作
ペア機能
メール
HelloMessenger
カメラ
データフォルダ
microSD
TM
カード
EZweb
EZニュースフラッシュ
EZナビ
auMusic
EZアプリ
(BREW®)
auMyPage
EZFeliCa
EZ・FM
PCサイトビューアー
PCドキュメントビューアー
かんたんモード
ティーン ズ モ ード
便利な機能
赤外線通信
機能設定
auのネットワ ーク
サービス
付録/索引
クイックガイド
●MDR-E0931
(sample) by SONY
Ready
Before using the W51H, check the contents
of the package comes with your W51H.
You should also familiarize yourself with
basic operations, like how to charge the
battery, how to turn the power on, etc.
Checking the Contents of the Package
◎The microSDTM memory card is not included.
◎An AC adaptor is not included. It is up to you to purchase a common AC
adaptor 01 (option).
All
set?

11
Ready
Earpiece
Main Display
Center key
Smart sensor
Cursor key
Microphone※1
Application
key
Mail key
Answer/
Pair key
Optical sensor
Address book key
Memo/Clear key
EZ/AF lock key
End/Power key
Number keys
Sub Display
Incoming indicator
FeliCa mark
Photo light/
Standby light
Stereo speaker
Camera start
indicator
Built-in antenna
※2
Built-in
antenna
※3
Camera lens
Battery pack/cover
Built-in antenna
※2
※
Do not take out this card if not necessary
as your number is recorded on it.
※1:
During a call, do not cover the microphone with your
hands or your chin. The microphone (placed on W51H
shown above) allows you to talk over your W51H in
Viewfinder position.
※2:
Take care to avoid covering the built-in antenna with
your hand when using the phone, using
EZweb, and when accessing GPS information.
※3:
Take care not to touch the exposed area of built-in
antenna.
au IC-Card
※
Names of Parts
■Back■Front
Flat-type earphone-microphone jack
Up key (side)
Down key (side)
Shutter key
Left key (side)
Right key (side)
Charge
indicator
(LED)
Strap eyelet
Center key (side)
Manner/Back key
Infrared port
Charging terminals
External
connection jack
microSD memory
card slot
■Side

12
Notch
Charge indicator
(LED)
Locking tab
Connector
You can also use the
plug by extending the
prongs like this.
Check the shape of
the connectors to ensure
they are aligned correctly
when you connect them.
Charging the Battery Pack
The battery pack that comes with the phone is not fully charged when
you purchase it. Be sure to charge the battery pack before using the
W51H for the first time. Charging takes about 140 minutes.
You should recharge the battery pack whenever the battery level icon
shows or .
◎You must purchase a common AC adaptor 01 (option) for charging. Note
that the configuration of the AC adaptor may be different from that shown
in the illustration above.
◎Pull out the connector of the common AC adaptor 01 (option) straight so
as to be parallel to the W51H or the desktop holder connector terminal
when you connect them.

13
Ready
※You can connect the common AC adaptor 01 (option) to the W51H directly to
charge the battery pack.
Check the shape of the connector
ends to ensure they are aligned
correctly (shown above) when
connecting.
Connect the common AC adaptor 01 (option) to the
desktop holder.
Check the shape of the connectors to ensure they are aligned correctly before
you connect.
Trying to force a connection may damage the connectors.
Insert the W51H into the desktop holder.
Fold out the power plug of the common AC adaptor 01
(option), and then plug it into a 100V AC power outlet.
This will cause the W51H charge LED indicator to light red, and (charging
battery icon) to display.
When charging is completed, the battery level icon will show and the LED
indicator will go out.
When charging the battery with your W51H in Viewfinder position, check the
charging battery icon shown on the screen. If you set “Func in Charge” to
“MEDIA STAND,” the screen keeps illuminating with the normal brightness.
To remove the W51H from the desktop holder, holding the holder by hand
and remove W51H.

14
Turning On Power
Hold down Ffor at least
1.5 seconds.
The standby screen appears.
•Communication is not possible while the signal strength
icon is (Out of Range).
•Communication may not be possible while the signal
strength icon is (Very Weak).
•The battery level icon (Fully Charged) only shows
during charging.
■Turning off power
Hold down Ffor at least 1.5 seconds.
Initial Values
The initial values are as follows.
Lock No. 1234
Teens Lock No. 1234
Caller ID ON
Incoming Display ON
Profile Blank
Font Size Add Book Char Middle
Input Middle
Mail Char Middle
EZweb Char Small
Data Folder Char Middle
Text Memo Char Middle
Icon
Signal
Strength Strong Medium Out of
Range
Weak Very
Weak
※Using Extension Mode
Using the Extension Mode, W51H automatically shuts down the
radio wave after issuing the Low Battery Alert. This is quite a useful
function that you can still check outgoing/incoming records, content
of e-mail, address book, Schedule and so on when necessary. In
this case, you can only use the functions which needs no radio
wave.
Standby screen
Icon
Battery
Level High Low
Fully
Discharged Extension Mode
※
Medium
Fully
Charged
109
Page
Charging

15
Ready
Security Code and Passwords
The W51H lets you use the numbers and passwords described below.
Be sure to take steps so you do not to forget your numbers and
passwords. You will need them to perform various operations and to
access subscription services.
Lock No.
Usage Examples
Initial Values
For modifying various phone settings
1234
Teens Lock No.
Usage Examples
Initial Values
For modifying various phone settings in Teens Mode
1234
EZ Password
Usage Examples
Initial Values
For entering and canceling subscriptions for EZweb fee-based content
4-digit number you entered on your subscription contract
Security Code
Usage Examples
Initial Values
①For remote operation of the Answering Service (Voice Mail) and Call
Transfer from a standard phone
②For inquiries, applications, and service modifications using au
Customer Service Center voice guidance, au website, and EZweb
③For changing e-mail settings
4-digit number you entered on your subscription contract
Premium EZ Password
Usage Examples
Initial Values
①
For entering and canceling subscriptions for EZweb fee-based content
paid for using “
まとめてau支払い
” (au Collective Payment Service)
②
For purchasing products from EZweb sites that use “
まとめてau支払い
”
(
au Collective Payment Service
)
4-digit number you entered on your subscription contract
If fingerprint data is registered, Fingerprint authentication screen appears
instead of the entering Lock No. screen.

16
Selecting English as the Display
Language
While the standby screen
is displayed, press c
.
Use
a
to select “ 機能設定 ”
(Settings), and then press
c
(OK).
Press
3
( 画面表示/照明 )
(ScreenSetup/DisplayLighting).

17
Ready
5(Set Language).
2(English).
This selects English as the display
language.
Even if English is selected as the display language, schedule and other
dates are displayed in the format year/month/day. Folder names inside of
the Data Folder are also displayed in year/month/day format.

18
h
※Can be operated in Viewfinder position only.
Operation Basics
■Key functions
•Displays the standby
shortcut icon.
•Selects an item.
•Displays the EZ apps
menu.
•E-mail
•C-mail (hold down for
about one second)
•Dials/answers a phone call.
•Displays the Pair Function.
•Memo
•Toggles Easy Voice Memo
on and off (hold down for
about one second).
•Deletes a character.
•Returns to the previous
menu screen.
%
L
N
C
l
d
•Displays incoming records.
•Returns to the previous
menu screen.
•Selects an item.
•Displays outgoing records.
•Scrolls forward one menu
screen.
•Selects an item.
•Displays the main menu.
•Applies an item.
•Displays the address book.
•Creates a new address
book (hold down for about
one second).
•Toggles power on and off
(hold down for at least 1.5
seconds).
•Hangs up.
•Terminates a function.
•Returns to the standby
screen.
•Displays the EZ menu.
&
R
F
0〜9*#
r
c
•Selects news flash telop,
window.
•Selects an item.
u
•Inputs phone number.
•Inputs text character.
■
Side key functions →
“Viewfinder Position and Self-portrait Position” (Page 22)
•Starts photo (hold down for
about one second).
•Shutter when shooting photo
•Starts recording when
recording a movie.
b
•Toggles Manner Mode
on and off (hold down
for about one second).
(•Displays outgoing records.※
•On menu, scroll one screen forward/backward.
•Selects an item. ※
•Selects news flash telop, window.
•Displays the standby shortcut icon.
•Selects an item.
•Page scroll at browser display
nm
◎If you lose track of where you are or if you make a mistake:
Press C/(to scroll back to the previous screen.
Press Fto return to the standby screen.
◎When is in the lower right corner of the photo or movie screen,
pressing 0will display key help.
◎Holding down c/vfor about one second toggles side key’s disabling
feature on and off while W51H is folded. To cancel the side key’s
disabling feature, follow the above procedure with W51H unfolded.
•Displays the
main menu.
•Applies an item.
v
Table of contents
Other KDDI Cell Phone manuals

KDDI
KDDI ARROWS Z ISW11F Installation guide

KDDI
KDDI IS12T Installation guide

KDDI
KDDI AQUOS SHOT SH006 User manual

KDDI
KDDI cyber-shot S006 User manual

KDDI
KDDI A1402S Installation guide

KDDI
KDDI W62SA User manual

KDDI
KDDI au IS12SH Specification sheet

KDDI
KDDI ARROWS ES IS12F Installation guide

KDDI
KDDI T002 User manual

KDDI
KDDI T003 User manual