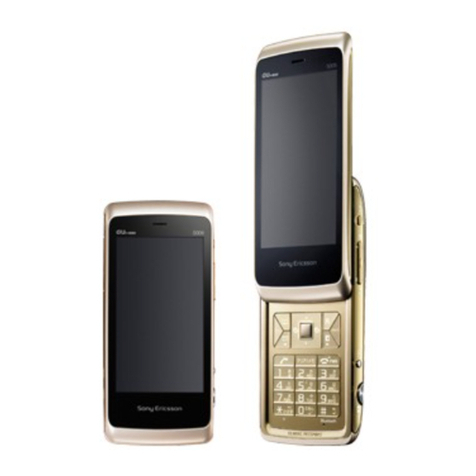
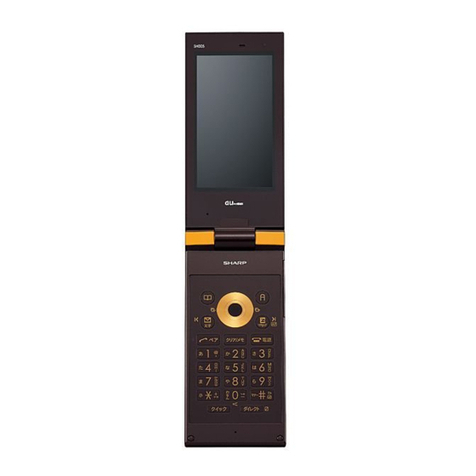
KDDI AQUOS SHOT SH006 User manual

SH006 BasicManual
Contents
Noteson
CellPhoneUse
Illustrationsand
Screenshots
inThisManual
GettingReady
Makingand
AnsweringCalls
GlobalFunction
CharacterInput
PhoneBook
Mail
Camera
EZweb
EZNewsEX
EZNavi
TV(1Seg)
InCaseof
LossofYourSH006
Troubleshooting
Index
Forinquiries,call:auCustomerServiceCenter
Forgeneralinformationandcharges(tollfree)
Forloss,theftordamageandoperationinformation
(tollfree)
Fromfixed-linephones:
PRESSINGZEROWILLCONNECTYOUTOANOPERATOR
AFTERCALLING157ONYOURauCELLPHONE
Fromaucellphones:
Fromfixed-linephones: Fromaucellphones:
157
areacodenotrequired
AccessMethod
Readthiscodefor
aneasyaccessto
auOnlineManual.
Readthiscodeforaneasy
accessto
みんなでQ&A
「なるほど!au」
(auUsersForum).
・Thepacketcommunication
chargeapplies.
Sales:KDDICORPORATION•
OKINAWACELLULARTELEPHONECOMPANY
Manufacturedby:SHARPCORPORATION
February2010Edition
CellphoneandPHSoperatorscollectandrecycleunused
telephones,batteriesandbatterychargersatstores
bearingthelogoregardlessofbrandandmanufacturer
toprotecttheenvironmentandreusevaluableresources.
なるほど!au
みんなでつくる、auQ&Aサイト
EZTopMenu/Searchauお客さまサポート(auCustomerSupport)
みんなでQ&A
「なるほど!au」(auUsersForum)
FromEZweb:
AccessMethod EZTopMenu/Searchauお客さまサポート(auCustomerSupport)
お問い合わせ(Inquiries)
・Menusaresubjecttochangewithoutpriornotice.
Incaseabovenumbersarenotavailable,
0120-977-033
(exceptOkinawa)
0120-977-699
(Okinawa)
113
areacodenotrequired
0077-7-113
0077-7-111
BasicManual
read this manual to master
the cellular phone

Introduction
Thank you for purchasing the SH006. Before using your SH006, be sure to read the SH006 Basic Manual (this PDF manual)
to ensure correct usage. After you have finished reading this manual, store this PDF manual and the printed manuals in
safe places so you can retrieve them whenever you need them.
Manuals for the SH006
The SH006 comes with the Basic Manual and Instruction Manual.
● For learning the basics:
Read the SH006 Basic Manual (this manual).
● For learning details on using each function:
Read the supplied SH006 Instruction Manual (Japanese). Be sure to read the Safety Precautions “安全上のご注意” to
ensure proper usage of the SH006.
The keyword searchable au Online Manual is also available on the au homepage:
http://www.au.kddi.com/manual/index.html
To access from EZweb:
R⇒Top Menu/Search ⇒
auお客さまサポート
(au Customer Support) ⇒
オンラインマニュアル
(Online Manual)
Scan this QR code to access the au Online Manual. ▶
•

Illustrations and Screenshots in This Manual
Note on Illustrations
The illustrations in this manual may look different from the actual cell phone in shape, color and typeface. The key
illustrations are also simplified as shown below.
Key Illustration Key Illustration
A&G%
BLHR
CNIC
D
123
456
789
*0#
JF
KT
L(
Eqw Mg
Fcajs
udlr
Nf
Ob
Note on Screenshots
The screenshots in this manual are simplified and may look different from the actual cell phone screens.
The display design themes of the SH006 vary by model color. The screenshots for the Cool White model are used in
this manual.
■
■
•
A
B
C
D
E
F
G
H
J
I
K
L
M
N
O
A
B
C
D
E
F
G
H
J
I
K
L
M
N
O

Notes on Cell Phone Use
Cell Phone Etiquette
The cell phone always emits weak radio waves when power
is on.
Use the cell phone in an enjoyable and safe manner without
forgetting to be considerate of others around you.
Use of cell phones is not allowed in some places.
Do not use the cell phone while you are driving. Doing
so is both dangerous and prohibited by law.
Using a cell phone in an aircraft is prohibited by law.
Set Airplane Mode to ON and turn the cell phone
power off.
Radio waves from cell phones may interfere with
medical electrical equipment.
Some people close to you in crowded places such
as packed trains may be using a cardiac pacemaker.
Turn the cell phone off in such places.
Abide by the rules of hospitals and other medical
institutions where it is forbidden to use or carry cell
phones.
Be considerate of where you use the cell phone and
how loudly you talk.
Do not make calls in theaters, museums, libraries, and
other similar places. Turn power off or turn on manner
mode not to disturb others around you by ring tones.
Do not use the cell phone on a street where you might
interrupt the flow of pedestrians.
Move to areas where you will not inconvenience others
on trains or in hotel lobbies.
●
•
•
●
•
•
●
•
•
•
Refrain from talking in a loud voice.
Obtain the permission of other people before you take
their photos with the cell phone’s camera.
Do not record information with the cell phone’s camera
in bookstores and other locations where taking photos
is not permitted.
Do Not Use the Cell Phone While Driving!
Turn off your cell phone or put it in Drive Mode while
driving.
Do not use the cell phone while driving a car/motorcycle
or riding a bicycle. It may result in a traffic accident. Using
a cell phone while driving is prohibited by law. Using a
cell phone while riding a bicycle may also be punishable
by law.
Prohibited!
Looking at a cell phone display
Talking on a cell phone while holding it
Drive Mode
In Drive Mode, a Japanese message meaning “I’m
driving now, so I can’t answer your call.” is played
when a call is received, and asks the caller to leave a
message on the answer memo.
When the standby screen is displayed, press )(, use
Ujto select Drive, and then press Uc(Set).
•
•
•
•
•
Notes on Cell Phone Use
Disaster Message Board Service
When a large scale disaster occurs, you can register
your safety information from EZweb. The registered
information can be referred from anywhere in Japan from
EZweb or Internet.
When a large scale disaster occurs,
from an au phone, you can register
your safety information (i.e. your
condition and comments) to the 災害
用伝言板 (Disaster Message Board)
created on the EZweb.
After registration of your safety
information, e-mail is sent to your
family or acquaintances you have
previously designated to notify that
your safety information has been
uploaded to the 災害用伝言板 (Disaster
Message Board).
•
•
You can inquire for safety information
of a person by entering his/her phone
number from EZweb or Internet.*
* To inquire from other carriers’ cell
phone, a PHS or PC, access
“http://dengon.ezweb.ne.jp/”.
Access
R⇒Top Menu/Search ⇒
災害用伝言板
(Disaster Message Board)
http://dengon.ezweb.ne.jp/
The maximum storage period of the registered
information is 72 hours.
The maximum available number of registrations is ten
per phone number. When the number of registrations
exceeds ten, the oldest one is overwritten.
The demonstration of this service can be referred to
anytime by pressing IR⇒Top Menu/Search ⇒
auお客さまサポート
(au Customer Support) ⇒
調べる
(Search) ⇒
災害用伝言板(デモ版)
(Disaster
Message Board (Demo Version)).
To view the Disaster Message Board in English, select
English from the top menu of the Disaster Message
Board.
•
•
•
•
•
Registering
safety
information
Registering
safety
information
Inquiring
for safety
information
Inquiring
for safety
information

Contents
Introduction
Illustrations and Screenshots in This Manual
1
Notes on Cell Phone Use 2
Cell Phone Etiquette ……………………………………
Do Not Use the Cell Phone While Driving! ……………
Disaster Message Board Service ……………………
Contents 4
Getting Ready 6
Checking the Contents of the Box …………………… 6
Names of Parts ………………………………………… 7
Replacing the Battery Pack …………………………… 8
Charging the Battery Pack …………………………… 9
Own Photo Position and Viewer Position …………… 0
Operating the Touch Panel ……………………………
Using the Horizontal Menu ……………………………
Learning the Basics …………………………………… 5
Turning On Power ……………………………………… 7
Switching the Display Language to English ………… 7
Initial Setup of E-mail and EZweb …………………… 7
Checking Your Phone Number and E-mail Address … 7
Display Indicators ……………………………………… 8
Using Main Menu ……………………………………… 9
Changing Your E-mail Address …………………………
Security Code and Passwords …………………………
Making and Answering Calls 23
Making a Call ……………………………………………
Making an International Call ……………………………
Answering a Call …………………………………………
Returning a Call (Outgoing History/Incoming History)
…
One-ring Calls ……………………………………………
Adjusting the Earpiece Volume during a Call ………… 5
Turning On Manner Mode ……………………………… 5
Changing the Incoming Ring Tone …………………… 5
Adjusting the Incoming Ring Tone Volume …………… 6
Turning On the Answer Memo ………………………… 6
Global Function 28
Setting the Area ………………………………………… 8
Obtaining the Latest PRL (Preferred Roaming List) … 8
Calling Japan from Overseas ………………………… 9
Character Input 30
Character Entry Modes ………………………………… 0
Entering Alphanumeric Characters …………………… 0
Entering E-mail Addresses ……………………………
Entering Pictograms ……………………………………
Phone Book 33
Saving a Phone Book Entry ……………………………
Dialing from the Phone Book …………………………
Editing Phone Book Entries ……………………………
Saving a Phone Number from the Incoming
or Outgoing History ……………………………………
Contents

5
Contents
Mail 35
Using E-mail …………………………………………… 5
Creating and Sending E-mail Messages …………… 5
Reading Received E-mail Messages ………………… 6
Reading an E-mail Message
with an Attached Photo or Movie ……………………… 6
Replying to Received E-mail Messages ……………… 6
Rejecting Spam ………………………………………… 7
Using C-mail …………………………………………… 8
Creating and Sending C-mail Messages …………… 8
Reading Received C-mail Messages ………………… 8
Camera 39
Photo Taking Tips ……………………………………… 9
About Photo Modes …………………………………… 0
Taking a Photo …………………………………………
Viewing Photos …………………………………………
EZweb 42
Accessing Sites …………………………………………
Bookmarking Frequently Accessed Pages …………… 5
Viewing Bookmarked Pages …………………………… 5
Checking Charges ……………………………………… 5
Downloading Chaku-Uta-Full-Plus™/
Chaku-Uta-Full®/Chaku-Uta® ………………………… 5
EZ News EX 47
Basic Operations ……………………………………… 7
Setting EZ News EX …………………………………… 7
EZ Navi 49
Passenger Seat Navi for People
in the Passenger Seat to Check the Route ………… 9
Security Navi to Check Where Your Kids Are ………… 9
EZ Navi Walk for When You Go Out ………………… 50
Evacuate Navi to Guide You Home or to Nearby
Evacuation Areas during Disasters …………………… 5
TV (1Seg) 52
Initial Setup of au Media Tuner ………………………… 5
Watching TV (Seg) …………………………………… 5
Basic Operations ……………………………………… 5
Exiting the au Media Tuner …………………………… 5
In Case of Loss of Your SH006 55
Setting Conditions for Activating
the Remote Ctrl Lock …………………………………… 55
Remotely Activating the Remote Ctrl Lock
on Your SH006 ………………………………………… 55
Activating the Remote Ctrl Lock
by the Security Lock Service ………………………… 56
Troubleshooting 57
Index 59

6
Getting Ready
Getting Ready
Checking the Contents of the Box
The box contains the cell phone and accessories.
Cell Phone• Battery Pack• CD-ROM
Instruction Manual (Japanese)
Warranty (Japanese)
Safety Precautions (Japanese)
Global Passport CDMA Owner’s Guide (Japanese)
Osaifu-Keitai®Guide (Japanese)
JIBUN BANK Launcher Operation Guide (Japanese)
Notice Sheet (Japanese)
Touch Panel & Camera Operation Guide (Japanese)
Wi-Fi WIN Operation Guide (Japanese)
•
•
•
•
•
•
•
•
•
•
An AC adapter, desktop holder, earphone plug adapter 01 for external connection jack, USB cable, stereo earphone,
and microSD memory card are not included with your cell phone. Purchase these items separately.
•

7
Getting Ready
* Do not remove this card unnecessarily as your phone number is recorded on it.
Cutout
au IC-Card*
Names of Parts
microSD
memory
card*
* Insert this card with the microSD logo side up.
From Side (Closed Position)■
Television antenna
Side shutter key
Side key (Down)Side key (Up)
Side manner/clear key
Television antenna
Side shutter key
Side key (Down)Side key (Up)
Side manner/clear key
Diagonally from Front
(Closed Position)
■
Strap eyelet
Charging terminals
Incoming/Charge
indicator
External connection
jack/cover
Sub-display
Strap eyelet
Charging terminals
Incoming/Charge
indicator
External connection
jack/cover
Sub-display
From Front
(Open Position)
■
Earpiece
Center key
Application key
EZ key
Clear/Memo key
Power/End key
Direct/Veil View key
Light sensor
Display
Cursor key
Address book key
Mail/Character key
Talk key
Number keys
Quick key
Microphone
Earpiece
Center key
Application key
EZ key
Clear/Memo key
Power/End key
Direct/Veil View key
Light sensor
Display
Cursor key
Address book key
Mail/Character key
Talk key
Number keys
Quick key
Microphone
From Back
(Closed Position)
■
Infrared port
Mobile light/flash
Internal au IC-Card
Camera lens
Speaker
microSD memory
card slot
Battery pack/cover
FeliCa mark
Internal antenna
Internal antenna
Infrared port
Mobile light/flash
Internal au IC-Card
Camera lens
Speaker
microSD memory
card slot
Battery pack/cover
FeliCa mark
Internal antenna
Internal antenna

8
Getting Ready
Contacts
Protruding
edge
1 2-1
2-32-2
Slight opening
When removing the battery pack, always pull up on
the protruding edge. Doing otherwise may result in
damage to the contacts.
When removing the battery pack, turn the cell phone
power off.
Before attaching the battery pack, make sure that the
au IC-Card is inserted.
Failure to follow the correct procedure when removing
or attaching the battery pack may result in damage to
the battery pack or the battery pack cover.
•
•
•
•
Replacing the Battery Pack
Removing the Battery Pack
Remove the battery pack cover on the back of
the cell phone by sliding it in the direction of
the arrow.
Pull upward on the protruding edge of the
battery pack to remove it from the cell phone.
Attaching the Battery Pack
With the protruding edge of the battery pack
facing up, align the contacts on the battery
pack with those of the cell phone and then
insert the battery pack securely.
Properly fit the four tabs of the battery pack
into the grooves of the cell phone, and then
slide the battery pack cover in the direction of
the arrow until it locks.
■
➡
➡
■
➡
➡
1 2
Protruding
edge
Battery pack
1 2
Protruding
edge
Battery pack

9
Getting Ready
Confirm that the incoming/charge indicator
lights.
Charging: The incoming/charge indicator lights.
Charging finished: The incoming/charge indicator
goes out.
Be sure to close the cover of the external connection
jack when charging is finished.
Do not pull or twist the cover of the external
connection jack forcibly.
Be sure to use the common AC adapter 02 (sold
separately) when charging overseas.
➡
•
•
•
•
•
Charging the Battery Pack
The battery pack is not fully charged at the time of purchase.
Be sure to charge the battery pack before using the cell
phone for the first time.
An AC adapter is not included with your cell phone.
Purchase a specified AC adapter (sold separately).
Connect a specified AC adapter to the cell
phone with the battery pack attached.
Open the cover of the external connection jack. Check
the shape of the connector of the AC adapter, and
plug it straight into the external connection jack.
Unfold the power plug of the AC adapter and
plug it into a 100 V AC power outlet.
•
➡
•
➡
Incoming/Charge indicator
3
12
Connector
100 V AC
power outlet
Power plug
AC adapter
External
connection jack
Incoming/Charge indicator
3
12
Connector
100 V AC
power outlet
Power plug
AC adapter
External
connection jack

0
Getting Ready
Close the display from the Own Photo Position.
Viewer Position
When opening, closing, or rotating the display, make
sure the TV antenna is put away.
Keep the display facing inside (Closed Position) when
carrying the cell phone around. Carrying the cell
phone around in the Viewer Position could result in
damage to the display.
Do not rotate the display forcefully. This could result in
damage to the cell phone.
The microphone cannot be used in the Viewer
Position. When making or receiving a call, the cell
phone must be in the Open Position.
➡
•
•
•
•
Own Photo Position and Viewer
Position
With the SH006, you can use your cell phone in different
positions by switching from the opened state (Open
Position) to the Own Photo Position or Viewer Position.
Open the display.
Open Position
Turn the display portion 180 degrees
clockwise.
Own Photo Position
➡

Getting Ready
Operating the Touch Panel
You can operate SH006 by directly touching the screen.
(Touch panel operations may not be available for some
functions.)
Basic Operations
Tap
Gently touch an item or
button and then immediately
release your finger.
Long Touch
Keep touching an item or
button.
Slide
While your finger is gently
touching an item, drag it to
the desired position.
Flick
Operate the screen by
quickly moving (flicking) your
finger up, down, right, or left.
■
Slide and Long Touch
While your finger is gently
touching an item, drag it to
the desired position and then
keep it in a stopped state.
Pinch
Use this operation on the
Photo Viewer to zoom in or
out. While two of your fingers
are touching the screen,
move the fingers apart to
zoom in, or closer together
to zoom out.
You can directly tap an indication displayed on the bottom
of the screen to execute the item. Some functions may not
be executed.
Use one finger to perform touch operations. Operation
may not be possible when operations such as the
following are performed.
Operation with a finger when you are wearing gloves
or operation with a fingernail
Operation with an object that has a sharp tip such as
a ballpoint pen or pencil
Operation while foreign matter is on the display
Be careful because the following cases may result in
misoperation.
Operation with a touch pen
Operation with a wet finger
Operation in which the touch panel is pressed hard
Operation when dirt or dust is adhering to the
display
•
•
•
•
•
•
•
•
•

Getting Ready
Operation while your hand is touching the area
surrounding the touch panel
Operation while a sticker or sheet (commercially
available protective sheet, privacy screen sticker,
etc.) is stuck on the touch panel
Operation Modes
The following two operation modes are available.
Mode Description
Touch Panel
Mode
Allows you to directly tap the screen to
select/execute the desired item. You
can also slide the cursor or scroll the
screen.
Flick Arrow Key
Mode
Does not allow you to directly tap the
screen to select/execute the desired
item. Flick the screen to move the
cursor to the desired item and then
directly tap the indication, such as
“OK”, at the bottom of the screen to
execute the item.
Directly tapping the indications may not
be available for some functions.
When you are in this mode,
appears at the top of the screen.
•
You can select/execute an item by using a key
operation regardless of the operation mode.
Even in Touch Panel mode, performing an operation
by tapping may not be possible in some cases.
•
•
■
•
•
Using the Virtual Keypads
This function is for displaying the operation keys, number
keys, and other items on the screen. You can display a
virtual keypad by flicking or tapping on the screen.
You can use the virtual keypad only in the Viewer Position.
If you display the virtual keypad while in the Viewer Position
and turn the display to the Open Position, the virtual keypad
disappears.
Virtual Keypad for the Standby Screen
You can display this when the standby screen is displayed
and nothing is selected by tapping the wallpaper part or
flicking upward from the bottom of the screen.
Virtual Keypad 1
You can display this in various Touch Panel mode screens
such as the Main menu screen by flicking upward from the
bottom of the screen.
■

Getting Ready
Virtual Keypad 2
You can display this when the virtual keypad for the
standby screen or virtual keypad 1 is displayed by tapping
the arrow at the top of the virtual keypad or flicking in either
the right or left direction.
Virtual Keypad for Number Input
You can display this by flicking upward on the number input
screen.
Virtual Keypad for Lock No. Entry
You can display this by flicking upward on the Lock No. or
password entry screen.
Virtual Keypad for Horizontal Menu
You can display this when activating the TV (1Seg) or PC
Site Viewer by flicking from right to left of the screen.
You can close a virtual keypad by tapping “Close” at
the top of the virtual keypad, flicking downward, or
tapping the background part.
•
Tap the arrow

Getting Ready
Using the Horizontal Menu
With the SH006, you can activate the functions suitable for
use in landscape orientation (such as the TV or camera)
directly from the Horizontal menu.
When the standby screen is displayed, press c
and switch your SH006 to the Viewer Position,
and then rotate it left horizontally.
Tap the desired function.➡
Adjusting the Touch Panel
If you are unable to perform selection of keys and items
with the touch panel as intended, please adjust the touch
panel.
When the standby screen is displayed, press c.
Use a to select SETTINGS and then
press c (Select).
Use j to select Touch Panel and then
press c (Select).
Use j to select Touch Panel Adj and
then press c (Select).
Tap the centers of the six circles displayed on
the screen in the vertical screen position.
Rotate SH006 to the left horizontal, and tap
the centers of the six circles displayed on the
screen.
The message “Touch panel adjustment is finished” is
displayed once all of the circles have changed color.
To adjust the touch panel, perform the steps with the
finger you normally use in a position allowing for ease
of operation.
■
➡
➡
➡
➡
➡
•

5
Getting Ready
Learning the Basics
Key Assignments
Side Key Assignments
If you lose track of where you are or if you make a mistake, press OCto return to the previous screen. Return to the
standby screen by holding down OFfor at least one second.
■
■
•
d: Display the Notification
window and Shortcut menu.
N: Make/answer calls.
C: Set/cancel Answer memo.
Delete characters.
Cancel operation.
l: Display Incoming History.
u: Display the ticker field, search window
and info pane.
T: Display the Wi-Fi WIN intro page, and
set/cancel new Veil View (long press).
w: Display Quick access menu.
c: Display Main menu.
R: Display EZ Service menu.
F: Turn power on/off (long press).
End call/communication.
Cancel operation.
0〜9*#:
Input phone numbers and characters.
r: Display Outgoing History.
%: Display EZapps menu.
&: Use Phone Book.
L: Display E-mail/C-mail menu.
g :
Turn on the mobile light (long press).
f: Activate LISMO
(long press).
b: Activate Camera (long press).
( :
Display Manner Mode menu.
Set/cancel manner mode (long press).
g :
Turn on the mobile light (long press).
f: Activate LISMO
(long press).
b: Activate Camera (long press).
( :
Display Manner Mode menu.
Set/cancel manner mode (long press).

6
Getting Ready
Virtual Keypad Key Assignments
Virtual Keypad for
the Standby Screen
Virtual Keypad Virtual Keypad
Virtual Keypad for
Number Input
Virtual Keypad for
Lock No. Entry
Virtual Keypad for
Horizontal Menu
<TV (Seg)>
Virtual Keypad for
Horizontal Menu
<PC Site Viewer>
* You can display this such as when playing back video
data recorded with 1Seg.
■
A B DC E F
G H I
A B DC E F
G H I
J K L
N POM Q
S
R
J K L
N POM Q
S
R
TT
T
K P Q
T
K P Q
T
K P
T
K P
TT
T
U L
T
U L
T
N P R
T
N P R
AAddress Book key LPower/End key
BE-mail key MF key
CMENU key NF key
DC-mail key ODirect/Veil View key
ECalendar key PEnter key
FEZ key QQuick key
GInfrared key RF key
HMemo key SF key
IProfile key TNumber keys
JAnswer key UREC key/STOP key
KClear key
Virtual Keypad for
Horizontal Menu*

7
Getting Ready
Use j to select
画面表示
(Screen Display) and
then press c (選択 [Select]).
Use j to select Set Language and then press
c (選択 [Select]).
Use j to select English and then press
c (Set).
Initial Setup of E-mail and EZweb
To use e-mail and EZweb, you need to apply for an EZweb
subscription. If you did not apply for an EZweb subscription
at the time of purchase, contact an au shop or the au
Customer Service Center.
Also, before use, you need to configure initial settings. Your
e-mail address is assigned automatically in the initial setup.
When the standby screen is displayed, press L.
Press c (OK).
After a short while, your e-mail address is displayed.
Press c (OK).
The initial settings are complete.
You can also configure initial settings by pressing IR
or I%.
Checking Your Phone Number
and E-mail Address
When the standby screen is displayed, press c
and then 0.
➡
➡
➡
➡
➡
•
Hiding/Redisplaying the
Notification Window
When the notification window is
displayed on the standby screen, you
can temporarily hide it by pressing
&(Back), and then display the Main
menu by pressing c. To redisplay the
hidden notification window, press d
when the standby screen is displayed.
Turning On Power
Hold down F for at least one second.
You cannot receive or make calls if (out of range
indicator) is displayed.
Turning Off Power
When the standby screen is displayed, hold down Ffor
at least one second.
Switching the Display Language
to English
You can switch the display language for function names
and other items to English.
When the standby screen is displayed, press c.
Use a to select
設定
(Settings) and then press
c (選択 [Select]).
■
•
■
➡
Notification windowNotification windowNotification windowNotification window

8
Getting Ready
Display Indicators
Display indicators inform you of mail arrival, current settings, etc.
Display
■
A CB D FE GH I KJ
L
M
N
O
P
Q SR
A CB D FE GH I KJ
L
M
N
O
P
Q SR
Indicator Description
ASignal strength
BBattery level
C
Wi-Fi WIN connection
status
Information about current
overseas area
Current area (e.g.
USA)
Calling is available
Packet
communication is
available
D
A microSD memory card
(commercially available)
inserted
EDuring a call
au Media Tuner activated
FEZapps activated
GConnecting to EZweb
Indicator Description
H
Flick Arrow Key mode set
Receiving EZ News EX
information
IMissed calls
JNew or unread e-mail/
C-mail
KCurrent date and time
LTicker field
MSearch window
NInfo pane
ONotification icons
PShortcut menu
QAuto Lock activated
RManner mode set
SAnswer memo or manner
mode set
Indicator Description
ASignal strength
BBattery level
C
Wi-Fi WIN connection
status
Information about current
overseas area
Current area (e.g.
USA)
Calling is available
Packet
communication is
available
D
A microSD memory card
(commercially available)
inserted
EDuring a call
au Media Tuner activated
FEZapps activated
GConnecting to EZweb
Indicator Description
H
Flick Arrow Key mode set
Receiving EZ News EX
information
IMissed calls
JNew or unread e-mail/
C-mail
KCurrent date and time
LTicker field
MSearch window
NInfo pane
ONotification icons
PShortcut menu
QAuto Lock activated
RManner mode set
SAnswer memo or manner
mode set
Table of contents
Other KDDI Cell Phone manuals

KDDI
KDDI URBANO V03 Installation guide

KDDI
KDDI SH001 User manual

KDDI
KDDI T005 User manual

KDDI
KDDI SA002 User manual

KDDI
KDDI AU A5404S Installation guide

KDDI
KDDI NS02 User manual

KDDI
KDDI biblio User manual

KDDI
KDDI CA001 User manual

KDDI
KDDI ARROWS Z ISW11F Installation guide

KDDI
KDDI au W32K Specification sheet

KDDI
KDDI Qua Phone PX Quick start guide

KDDI
KDDI t008 User manual

KDDI
KDDI aquos K SHF31 User manual

KDDI
KDDI ARROWS ES IS12F Installation guide

KDDI
KDDI CA007 User manual

KDDI
KDDI exilim CA005 User manual

KDDI
KDDI T007 User manual

KDDI
KDDI aquos shl25 User manual

KDDI
KDDI Au TS003 Installation guide

KDDI
KDDI SH011 User manual