manuals.online logo
Brands
  1. Home
  2. •
  3. Brands
  4. •
  5. KDK
  6. •
  7. Fan
  8. •
  9. KDK X48XG / X48XGMN User manual

KDK X48XG / X48XGMN User manual

This manual suits for next models

7

Other KDK Fan manuals

KDK K14X5 User manual

KDK

KDK K14X5 User manual

KDK KX405 User manual

KDK

KDK KX405 User manual

KDK S44XU User manual

KDK

KDK S44XU User manual

KDK 24CURB User manual

KDK

KDK 24CURB User manual

KDK 23BWDBH User manual

KDK

KDK 23BWDBH User manual

KDK 23BWBH User manual

KDK

KDK 23BWBH User manual

KDK 17CUH User manual

KDK

KDK 17CUH User manual

KDK K15YC User manual

KDK

KDK K15YC User manual

KDK K15Z5 User manual

KDK

KDK K15Z5 User manual

KDK 25GSC User manual

KDK

KDK 25GSC User manual

KDK K14ZW User manual

KDK

KDK K14ZW User manual

KDK U60FW User manual

KDK

KDK U60FW User manual

KDK K15YX User manual

KDK

KDK K15YX User manual

KDK K15Y2 User manual

KDK

KDK K15Y2 User manual

KDK KX405 User manual

KDK

KDK KX405 User manual

KDK T60AW User manual

KDK

KDK T60AW User manual

KDK 15TGQZ User manual

KDK

KDK 15TGQZ User manual

KDK R48SP User manual

KDK

KDK R48SP User manual

KDK N48LG User manual

KDK

KDK N48LG User manual

KDK 20RGF User manual

KDK

KDK 20RGF User manual

KDK V56VK User manual

KDK

KDK V56VK User manual

KDK 24CFM User manual

KDK

KDK 24CFM User manual

KDK F-M14C5 User manual

KDK

KDK F-M14C5 User manual

KDK T60AW User manual

KDK

KDK T60AW User manual

Popular Fan manuals by other brands

Minka Group minkaAire Wave F843 instruction manual

Minka Group

Minka Group minkaAire Wave F843 instruction manual

Airflow Adroit DV50 instruction manual

Airflow

Airflow Adroit DV50 instruction manual

Vornado 270 Series owner's guide

Vornado

Vornado 270 Series owner's guide

comfort air TH-10D instruction manual

comfort air

comfort air TH-10D instruction manual

Livoo DOM386 instruction manual

Livoo

Livoo DOM386 instruction manual

Holmes BLIZZARD HAOF-90 owner's guide

Holmes

Holmes BLIZZARD HAOF-90 owner's guide

Taurus GRECO 16 ELEGANCE manual

Taurus

Taurus GRECO 16 ELEGANCE manual

Quorum PINNACLE installation instructions

Quorum

Quorum PINNACLE installation instructions

Monte Carlo Fan Company 3DIR58RBD-V1 Owner's guide and installation manual

Monte Carlo Fan Company

Monte Carlo Fan Company 3DIR58RBD-V1 Owner's guide and installation manual

Craftmade UH52 installation guide

Craftmade

Craftmade UH52 installation guide

Jocel JVA030658 instruction manual

Jocel

Jocel JVA030658 instruction manual

MIKA MFB1211/GR user manual

MIKA

MIKA MFB1211/GR user manual

Harbor Breeze RLG52NWZ5L manual

Harbor Breeze

Harbor Breeze RLG52NWZ5L manual

Allen + Roth L1405 instruction manual

Allen + Roth

Allen + Roth L1405 instruction manual

ViM KUBAIR F400 ECOWATT Technical manual

ViM

ViM KUBAIR F400 ECOWATT Technical manual

HIDRIA R10R-56LPS-ES50B-04C10 user guide

HIDRIA

HIDRIA R10R-56LPS-ES50B-04C10 user guide

BLAUBERG Ventilatoren CENTRO-M 100 L user manual

BLAUBERG Ventilatoren

BLAUBERG Ventilatoren CENTRO-M 100 L user manual

Triangle Engineering HEAT BUSTER SPL Series owner's manual

Triangle Engineering

Triangle Engineering HEAT BUSTER SPL Series owner's manual

manuals.online logo
manuals.online logoBrands
  • About & Mission
  • Contact us
  • Privacy Policy
  • Terms and Conditions

Copyright 2025 Manuals.Online. All Rights Reserved.

Operating and
Installation Instructions
Ceiling Fan
Thank you for purchasing this KDK product.
Before operating this product, please read the instructions
carefully, and save this manual for future reference.
Model No.
X48XG / X48XGMN X56XG / X56XGMN
T48XG / T48XGMN T56XG / T56XGMN
X48XC / X48XCMN X56XC / X56XCMN
T48XC / T48XCMN T56XC / T56XCMN
Operating and
Installation Instructions
Ceiling Fan
Safety precautions 2-3
Name of parts 8
How to install 9-21
How to use 21
Maintenance 22
Specifications 23
Precauciones de seguridad 4-5
Nombre de las partes 8
Cómo instalarlo 9-21
Cómo utilizarlo 21
Mantenimiento 22
Especificaciones 23
6-7 ﻥﺎﻣﻵﺍ ﺕﺎﻃﺎﻴﺘﺣﺍ
8
ﺀﺍﺰﺟﻷﺍ ﺀﺎﻤﺳﺃ
21-9
ﺐﻴﻛﺮﺘﻟﺍ ﺔﻴﻔﻴﻛ
21 ﻝﺎﻤﻌﺘﺳﻻﺍ ﺔﻴﻔﻴﻛ
22 ﺔﻧﺎﻴﺼﻟﺍ
23
ﺕﺎﻔﺻﺍﻮﻣ
Contents
Contenido
Instrucciones de
Instalación y Uso
Ventilador de Techo
Gracias por comprar este producto KDK.
Antes de poner en marcha este producto, lea atentamente las
instrucciones y guarde el manual para consultarlo en el futuro.
ﺕﺎﻳﻮﺘﺤﻤﻟﺍ
ﻞﻴﻐﺸﺘﻟﺍﻭ ﺐﻴﻛﺮﺘﻟﺍ ﺕﺎﻤﻴﻠﻌﺗ
ﻒﻘﺳ ﺔﺣﻭﺮﻣ
.KDK ﻦﻣ ﺞﺘﻨﳌﺍ ﺍﺬﻫ ﺀﺍﺮﺷ ﻰﻠﻋ ﺍﺮﻜﺷ
ﺍﺬﻫ ﻆﻔﺣﺃﻭ ،ﺔﻳﺎﻨﻌﺑ ﺕﺎﻤﻴﻠﻌﺘﻟﺍ ﺓﺀﺍﺮﻗ ﻰﺟﺮﻳ ،ﺔﺣﻭﺮﻤﻟﺍ ﻩﺬﻫ ﻞﻴﻐﺸﺗ ﻞﺒﻗ
.ﻞﺒﻘﺘﺴﻤﻟﺍ ﻲﻓ ﻪﻴﻟﺇ ﻉﻮﺟﺮﻠﻟ ﺐﹼﻴﺘﻜﻟﺍ
(T -series)
(T-XC / XCMN -series)
(X -series)
(X-XC / XCMN -series)
(T-XG / XGMN -series)
(X-XG / XGMN -series)
F48_56ZX_TZ_KDK.indd 1F48_56ZX_TZ_KDK.indd 1 3/7/2018 3:42:44 PM3/7/2018 3:42:44 PM
2
Safety precautions
To avoid the possibility of causing injury to users or damage to properties, please follow all the
explanations written below.
This symbol denotes
an action that is
COMPULSORY.
This symbol denotes
an action that is
PROHIBITED.
WARNING
A state that may be caused by the mishandling of
products, which, if not avoided, may lead to the
possibility of death or serious injury of users.
Follow strictly all the instructions given in
this manual for installation.
Electrical and installation work needs to be
performed by a qualified individual.
Installation error can cause fire, electrical
shock, injury or Ceiling Fan to drop.
This appliance is not intended for use by
persons (including children) with reduced
physical, sensory or mental capabilities,
or lack of experience and knowledge,
unless they have been given supervision
or instruction concerning use of the
appliance by a person responsible for
their safety. Children should be supervised
to ensure that they do not play with the
appliance.
Switch off the power supply and wait until
the Blades is fully static, before cleaning
or doing any maintenance jobs.
Can cause injury or electrical shock if Ceiling
Fan move suddenly.
Kindly refer to your authorized dealer for
repairing or maintenance.
Ensure that the Pipe has been fully tighten to
Motor Shaft (Bolt tightening torque is 800 ~
1200 N·cm) and Cotter Pin must fix into Bolt
and bent.
Can cause injury if the Ceiling Fan drops.
Tighten the Blade Screws firmly using a
screwdriver. (250-300 N•cm)
Can cause injury if Blade drops.
Ensure that the ceiling hook can sustain
more than 10 times the Ceiling Fan weight.
Can cause injury if Ceiling Fan drops.
Ensure that the mounting of the
suspension system shall be performed
by the manufacturer, its service agent or
suitably qualified persons.
Can cause injury if Ceiling fan drops.
If unusual oscillating movement, any
abnormality or failure occur is observed,
imediately stop using and turn “OFF” the
Miniature Circuit Breaker (MCB).
Risk of smoke, fire, electrical shock or Ceiling
Fan drops.
Please contact your authorized dealer for
repairing or maintenance.
Dismantle the broken or damaged Ceiling
Fan.
Can cause injury if Ceiling Fan drops.
Do not install the Ceiling Fan at oily and
dusty places.
Can cause fire or electrical shock due to short
circuit.
Do not install the Ceiling Fan near
flammable areas such as a gas cooker.
Can cause fire or electrical shock due to short
circuit.
Do not install the Ceiling Fan near
chemicals and alkali.
Can cause fire or electrical shock due to short
circuit.
Do not damage the wire during installation
e.g. deform due to heat, twist, bend, etc.
Can cause fire or electrical shock due to short
circuit.
Do not use power supply other than rated
voltage mentioned.
Overheating can cause electrical shock or fire.
Do not hang onto the Ceiling Fan.
Can cause injury if Ceiling Fan drops.
Do not disassemble the Ceiling Fan unless
stated by this manual.
Must use only supplied parts.
Can cause fire, electrical shock, injury or
Ceiling Fan to drop.
Do not touch the Ceiling Fan while it is
operating.
Can cause injury, damage or Ceiling Fan to
drop.
Do not sprinkle water to Ceiling Fan or do
not wet the Ceiling Fan.
Can cause fire or electrical shock due to short
circuit.
Always follow these instructions
F48_56ZX_TZ_KDK.indd 2F48_56ZX_TZ_KDK.indd 2 3/7/2018 3:42:49 PM3/7/2018 3:42:49 PM
3
CAUTION
A state that may be caused by the mishandling of
products, which, if not avoided, may result in the
injury of users or property damage.
To avoid the possibility of causing injury
to users or damage to properties, please
follow all the explanation written in this
manual. The manufacturer will not be
responsible for any accidents or injuries
caused by defective, deficient installation
or installation which does not follow the
instruction manual.
Ceiling Fan must be mounted above 2.3 m
from the floor and 1 m from the wall to the
Blade.
Can cause unstable air flow and affect the
Ceiling Fan to wobble.
Can cause injury if Ceiling Fan drops.
Refer to Step 4 on page 14 for the
measurement method.
After installation make sure the Ceiling Fan
does not wobble extremely.
Can cause injury if Ceiling Fan drops.
Replace all the Blades if any of them
breaks or cracks.
Can cause injury if Ceiling Fan drops due to
wobbling.
Do not install the Ceiling Fan at a wet, high
temperature and high humidity area such
as shower room.
If an electrical current leakage occurs, it can
cause electrical shock or fire easily.
This product is for in house use only. Do
not install at a windy places.
Can cause rust, discolour, damage or injury.
Do not install at places where there is high
vibration and impact.
Can cause injury if Ceiling Fan drops.
Avoid fixing inside dome ceiling.
Can cause unstable air flow and affect the
Ceiling Fan to wobble.
Can cause injury if Ceiling Fan drops.
Do not connect Ceiling Fan to a dimmer
switch.
It can damage the Ceiling Fan.
Do not expose yourself continuously to
direct wind from the Ceiling Fan.
It may cause discomfort.
Wipe away dirt with a clean soft cloth,
ordinary soap and water to keep the
Ceiling Fan clean. Do not use solvents
(gasoline, petroleum, thinner, benzine,
alcohol, cleaning powder, alkaline
detergent) or any other chemicals.
Can cause plastic part deformation or metal
corrosion.Can cause injury if parts drop.
Safety precautions Always follow these instructions
F48_56ZX_TZ_KDK.indd 3F48_56ZX_TZ_KDK.indd 3 3/7/2018 3:42:52 PM3/7/2018 3:42:52 PM
4
Para evitar la posibilidad de causar lesiones a usuarios o daños a propiedades, por favor siga todas las
indicaciones que aparecen escritas abajo.
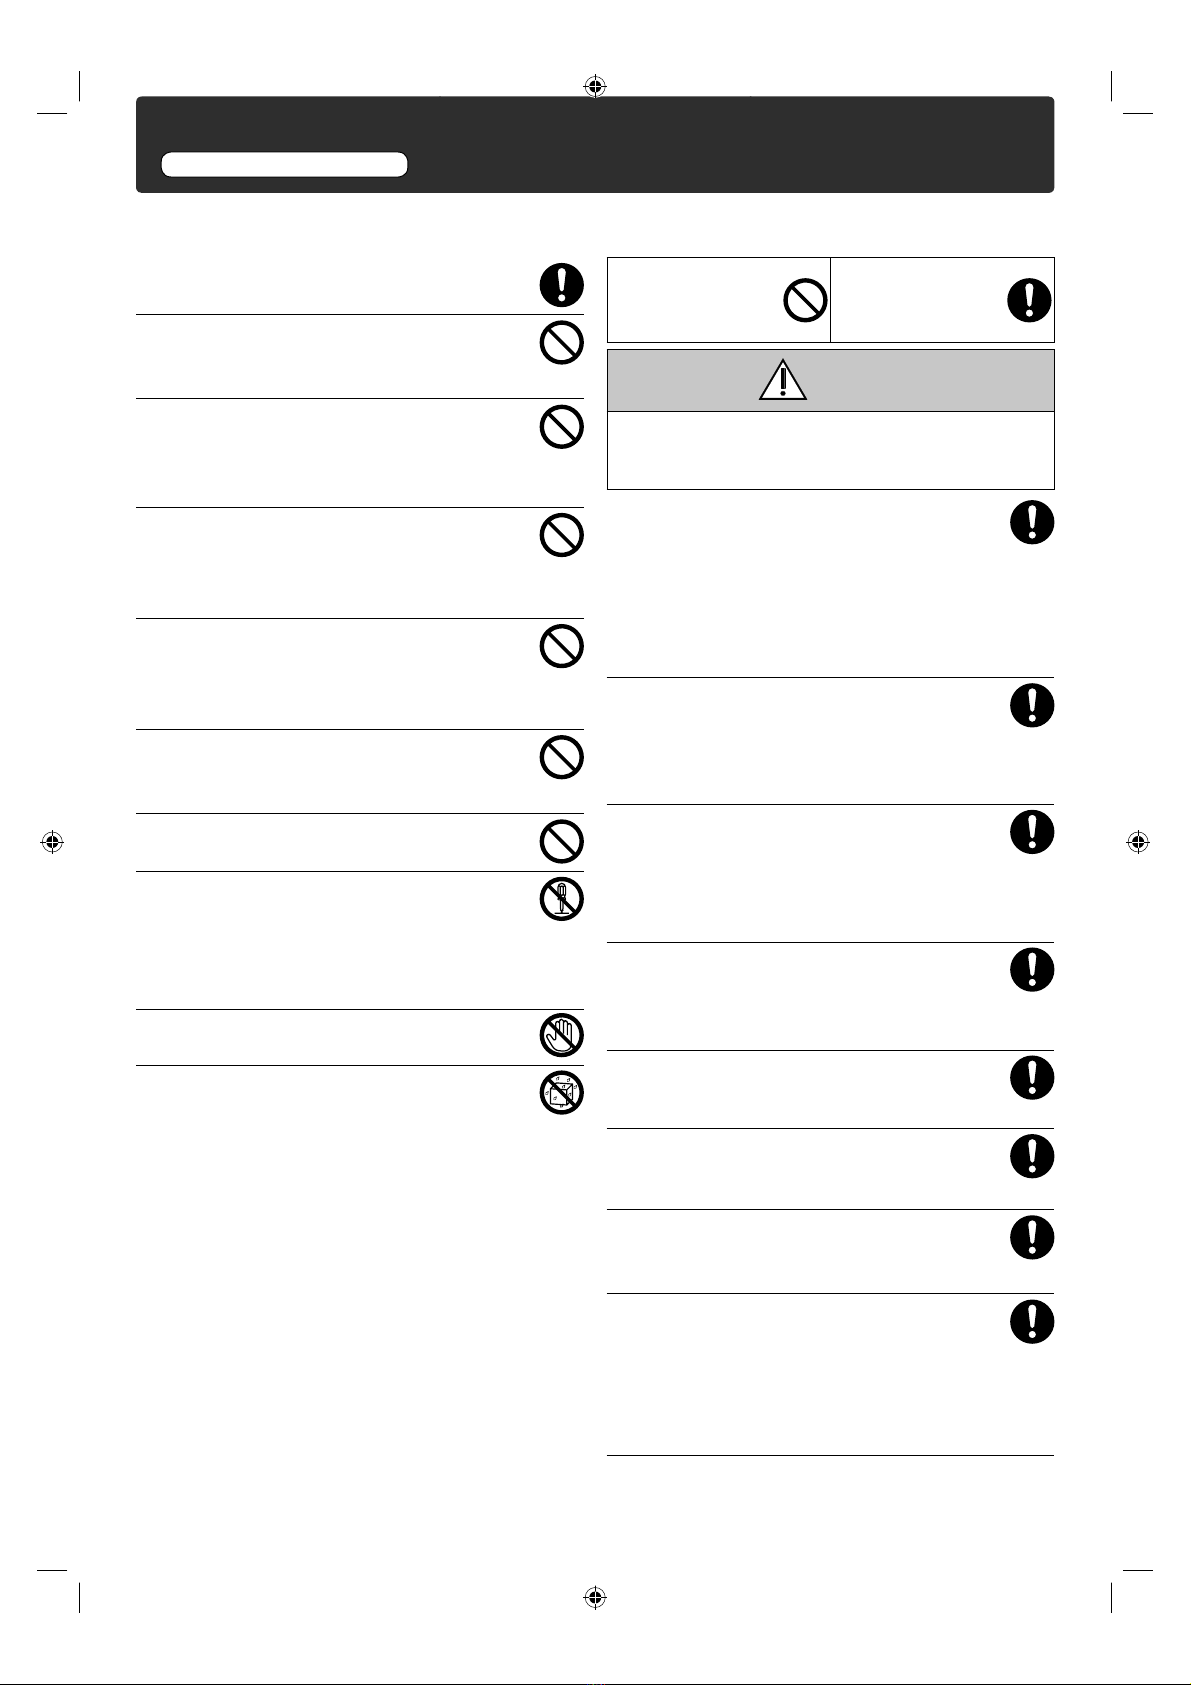
Este símbolo
representa una
acción que es
OBLIGATORIA.
Este símbolo
representa una acción
que está PROHIBIDA.
ADVERTENCIA
Un estado que puede provocarse debido a un manejo
equivocado de los productos, que si no se evita, puede
provocar la muerte o graves lesiones a los usuarios.
Siga estrictamente todas las instrucciones
expresadas en este manual para la instalación.
El cableado eléctrico debe ser realizado por
personal competente.
La instalación debe ser realizada por personal
calificado.
Cualquier error de instalación puede causar un
incendio, descarga eléctrica, caída del ventilador del
techo o lesiones.
Este aparato no está pensado para el uso por
personas (incluyendo niños) con capacidades
mentales, sensoriales o físicas reducidas, o falta
de experiencia y conocimiento, a menos que se
les haya dado control o formación en relación al
uso apropiado por una persona responsable de su
seguridad. Los niños deberían estar controlados
para asegurar que no juegan con el aparato.
Apague toda la alimentación eléctrica y espera
hasta que el aspa está totalmente parada, antes
de limpiarla o realizar cualquier trabajo de
mantenimiento.
En caso contrario, podría causar lesiones y descarga
eléctrica, o provocar que el ventilador del techo se
moviese repentinamente.
Por favor, contacte con su distribuidor autorizado para
las reparaciones o el mantenimiento.
Asegúrese de que la Tubería está totalmente
apretada al eje del motor (el par de apriete del
perno es 800~1200N•cm), y el pasador ha de estar
fijado al perno y a la curva.
Si el ventilador del techo se cae, puede causar
lesiones.
Apriete firmemente los tornillos del aspa utilizando
un destornillador. (250-300 N•cm)
Puede provocar lesiones si se cae el aspa.
Asegúrese de que el gancho puede aguantar 10
veces el peso del ventilador de techo.
Si el ventilador del techo se cae, puede causar
lesiones.
Asegúrese de que el montaje del sistema de
suspensión lo realice el fabricante, su agente de
servicio o personas debidamente cualificadas.
Si el ventilador del techo se cae, puede causar
lesiones.
Si detecta movimientos oscilantes
inusuales o cualquier anomalía o avería,
detenga inmediatamente su uso y ponga
en “OFF” el interruptor automático en
miniatura (MCB, por sus siglas en inglés).
Existe riesgo de humo, incendio, descarga eléctrica o
caída del ventilador de techo.
Contacte con su distribuidor autorizado para las
reparaciones o el mantenimiento.
Desmonte el ventilador del techo dañado o roto.
En caso contrario, podría causar la caída del ventilador
del techo, y lesiones.
Evite instalar el ventilador de techo en ambientes
oleosos y polvorosos.
Puede causar un incendio o una descarga eléctrica por
cortocircuito.
No lo instale cerca de una zona inflamable como
una cocina a gas.
Puede causar un incendio o una descarga eléctrica por
cortocircuito.
No lo instale cerca de sustancias químicas y álcali.
Puede causar un incendio o una descarga eléctrica por
cortocircuito.
Evite dañar el cable durante la instalación. P.ej. que
se deforme por el calor, girarlo, curvarlo, etc..
Puede causar un incendio o una descarga eléctrica por
cortocircuito.
No utilice una alimentación eléctrica diferente del
voltaje especificado mencionado.
Un sobrecalentamiento puede causar un incendio o
descarga eléctrica.
No se cuelgue del ventilador de techo.
En caso contrario, podría causar la caída del
ventilador del techo, y lesiones.
No desmonte las piezas del ventilador de
techo a no ser que lo indique este manual.
Deberá utilizar accesorios originales.
En caso contrario, podría causar un incendio,
descarga eléctrica, caida del ventilador del
techo, o lesiones.
No toque el ventilador del techo mientras se
encuentre en funcionamiento.
En caso contrario, puede causar lesiones,
daños, o podría caerse el ventilador del techo.
No rocíe con agua el ventilador de techo, ni
lo moje.
Puede causar un incendio o una descarga eléctrica por
cortocircuito.
Precauciones de seguridad Respete siempre las siguientes instrucciones
F48_56ZX_TZ_KDK.indd 4F48_56ZX_TZ_KDK.indd 4 3/7/2018 3:42:53 PM3/7/2018 3:42:53 PM
5
PRECAUCIÓN
Un estado que puede provocarse debido a un manejo
equivocado de los productos, que si no se evita puede
provocar graves lesiones a los usuarios o daños a las
propiedades.
Para evitar la posibilidad de causar lesiones a
usuarios o daños a propiedades, por favor siga
todas las indicaciones que aparecen escritas en
este manual. El fabricante no se responsabilizará
por ningún accidente o lesión causados por
una instalación incorrecta, insuficiente, o que
no se realice de acuerdo con este manual de
instrucciones.
El ventilador del techo debe montar a más de 2,3
m desde el suelo y a 1 m desde la pared al aspa.
Evite fijarlo por dentro de un techo con bóveda.
Golpearse con las aspas puede provocar lesiones.
Provocando una inestabilidad en la circulación del flujo
de aire y que el ventilador de techo vibre.
Consulte la página 14 (paso 4) para el método de
medición.
Después de la instalación asegúrese de que el
ventilador de techo no se tambalea.
Si el ventilador del techo cae, puede causar lesiones.
Después de la instalación asegúrese de que el
ventilador de techo no se tambalea.
Puede provocar lesiones si el ventilador de techo se
cae al tambalearse.
No instale el ventilador de techo en ambientes
mojados, con elevado nivel de humedad y altas
temperaturas, tales como las duchas.
Si se produce una fuga de corriente eléctrica, puede
originar un incendio y descarga eléctrica con facilidad.
Este producto es únicamente para uso en casa. No
lo instale en lugares ventosos.
Puede provocar óxido, decolorarse, provocar daños y
lesiones.
No lo instale en lugares con alta vibración e
impacto.
Si el ventilador del techo cae, puede causar lesiones.
Evite fijarlo al techo en cúpula.
Puede generar un flujo de aire inestable y hacer que el
ventilador de techo se tambalee.
Si el ventilador del techo cae, puede causar lesiones.
No conecte el ventilador de techo al interruptor
regulador.
Puede dañar el ventilador de techo.
Evite la exposición directa al aire del ventilador de
techo.
Podría causarle malestar.
No utilice disolventes (gasolina, petróleo,
diluyente, bencina, alcohol, polvo limpiador,
sustancia alcalina, detergente) o cualquier otra
sustancia química. Limpie la suciedad con un paño
suave y limpio, jabón normal y agua para mantener
el ventilador limpio.
Puede provocar deformaciones en piezas de plástico y
corrosión en el metal.
Precauciones de seguridad Respete siempre las siguientes instrucciones
F48_56ZX_TZ_KDK.indd 5F48_56ZX_TZ_KDK.indd 5 3/7/2018 3:42:54 PM3/7/2018 3:42:54 PM
6
.ﻞﻔﺳﻻﺍ ﻲﻓ ﺏﻮﺘﻜﻤﻟﺍ ﺡﺮﺸﻟﺍ ﻉﺎﺒﺗﺍﻰﺟﺮﻳ ،ﺕﺎﻜﻠﺘﻤﻤﻠﻟ ﻭﺍ ﻦﻴﻠﻤﻌﺴﺘﻤﻟﺍ ﺹﺎﺨﺷﻼﻟ ﺕﺎﺣﻭﺮﺟ ﻝﻮﺼﺣ ﺔﻴﻧﺎﻜﻣﺍ ﺐﹼﻨﺠﺘﻟ
ﻰﻠﻋ ﺰﻣﺮﻟﺍ ﺍﺬﻫ ﻝﺪﻳ
.ﺭﻮﻈﺤﻣ ﻞﻤﻋ
ﻰﻠﻋ ﺰﻣﺮﻟﺍ ﺍﺬﻫ ﻝﺪﻳ
.ﻲﻣﺍﺰﻟﺇ ﻞﻤﻋ
ﺮﻳﺬﺤﺗ
،ﻲﺘﻟﺍﻭ ،ﺕﺎﺠﺘﻨﻤﻟﺍ ﻝﺎﻤﻌﺘﺳﺍ ﺓﺀﺎﺳﺇ ﺎﻬﺒﺒﺳ ﻥﻮﻜﻳ ﺪﻗ ﻲﺘﻟﺍ ﺔﻟﺎﺤﻟﺍ
ﺡﻭﺮﺠﻟﺍ ﻭﺃ ﺕﻮﻤﻟﺍ ﺔﻴﻧﺎﻜﻣﺇ ﻰﻟﺇ ﻱﺩﺆﺗ ﺪﻗ ،ﺎﻬﻳﺩﺎﻔﺗ ﻢﺘﻳ ﻢﻟ ﻥﺇ
.ﻦﻴﻠﻤﻌﺘﺴﻤﻠﻟ ﺔﻳﺪﺠﻟﺍ
ﻞﺟﺍ ﻦﻣ ﺐﻴﺘﻜﻟﺍ ﺍﺬﻫ ﻲﻓ ﺓﺎﻄﻌﻤﻟﺍ ﺕﺎﻤﻴﻠﻌﺘﻟﺍ ﻞﻛ ﺔﻗﺪﺑ ﻊﺒﺗﺍ
.ﺐﻴﻛﺮﺘﻟﺍ
ﺔﻴﻟﺎﻋ ﺔﺟﺭﺩ ﻰﻠﻋ ﺺﺨﺷ ﺔﻴﺋﺎﺑﺮﻬﻜﻟﺍ ﺕﻼﺻﻮﻟﺍ ﻞﻤﻌﺑ ﻡﻮﻘﻳ ﻥﺃ ﺐﺠﻳ
.ﺓﺀﺎﻔﻜﻟﺍ ﻦﻣ
.ﻞﻫﺆﻣ ﺺﺨﺷ ﺐﻴﻛﺮﺘﻟﺎﺑ ﻡﻮﻘﻳ ﻥﺃ ﺐﺠﻳ
ﻁﻮﻘﺳ ،ﺔﻴﺋﺎﺑﺮﻬﻛ ﺔﺑﺮﺿ ،ﻖﻳﺮﺣ ﺊﻃﺎﺨﻟﺍ ﺐﻴﻛﺮﺘﻟﺍ ﺐﺒﺴﻳ ﻥﺍ ﻦﻜﻤﻳ
.ﺕﺎﺣﻭﺮﺟ ﻝﻮﺼﺣ
ﻭﺃ
ﺔﺣﻭﺮﻤﻟﺍ
ﺹﺎﺨﺷﺍ ﻞﺒﻗ ﻦﻣ ﻝﺎﻤﻌﺘﺳﻼﻟ ﺔﺼﺼﺨﻣ ﺮﻴﻏ ﺔﺣﻭﺮﻤﻟﺍ ﻩﺬﻫ
ﻻﻦﻳﺬﻟﺍ ﻭﺍ ،ﺔﻴﻠﻘﻌﻟﺍ ﺕﺎﻗﺎﻋﻻﺍ ﻱﻭﺫ ﻭﺍ ﻦﻴﻗﺎﻌﻣ (ﻝﺎﻔﻃﻻﺍ ﻰﻟﺍ ﺔﻓﺎﺿﻻﺎﺑ)
ﺕﺎﻤﻴﻠﻌﺗ ﻭﺍ ﺩﺎﺷﺭﺍ ﻢﻫﺪﻨﻋ ﻥﺎﻛ ﺍﺫﺍ ﻻﺇ ﺔﻓﺮﻌﻣ ﻭﺍ ﺓﺮﺒﺧ ﻢﻫﺪﻨﻋ ﺪﺟﻮﻳ
ﺀﻻﻮﻫ ﺔﻣﻼﺳ ﻦﻋ ﻝﻮﺌﺴﻣ ﺺﺨﺷ ﻞﺒﻗ ﻦﻣ ﺔﺣﻭﺮﻤﻟﺍ ﺓﺬﻬﺑ ﻖﻠﻌﺘﺗ
.ﺹﺎﺨﺷﻻﺍ
ﺔﺣﻭﺮﻤﻟﺍ ﺔﺸﻳﺭ ﻒﻗﻮﺘﺗ ﻰﺘﺣ ﺮﻈﺘﻧﺍﻭ ﺔﻴﺋﺎﺑﺮﻬﻜﻟﺍ ﺔﻗﺎﻄﻟﺍ ﺪﻳﻭﺰﺗ ﻞﺼﻓﺍ
.ﺔﺣﻭﺮﻤﻟﺍ ﺔﻧﺎﻴﺻ ﻝﺎﻤﻋﺃ ﻦﻣ ﻞﻤﻋ ﻱﺃ ﺀﺍﺮﺟﺇ ﻞﺒﻗ ﺔﻠﻣﺎﻛ ﺓﺭﻮﺼﺑ
ﺔﺑﺮﺿﻭ ﺕﺎﺣﻭﺮﺟ ﺐﺒﺴﺗﻭ ،ﺔﺌﺟﺎﻔﻣ ﺓﺭﻮﺼﺑ ﺔﺣﻭﺮﻤﻟﺍ ﻞﻐﺘﺸﺗ ﻥﺍ ﻦﻜﻤﻳ
.ﺔﻴﺋﺎﺑﺮﻬﻛ
.ﺔﻧﺎﻴﺼﻟﺍ ﻭﺃ ﺡﻼﺻﻹﺍ ﻝﺎﻤﻋﻷ ﺪﻤﺘﻌﳌﺍ ﻞﻴﻛﻮﻟﺍ ﻰﻟﺇ ﻉﻮﺟﺮﻟﺍ ﻰﺟﺮﹸﻳ
ﻙﺮﺤﻤﻟﺍ ﺩﻮﻤﻋ ﻰﻠﻋ ﺔﻠﻣﺎﻛ ﺓﺭﻮﺼﺑ ﻩﺪﺷ ﻢﺗ ﺏﻮﺒﻧﻷﺍ ﻥﺃ ﻦﻣ ﺪﻛﺄﺗ
ﺱﻮﺑﺪﻟﺍ ﺖﻴﺒﺜﺗ ﺐﺠﻳﻭ (N•cm 1200 ~ 800 ﻮﻫ ﻲﻏﺮﺒﻟﺍ ﺪﺷ ﻡﺰﻋ)
.ﻲﻨﺤﻣﻭ ﺭﺎﻤﺴﻤﻟﺍ ﺔﺤﺘﻓ ﻰﻠﻋ ﻱﺭﻮﺑﺎﺨﻟﺍ
.ﻑﻘﺳﻟﺍ ﺔﺣﻭﺭﻣ ﻁﻭﻘﺳ ﺔﻟﺎﺣ ﻲﻓ ﺔﺑﺎﺻﺇ ﺙﻭﺩﺣ ﻲﻓ ﺏﺑﺳﺗﻳ ﻥﺃ ﻥﻛﻣﻳ
.ﻲﻏﺍﺮﺑ ﻚﻔﻣ ﻝﺎﻤﻌﺘﺳﺎﺑ ﻢﻜﺤﻣ ﻞﻜﺸﺑ ﺔﺸﻳﺮﻟﺍ ﻲﻏﺍﺮﺑ ﺪﺷ
(N•cm 300 ~ 250)
.ﺔﺸﻳﺮﻟﺍ ﺖﻄﻘﺳ ﺍﺫﺇ ﺡﻭﺮﺟ ﻞﺼﺤﻳ ﻥﺃ ﻦﻜﻤﻳ
ﺔﺣﻭﺮﻣ ﻥﺯﻭ ﻑﺎﻌﺿﺃ 10 ﻦﻣ ﺮﺜﻛﺃ ﻞﹼﻤﺤﺘﻳ ﻑﺎﻄﺨﻟﺍ ﻥﺃ ﻦﻣ ﺪﻛﺄﺗ
.ﻒﻘﺴﻟﺍ
.ﻑﻘﺳﻟﺍ ﺔﺣﻭﺭﻣ ﻁﻭﻘﺳ ﺔﻟﺎﺣ ﻲﻓ ﺔﺑﺎﺻﺇ ﺙﻭﺩﺣ ﻲﻓ ﺏﺑﺳﺗﻳ ﻥﺃ ﻥﻛﻣﻳ
ﻭﺃ ﺔﻌﹼﻨﺼﳌﺍ ﺔﻛﺮﺸﻟﺍ ﺔﻄﺳﺍﻮﺑ ﻖﻴﻠﻌﺘﻟﺍ ﻡﺎﻈﻧ ﺐﻴﻛﺮﺗ ﻰﻠﻋ ﺹﺮﺣﺍ
.ﺐﺳﺎﻨﻣ ﹴ
ﻞﻜﺸﺑ ﲔﻠﻫﺆﻣ ﺹﺎﺨﺷﺃ ﻭﺃ ﺎﻬﻟ ﻊﺑﺎﺘﻟﺍ ﺕﺎﻣﺪﳋﺍ ﻞﻴﻛﻭ
.ﻑﻘﺳﻟﺍ ﺔﺣﻭﺭﻣ ﻁﻭﻘﺳ ﺔﻟﺎﺣ ﻲﻓ ﺔﺑﺎﺻﺇ ﺙﻭﺩﺣ ﻲﻓ ﺏﺑﺳﺗﻳ ﻥﺃ ﻥﻛﻣﻳ
ﻭﺃ ﻞﻠﺧ ﻱﺃ ﻭﺃ ،ﺔﻳﺩﺎﻋ ﺮﻴﻏ ﺔﺑﺬﺑﺬﺘﻣ ﺔﻛﺮﺣ ﺙﻭﺪﺣ ﺔﻈﺣﻼﻣ ﺔﻟﺎﺣ ﻲﻓ
ﻊﻃﺎﻗ “ﻞﻴﻐﺸﺗ ﻑﺎﻘﻳﺇ” ﺏﻢﻗﻭ ﺍﹰﺭﻮﻓ ﻡﺍﺪﺨﺘﺳﻻﺍ ﻒﻗﻭﺃ ،ﺭﻮﺼﻗ
.(MCB)ﺮﻴﻐﺼﻟﺍ ﺓﺭﺍﺪﻟﺍ
ﺔﺣﻭﺮﻣ ﻁﻮﻘﺳ ﻭﺃ ،ﺔﻴﺋﺎﺑﺮﻬﻜﻟﺍ ﺔﻣﺪﺼﻟﺍ ﻭﺃ ،ﻖﻳﺮﳊﺍ ﻭﺃ ،ﻥﺎﺧﺪﻟﺍ ﺙﻭﺪﺣ ﺮﻄﺧ
.ﻒﻘﺴﻟﺍ
.ﺔﻧﺎﻴﺼﻟﺍ ﻭﺃ ﺡﻼﺻﻹﺍ ﻝﺎﻤﻋﻷ ﺪﻤﺘﻌﳌﺍ ﻞﻴﻛﻮﻟﺎﺑ ﻝﺎﺼﺗﻻﺍ ﻰﺟﺮﹸﻳ
.ﺓﺭﺮﻀﺘﻤﻟﺍ ﻭﺍ ﺓﺭﻮﺴﻜﻤﻟﺍ ﻒﻘﺴﻟﺍ ﺔﺣﻭﺮﻣ ﻚﻴﻜﻔﺗ
.ﻑﻘﺳﻟﺍ ﺔﺣﻭﺭﻣ ﻁﻭﻘﺳ ﺔﻟﺎﺣ ﻲﻓ ﺔﺑﺎﺻﺇ ﺙﻭﺩﺣ ﻲﻓ ﺏﺑﺳﺗﻳ ﻥﺃ ﻥﻛﻣﻳ
.ﺔﺑﺮﺘﳌﺍ ﻦﻛﺎﻣﻷﺍ ﻭﺔﻴﺘﻳﺰﻟﺍ ﻲﻓ ﻒﻘﺴﻟﺍ ﺔﺣﻭﺮﻣ ﺖﻴﺒﺜﺘﺑ ﻢﻘﺗ ﻻ
ﺐﺒﺴﺑ ﺔﻴﺋﺎﺑﺮﻬﻛ ﺔﻣﺪﺼﻟ ﺽﺮﻌﺘﻟﺍ ﻭﺃ ﻖﻳﺮﺣ ﺏﻮﺸﻧ ﻲﻓ ﺐﺒﺴﺘﻟﺍ ﻦﻜﳝ
.ﻰﺋﺎﺑﺮﻬﻛ ﺱﺎﻣ
ﺔﻘﻄﻨﻣ ﻞﺜﻣ ﻝﺎﻌﺘﺷﻼﻟ ﺔﻠﺑﺎﻗ ﻖﻃﺎﻨﻣ ﻲﻓ ﻒﻘﺴﻟﺍ ﺔﺣﻭﺮﻣ ﺐﻛﺮﺗ ﻻ
.ﺯﺎﻐﻟﺍ ﺥﺎﹼﺒﻃ
ﺐﺒﺴﺑ ﺔﻴﺋﺎﺑﺮﻬﻛ ﺔﻣﺪﺼﻟ ﺽﺮﻌﺘﻟﺍ ﻭﺃ ﻖﻳﺮﺣ ﺏﻮﺸﻧ ﻲﻓ ﺐﺒﺴﺘﻟﺍ ﻦﻜﳝ
.ﻰﺋﺎﺑﺮﻬﻛ ﺱﺎﻣ
ﺔﻴﺋﺎﻴﻤﻴﻜﻟﺍ ﺩﺍﻮﳌﺍ ﻦﻣ ﺏﺮﻘﻟﺎﺑ ﻒﻘﺴﻟﺍ ﺔﺣﻭﺮﻣ ﺖﻴﺒﺜﺘﺑ ﻢﻘﺗ ﻻ
.ﺕﺎﻳﻮﻠﻘﻟﺍﻭ
ﺐﺒﺴﺑ ﺔﻴﺋﺎﺑﺮﻬﻛ ﺔﻣﺪﺼﻟ ﺽﺮﻌﺘﻟﺍ ﻭﺃ ﻖﻳﺮﺣ ﺏﻮﺸﻧ ﻲﻓ ﺐﺒﺴﺘﻟﺍ ﻦﻜﳝ
.ﻰﺋﺎﺑﺮﻬﻛ ﺱﺎﻣ
،ﺓﺭﺍﺮﺤﻟﺍ ﺐﺒﺴﺑ ﻙﻼﺳﻷﺍ ﺭﺮﻀﺗﻼﺜﻣ ،ﺐﻴﻛﺮﺘﻟﺍ ﺀﺎﻨﺛﺃ ﻙﻼﺳﻷﺍ ﺭﺮﻀﺗﻻ
.ﺦﻟﺍ ،ﻲﻨﺜﻟﺍ ،ﺢﺟﺭﺄﺘﻟﺍ
ﺐﺒﺴﺑ ﺔﻴﺋﺎﺑﺮﻬﻛ ﺔﻣﺪﺼﻟ ﺽﺮﻌﺘﻟﺍ ﻭﺃ ﻖﻳﺮﺣ ﺏﻮﺸﻧ ﻲﻓ ﺐﺒﺴﺘﻟﺍ ﻦﻜﳝ
.ﻰﺋﺎﺑﺮﻬﻛ ﺱﺎﻣ
ﺓﺭﺪﻘﻤﻟﺍ ﺔﻴﻄﻟﻮﻔﻟﺍ ﺮﻴﻏ ﺔﻴﺋﺎﺑﺮﻬﻛ ﺔﻗﺎﻃ ﺪﻳﻭﺰﺗ ﺭﺪﺼﻣ ﻞﻤﻌﺘﺴﺗ ﻻ
.ﺓﺭﻮﻛﺬﻤﻟﺍ
.ﻖﻳﺮﺣ ﻭﺍ ﺔﻴﺋﺎﺑﺮﻬﻛ ﺔﺑﺮﺿ ﻁﺮﻔﻤﻟﺍ ﻦﻴﺨﺴﺘﻟﺍ ﺐﺒﺴﻳ ﻥﺍ ﻦﻜﻤﻳ
.ﻒﻘﺴﻟﺍ ﺔﺣﻭﺮﻤﺑ ﻖﹼﻠﻌﺘﺗ ﻻ
.ﻑﻘﺳﻟﺍ ﺔﺣﻭﺭﻣ ﻁﻭﻘﺳ ﺔﻟﺎﺣ ﻲﻓ ﺔﺑﺎﺻﺇ ﺙﻭﺩﺣ ﻲﻓ ﺏﺑﺳﺗﻳ ﻥﺃ ﻥﻛﻣﻳ
ﺍﺬﻫ ﻲﻓ ﺢﺿﻮﻣ ﻮﻫ ﺎﻤﻛ ﻻﺇ ﻒﻘﺴﻟﺍ ﺔﺣﻭﺮﻣ ﺀﺍﺰﺟﺃ ﻚﻴﻜﻔﺗ ﻝﻭﺎﺤﺗ ﻻ
.ﺐﻴﺘﻜﻟﺍ
.ﺔﻴﻠﺻﻻﺍ ﺕﺎﻘﺤﻠﻤﻟﺍ ﻝﺎﻤﻌﺘﺳﺍ ﺐﺠﻳ
ﻝﻮﺼﺣ
ﻭﺃ
ﺔﺣﻭﺮﻤﻟﺍ ﻁﻮﻘﺳ ،ﺔﻴﺋﺎﺑﺮﻬﻛ ﺔﺑﺮﺿ ،ﻖﻳﺮﺣ ﻚﻟﺫ ﺐﺒﺴﻳ ﻥﺍ ﻦﻜﻤﻳ
.ﺕﺎﺣﻭﺮﺟ
.ﻞﻴﻐﺸﺗ ﺔﻟﺎﺣ ﻲﻓ ﻥﻮﻜﺗ ﺎﻣﺪﻨﻋ ﺔﺣﻭﺮﻤﻟﺍ ﺲﻤﻠﺗ ﻻ
.ﺔﺣﻭﺮﻤﻟﺍ ﻁﻮﻘﺳ
ﻭﺃ
ﺭﺮﺿﻭ ،ﺡﺮﺟ ﻚﻟﺫ ﺐﺒﺴﻳ ﻥﺍ ﻦﻜﻤﻳ
.ﻒﻘﺴﻟﺍ ﺔﺣﻭﺮﻣ ﺐﻃﺮﺗ ﻻ،ﻭﺃ ﻒﻘﺴﻟﺍ ﺔﺣﻭﺮﻣ ﻰﻠﻋ ﺀﺎﻤﻟﺍ ﻖﺷﺮﺗ ﻻ
ﺐﺒﺴﺑ ﺔﻴﺋﺎﺑﺮﻬﻛ ﺔﻣﺪﺼﻟ ﺽﺮﻌﺘﻟﺍ ﻭﺃ ﻖﻳﺮﺣ ﺏﻮﺸﻧ ﻲﻓ ﺐﺒﺴﺘﻟﺍ ﻦﻜﳝ
.ﻰﺋﺎﺑﺮﻬﻛ ﺱﺎﻣ
ﻥﺎﻣﻵﺍ ﺕﺎﻃﺎﻴﺘﺣﺍ
ﺎﹰﻤﺋﺍﺩ ﺕﺎﻤﻴﻠﻌﺘﻟﺍ ﻩﺬﻫ ﺓﺎﻋﺍﺮﲟ ﻢﻗ
F48_56ZX_TZ_KDK.indd 6F48_56ZX_TZ_KDK.indd 6 3/7/2018 3:42:55 PM3/7/2018 3:42:55 PM
7
ﻪﻴﺒﻨﺗ
،ﻲﺘﻟﺍﻭ ،ﺕﺎﺠﺘﻨﻤﻟﺍﻝﺎﻤﻌﺘﺳﺍ ﺓﺀﺎﺳﺇ ﺎﻬﺒﺒﺳ ﻥﻮﻜﻳ ﺪﻗ ﻲﺘﻟﺍ ﺔﻟﺎﺤﻟﺍ
ﺭﺮﻀﺗ ﻭﺃ ﻦﻴﻠﻤﻌﺘﺴﻤﻠﻟ ﺔﻳﺪﺠﻟﺍ ﺡﻭﺮﺠﻟﺍ ﺔﻴﻧﺎﻜﻣﺇ ﻰﻟﺇ ﻱﺩﺆﺗ ﺪﻗ ،ﺎﻬﻳﺩﺎﻔﺗ ﻢﺘﻳ ﻢﻟ ﻥﺇ
.ﺕﺎﻜﻠﺘﻤﻤﻟﺍ
ﻭﺍ ﻦﻴﻠﻤﻌﺴﺘﻤﻟﺍ ﺹﺎﺨﺷﻼﻟ ﺕﺎﺣﻭﺮﺟ ﻝﻮﺼﺣ ﺔﻴﻧﺎﻜﻣﺍ ﺐﹼﻨﺠﺘﻟ
.ﺐﻴﺘﻜﻟﺍ ﺍﺬﻫ ﻲﻓ ﺏﻮﺘﻜﻤﻟﺍ ﺡﺮﺸﻟﺍ ﻉﺎﺒﺗﺍ ﻰﺟﺮﻳ ،ﺕﺎﻜﻠﺘﻤﻤﻠﻟ
ﻦﻋ ﺔﺒﺒﺴﺘﻤﻟﺍ ﺕﺎﺣﻭﺮﺠﻟﺍﻭ ﺙﺩﺍﻮﺣ ﺔﻳﺍ ﻦﻋ ﻝﻮﺌﺴﻣ ﺮﻴﻏ ﻊﻧﺎﺼﻟﺍ
،ﻞﻄﻌﻟﺍ
ﺍﺬﻫ ﺕﺎﻤﻴﻠﻌﺗ ﻊﻣ ﻖﻓﺍﻮﺘﻳ ﻻﻱﺬﻟﺍ ﺐﻴﻛﺮﺘﻟﺍ ﻭﺍ ﺺﻗﺎﻨﻟﺍ ﺐﻴﻛﺮﺘﻟﺍﻭ
.ﺐﻴﺘﻜﻟﺍ
ﺔﻴﺿﺭﻻﺍ ﻕﻮﻓ ﺮﺘﻣ 2.3 ﻦﻣ ﺮﺜﻛﺍ ﺔﻓﺎﺴﻣ ﻰﻠﻋ ﺔﺣﻭﺮﻤﻟﺍ ﺐﻴﻛﺮﺗ ﺐﺠﻳ
.ﺔﺣﻭﺮﻤﻟﺍ ﺔﺸﻳﺭﻭ ﺭﺍﺪﺠﻟﺍ ﻦﻴﺑ ﺮﺘﻣ 1 ﻦﻣ ﺮﺜﻛﺍ ﺔﻓﺎﺴﻣ ﻰﻠﻋﻭ
.ﺔﺣﻭﺮﻤﻟﺍ ﺕﺍﺮﻔﺷ ﺭﺍﺪﺠﻟﺍ ﺏﺎﺻﺃ ﺍﺫﺇ ﺡﻭﺮﺟ ﻞﺼﺤﻳ ﻥﺃ ﻦﻜﻤﻳ
ﻒﻘﺴﻟﺍ ﺔﺣﻭﺮﻣ ﻰﻠﻋ ﺮﺛﺆﻳ ﻭﺖﺑﺎﺛ ﺮﻴﻏ ﺀﺍﻮﻫ ﻖﻓﺪﺗ ﻚﻟﺫ ﺐﺒﺴﻳ ﻥﺃ ﻦﻜﻤﻳ
.ﺀﺍﺩﻷﺍ ﻲﻓ ﺏﺬﺑﺬﺘﺗ ﺎﻬﻠﻌﺠﻳﻭ
.ﺱﺎﻳﻘﻟﺍ ﺔﻘﻳﺭﻁ ﻰﻠﻋ ﻑﺭﻌﺗﻠﻟ (4 ﺓﻭﻁﺧ) 11 ﺔﺣﻔﺻ ﻰﻟﺇ ﻊﺟﺭﺍ
ﺮﻴﻏ ﺓﺭﻮﺼﺑ ﻞﻳﺎﻤﺘﺗ ﻻﻒﻘﺴﻟﺍ ﺔﺣﻭﺮﻣ ﻥﺃ ﻦﻣ ﺪﻛﺄﺗ ﺐﻴﻛﺮﺘﻟﺍ ﺪﻌﺑ
.ﺔﻳﺩﺎﻋ
.ﻑﻘﺳﻟﺍ ﺔﺣﻭﺭﻣ ﻁﻭﻘﺳ ﺔﻟﺎﺣ ﻲﻓ ﺔﺑﺎﺻﺇ ﺙﻭﺩﺣ ﻲﻓ ﺏﺑﺳﺗﻳ ﻥﺃ ﻥﻛﻣﻳ
.ﺔﺸﻳﺭ ﺔﻳﻻ ﺀﺎﻨﺤﻧﺍ ﻭﺍ ﺮﺴﻛ ﻞﺼﺣ ﺍﺫﺍ ﺕﺍﺮﻔﺸﻟﺍ ﻞﻛ ﺮﹼﻴﻏ
ﺐﺒﺴﺑ ﻒﻘﺴﻟﺍ ﺔﺣﻭﺮﻣ ﻁﻮﻘﺳ ﺔﻟﺎﺣ ﻲﻓ ﺕﺎﺑﺎﺻﺇ ﻉﻮﻗﻭ ﻦﻜﳝ
.ﺢﺟﺭﺄﺘﻟﺍ
ﺔﺑﻮﻃﺮﻟﺍﻭ ﺓﺭﺍﺮﺤﻟﺍ ﺔﻴﻟﺎﻋ ،ﺔﺒﻃﺭ ﻖﻃﺎﻨﻣ ﻲﻓ ﻒﻘﺴﻟﺍ ﺔﺣﻭﺮﻣ ﺐﹼﻛﺮﺗ ﻻ
.ﻡﺎﻤﺤﻟﺍ ﺔﻓﺮﻏ ﻞﺜﻣ
ﺔﺑﺮﺻ ﻚﻟﺫ ﺐﺒﺴﻳ ﻥﺍ ﻦﻜﻤﻳ ،ﻲﺋﺎﺑﺮﻬﻜﻟﺍ ﺭﺎﻴﺘﻠﻟ ﺏﺮﺴﺗ ﻞﺼﺣ ﺍﺫﺍ
.ﻖﻳﺮﺣ ﻭﺃ ﺔﻴﺋﺎﺑﺮﻬﻛ
ﺔﺣﻭﺮﻤﻟﺍ ﺖﻴﺒﺜﺘﺑ ﻢﻘﺗ ﻻ.ﻂﻘﻓ ﻲﻟﺰﻨﻤﻟﺍ ﻝﺎﻤﻌﺘﺳﻼﻟ ﻮﻫ ﺞﺘﻨﻤﻟﺍ ﺍﺬﻫ
.ﺍﺪﻳﺪﺷ ﺀﺍﻮﻬﻟﺍ ﺭﺎﻴﺗ ﺎﻬﺑ ﻥﻮﻜﻳ ﻲﺘﻟﺍ ﻦﻛﺎﻣﻷﺍ ﻲﻓ
،ﻥﻮﻠﻟ ﺮﻴﻴﻐﺗ ،ﺃﺪﺻ ﻝﻮﺼﺣ ﻝﺰﻨﻤﻟﺍ ﺝﺭﺎﺧ ﻝﺎﻤﻌﺘﺳﻻﺍ ﺐﺒﺴﻳ ﻥﺍ ﻦﻜﻤﻳ
.ﺡﻭﺮﺟ ﻭﺃ ﺭﺮﺿ
ﺕﺍﺮﺛﺆﻣﻭ ﺕﺍﺯﺍﺰﺘﻫﺍ ﻰﻠﻋ ﻯﻮﺘﺤﺗ ﻦﻛﺎﻣﺍ ﻲﻓ ﻒﻘﺴﻟﺍ ﺔﺣﻭﺮﻣ ﺐﻴﻛﺮﺗ ﻻ
.ﺔﻴﻟﺎﻋ
.ﻑﻘﺳﻟﺍ ﺔﺣﻭﺭﻣ ﻁﻭﻘﺳ ﺔﻟﺎﺣ ﻲﻓ ﺔﺑﺎﺻﺇ ﺙﻭﺩﺣ ﻲﻓ ﺏﺑﺳﺗﻳ ﻥﺃ ﻥﻛﻣﻳ
.ﺔﺒﺒﻘﳌﺍ ﻒﻘﺳﻷﺍ ﻞﺧﺍﺩ ﺖﻴﺒﺜﺘﻟﺍ ﺐﹼﻨﲡ
ﻒﻘﺴﻟﺍ ﺔﺣﻭﺮﻣ ﻰﻠﻋ ﺮﺛﺆﻳﻭ ﺀﺍﻮﻬﻟﺍ ﻖﻓﺪﺗ ﺭﺍﺮﻘﺘﺳﺍ ﻡﺪﻋ ﺐﺒﺴﻳ ﺪﻗ ﺚﻴﺣ
.ﺎﻬﺤﺟﺭﺄﺗ ﻲﻓ ﺎﹰﺒﺒﺴﺘﻣ
.ﻑﻘﺳﻟﺍ ﺔﺣﻭﺭﻣ ﻁﻭﻘﺳ ﺔﻟﺎﺣ ﻲﻓ ﺔﺑﺎﺻﺇ ﺙﻭﺩﺣ ﻲﻓ ﺏﺑﺳﺗﻳ ﻥﺃ ﻥﻛﻣﻳ
ﺕﺍﺮﺛﺆﻣﻭ ﺕﺍﺯﺍﺰﺘﻫﺍ ﻰﻠﻋ ﻯﻮﺘﺤﺗ ﻦﻛﺎﻣﺍ ﻲﻓ ﻒﻘﺴﻟﺍ ﺔﺣﻭﺮﻣ ﺐﻴﻛﺮﺗ ﻻ
.ﺔﻴﻟﺎﻋ
.ﻑﻘﺳﻟﺍ ﺔﺣﻭﺭﻣ ﻁﻭﻘﺳ ﺔﻟﺎﺣ ﻲﻓ ﺔﺑﺎﺻﺇ ﺙﻭﺩﺣ ﻲﻓ ﺏﺑﺳﺗﻳ ﻥﺃ ﻥﻛﻣﻳ
.ﻒﻘﺴﻟﺍ ﺔﺣﻭﺮﻣ ﻦﻣ ﺮﺷﺎﺒﻤﻟﺍ ﺀﺍﻮﻬﻠﻟ ﺮﻤﺘﺴﻤﻟﺍ ﺽﺮﻌﺘﻟﺍ ﺐﹼﻨﺠﺗ
.ﺔﺣﺍﺭ ﻡﺪﻋ ﻚﻟﺫ ﺐﺒﺴﻳ ﻥﺍ ﻦﻜﻤﻳ
ﻦﻳﺰﻨﺒﻟﺍ ،ﺀﻼﻄﻟﺍ ﻖﻗﺮﻣ ،ﻝﻭﺮﺘﺒﻟﺍ ،ﲔﻟﻭﺯﺎﳉﺍ) ﺕﺎﺒﻳﺬﳌﺍ ﻞﻤﻌﺘﺴﺗ ﻻ
ﺩﺍﻮﳌﺍ ﻭﺍ (ﺕﺎﻔﻈﻨﳌﺍ ،ﺕﺎﻳﻮﻠﻘﻟﺍ ،ﻒﻴﻈﻨﺘﻟﺍ ﻕﻮﺤﺴﻣ ،ﻝﻮﺤﻜﻟﺍ،
ﻱﺩﺎﻋ ﻥﻮﺑﺎﺻ ،ﺔﻤﻋﺎﻧ ﺵﺎﻤﻗ ﺔﻌﻄﻘﺑ ﺭﺎﺒﻐﻟﺍ ﺢﺴﻣﺍ ﻯﺮﺧﻻﺍ ﺔﻳﻭﺎﻤﻴﻜﻟﺍ
.ﺔﻔﻴﻈﻧ ﺓﺭﻮﺼﺑ ﺔﺣﻭﺮﳌﺍ ﻆﻔﳊ ﺀﺎﻣﻭ
.ﻥﺪﻌﻤﻠﻟ ﻞﻛﺂﺗﻭ ﺔﻴﻜﻴﺘﺳﻼﺒﻟﺍ ﺀﺍﺰﺟﻸﻟ ﻒﻠﺗ ﻚﻟﺫ ﺐﺒﺴﻳ ﻥﺃ ﻦﻜﳝ
ﻥﺎﻣﻵﺍ ﺕﺎﻃﺎﻴﺘﺣﺍ
ﺎﹰﻤﺋﺍﺩ ﺕﺎﻤﻴﻠﻌﺘﻟﺍ ﻩﺬﻫ ﺓﺎﻋﺍﺮﲟ ﻢﻗ
F48_56ZX_TZ_KDK.indd 7F48_56ZX_TZ_KDK.indd 7 3/7/2018 3:42:56 PM3/7/2018 3:42:56 PM
8
Parts pieces
AUpper Canopy ………………… 1
BPipe …………………………… 1
(9, 12, 16, 18 or 22 inches)
CLower Canopy………………… 1
DMotor Assembly ……………… 1
EBlade …………………………… 3
FSpeed Regulator……………… 1
GPulley Set ……………………… 1
HEllipse Bolt …………………… 1
IP-R Washers ………………… 1
JSpring Washer ……………… 1
KHexa Nut ……………………… 1
LCotter Pin ……………………… 1
Partes piezas
ACubierta superior …………… 1
BTubo …………………………… 1
(9, 12, 16, 18 o 22 pulgadas)
CCubierta inferior ……………… 1
DConjunto del motor ………… 1
EAspa …………………………… 3
FRegulador de velocidad …… 1
GConjunto de polea …………… 1
HPerno de elipse ……………… 1
IArandelas P-R ………………… 1
JArandela de resorte ………… 1
KTuerca hexagonal …………… 1
LPasador………………………… 1
ﺩﺪﻌﻟﺍ ﺀﺍﺰﺟﻻﺍ
1……………………… ﺔﻳﻮﻠﻌﻟﺍ ﺔﹼﺒﻘﻟﺍ A
1……………………………… ﺏﻮﺒﻧﻻﺍ
(ﺔﺻﻮﺑ 22 ﻭﺃ 18 ﻭﺃ 16 ﻭﺃ 12 ﻭﺃ 9)
B
1……………………… ﺔﻴﻠﻔﺴﻟﺍ ﺔﹼﺒﻘﻟﺍ C
1……………………ﻙﺮﺤﻤﻟﺍ ﺔﻋﻮﻤﺠﻣ D
3……………………………… ﻞﺼﻨﻟﺍ E
1……………………… ﺔﻋﺮﺴﻟﺍ ﻢﻈﻨﻣ F
1…………………… ﺓﺮﻜﺒﻟﺍ ﺔﻋﻮﻤﺠﻣ G
1…………………… ﻱﻭﺎﻀﻴﺑ ﺭﺎﻤﺴﻤﻟﺍ H
1………………………… P-R ﺔﻜﻠﻔﻟﺍ I
1…………………… ﺔﻀﺑﺎﻨﻟﺍ ﺔﻜﻠﻔﻟﺍ J
1………………… ﺔﻴﺳﺍﺪﺳ ﺔﻟﻮﻤﺼﻟﺍ K
1…………………… ﻱﺭﻮﺑﺎﺨﻟﺍ ﺱﻮﺑﺪﻟﺍ L
Name of parts Nombre de las partes ﺀﺍﺰﺟﻷﺍ ﺀﺎﻤﺳﺃ
■
Attention:
• Do not place the Ceiling Fan directly on
the floor.
Can cause scratches to the product.
■
Atención:
• No coloque el ventilador de techo
directamente sobre el suelo.
Puede provocar arañazos al producto.
:ﻩﺎﺒﺘﻧﺍ
■
.ﺓﺮﺷﺎﺒﻣ ﺽﺭﻸﻟ ﺔﺴﻣﻼﻣ ﻒﻘﺴﻟﺍ ﺔﺣﻭﺮﻣ ﻊﻀﺗ ﻻ•
.ﺞﺘﻨﻤﻟﺎﺑ ﺵﻭﺪﺧ ﺙﺍﺪﺣﺇ ﻲﻓ ﺐﺒﺴﺘﻳ ﺪﻗ ﺍﺬﻫ ﻥﻷ
:ﺔﻈﺣﻼﻣ
■
ﺽﺍﺮﻏﻷ ﻞﻴﻟﺪﻟﺍ ﺍﺬﻫ ﻲﻓ ﺔﺿﻭﺮﻌﳌﺍ ﺭﻮﺼﻟﺍ •
.ﻲﻟﺎﳊﺍ ﺯﺎﻬﳉﺍ ﻦﻋ ﻒﻠﺘﺨﺗ ﺪﻗﻭ ﻂﻘﻓ ﺡﺮﺸﻟﺍ
■
Note:
• The illustrations in this manual are for
explanation purposes only and may differ
from the actual unit.
■
Nota:
• Las ilustraciones de este manual son
para fines ilustrativos solamente y
pueden ser diferentes de la unidad real.
(T-XC / XCMN -series)
(X-XC / XCMN -series)
60
47
30
85
85
43
(mm)
12
F
(T -series)
(X -series)
B
C
D
E
A
G
HIJKL
L1 L2
L1
(mm)
F
62~64
80.6
80.6
57
4~5
7~8
9~10
(T-XG / XGMN -series)
(X-XG / XGMN -series)
F48_56ZX_TZ_KDK.indd 8F48_56ZX_TZ_KDK.indd 8 3/7/2018 3:42:58 PM3/7/2018 3:42:58 PM
9
1Pull out the Safety Wire afrom the
Pipe Bas shown.
Remove the Safety Wire screw
b
from the Pipe and keep it for step 4-
4
on page 15.
Remove the Lower Canopy screw
c
from the Pipe and keep it for step 6-
2
on page 18.
1
Extraiga el cable de seguridad
a
del
tubo
B
como se muestra en la figura.
Quite el tornillo del cable de
seguridad bdel tubo y guarde
estos tornillos para el paso 4-
4de
la página 15.
Quite el tornillo de la cubierta
inferior c
del tubo y guarde para el
paso 6 - 2en la página 18.
2Pull out the safety wire afrom the
slit of the Pipe B.
3
Insert the Lower Canopy
C
to the
Pipe. Then insert the Upper Canopy
A
(with brand logo) to the Pipe.
• Do not tighten the Lower Canopy
screw
c
and the Upper Canopy
screw d.
2Extraiga el cable de seguridad
a
de la hendidura del tubo
B.
3Introduzca la cubierta inferior C
en el tubo. Después introduzca la
cubierta superior A(con marca de
logo) en el tubo.
• No apriete el tornillo de la cubierta
inferior cni el de la cubierta
superior d.
■
Insert the canopy
■
Introduzca la cubierta
1
Check point after installation Compruebe el punto después
de la instalación ﺐﻴﻛﺮﺘﻟﺍ ﺪﻌﺑ ﺺﺤﻔﻟﺍ ﻁﺎﻘﻧ
Insert the Lower Canopy and the
Upper Canopy to the Pipe. The
screws are not tightened.
Introduzca la cubierta inferior y
superior en el tubo. Los tornillos no
están apretados.
ﻲﻓ ﻱﻮﻠﻌﻟﺍ ﺀﺎﻄﻐﻟﺍﻭ ﻲﻠﻔﺴﻟﺍ ﺀﺎﻄﻐﻟﺍ ﻞﺧﺩﺃ
.ﺔﻃﻮﺑﺮﻣ ﺖﺴﻴﻟ ﻲﻏﺍﺮﺒﻟﺍ .ﺏﻮﺒﻧﻷﺍ
The Upper Canopy (with brand
logo) is on top of the Lower Canopy
(without brand logo).
Cubierta superior (con marca de logo)
está encima de la cubierta inferior (sin
marca de logo).
ﺔﻤﻗ ﻰﻠﻋ (ﺔﻳﺭﺎﺠﺘﻟﺍ ﺔﻣﻼﻌﻟﺍ ﻊﻣ) ﺔﻳﻮﻠﻌﻟﺍ ﺔﹼﺒﻘﻟﺍ
.(ﺔﻳﺭﺎﺠﺘﻟﺍ ﺔﻣﻼﻌﻟﺍ ﻥﻭﺪﺑ) ﺔﻴﻠﻔﺴﻟﺍ ﺔﹼﺒﻘﻟﺍ
How to install Cómo instalarlo ﺐﻴﻛﺮﺘﻟﺍ ﺔﻴﻔﻴﻛ
Bﺏﻮﺒﻧﻷﺍ ﻦﻣ aﻥﺎﻣﻷﺍ ﻚﻠﺳ ﺐﺤﺳﺍ
ﺢﺿﻮﻣ ﻮﻫ ﺎﻤﻛ
ﺏﻭﺑﻧﻷﺍ ﻥﻣ bﻥﺎﻣﻷﺍ ﻙﻠﺳ ﻲﻏﺭﺑ ﻙﻔﺑ ﻡﻗ
.15 ﺔﺣﻔﺻ ﻲﻓ 4-4 ﺓﻭﻁﺧﻠﻟ ﻪﺑ ﻅﻔﺗﺣﺍﻭ
ﺏﻭﺑﻧﻷﺍ ﻥﻣ cﻲﻠﻔﺳﻟﺍ ﺀﺎﻁﻐﻟﺍ ﻲﻏﺭﺑ ﻙﻔﺑ ﻡﻗ
.18 ﺔﺣﻔﺻ ﻲﻓ 2-6 ﺓﻭﻁﺧﻠﻟ ﻪﺑ ﻅﻔﺗﺣﺍﻭ
1
ﺔﹼﺒﻘﻟﺍ ﻝﺎﺧﺩﺇ
■
ﻕﺷ ﻥﻣ ﺝﺭﺎﺧﻠﻟ aﻥﺎﻣﻷﺍ ﻙﻠﺳ ﺏﺣﺳﺍ
.Bﺏﻭﺑﻧﻷﺍ
2
.ﺏﻮﺒﻧﻷﺍ ﻲﻓ Cﻲﻠﻔﺴﻟﺍ ﺀﺎﻄﻐﻟﺍ ﻞﺧﺩﺃ
ﺭﺎﻌﺷ ﻪﺑ ﻱﺬﻟﺍ) Aﻱﻮﻠﻌﻟﺍ ﺀﺎﻄﻐﻟﺍ ﻞﺧﺩﺃ ﻢﺛ
.ﺏﻮﺒﻧﻷﺍ ﻲﻓ (ﺔﻛﺭﺎﳌﺍ
cﻲﻠﻔﺴﻟﺍ ﺀﺎﻄﻐﻟﺍ ﻲﻏﺮﺑ ﻂﺑﺭ ﻢﻜﺤﺗ ﻻ•
.dﻱﻮﻠﻌﻟﺍ ﺀﺎﻄﻐﻟﺍ ﻲﻏﺮﺑﻭ
3
B
B
C A
a
a
b
c
d
2 3
c
F48_56ZX_TZ_KDK.indd 9F48_56ZX_TZ_KDK.indd 9 3/7/2018 3:43:02 PM3/7/2018 3:43:02 PM
B
D
e
f
g
10
1
Pull the power cord
A
(from the
power supply) and insert into the Pipe
hole as shown.
1Extraiga el cable de corriente
A
(desde la alimentación eléctrica) e
insertelo en el orificio del tubo como
se muestra.
2Assemble the Pipe to the Motor
Assembly D.
First, ensure that the shaft cap
e
sits on the motor shaft
f
and is
tightened with the stopping screw
g
.
Then fix the Pipe Bto the shaft
cap e.
Ensure that the Pipe hole and the
motor shaft hole are aligned.
2Monte el tubo en el conjunto del
motor D.
Primero, asegúrese de que la tapa del eje
e
se sientan en el eje del motor
f
y
se aprieta con el tornillo de parada
g
.
Después, fijar el tubo Ba la tapa
de eje e.
Asegúrese de que el agujero de la tubería y
el agujero de eje del motor están alineados.
■
Assemble the Pipe to the
Motor Assembly
■
Monte el tubo en el
conjunto del motor
2
Check point after installation Compruebe el punto después
de la instalación
Make sure that the shaft cap and the
Pipe sit on the stopping screw.
Asegúrese de que la tapa del eje y el
tubo se asientan en el tornillo de parada.
CAUTION
Do not remove the
Stopping Screw.
Do not remove the
Shaft Cap.
Fix the Pipe correctly to
the motor shaft.
Can cause injury if the
Ceiling Fan drops.
ﻪﻴﺒﻨﺗ
.ﺯﺎﺠﺘﺣﻻﺍ ﻲﻏﺮﺑ ﻚﻔﺑ ﻢﻘﺗ ﻻ
.ﺩﻮﻤﻌﻟﺍ ﺀﺎﻄﻏ ﻚﻔﺑ ﻢﻘﺗ ﻻ
ﺩﻭﻣﻋ ﻊﻣ ﺏﻭﺑﻧﻷﺍ ﺕﻳﺑﺛﺗﺑ ﻡﻗ
.ﺢﻳﺣﺻ ﻝﻛﺷﺑ ﻙﺭﺣﻣﻟﺍ ﻥﺍﺭﻭﺩ
ﺔﺑﺎﺻﺇ ﺙﻭﺩﺣ ﻲﻓ ﺏﺑﺳﺗﻳ ﻥﺃ ﻥﻛﻣﻳ
ﺔﺣﻭﺭﻣ ﻁﻭﻘﺳ ﺔﻟﺎﺣ ﻲﻓ
.ﻑﻘﺳﻟﺍ
PRECAUCIÓN
No quite el tornillo de
parada.
No quite el tapa de eje.
Fijar el tubo
correctamente en el eje
del motor.
Si el ventilador del techo
se cae, puede causar
lesiones.
ﺭﺪﺼﻣ ﻦﻣ) Aﺀﺎﺑﺮﻬﻜﻟﺍ ﻚﻠﺳ ﺐﺤﺳﺍ
ﺏﻮﺒﻧﻷﺍ ﺔﺤﺘﻓ ﻲﻓ ﻪﻠﺧﺩﺃﻭ (ﺔﻗﺎﻄﻟﺍ ﺩﺍﺪﻣﺇ
.ﺢﺿﻮﻣ ﻮﻫ ﺎﻤﻛ
1
.Dﻙﺭﺣﻣﻟﺍ ﺔﻋﻭﻣﺟﻣ ﻊﻣ ﺏﻭﺑﻧﻷﺍ ﻊﻳﻣﺟﺗﺑ ﻡﻗ
ﻰﻠﻋ ﺭﻘﺗﺳﻣ eﻥﺍﺭﻭﺩﻟﺍ ﺩﻭﻣﻋ ﺀﺎﻁﻏ ﻥﺃ ﺩﻛﺄﺗ ،ﹰﻻﻭﺃ
ﻲﻏﺭﺑ ﻊﻣ ﻁﻭﺑﺭﻣﻭ fﻙﺭﺣﻣﻟﺍ ﻥﺍﺭﻭﺩ ﺩﻭﻣﻋ
.gﻑﺎﻘﻳﻹﺍ
ﺩﻭﻣﻋ ﺀﺎﻁﻏ ﻊﻣ Bﺏﻭﺑﻧﻷﺍ ﺕﻳﺑﺛﺗﺑ ﻡﻗ ﻙﻟﺫ ﺩﻌﺑ
.eﻥﺍﺭﻭﺩﻟﺍ
ﺩﻭﻣﻋ ﺔﺣﺗﻓ ﻊﻣ ﺏﻭﺑﻧﻷﺍ ﺔﺣﺗﻓ ﺓﺍﺫﺎﺣﻣ ﻥﻣ ﺩﻛﺄﺗ
.ﻙﺭﺣﻣﻟﺍ ﻥﺍﺭﻭﺩ
2
ﺔﻋﻮﻤﺠﻣ ﻰﻠﻋ ﺏﻮﺒﻧﻷﺍ ﻊﻴﻤﺠﺗ
■
ﻙﺮﺤﻤﻟﺍ
ﻰﻠﻋ ﺏﻮﺒﻧﻷﺍﻭ ﺩﻮﻤﻌﻟﺍ ﺀﺎﻄﻏ ﺖﻴﺒﺜﺗ ﻦﻣ ﺪﻛﺄﺗ
.ﺯﺎﺠﺘﺣﻻﺍ ﻲﻏﺮﺑ
ﺐﻴﻛﺮﺘﻟﺍ ﺪﻌﺑ ﺺﺤﻔﻟﺍ ﻁﺎﻘﻧ
How to install Cómo instalarlo ﺐﻴﻛﺮﺘﻟﺍ ﺔﻴﻔﻴﻛ
ACeiling /
Techo /
ﻒﻘﺴﻟﺍ
F48_56ZX_TZ_KDK.indd 10F48_56ZX_TZ_KDK.indd 10 3/7/2018 3:43:04 PM3/7/2018 3:43:04 PM