Assemble units as described herein only. To do otherwise
may result in instability. All screws, nuts and bolts must be
tightened securely and must be checked periodically after
assembly. Failure to assemble properly, or to secure parts
may result in assembly failure and personal injury.
7
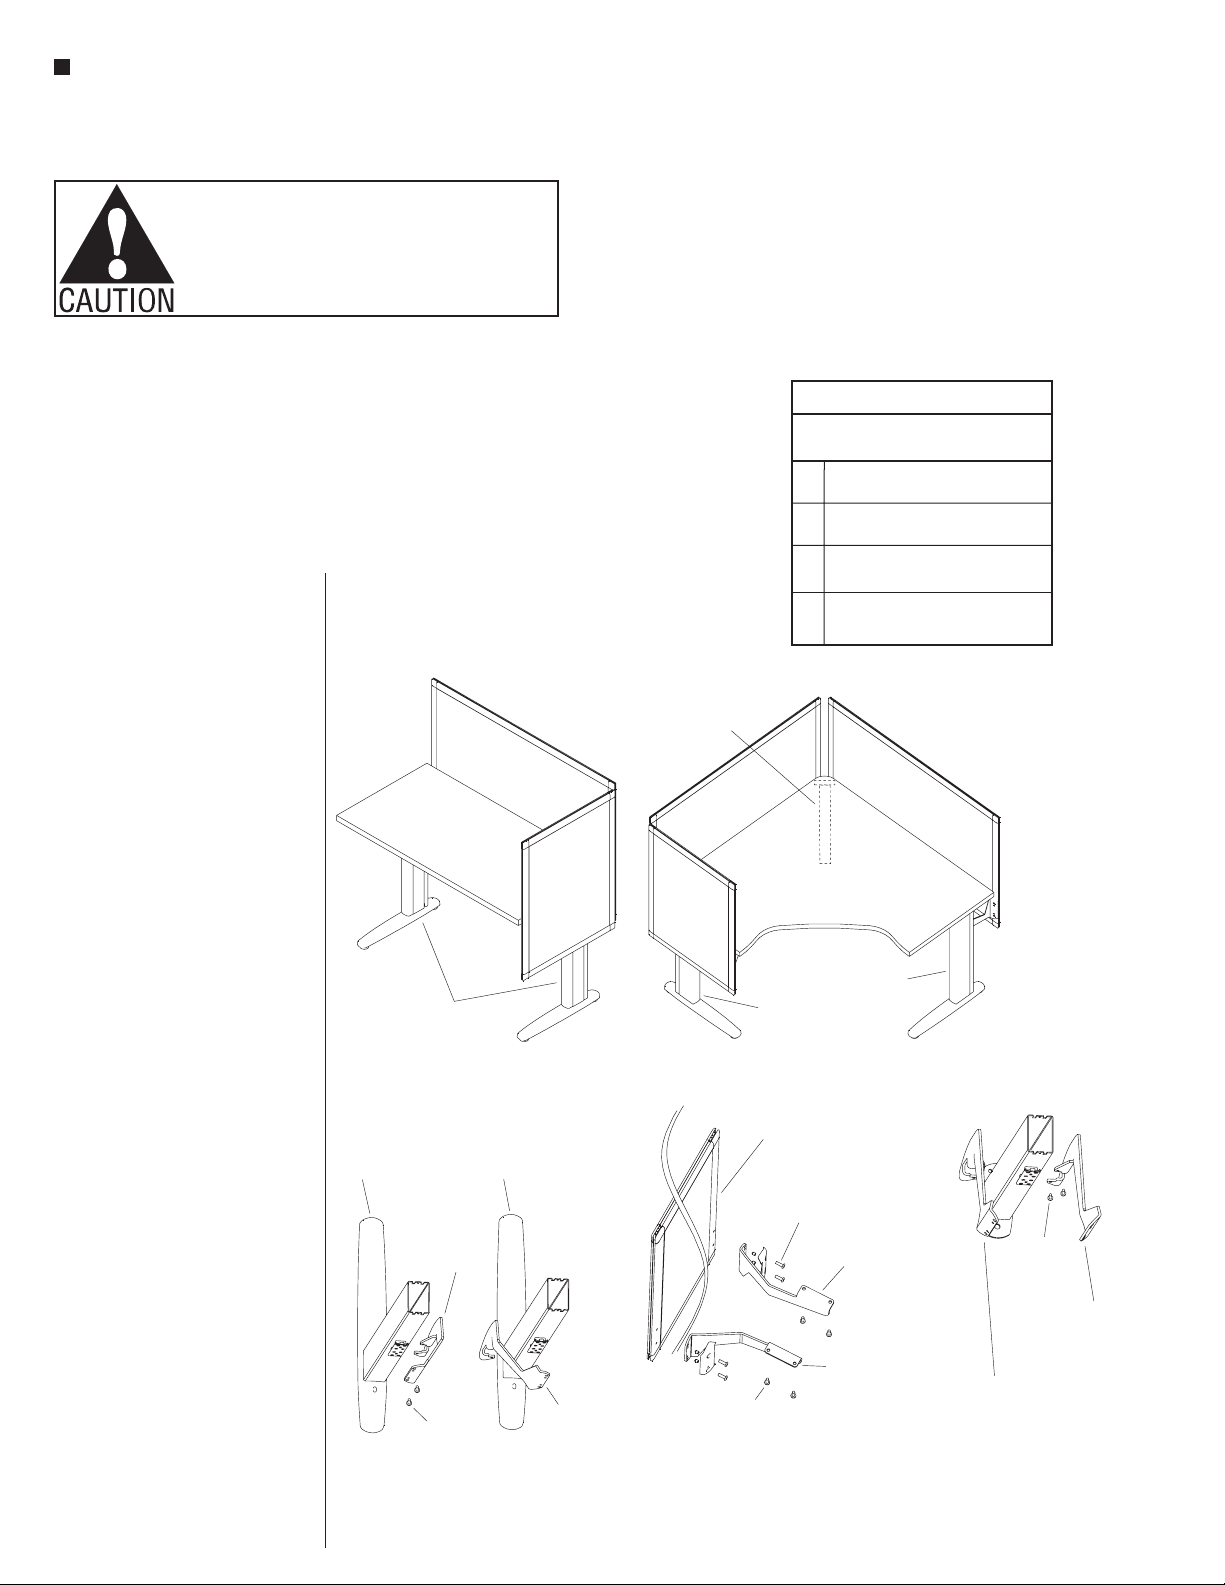
Genesis® Desking - Wire Management Troughs & 10-Wire Electrical System
Assembly Instructions
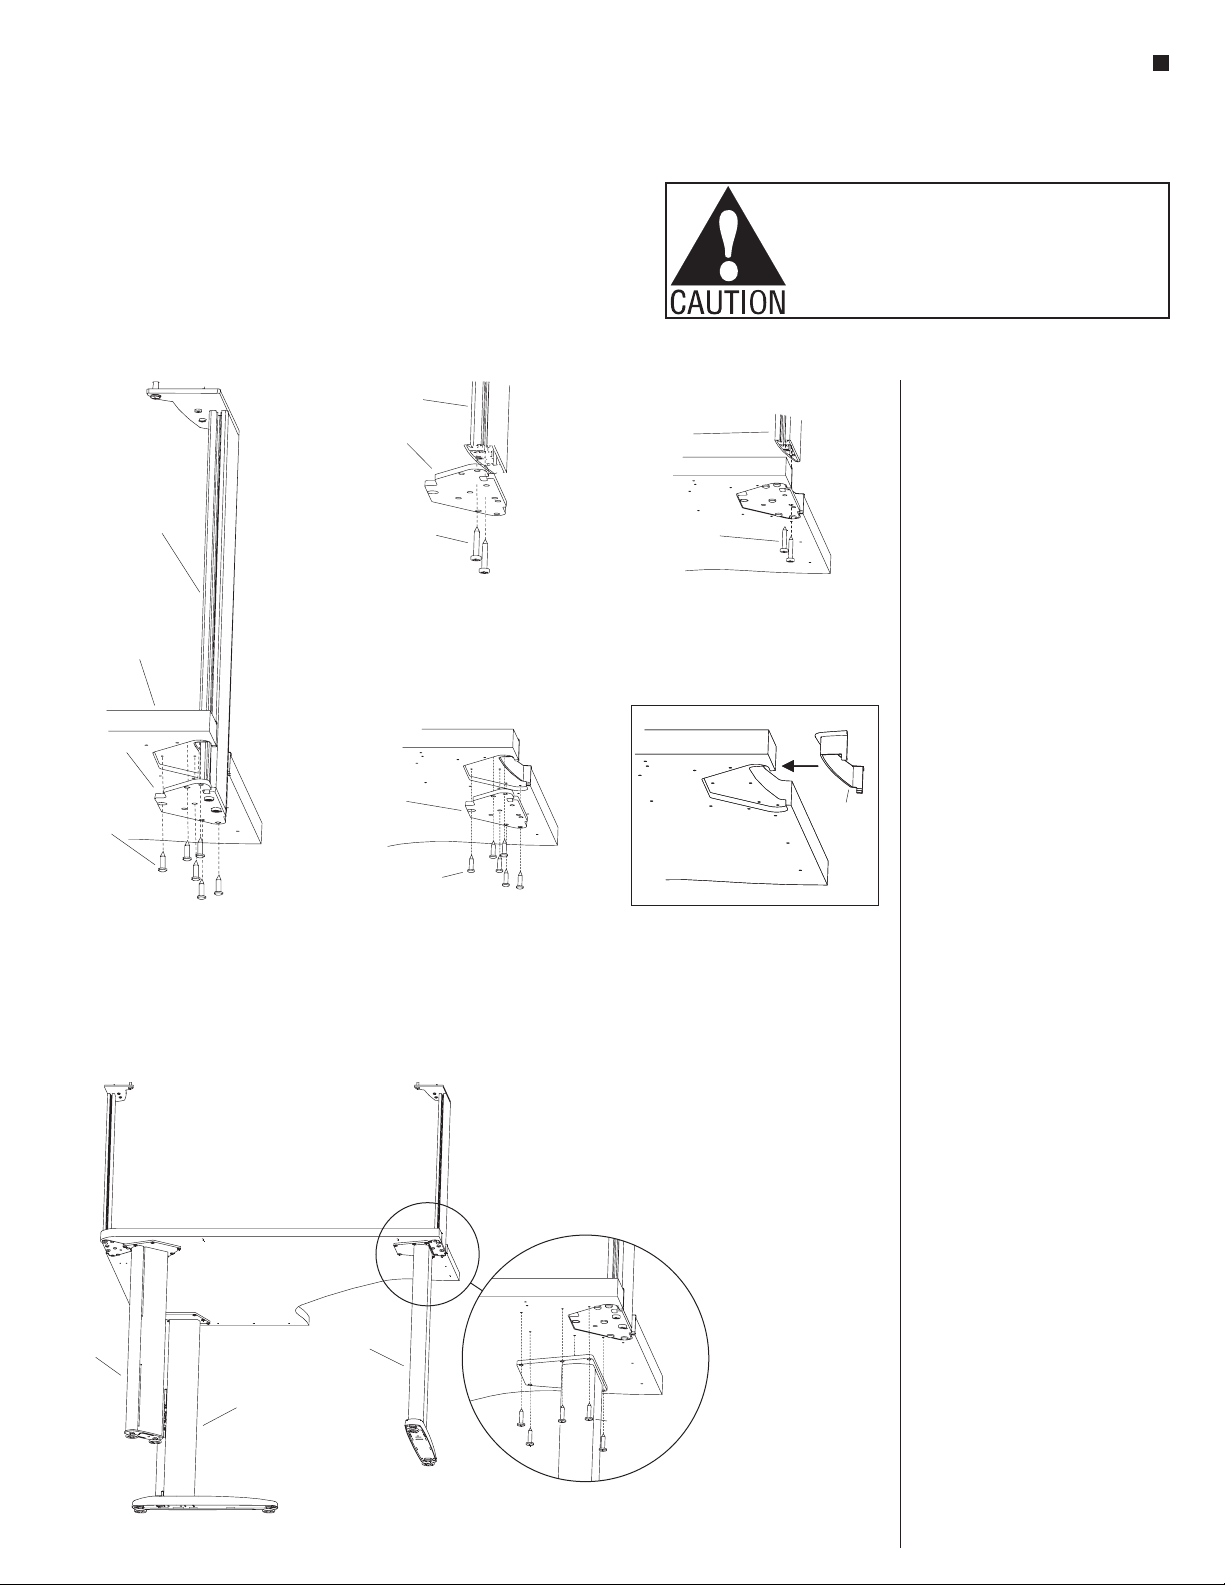
wire attachment
bracket
aluminum
cover
table base not shown for clarity
#10-24 x /”
Torx head screw
1
4
Detail F
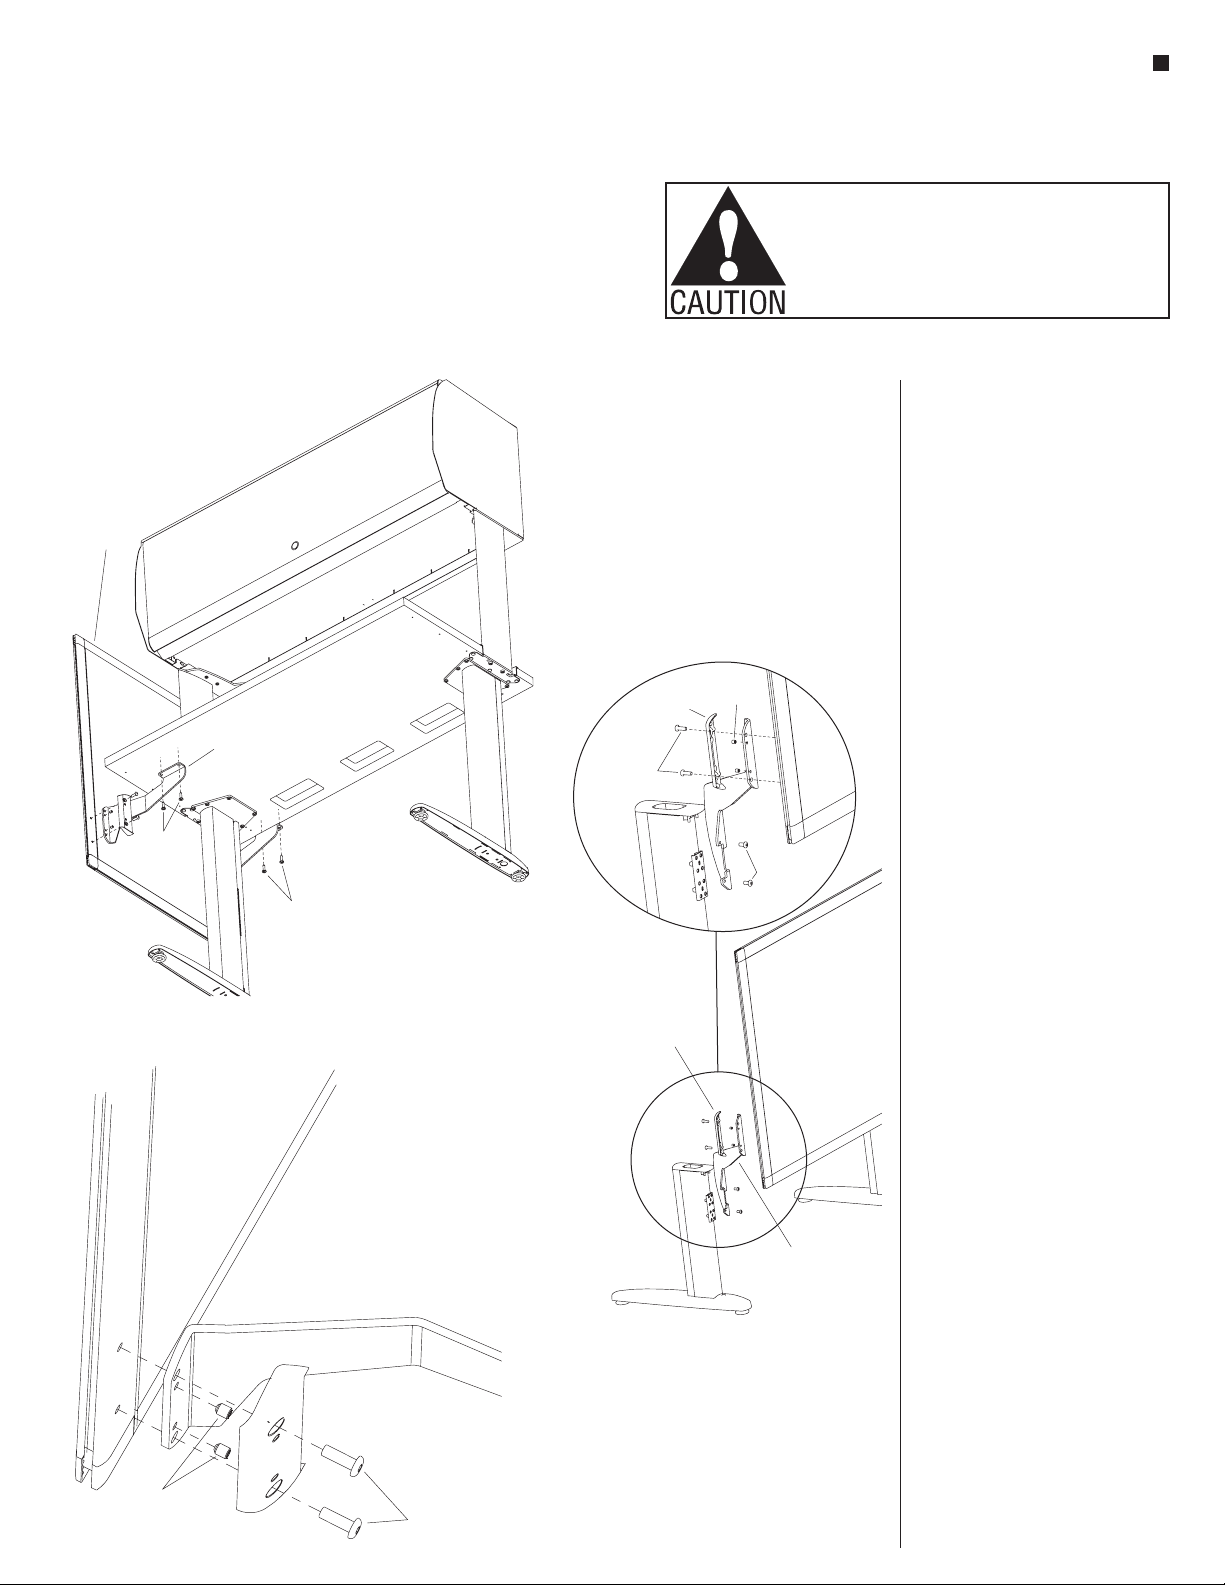
Preparing for Electrical
Installation
Note: Before assembling electrical
components, troughs should be
assembled to the desk legs. If wire
trough is not installed to the desk
legs, reference “Cross Brace and/or
Wire Trough Installation” instructions
on page 4.
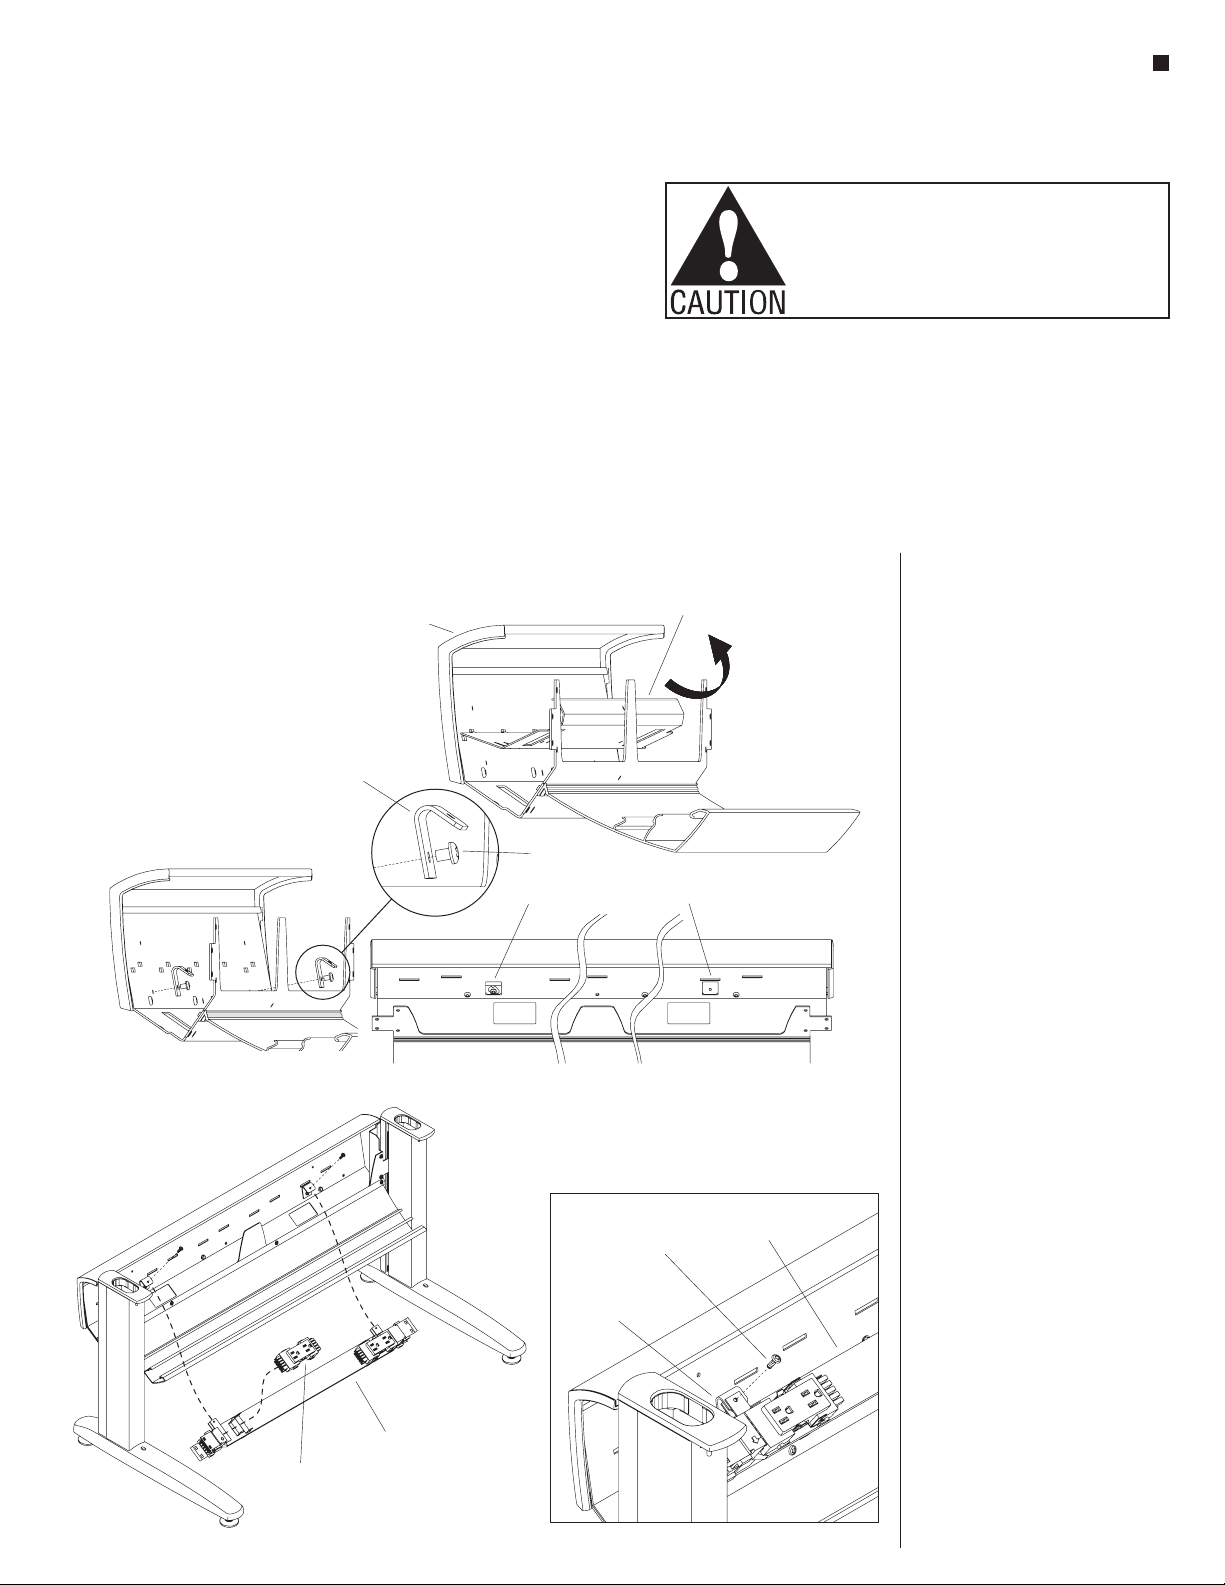
1. Prepare trough by removing the inner
cover. Lift up on the return lip of the
cover to swing cover up, then remove
cover and set aside near the desk
(Figure 14).
Note: It is sometimes helpful to
remove the rear aluminum cover.
10-wire
rigid wireway
10-wire
duplex
receptacle
10-wire
rigid wireway
10-24 x /”
Torx head screw
1
4
10-wire
rigid wireway
mounting tabs
2. Install wireway attachment brackets
(two per trough) using #10-24 x 1/4”
Torx head screw. The brackets
attach near the outside edge of the
receptacle holes as shown in Figure
14 & Detail F.
Duplex Receptacle Installation
Note: Duplex receptacles for the
10-wire system are specified/
ordered separately. Six receptacles
are available for accessing one of
each of the six circuits of the 10-wire
system. They are designed with a
numeral on each (i.e. 1, 2, 3, 4, 5, &
6). Circuits 4, 5 and 6 have triangles
to identify them as isolated circuits.
To install the receptacles, follow the
steps below.
WARNING: Assembly of all
mechanical components must
be completed before making any
electrical connections. All electrically
connected furnishings must also be
mechanically connected.
1. Per the space-planning layout,
determine the correct location for
each numbered receptacle in the
system (Figure 15).
2. Plug the required 10-wire duplex
receptacle(s) into the plastic ends of
the 10-wire rigid wireway and secure
by inserting until metal snap engages
(Figure 15).
10-Wire Rigid Wireway Installation
1. Position the 10-wire rigid wireway
up against the wireway attachment
bracket so that the attachment
bracket nests in between the two
mounting tabs on the 10-wire rigid
wireway (Figure 15 & Detail G).
2. Secure the 10-wire rigid wireway to
each wire attachment bracket using a
10-24 x 1/4” Trox head screw
(Figure 15 & Detail G).