manuals.online logo
Brands
  1. Home
  2. •
  3. Brands
  4. •
  5. KI
  6. •
  7. Indoor Furnishing
  8. •
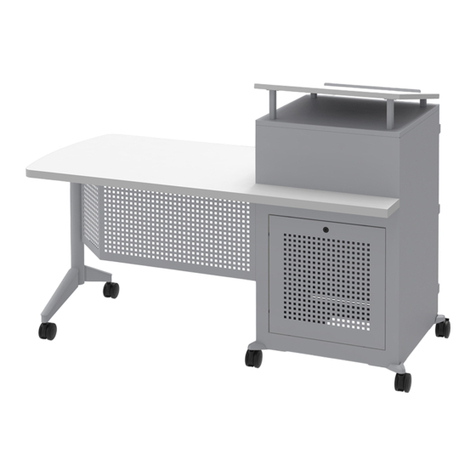
  9. KI Likha Casegoods User manual

KI Likha Casegoods User manual

Assemble units as described herein only. To do otherwise
may result in instability. All screws, nuts and bolts must be
tightened securely and must be checked periodically after
assembly. Failure to assemble properly, or to secure parts
may result in assembly failure and personal injury.
Adjustable-Height Desks &
Credenzas Assembly
Tools Required
• Spirit level
• Pry bar
1. Carefully remove desk from carton
and packaging. Verify all glides
are installed. Place the desk in the
desired location.
Note: If the adjustable-height
desk or credenza does not have a
control switch pre-installed, proceed
to “Control Switch Installation”
instructions on page 3 before
proceeding to the next step.
2. Locate control box attached behind
the kneespace back panel. Route
power cord through the desired
pedestal grommet, to an approved
power source.
3. Synchronize legs by pressing the
down button on the control pad once,
then press and hold the down button
until legs reset.
4. Using the control pad, raise the
desktop up. Using a spirit level,
level the glides on the chassis
front-to-back on both ends, then
level from side-to-side.
5. Press the down button on the control
pad to lower the adjustable-height
desktop until there is a small, equal
gap around the entire unit between
the underside of the desktop and
the top of the chassis. This is to
ensure the desktop, when lowered,
will not touch one corner before the
other corners, which could cause the
desktop to automatically return to the
2” soft stop position. This is a safety
feature to prevent harm.
Assembly Instructions
Likha Casegoods
Adjustable-Height Desks & Credenzas
September 2022
Figure 2
desktop
chassis
even gap
Figure 1
kneespace
back panel
pedestal
grommet
2
Assemble units as described herein only. To do otherwise
may result in instability. All screws, nuts and bolts must be
tightened securely and must be checked periodically after
assembly. Failure to assemble properly, or to secure parts
may result in assembly failure and personal injury.
Likha Casegoods - Adjustable-Height Desks & Credenzas
Assembly Instructions
Moving Modesty Panel
Installation
Parts List
• Moving Modesty Panel
• Adjustable-Height Pedestal Desk
• Shoulder Pin Screws and Cams
(qty 5 - usage quantity varies by
size)
• Cam Covers (qty 5)
Warning: Do not use power tools
to secure shoulder pin screws to
the underside of the worksurface.
Hand tighten screws using a Phillips
screwdriver to prevent stripping.
1. Raise the height of the
adjustable-height pedestal desk or
credenza enough to gain access
underneath the desktop from the user
side. This will allow a second person
to secure the modesty panel to the
cams in a later step (Figure 3).
2. Using a Phillips screwdriver, twist
four shoulder pin screws into the
mounting hole locations on the
underside of the desktop until the
first shoulder of the pin screw comes
tightly into contact with the desktop
as illustrated (Figure 3).
3. Carefully, unwrap the moving
modesty panel from the packaging.
4. Insert a cam into each cam hole in
the modesty panel, with the arrows
pointing to the top edge of the
modesty panel.
5. Align the cam holes on top of the
moving modesty panel with the
heads of the shoulder pin screws
under the desktop. With the
assistance of a second person, have
one person lift the modesty panel up
against the desktop so the shoulder
pin screws insert into the cam
holes, then the second person turns
each cam clockwise with a Phillips
screwdriver to lock the sleeve in
place under the worksurface
(Figures 3 & 4).
6. Press a cam cover into each cam
hole on the modesty panel
(Figure 4).
Figure
3
desktop
shoulder
pin screws
moving
modesty panel
adjustable-height
pedestal desk
Figure 4
cam
adjustable-height
pedestal desk
moving
modesty panel
3
Assemble units as described herein only. To do otherwise
may result in instability. All screws, nuts and bolts must be
tightened securely and must be checked periodically after
assembly. Failure to assemble properly, or to secure parts
may result in assembly failure and personal injury.
Likha Casegoods - Adjustable-Height Desks & Credenzas
Assembly Instructions
Figure 5
switch
bracket
plate
8 x /”
3
4
Phillips pan head
screws switch bracket
mounting
tab
pedestal
drawer
pedestal
(side)
desktop
Figure 6
control
switch
#6-32 x /”
7
8
Phillips at head
screws
switch
bracket
plate
Control Switch Installation
Parts List
• #8 x 3/4” Phillips pan head screws
(qty 3)
• #6-32 x 7/8” Phillips flat head zinc
screws (qty 2)
• Switch bracket
• Control switch
1. Position the switch bracket plate
under the front, user side of the
desktop, with the switch bracket
mounting tab against the pedestal
and straight, making sure the switch
bracket is no higher than the top
of the pedestal, and positioned to
be flush with the front edge of the
pedestal drawer face (Figure 5).
2. Using the correctly positioned switch
bracket as a template, mark the
three mounting tab hole locations to
the side of the pedestal, then move
the switch bracket away. Using a
cordless power drill and a 1/32” drill
bit, carefully bore three holes at the
center of the marked locations on the
pedestal side (Figure 5).
3. Align the mounting holes of the
switch bracket mounting tab with the
pre-drilled holes on the side of the
pedestal and secure using three
#8 x 3/4” Phillips pan head screws.
Take care not to over tighten
(Figure 5).
4. Align the mounting holes of the
control switch with the mounting
holes on the switch bracket plate,
Secure switch to the plate using two
#6-32 x 7/8” Phillips flat head zinc
screws (Figure 6).
5. Route the control switch cable
through the kneespace grommet and
plug into the control box under the
kneespace desktop.
6. Proceed back to “Adjustable-Height
Desks & Credenzas Assembly”
instructions on page 1.
1330 Bellevue Street • P.O. Box 8100 • Green Bay, WI 54308-8100 • Tel 1-800-424-2432 • www.ki.com
© 2022 Krueger International, Inc. All Rights Reserved • Code KI-AI-000101R1/KI/PDF/0922
Likha Casegoods - Adjustable-Height Desks & Credenzas
Assembly Instructions

Other KI Indoor Furnishing manuals

KI Intellect Chair Guide

KI

KI Intellect Chair Guide

KI CafeWay ECRCB Maintenance manual

KI

KI CafeWay ECRCB Maintenance manual

KI Instruct All Terrain Instructor's Desk User manual

KI

KI Instruct All Terrain Instructor's Desk User manual

KI Smart Lift User manual

KI

KI Smart Lift User manual

KI Soltice Metal User manual

KI

KI Soltice Metal User manual

KI Doni Guide

KI

KI Doni Guide

KI InTandem User manual

KI

KI InTandem User manual

KI KI 700 Series User manual

KI

KI KI 700 Series User manual

KI Aristotle Casegoods Aluminum Leg Table with Acrylic... User manual

KI

KI Aristotle Casegoods Aluminum Leg Table with Acrylic... User manual

KI Instruct All Terrain Mobile Instructor's... User manual
KI

KI Instruct All Terrain Mobile Instructor's... User manual

KI Intellect Book Box User manual

KI

KI Intellect Book Box User manual

KI Pirouette User manual

KI

KI Pirouette User manual

KI Universal Overhead Storage User manual

KI

KI Universal Overhead Storage User manual

KI Doni User manual

KI

KI Doni User manual

KI Lancaster Auditorium Seating User manual

KI

KI Lancaster Auditorium Seating User manual

KI Extol Installation instructions

KI

KI Extol Installation instructions

KI CB User manual

KI

KI CB User manual

KI Uniframe Table Guide

KI

KI Uniframe Table Guide

KI Altus Installation guide

KI

KI Altus Installation guide

KI CafeWay ECRCP User manual

KI

KI CafeWay ECRCP User manual

KI Ruckus Desk User manual

KI

KI Ruckus Desk User manual

KI WorkZone Series User manual

KI

KI WorkZone Series User manual

KI Instruct User manual

KI

KI Instruct User manual

KI Pirouette User manual

KI

KI Pirouette User manual

Popular Indoor Furnishing manuals by other brands

Be Mobiliário Inteligente 1003 FREE Assembly instructions

Be Mobiliário Inteligente

Be Mobiliário Inteligente 1003 FREE Assembly instructions

DH Casual BARI 6 PC LOUNGE SET quick start guide

DH Casual

DH Casual BARI 6 PC LOUNGE SET quick start guide

Songmics VASAGLE LTV09 manual

Songmics

Songmics VASAGLE LTV09 manual

siena GARDEN Miros 508707 Assembly instruction

siena GARDEN

siena GARDEN Miros 508707 Assembly instruction

RSA Lighting Galleria CGCVI Specifications

RSA Lighting

RSA Lighting Galleria CGCVI Specifications

DHP 5457096 Assembly instructions

DHP

DHP 5457096 Assembly instructions

Triarch 31127 Assembly instructions

Triarch

Triarch 31127 Assembly instructions

Costway CB10278 user manual

Costway

Costway CB10278 user manual

Sauder 426928 manual

Sauder

Sauder 426928 manual

Home Decorators Collection Rea Assembly instructions

Home Decorators Collection

Home Decorators Collection Rea Assembly instructions

Costway HW70644 Assembly instructions

Costway

Costway HW70644 Assembly instructions

EefaCo.Store Bedford 88 5531 17 quick start guide

EefaCo.Store

EefaCo.Store Bedford 88 5531 17 quick start guide

Crosley CF6012 Assembly instructions

Crosley

Crosley CF6012 Assembly instructions

Twoey inside 3810 quick start guide

Twoey inside

Twoey inside 3810 quick start guide

Modus Furniture RETREAT FULL BED Assembly instructions

Modus Furniture

Modus Furniture RETREAT FULL BED Assembly instructions

Score Apical manual

Score

Score Apical manual

Living Spaces Halle Queen Assembly instructions

Living Spaces

Living Spaces Halle Queen Assembly instructions

Coaster 203500TB1 Assembly instructions

Coaster

Coaster 203500TB1 Assembly instructions

manuals.online logo
manuals.online logoBrands
  • About & Mission
  • Contact us
  • Privacy Policy
  • Terms and Conditions

Copyright 2025 Manuals.Online. All Rights Reserved.