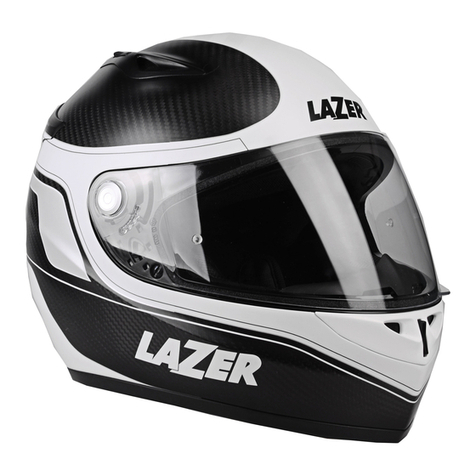
LAZER Mambo Evo PURE CARBON User manual

User’sGUide 6
ManUel d’Utilisation 8
GebrUiksaanwijzinG 10
bedienUnGsanleitUnG 12
ManUal de Uso 14
ManUal do UsUário 16
ManUale d’Uso 18
MaMbo Evo
PURE CARBON
MEG Mambo Evo Pure Carbon bichro DEF.indd 1 22/12/16 15:21

- 3 -
UK
IMPORTANT
Please read this manual carefully BEFORE using your
helmet for the first time.
Following the instructions will keep your helmet
effective and SAFE.
Remember to keep the manual in a safe place.
It contains instructions, which are EXTREMELY
IMPORTANT for your safety.
We have done our best to be as clear and explicit as
possible. However, should you find the instructions
unclear, or have any questions or require further
information, please do not hesitate to contact
us by post, e-mail or directly on our website:
www.lazerhelmets.com
INFORMATION FOR USERS
- To insure an adequate protection, this helmet
must fit closely and be securely attached.
- Any helmet that has sustained a violent impact
should be replaced.
- Warning! Do not apply paint, stickers, petrol or
other solvents to this helmet. Use only warm soapy
water to clean the helmet surface.
ECE 22.05
FR
IMPORTANT
Veuillez lire attentivement ce manuel AVANT
d’utiliser votre casque pour la première fois.
Suivre les instructions maintiendra votre casque
dans un état lui assurant efficacité et SECURITE.
Veillez à garder ce manuel en lieu sûr. Il contient des
instructions qui sont EXTREMEMENT IMPORTANTES
pour votre sécurité.
Nous avons fait tout ce que nous pensions
utile afin de rendre nos instructions claires et
explicites, si toutefois vous ne les trouviez pas assez
compréhensibles ou que vous aviez des questions
ou vous souhaiteriez de plus amples informations,
n’hésitez pas à nous contacter via la poste, par
courriel ou directement sur notre site:
www.lazerhelmets.com
MISE EN GARDE
- Pour assurer une protection suffisante, ce casque
doit être bien ajusté et être solidement attaché.
- Tout casque qui a été soumis à un choc violent
est à remplacer.
- Attention: N’appliquer sur ce casque ni peinture,
ni autocollant, ni essence, ni aucun autre solvant.
N’utilisez que de l’eau chaude et savonneuse
pour nettoyer le casque.
ECE 22.05
NL
BELANGRIJK
Gelieve deze handleiding aandachtig te lezen
alvorens de helm voor het eerst in gebruik te
nemen.
Onderstaande instructies helpen u de helm efficiënt
en veilig te houden.
Bewaar deze handleiding zodat u die te allen tijde
gemakkelijk kan raadplegen. Deze bevat instructies
die HEEL BELANGRIJK zijn voor uw veiligheid.
Wij hebben onze uiterste best gedaan om
zo duidelijk mogelijk te zijn. Indien sommige
instructies niet duidelijk zijn of hebt u nog andere
vragen, aarzel niet met ons contact op te
nemenper post of per e-mail of rechtstreeks via :
www.lazerhelmets.com.
PEAK INCLUDED
IN THE BOX
MAMBO Evo
PURE CARBON
GUARANTEE
MEG Mambo Evo Pure Carbon bichro DEF.indd 2-3 22/12/16 15:21

- 4 -
WAARSCHUWING
- Om een voldoende bescherming te waarborgen
moet deze helm goed passen en tevens een goed
zijdelings zicht mogelijk maken.
- Iedere helm die een hevige klap heeft opgevangen
dient te worden vervangen, zelfs al is de geleden
schade niet zichtbaar.
- Niet verven, noch reinigen met bijtende
producten. Gebruik warm water en zeep voor het
reinigen van de helm.
ECE 22.05
DE
WICHTIG
Bitte lesen Sie diese Gebrauchsanweisung VOR der
ersten Benutzung Ihres Helms.
Wenn Sie sich an die Anweisungen halten, wird Ihr
Helm in einem Zustand bleiben, der seine Wirksam-
keit und Ihre Sicherheit gewährleistet.
Bitte bewahren Sie diese Gebrauchsanweisung an
einem Ort auf,an dem sie leicht wieder aufzufinden
ist.Sie enthält EXTREM WICHTIGE Sicherheitsanwei-
sungen.
In diesem Manual finden Sie alle nützlichen und
notwendigen Informationen, welche für die Benut-
zung des Helmes wichtig sind. Wenn allerdings ge-
wisse Anweisungen Ihrer Meinung nach unklar sind,
oder falls Sie Fragen haben und zusätzliche Infor-
mationen benötigen, dann nehmen Sie doch bitte,
per Post, per E-Mail, oder direkt auf unserer Website
www.lazerhelmets.com,Kontakt mit uns auf.
WARNUNG
- Um einen ausreichenden Schutz zu ermöglichen
muss dieser Helm genau passen und sorgfältig
verschlossen werden.
- Jeder Helm, der einem heftigen Stoss ausgesetzt
wurde,ist unbedingt zu ersetzen.
- Achtung!Der Helm darf nicht mit Farbe, Benzin
oder Beizmitteln bestrichen oder mit Aufklebern
versehen werden.Um die Oberfläche des Helms
zu reinigen, benutzen Sie bitte nur warmes Wasser
und Seifenlauge.
ECE 22.05
ES
IMPORTANTE
Lea con atención este manual ANTES de utilizar su
casco por primera vez.
Si sigue las instrucciones, mantendrá su casco en
un estado que le garantizará eficacia y SEGURIDAD.
Guarde este manual en un lugar en el que pueda
encontrarlo fácilmente. Contiene instrucciones de
seguridad SUMAMENTE IMPORTANTES.
Hemos procurado ser lo más claros y explícitos
posible. Sin embargo, si las instrucciones no le
parecen claras, si desea hacer preguntas o si
necesita información, no dude en ponerse en
contacto con nosotros por correo, por correo
electrónico o via la página internet:
www.lazerhelmets.com
AVISO PARA USUARIOS
- Para garantizar una protección adecuada, su
casco tiene que estar bien ajustado y abrochado.
- Cualquier casco que haya sido expuesto a un
golpe violento tiene que ser sustituido por otro.
- ATENCION! No aplicar pintura, pegatinas,
gasolina o productos agresivos en el casco. Use
agua caliente y jabón para limpiar la superficie
del casco.
ECE 22.05
- 5 -
PT
IMPORTANTE
Por favor, leia este manual cuidadosamente antes
de usar o seu capacete pela primeira vez.
Seguindo as instruções irá manter o seu capacete
eficaz e seguro.
Lembre-se de manter o manual em um local seguro.
Ele contém instruções, que são EXTREMAMENTE
IMPORTANTE para a sua segurança.
Nós fizemos o nosso melhor para ser o mais claro
e explícito possível, no entanto, deve encontrar
as instruções claras, ou se tiver alguma dúvida
ou necessitar de mais informações, por favor não
hesite em contactar-nos por correio, e-mail ou
website: www.lazerhelmets.com
INFORMAÇÃO PARA USUÁRIOS
- Para protecção adequada, este capacete deve
ser usado fechado e apertado.
- Qualquer capacete que tenha sofrido um
impacto violento deve ser substituído.
- Atenção! Não aplique tintas, adesivos, gasolina
ou outros solventes no capacete. Use apenas
água morna e sabão para limpar a superfície do
capacete.
ECE 22.05
IT
IMPORTANTE
Si prega di leggere attentamente questo manuale
PRIMA di utilizzare il Vostro casco per la prima volta.
Seguendo queste istruzioni manterrete il Vostro
casco nel miglior modo sia per l’efficienza che per
la sicurezza.
Conservate questo manuale in un luogo sicuro.
Contiene istruzioni che sono ESTREMAMENTE
IMPORTANTI per la Vostra sicurezza.
Abbiamo realizzato questo manuale in modo che
sia il più chiaro ed esplicito possibile, qualora
trovaste delle istruzioni non chiare o avete
domande o necessitate di ulteriori informazioni,
non esitate a contattarci direttamente per e-mail,
per posta o via la pagina internet:
www.lazerhelmets.com
INFORMAZIONI PER GLI UTENTI
- Per un’adeguata protezione, questo casco deve
essere ben calzato sulla testa e saldamente
allacciato.
- Ogni casco che ha subito un violento urto deve
essere sostituito.
- ATTENZIONE! Non utilizzare vernici, benzina o altri
solventi per questo casco. Non applicate adesivi.
Pulite il vostro casco esclusivamente con un
panno morbido, umido e sapone neutro.
ECE 22.05
MEG Mambo Evo Pure Carbon bichro DEF.indd 4-5 22/12/16 15:21

UK
Congratulations for buying our LAZER Mambo Evo Pure
Carbon helmet!
ADVICES
WARNING
No helmet can protect the wearer against all possible
impacts.
For maximum protection, the helmet must fit firmly on
the head, and all retention straps must be securely
fastened. With the chinstrap comfortably but firmly
adjusted, it should not be possible, in most cases, for
the helmet to be removed from the head when pulled
at the rear in an upward direction.
The helmet is designed to be retained by a strap
under the chin.
The helmet may be used with glasses.
No attachments should be made to the helmet except
those recommended by the helmet manufacturer. Do
not drill or cut the shell.
The helmet is designed to absorb shock by partial
destruction of the shell and liner. This damage may
not be visible. Therefore if it subjected to a severe
blow, the helmet should be replaced even if it is
apparently undamaged.
The liner is essential to the intended performance of
the helmet.
The helmet may be damaged and rendered
ineffective by petroleum products, cleaning agents,
paints, adhesives, etc., without the damage being
visible to the user. Use only warm soapy water to clean
the helmet surface.
VISION
When riding a motorcycle, your life could depend
on a clear vision. Always keep your field of vision
unobstructed
FASTENING
Your helmet will be useless if it’s too big or not properly
fastened. Always buy a helmet to your exact size and
always fasten it properly.
MODIFICATIONS
Never modify your helmet in any way. Modifications
could result in lowering the effectiveness of your
helmet.
DAMAGED HELMET
When your helmet sustains a severe shock, part of its
structure and lining may have been deteriorated by
absorbing the energy of the impact. These damages
may not be visible to the eye. In this case, do not
hesitate to replace it.
CARE AND MAINTENANCE
Clean the outside and inside of your helmet regularly.
Use a soft cloth and warm or slightly soapy water.
NEVER USE GAS OIL, SOLVENTS, PETROL OR OTHER
AGGRESSIVE PRODUCTS.
The padding is removable to make it easy to clean.
Again, only use warm or slightly soapy water. Hand
wash and drip dry.
STORAGE
After washing your helmet, store it inside a bag, in a
dry temperate place. Avoid storing your helmet for an
extended period in a place exposed to strong light.
DURABILITY
As time goes by, some wearing marks can appear
on safety elements of your helmet, such as: wearing
or fraying of the strap, malfunction of the buckle,
cracking or crumbling of the inner liner, cracking of
the shell,… In this case, contact your dealer to check
or replace your helmet.
- 6 -
ADJUSTING AND USING
THE MICROMETRIC BUCKLE (fig. 1)
1. First, adjust the length of the strap by rolling it
through the plastic adjustable strap (A)
2. To close the buckle, insert the ratcheted tongue
(B) into the casing (C). When you hear a “click”,
the buckle is closed. The multi-notching allows
for minute adjustments in order to obtain perfect
comfort and fit with the buckle
3. If necessary, go back and repeat Step 1
4. To open the buckle, pull on the red strap (D) and
draw back the ratcheted tongue using your other
hand
WILL IT STAY ON? (fig. 2)
You want to know the helmet you buy will stay firmly on
your head in a crash. Make sure the chinstrap is done
up and tilt your head forward. Ask someone to try and
roll the helmet off your head by carefully pushing up
from the rear of the helmet at its base. If you can roll
it off in the showroom, then it’s sure to come off in a
crash.
HOW TO CHANGE THE INTERNAL SUN VISOR
ON YOUR HELMET (FIG.3)
• The internal sun visor must be in the lowered
position (E)
• Hold the internal sun visor between 2 fingers
on each end of the visor (F) and pull it gently
forward until the 2 clips situated on the internal
sun visor detach from the 2 lugs situated inside
the mechanism (G)
To replace the visor:
• Slide the visor back as far as it will go, until you
hear a double click (on each side), indicating it is
clipped correctly on the lugs (H)
• Ensure the mechanism is working properly
(I-J)
HOW TO REMOVE AND REPLACE
CHEEK PADS BACK ON YOUR HELMET (fig. 4)
• Cheek pads are fixed to the helmet by means of
2 snaps on their sides and a collar of plastic slid
between the shell and the base (K)
• Detach the pad from the 2 snaps and pull to tear it
from the shell (L)
To put the pad back on:
• Insert the collar between shell and EPS base (M)
• Snap the 2 press studs on the side of the EPS base
(N)
HOW TO REMOVE AND REPLACE
THE CROWN PAD ON YOUR HELMET (fig. 5)
• Pull the crown pad on the neck to unsnap the 2 press
studs (O)
• Pull the crown pad at the front to detach the Velcro
scratch pads (P)
• Remove the entire crown pad from the helmet (Q)
To put the cron pad back on:
• Introduce the whole crown pad inside the helmet (R)
• Snap the 2 press studs of the crown pad on the neck
• Attach the Velcro scratch pads of the crown pad to
the front
PEAK INCLUDED IN THE BOX (fig. 6)
How to put the peak?
See fig. 5
WWW.LAZERHELMETS.COM
- 7 -
MEG Mambo Evo Pure Carbon bichro DEF.indd 6-7 22/12/16 15:21

- 8 - - 9 -
FR
Félicitations pour l’achat de votre casque LAZER Mambo Evo
Pure Carbon.
CONSEILS
ATTENTION
Aucun casque ne peut protéger le porteur contre tous les
impacts possibles.
Pour une protection maximale, le casque doit être bien
ajusté sur la tête, et toutes les sangles de rétention
doivent être solidement attachées. Lorsque la jugulaire est
confortablement mais fermement ajustée, il ne devrait pas
être possible dans la plupart des cas, de retirer le casque de
la tête en essayant de l’arracher vers l’avant.
Le casque est conçu pour être retenu par une sangle sous
le menton.
Le casque peut être utilisé avec des lunettes.
Ne pas ajouter de pièces ou accessoires qui ne seraient pas
conçus pour le casque, sauf ceux qui sont recommandées
par le fabricant du casque. Ne pas percer ni couper la
calotte.
Le casque est conçu de manière à absorber les chocs par
la destruction partielle de la calotte et du rembourrage
protecteur. Ces dommages peuvent ne pas être visibles.
Dès lors, si le casque a subi un impact important, il devrait
être remplacé même s’il est intact en apparence.
Le rembourrage protecteur (calottin) est essentiel pour la
performance recherchée du casque.
Le casque peut être endommagé et rendu inefficace par les
hydrocarbures, les agents de nettoyage, peintures, adhésifs,
etc., sans que le dommage soit visible à l’utilisateur. Utiliser
uniquement de l’eau tiède légèrement savonneuse pour
nettoyer la surface du casque.
VISION
A moto, la vue, c’est la vie. Veillez toujours à optimaliser
votre vision, n’obstruez pas votre champ de vision.
FERMETURE
Votre casque sera inutile s’il est trop grand ou s’il est mal
attaché. Veillez donc à l’acheter à la bonne taille et à
toujours boucler sa jugulaire.
MODIFICATIONS
Il est formellement déconseillé d’apporter quelque
modification que ce soit à votre casque. Cela pourrait
impliquer des dégradations qui diminueraient l’efficacité de
votre casque.
CASQUE ENDOMMAGÉ
Lorsque votre casque subit un choc important, une
partie de sa structure et de son rembourrage se détériore
en absorbant l’énergie du choc; il se peut que cette
détérioration reste invisible à l’oeil nu, dans ce cas
remplacez-le.
SOIN ET ENTRETIEN
Nettoyez régulièrement l’extérieur et l’intérieur du casque.
Utilisez un chiffon doux et une solution d’eau tiède pure ou
légèrement savonnée.
NE JAMAIS UTILISER DE GASOIL , DILUANTS, ESSENCES ET
AUTRES PRODUITS AGRESSIFS.
Les garnitures de confort se démontent afin de faciliter leur
nettoyage. Là encore, n’utilisez que de l’eau tiède pure
ou légèrement savonnée. Lavez-les à la main et faites-les
ensuite sécher à l’air.
STOCKAGE
Après avoir nettoyé votre casque, stockez-le à l’intérieur
d’une housse, dans un endroit sec et tempéré. Evitez un
stockage prolongé exposé à la lumière.
LONGÉVITÉ
Avec l’âge, certains signes d’usure peuvent apparaître
sur les éléments de sécurité de votre casque, tels que:
sangle usée ou effilochée, disfonctionnement de la boucle,
craquelures ou effritement du rembourrage protecteur
intérieur, fissures de la calotte,…. Dans ce cas, contactez
votre revendeur pour inspection ou remplacez votre casque.
AJUSTEMENT ET UTILISATION
DE LA BOUCLE MICROMÉTRIQUE (FIG. 1)
1. Ajustez d’abord la longueur de la sangle en la faisant
glisser autour de l’attache en plastique coulissante (A)
2. Pour fermer votre boucle, introduisez la languette à
cliquets (B) dans le boîtier (C). Vous entendez “clic”, votre
boucle est fermée. Le multi crantage vous permet un
réglage plus fin et d’obtenir ainsi une tension parfaite et
confortable de la sangle
3. Au besoin, revenez au point # 1
4. Pour ouvrir votre boucle, tirez sur la lanière rouge (D) et
retirez la languette à cliquets à l’aide de l’autre main
EST-CE QU’IL TIENDRA SUR VOTRE TÊTE ? (FIG. 2)
Vous voulez savoir si le casque que vous achetez restera sur
votre tête en cas d’accident ? Assurez-vous que les sangles
sont attachées puis secouez la tête en avant. Demandez à
quelqu’un de vous arrachez le casque de la tête en tirant
prudemment à la base de l’arrière vers l’avant. Si vous
arrivez à le retirer dans le magasin alors il est certain qu’il ne
tiendra pas en cas d’accident.
COMMENT CHANGER L’ÉCRAN
SOLAIRE INTERNE DE VOTRE CASQUE (FIG.3)
• L’écran solaire interne doit être en position abaissée (E)
• Pincez l’écran solaire interne entre 2 doigts à chaque
extrémité de l’écran (F) et tirez-le doucement vers
l’avant jusqu’à ce que les 2 clips situés sur l’écran
solaire interne se détachent des 2 ergots situés à
l’intérieur du mécanisme (G)
Pour remettre l’écran:
• Faites glisser l’écran vers le fond de son espace de
fonctionnement, jusqu’à entendre un double clic (un
de chaque côté), confirmant la bonne fixation sur les
ergots (H)
• Vérifiez le bon fonctionnement du mécanisme en
relevant et en abaissant plusieurs fois l'écran solaire
interne à l'aide du becquet de manipulation (I-J).
COMMENT ENLEVER ET REMETTRE COUSSINETS
DE JOUES (PLOTS) SUR VOTRE CASQUE (FIG. 4)
• Les plots de joues sont fixés latéralement sur le casque au
moyen de 2 boutons pression, et sur le bas du casque au
moyen d’une collerette plastique à glisser entre la calotte
et la base EPS (K)
• Détachez les 2 boutons et tirez pour arracher le plot à la
calotte (L)
Pour remettre le plot:
• Insérez la collerette entre la calotte et la base EPS (M)
• Alignez et pressez les 2 boutons-pression sur le côté de la
base EPS (N)
COMMENT ENLEVER ET REMETTRE
LA COIFFE DE VOTRE CASQUE (FIG. 5)
• Tirez la coiffe au niveau de la nuque pour détacher les 2
boutons-pression (O)
• Tirez la coiffe au niveau du front pour détacher les 2
boutons-pression (P)
• Retirez la coiffe entière à partir du casque (Q)
Comment remettre la coiffe:
• Mettez en place la coiffe à l'intérieur du casque (R)
• Alignez et fermez les 2 boutons-pression de la coiffe sur
la nuque
• Alignez et fermez les scratchs à l'avant
VISIERE LIVREE DANS LA BOITE (FIG. 6)
Comment monter la visière?
Voir fig. 5
WWW.LAZERHELMETS.COM
MEG Mambo Evo Pure Carbon bichro DEF.indd 8-9 22/12/16 15:21
Table of contents
Languages:
Other LAZER Motorcycle Accessories manuals
LAZER
LAZER LZ6-BORA User manual
LAZER
LAZER BULLET 2.0 User manual

LAZER
LAZER X8 User manual
LAZER
LAZER CORSICA User manual
LAZER
LAZER Victor KinetiCore User manual
LAZER
LAZER TWIST User manual
LAZER
LAZER Century User manual
LAZER
LAZER X6 User manual
LAZER
LAZER JAZZ User manual
LAZER
LAZER SuperSkin User manual
