manuals.online logo
Brands
  1. Home
  2. •
  3. Brands
  4. •
  5. LEGRAND
  6. •
  7. Lighting Equipment
  8. •
  9. LEGRAND BH4NDWE User manual

LEGRAND BH4NDWE User manual

Non-ducted heater, exhaust fan and LED light
Specification
Supply Voltage:
Frequency:
230-240 V a.c.
50 Hz
Max. Power Consumption:1240 W
(May be connected to a light or power circuit if loading permits.)
Please read carefully
Read through these instructions completely before commencing
installation.
CAUTION
This product is not designed to be ducted. Do not fit after-market ducting
kits. If ducting is required, then the ducted Instant Heat series, R622D2 is
more suitable for this purpose.
Regulations concerning the discharge of air have to be fulfilled. Local
building codes may require venting to the outside. The volume of the roof
space must be a minimum of 3 cubic metres and adequately ventilated to
allow moisture to dissipate.
This product is to be installed in standard roof applications only, not in
restricted ceiling cavities as found in multi-storey applications (See Fig. 1)
Installation:
The infrared lamps heat by direct radiation rather than by heating the air in
the room, so the Instant Heat should be located directly over the drying area.
HPM Instant Heat must not be installed where there is a possibility of water
splashing on to the lamps. Locate in accordance with the requirements of
the Australian/New Zealand Wiring Rules AS/NZS 3000 relating to damp
situations. This means that no part may be located directly above any part
of the bath or shower recess or enclosure. For unenclosed showers refer to
Wiring Rules conditions.
Note: Steam will only be removed if there is sufficient flow of air through the
room. Ensure adequate inlets exist through windows, vents or under the door.
Air-flow path from inlets to fan should ideally pass over the steam sources.
Location:
The Instant Heat is for ceiling mounting only,
with the lowest point to be at least 2.2 metres
above floor level. It is not intended to be
installed in wardrobes or within 300mm of
sides of walls, as per Figure 2. There is a
danger of combustion if placed too close to
curtains or other flammable materials.
Note: Instant Heat products must only be
installed horizontally in ceiling.
Ceiling preparation:
Instant Heat may be installed either between
joists using the built-in clip fasteners or
against a joist using a screw to replace a clip.
Drill a hole in the flange to suit.
The clearances between Instant Heat and
adjacent building members shown in Figure 3
shall be observed. Thermal insulation or similar
material shall not be placed on top of the unit,
and adjacent material to the side shall be kept
clear to a minimum distance of 200mm (Fig.4).
Joists, beams and rafters shall not be cut or
notched to install Instant Heat.
After determining the location of Instant Heat
use this template to mark out and cut the
aperture (Fig 5). If adequate support is not
available for Instant Heat, it may be necessary to
provide extra strengthening.
Fixing to ceiling:
Remove all lamps to prevent damage from clip
fasteners. Spin the fan to check for freedom of rotation. Push the Instant
Heat body into the opening allowing the springs to snap open. To secure,
push the lower ends of the springs apart (Fig.6). Ceiling board thickness
should be adjusted to enable the springs to be fitted without excessive force.
Final assembly:
Check that the power to the unit is off. Position
the lamp surround below the unit so that the two
pins on the underside line up with the two holes
in the flange. The cover is designed to snap onto
the housing flange (Fig.7) which sits flush
against the ceiling.
Insert the five lamps into the sockets, tightening
well to ensure good electrical contact and long
life. Wipe the surround and the bulbs clean.
Connect the power and check all functions.
Wiring:
Four switches on an Excel Life wall plate are
supplied. Do not use with any solid state speed
control. Wall plate should be located so that the
switches are not within reach of a person in a
bath or a shower. Wiring connection is as per
Figure 8.
Please use this card as hole cutting template 322mm x322mm
Instant Heat 3-in-1
Non-Ducted 4 Heat Lamps
Cat.No.BH4NDWE /BH4NDMS
Instruction Manual
Fig8. Wiring diagram
Fig 5
Fig 6
Fig 7
Fig 1
Fig 4
›200mm
›200mm
Fig 2
Wall
>300mm
>300mm
Fig 3
300mm
Min. clearance
Unobstructed
Airflow
500mm Min.
2.2M Min.
This product should be installed by a licensed electrician or similarly qualified person.
Note: The fan will run automatically when the
heat lamp is switched ON.
CAUTION: Warranty will be void if the instant
heat unit is not wired as per wiring
diagram (Fig.8) below.
H
H
H
Inst ant Heat
Cat . No. BH4ND
Earth
Neutral
Light
Fan
Heat 1
Heat 2
Excel Life
Switch Pla te Terminal block
1
1
1
1
X
A
N
H
2
2
2
2
C
C
C
C
TT
Maintenance:
Cleaning:
1Isolate the Instant Heat from the 240V supply. Ensure the lamps are cool to
touch before handling.
2Wipe lamps and fascia with care using a soft cloth soaked with a neutral
detergent.
Lamp Replacement:
1Isolate the Instant Heat from the 240V supply. Ensure the lamps are cool to
touch before handling.
2Replace LED light globe with HPM Cat.No.LR804K or E27 R80 100W
max equivalent.
3Replace heat lamp with HPM Cat.No: L275HLES or E27 275W
max equivalent (Not suitable for use with 375W heat lamps).
Specifications:
Supply voltage 230-240 V a.c. 50 Hz
Max. power input 1150 W
Airflow 390 m3/hr max#
Ceiling cut-out 322 x 322 mm
Projection into ceiling 205 mm
Required ceiling depth 500 mm
Facia protrusion 25 mm
Heat lamps 4 x275 W
LED Centre light 7W R80 600 lm
Weight 4.5 kg
# Airflow dependant on installationconditions
Parts Supplied:
Instant Heat 1piece
Infra-red heat lamp (275W) (L275HLES) 4pieces
LED centre lamp (7W) (LR80014K) 1piece
Wall switch plate (ED770/4FLHHWE) 1piece
Installation instructions/template 1piece
WARNING:
1. Use the Instant Heat only as described in this instruction. Other use not
recommended by Legrand may cause fire or electric shock.
2. This appliance is not intended for use by persons (including children) with
reduced physical, sensory or mental capabilities, or lack of experience
and knowledge, unless they have been given supervision or instruction
concerning use of the appliance by a person responsible for their safety.
Children should be supervised to ensure that they do not play with the
appliance.
3. This appliance is intended for household use and similar purposes. It is
not suitable for use in an environment heavily-laden with dust. Under
these conditions the life of the fan motor can be significantly reduced.
4. This heater is not equipped with a device to control the room temperature.
Do not use this heater in small rooms when they are occupied by persons
not capable of leaving the room on their own, unless constant supervision
is provided.
5. All wiring must be carried out by a licensed electrician in accordance with
applicable national/local codes and standards.
6. The lamps are hot when in use. Do not touch the infrared lamps with any
part of your body when in use. Allow all lamps to cool sufficiently before
touching or replacing.
7. For indoor use only.
8. This product contains no serviceable parts, and no attempt should be
made to repair this product. If the product is faulty it should be discarded.
9. This product must be cleaned periodically from dust and other
contaminants with a damp cloth. Cleaning agents and solvents should
never be used.
10.Airflows listed in this product indicate the product performance. Refer
to the BCA (Building Code of Australia), or similar, for the appropriate
number of room air changes required for a particular installation.
11. This product has been designed to operate in ambient temperatures
between 5°C to 40°C.
12. Ventilation products must have an adequate source of external air to
ensure rated performance can be achieved.
13. This product should not be enclosed in thermal insulation as it may
cause the unit to overheat.
14. The lamps on this product should be tightened until fit is secure. Over
tightening may damage the lamp and under tightening may result in
hot joints.
15. The terminals on this product should be tightened between 0.4Nm and
0.6Nm. Over tightening may damage the product. Under tightening may
result in hot joints.
16. This product is not suitable for installation in hazardous and/or
corrosive areas.
17. This product has been designed for domestic or similar uses and is not
suitable for a commercial installation.
18. The material in this product may vary in colour from batch to batch.
Colour matching from one batch to another cannot be guaranteed.
19. This product has been designed to operate on a nominal supply voltage
of 230 -240 Va.c. 50 Hz.
20. After installation this product must be tested as required by the
appropriate government and/or staturatory regulations.
21. This product utilises intellectual property in the form of registered
designs, trademarks, and/or patents. Such intellectual property remains
the property of Legrand in all cases.
22. Legrand reserves the right to modify the specification of this
product at any time.
Please use this card as hole cutting template 322mm x322mm
Customer Service
For all Customer Service and Technical Support please call
Monday to Friday during business hours.
Legrand Australia
1300 369 777
www.hpm.com.au
Legrand New Zealand
0800 476 009
www.hpm.co.nz
ABN: 31 000 102661
08/2021
LE12231AB
Instant Heat 3-in-1
Non-Ducted 4 Heat Lamps
Cat.No:BH4NDWE /BH4NDMS
Instruction Manual
Warranty:
Legrand warrants the following on the Instant Heat from the date of
purchase:
• 5-year warranty on motor.
These goods come with guarantees that cannot be excluded under the
Australian Consumer Law. You are entitled to a replacement or a refund
for a major failure and compensation for any other reasonably
foreseeable loss or damage. You are also entitled to have the goods
repaired if the goods fail to be of acceptable quality and the failure does
not amount to a major failure.
See the Warranty card enclosed with this product for further details.

This manual suits for next models

1

Other LEGRAND Lighting Equipment manuals

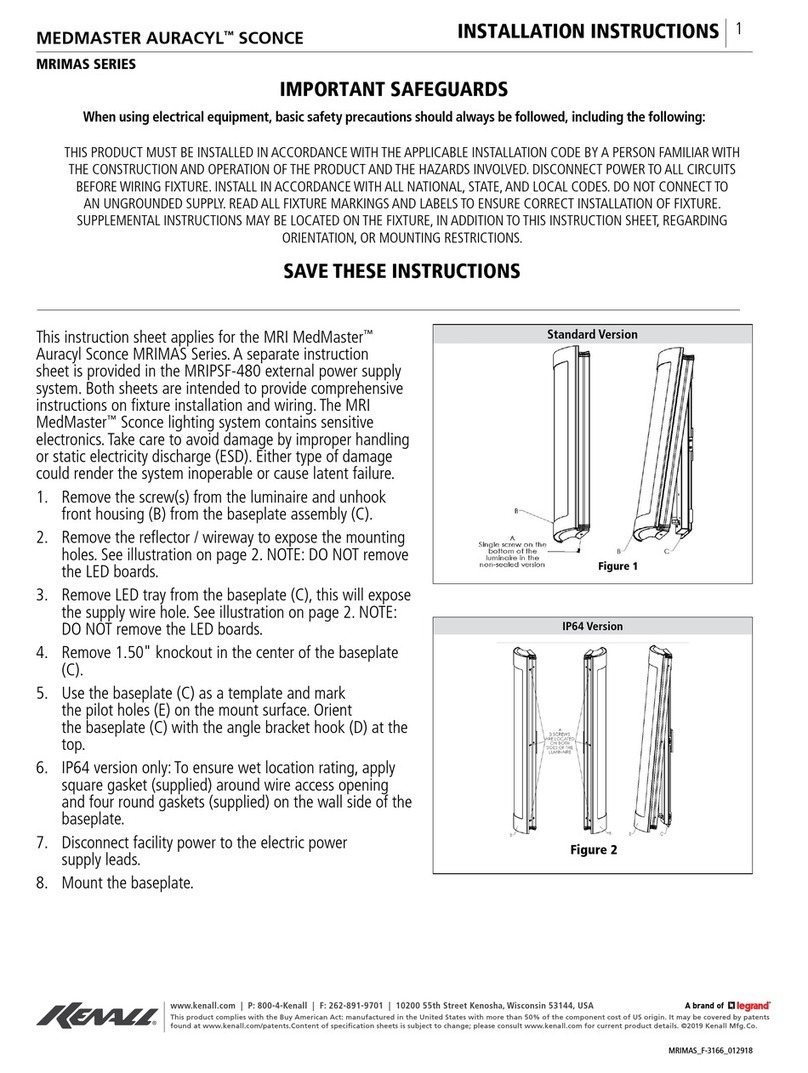
LEGRAND Kenall SENSCAPE SPG18 User manual

LEGRAND

LEGRAND Kenall SENSCAPE SPG18 User manual

LEGRAND CONNECTRAC User manual

LEGRAND

LEGRAND CONNECTRAC User manual

LEGRAND Kenall CAE Series User manual

LEGRAND

LEGRAND Kenall CAE Series User manual

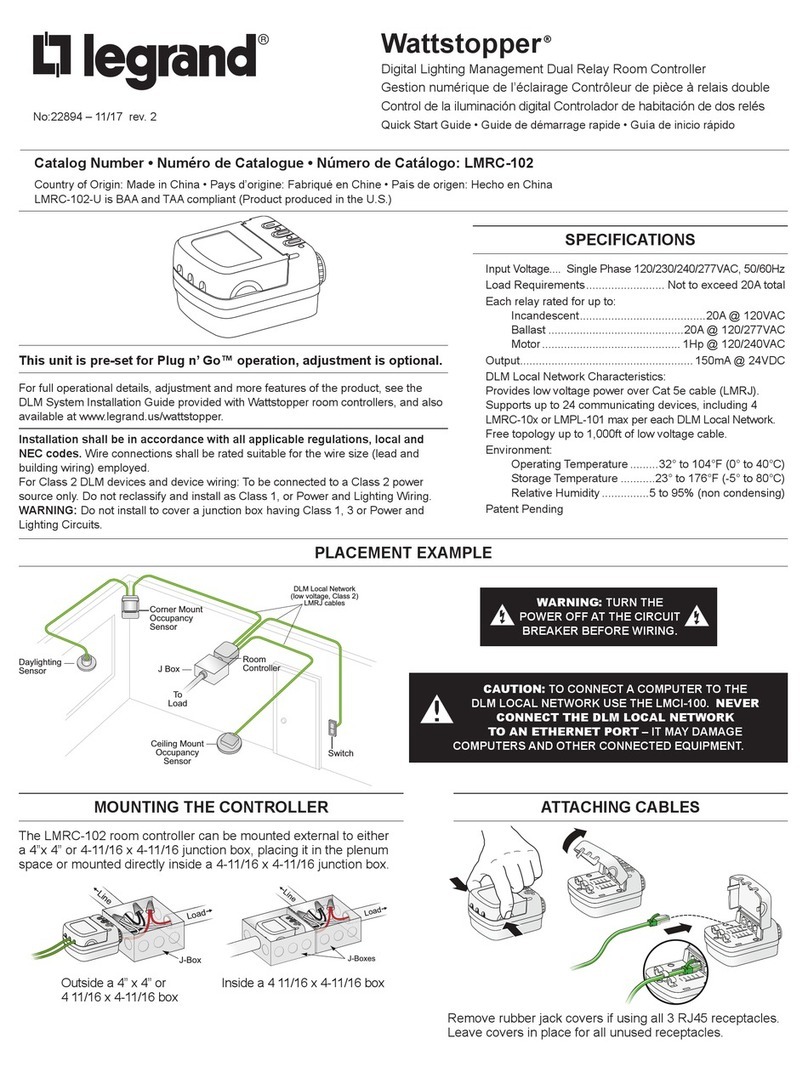
LEGRAND Wattstopper LMRC-102 User manual

LEGRAND

LEGRAND Wattstopper LMRC-102 User manual

LEGRAND WP2 LED User manual

LEGRAND

LEGRAND WP2 LED User manual

LEGRAND 0 648 88 User manual

LEGRAND

LEGRAND 0 648 88 User manual

LEGRAND CP Electronics Vitesse Modular User manual

LEGRAND

LEGRAND CP Electronics Vitesse Modular User manual

LEGRAND URA ONE Series User manual

LEGRAND

LEGRAND URA ONE Series User manual

LEGRAND HKT1 User manual

LEGRAND

LEGRAND HKT1 User manual

LEGRAND 0 648 88 User manual

LEGRAND

LEGRAND 0 648 88 User manual

LEGRAND Wattstopper User manual

LEGRAND

LEGRAND Wattstopper User manual

LEGRAND DLI90BTWE User manual

LEGRAND

LEGRAND DLI90BTWE User manual

LEGRAND 0 405 10 User manual

LEGRAND

LEGRAND 0 405 10 User manual

LEGRAND Emos DCFC33 User manual

LEGRAND

LEGRAND Emos DCFC33 User manual

LEGRAND Bulkhead 265 LED User manual

LEGRAND

LEGRAND Bulkhead 265 LED User manual

LEGRAND 025626 User manual

LEGRAND

LEGRAND 025626 User manual

LEGRAND 0 648 88 User manual

LEGRAND

LEGRAND 0 648 88 User manual

LEGRAND KENALL MILLENIUM METREX METSW Series User manual

LEGRAND

LEGRAND KENALL MILLENIUM METREX METSW Series User manual

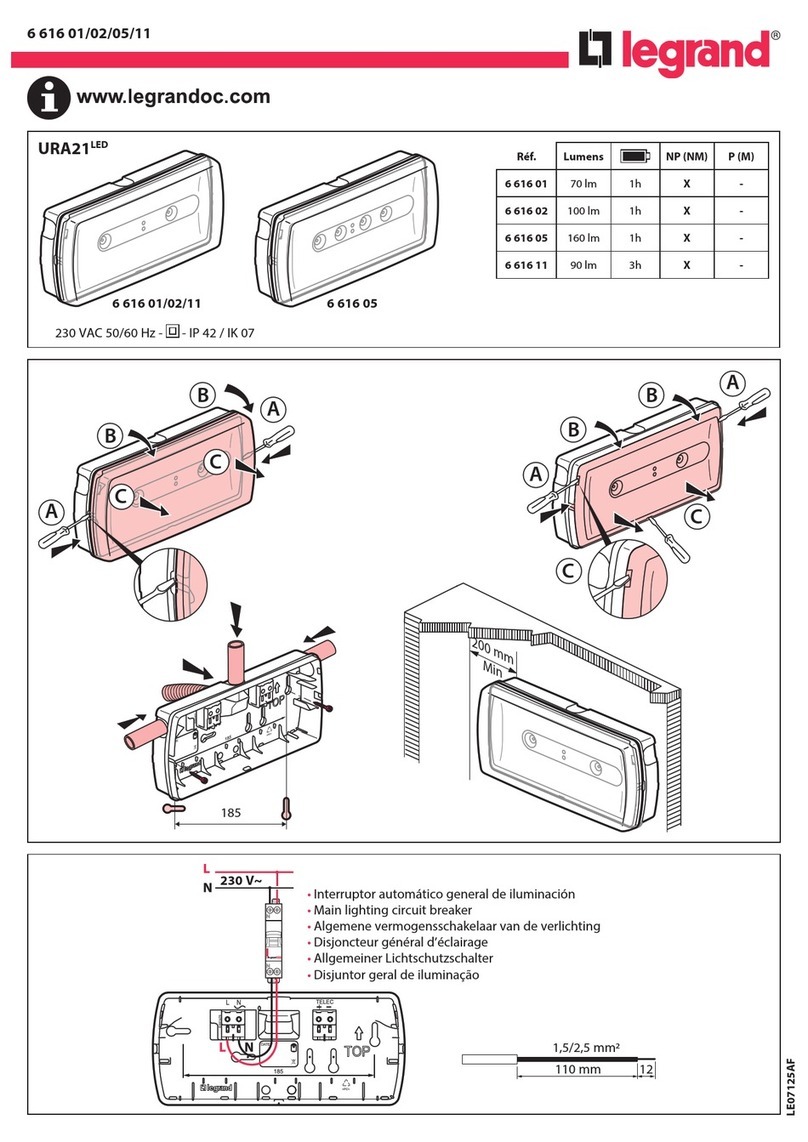
LEGRAND URA21LED User manual

LEGRAND

LEGRAND URA21LED User manual

LEGRAND adorne ADWR700MMTU User manual

LEGRAND

LEGRAND adorne ADWR700MMTU User manual

LEGRAND Kenall MRIMAS Series User manual

LEGRAND

LEGRAND Kenall MRIMAS Series User manual

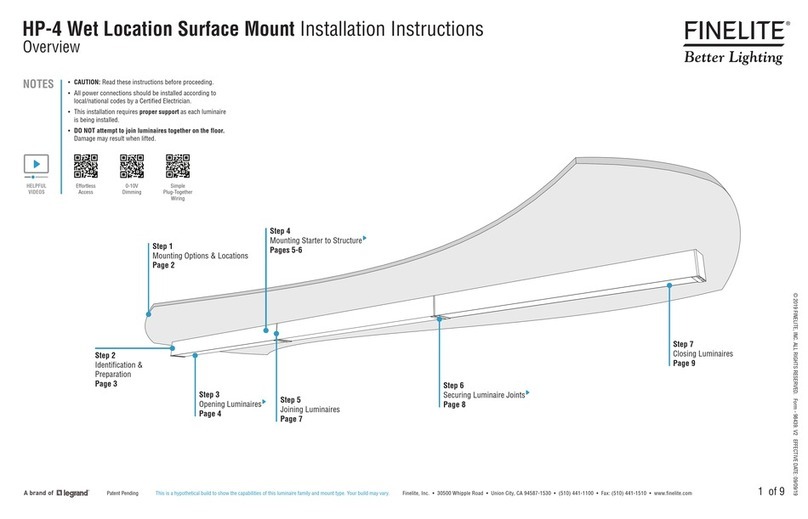
LEGRAND Finelite HP-4 User manual

LEGRAND

LEGRAND Finelite HP-4 User manual

LEGRAND LED SATELLITE User manual

LEGRAND

LEGRAND LED SATELLITE User manual

LEGRAND Adorne APCC User manual

LEGRAND

LEGRAND Adorne APCC User manual

Popular Lighting Equipment manuals by other brands

Life 39.9F70020C quick start guide

Life

Life 39.9F70020C quick start guide

EuroLite LED ML-20 user manual

EuroLite

EuroLite LED ML-20 user manual

LIGMAN OD-50141 installation manual

LIGMAN

LIGMAN OD-50141 installation manual

Home Accents Holiday 1002461144 instructions

Home Accents Holiday

Home Accents Holiday 1002461144 instructions

Experia IRiS Ripple Light instruction manual

Experia

Experia IRiS Ripple Light instruction manual

Erco Gecko Mounting instructions

Erco

Erco Gecko Mounting instructions

Inter-lux ZTA.100.Surface Installation and maintenance instructions

Inter-lux

Inter-lux ZTA.100.Surface Installation and maintenance instructions

Whelen Engineering Company TN Series installation guide

Whelen Engineering Company

Whelen Engineering Company TN Series installation guide

IKEA BJÖRKSPIREA manual

IKEA

IKEA BJÖRKSPIREA manual

Toolland PM 6640 instruction manual

Toolland

Toolland PM 6640 instruction manual

GTD GTD-LP200 user manual

GTD

GTD GTD-LP200 user manual

LIVARNO home 1105-W-UK manual

LIVARNO home

LIVARNO home 1105-W-UK manual

ProLights EclPar IPMFC user manual

ProLights

ProLights EclPar IPMFC user manual

Velvet EVO Series user manual

Velvet

Velvet EVO Series user manual

IDTOLIGHT GENT installation instructions

IDTOLIGHT

IDTOLIGHT GENT installation instructions

MAYTONI S35 installation manual

MAYTONI

MAYTONI S35 installation manual

MaxLite MLFP14DP4535 user manual

MaxLite

MaxLite MLFP14DP4535 user manual

SLV Elektronik 550621 instruction manual

SLV Elektronik

SLV Elektronik 550621 instruction manual

manuals.online logo
manuals.online logoBrands
  • About & Mission
  • Contact us
  • Privacy Policy
  • Terms and Conditions

Copyright 2025 Manuals.Online. All Rights Reserved.