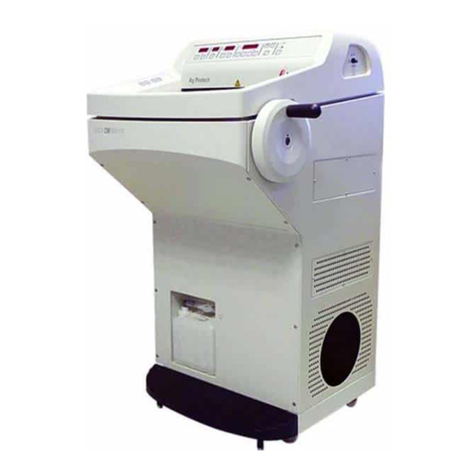
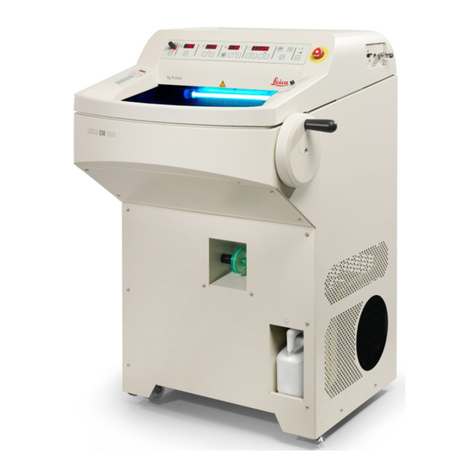
Leica CM1860 User manual

Instructions for Use
CM1860/CM1860 UV - Cryostat
Leica CM1860/CM1860 UV, V1.6 RevI– 10/2016, English
Order no.: 14 0491 80101 RevI
Always keep this manual with the instrument.
Read carefully before working with the instrument.


3
Leica CM1860/CM1860UV – Cryostat
Leica Biosystems Nussloch GmbH
Heidelberger Str. 17 - 19
D-69226 Nussloch
Germany
Phone:+49 62 24 143-0
Fax: +49 6224 143-268
Internet: http://www.LeicaBiosystems.com
contract provisions agreed between ourselves
and our customers.
Leica reserves the right to change technical spec-
ifications as well as manufacturing processes
without prior notice. Only in this way is it pos-
sible to continuously improve the technology and
manufacturing techniques used in our products.
This document is protected under copyright laws.
All copyrights to this documentation are held by
Leica Biosystems Nussloch GmbH.
Any reproduction of text and illustrations (or of
any parts thereof) by means of print, photocopy,
microfiche, web cam or other methods – includ-
ing any electronic systems and media – requires
express prior permission in writing by Leica Bio-
systems Nussloch GmbH.
For the instrument serial number and year of
manufacture, please refer to the nameplate on
the back of the instrument.
© Leica Biosystems Nussloch GmbH
The information, numerical data, notes and value
judgments contained in this manual represent
the current state of scientific knowledge and
state-of-the-art technology as we understand it
following thorough investigation in this field. We
are under no obligation to update the present
manual periodically and on an ongoing basis ac-
cording to the latest technical developments, nor
to provide our customers with additional copies,
updates etc. of this manual.
To the extent permitted in accordance with the
national legal system as applicable in each indi-
vidual case, we shall not be held liable for errone-
ous statements, drawings, technical illustrations
etc. contained in this manual. In particular, no
liability whatsoever is accepted for any financial
loss or consequential damage caused by or
related to compliance with statements or other
information in this manual.
Statements, drawings, illustrations and other
information regarding the contents or technical
details of the present Instructions for Use are not
to be considered warranted characteristics of
our products. These are determined only by the
NOTE

4Instructions for Use V 1.6 RevI – 10/2016
Table of Contents
1. Important Information ............................................................................................................................. 6
1.1 Symbols in the text and their meanings ..............................................................................................................6
1.2 Qualification of personnel........................................................................................................................... 8
1.3 Intended use of instrument......................................................................................................................... 8
1.4 Instrument type............................................................................................................................................. 8
2. Safety ......................................................................................................................................................... 9
2.1 Safety notes .................................................................................................................................................. 9
2.2 Warnings ....................................................................................................................................................... 9
2.3 Safety devices ............................................................................................................................................ 10
2.3.1 Locking/unlocking the handwheel .......................................................................................................... 12
2.3.2 Knife guard .................................................................................................................................................. 12
2.4 Operating conditions ................................................................................................................................. 13
2.5 Operating the instrument .......................................................................................................................... 14
2.6 Cleaning and disinfection ......................................................................................................................... 14
2.7 Removing the microtome .......................................................................................................................... 15
2.8 Maintenance............................................................................................................................................... 15
3. Technical Data ....................................................................................................................................... 16
4. Setting up the Instrument ..................................................................................................................... 18
4.1 Installation site requirements .................................................................................................................. 18
4.2 Unpacking instructions for the cryostat CM1860/1860UV................................................................... 19
4.3 Standard delivery—packing list .............................................................................................................. 22
4.4 Assembling the handwheel ...................................................................................................................... 23
5. Instrument Setup.................................................................................................................................... 24
5.1 Electrical connection................................................................................................................................. 24
5.2 Prior to operation ....................................................................................................................................... 24
5.3 Overview of the Leica CM1860/CM1860 UV ........................................................................................... 25
5.4 Power switch and circuit breaker........................................................................................................... 27
5.5 Switching on the instrument .................................................................................................................... 27
6. Operating the Instrument...................................................................................................................... 28
6.1 Control panel 1............................................................................................................................................ 28
6.2 Programming the desired values............................................................................................................. 31
6.2.1 Setting the time........................................................................................................................................... 31
6.2.2 Setting the automatic defrost time (cryochamber) .............................................................................. 31
6.2.3 Selecting the cryochamber temperature............................................................................................... 31
6.2.4 Activation of the Peltier element (option) .............................................................................................. 32
6.2.5 Manual defrosting of the quick freeze shelf.......................................................................................... 32
6.2.6 Manual defrosting of the cryochamber.................................................................................................. 33
6.2.7 Setting the section thickness................................................................................................................... 33
6.3 Retraction (factory default setting: disabled).......................................................................... 33
6.4 Display lock ................................................................................................................................................. 34
6.5 Control panel 2 - Electric coarse feed .................................................................................................... 34

5
Leica CM1860 /CM1860UV – Cryostat
7. Daily Use of the Instrument.................................................................................................................. 35
7.1 Specimen freezing ..................................................................................................................................... 35
7.1.1 Quick freeze shelf....................................................................................................................................... 35
7.1.2 Stationary heat extractor (optional) ............................................................................................ 36
7.2 Specimen discs .......................................................................................................................................... 36
7.2.1 Inserting the specimen discs into the specimen head ........................................................................ 36
7.2.2 Specimen orientation ................................................................................................................................ 36
7.3 Sectioning.................................................................................................................................................... 37
7.3.1 Blade holder CE .......................................................................................................................................... 37
7.3.2 Blade holder CE-TC.................................................................................................................................... 43
7.3.3 Knife holder CN........................................................................................................................................... 44
7.3.4 Knife holder CN-Z with anti-roll guide .................................................................................................... 48
7.3.5 Cleaning the blade and knife holders ..................................................................................................... 48
7.3.6 Installing the shelf (movable) (optional) ................................................................................................. 50
7.4 Temperature selection chart (in minus°C) ............................................................................................ 51
7.5 Defrosting .................................................................................................................................................... 52
7.5.1 Automatic defrosting of the cryochamber............................................................................................. 52
7.5.2 Manual defrosting of the cryochamber.................................................................................................. 52
7.5.3 Manual defrosting of the quick freeze shelf.......................................................................................... 53
7.6 Terminating work ....................................................................................................................................... 53
7.6.1 Terminating daily work.............................................................................................................................. 53
7.6.2 Shutdown for a longer period .................................................................................................................. 54
8. Troubleshooting ..................................................................................................................................... 55
8.1 Error messages in the display.................................................................................................................. 55
8.2 Temperature control button ..................................................................................................................... 56
8.3 Possible sources of error, causes and remedies ................................................................................. 57
8.3.1 Changing the battery ................................................................................................................................. 61
9. Cleaning, Disinfection, Maintenance ................................................................................................ 62
9.1 Cleaning ....................................................................................................................................................... 62
9.2 Spray disinfection with Leica Cryofect................................................................................................... 63
9.3 Maintenance............................................................................................................................................... 64
9.3.1 General maintenance instructions.......................................................................................................... 64
9.3.2 Replacing the fuses ................................................................................................................................... 66
9.3.3 Replacing the UVC lamp............................................................................................................................ 66
9.3.4 Replacing the fluorescent lamp............................................................................................................... 68
10. Ordering Information, Components and Consumables................................................................... 69
10.1 Ordering information.................................................................................................................................. 69
10.2 Mobile heat extractor – application............................................................................................ 92
10.3 Cold extractor – application ........................................................................................................ 92
11. Warranty and Service ........................................................................................................................... 93
12. Decontamination Certificate (Master)............................................................................................... 94
Table of Contents
6Instructions for Use V 1.6 RevI – 10/2016
1.1 Symbols in the text and their meanings
Useful tips,
i.e. important information for the user,
appear in gray boxes and are marked
by an .
Caution – UVC radiation!
Numbers in parentheses refer to item
numbers in illustrations or to the illus-
trations themselves.
(5)
(Fig.5)
1. Important Information
Warnings
appear in a gray box and are marked
by a warning triangle .
REF
SN
Manufacturer
This product fulfills the requirements
of the Council's Directive 98/79/EC
concerning in vitro diagnostics (IVD)
medical devices.
In vitro diagnostics (IVD) medical device
Observe the Instructions for Use
Order No.
Serial number
The CSA test mark means that a prod-
uct has been tested and fulfills the
applicable safety and/or performance
standards, including the relevant stan-
dards defined or administered by the
American National Standards Institute
(ANSI), Underwriters Laboratories (UL),
the Canadian Standards Association
(CSA), the National Sanitation Founda-
tion International (NSF) and others.
Symbol for labeling electrical and elec-
tronic equipment in accordance with
Section 7 of the German Electrical and
Electronic Equipment Act (ElektroG).
ElektroG is the law governing how
electrical and electronic equipment
is brought into circulation, returned
and disposed of in an environmentally
friendly manner.
Environmental protection symbol of the
China RoHS directive. The number in
the symbol indicates the "Environment-
friendly Use Period" of the product. The
symbol is used if a substance restricted
in China is used in excess of the maxi-
mum permitted limit.
Date of Manufacture

7
Leica CM1860/CM1860UV – Cryostat
The package contents are fragile and
must be handled with care.
Indicates the correct upright position of
the package.
The package must be kept in a dry en-
vironment.
Indicates the temperature
range permitted for storing
and handling the package.
Minimum +5 °C
Maximum +50 °C
Indicates the temperature
range permitted for transport-
ing the package.
Minimum -40 °C
Maximum +55 °C
It is not permitted to stack packages,
and no loads may be placed on top of
the package.
1. Important Information
Tip-n-Tell indicator to moni-
tor whether the shipment has
been transported and stored
in upright position according
to your requirements. With
a pitch of 60 ° or more, the
blue quartz sand flows into
the arrow-shaped indicator
window and sticks there per-
manently. Improper handling
of the shipment is immediately
detectable and can be proven
definitively.
Example of labeling
in accordance with
IPPC
Package labeling in accor-
dance with German Haz-
ardous Freight Ordinance
Road and Rail (GGVSE)/Eu-
ropean Agreement concern-
ing the International Car-
riage of Dangerous Goods
by Road (ADR) for trans-
porting hazardous goods.
Class 3: "FLAMMABLE LIQ-
UID"
• IPPCsymbol
• Countrycodein accordancewith
ISO 3166, e.g. DE for Germany
• Regionalidentifier,e.g.HEforHessen
• Producer/treatmentprovider code,
unique assigned number starting
with 49
• Treatmentcode,e.g.HT(heattreat-
ment), MB (methyl bromide), and
possibly DB (debarked)

8Instructions for Use V 1.6 RevI – 10/2016
1. Important Information
1.4 Instrument type
All information contained in these Instructions for
Use applies exclusively to the instrument type in-
dicated on the title page. A nameplate bearing the
instrument serial number (SN) is attached to the
back of the instrument.
These Instructions for Use include important
instructions and information related to the oper-
ating safety and maintenance of the instrument.
The Instructions for Use are an important part of
the product, and must be read carefully prior to
startup and use and must always be kept near the
instrument.
If additional requirements on accident prevention
and environmental protection apply in the country
of operation, these Instructions for Use must be
supplemented by appropriate instructions to ensure
Fig. 1
1.3 Intended use of instrument
The Leica CM1860/CM1860UV is a high-performance cryostat with disinfection system for routine and
research applications in biology, medicine and industry. The instrument is used to freeze and section
specimen material quickly. The instrument is not designed for unsupervised storage of specimen
material. The instrument may only be operated within the scope of its designated use as described
above and as per the instructions given in these Instructions for Use. The Leica CM1860/CM1860UV
is also suitable for IVD (in vitro diagnostics).
Any other use of the instrument is considered improper.
Despite chemical and/or UV-light disinfection, adequate safety measures as per the applicable
laboratory regulations must still be taken (i.e. safety goggles, gloves, laboratory coat and mask
must be worn). These disinfections mean a reduction in the number of germs of at least 99.99 %
(see certificate on the Leica website).
1.2 Qualification of personnel
Only trained laboratory personnel may operate the Leica CM1860/CM1860 UV. Prior to operating the
instrument, the operator must thoroughly read and understand these Instructions for Use and must
familiarize him/herself with all technical details of the instrument.
The nameplate shown here is intended as an
example only!
compliance with such requirements.
Proper and intended use includes the observance
of all instructions in the Instructions for Use and
compliance with all inspection and maintenance
instructions.

9
Leica CM1860/CM1860UV – Cryostat
2. Safety
2.1 Safety notes
These Instructions for Use include important in-
structions and information related to the operating
safety and maintenance of the instrument.
The Instructions for Use are an important part of
the product, and must be read carefully prior to
startup and use and must always be kept near the
instrument.
This instrument has been built and tested in accor-
dance with the safety requirements for electrical
equipment for measurement, control, and labora-
tory use.
Residual risks
The instrument has been designed and constructed
with the latest state-of-the-art technology and
The safety and caution notes in this chapter must be observed at all times.
Be sure to read these notes even if you are already familiar with the operation and use of other
Leica products.
The protective devices on both instrument and components must neither be removed nor modi-
fied. Only service personnel qualified by Leica may repair the instrument and access the instru-
ment's internal components.
2.2 Warnings
The safety devices installed in this instrument by the manufacturer only constitute the basis for
accident prevention. Operating the instrument safely is, above all, the responsibility of the owner,
as well as the designated personnel who operate, service or repair the instrument.
To ensure trouble-free operation of the instrument, make sure to comply with the following
instructions and warnings.
These Instructions for Use must be appropriately supplemented as required by the existing
regulations on accident prevention and environmental safety in the operator's country.
For the CE certificate and up-to-
date certificates pertaining to UV
disinfection, visit us online at:
www.LeicaBiosystems.com
according to recognized standards and regula-
tions with regard to safety technology. Operating
or handling the instrument incorrectly can place
the user or other personnel at risk of injury or can
cause damage to the instrument or other property.
The machine may be used only as intended and
only if all of its safety features are in proper working
condition. Malfunctions that impede safety must be
remedied immediately.
To maintain this condition and ensure safe opera-
tion, the user must observe all notes and warnings
contained in these Instructions for Use.
Only original spare parts and permitted original
accessories may be used.

10 Instructions for Use V 1.6 RevI – 10/2016
2. Safety
UVC disinfection is effective when disinfecting sur-
faces and air within the irradiated working area of the
Leica CM1850UV, CM1860UV and CM1950 cryostats at -20 °C
(Table 1, see I. Maier certificate). For powerful disinfection, we
recommend irradiation for three hours (CM1850UV/CM1860UV/
CM1950). Vegetative bacteria including Mycobacterium tuber-
culosis, bacterial endospores (Bacillus sp.) and fungi are killed
during this time. Even viruses including such resistant species
as hepatitis are inactivated up to at least 4 log10 units (99.99 %).
2.3 Safety devices
To prevent adverse health effects from UV radiation, the UV dis-
infection cycle can be started only after the sliding window has
been properly closed. Closing the window activates the corre-
sponding safety features.
When working with cryostats, personal safety precautions must
always be taken. It is mandatory to wear work safety shoes, safe-
ty gloves, a mask and safety goggles.
The consistent use of these safety features and strict observation of the
warnings and cautions in these Instructions for Use will safeguard the
operator from accidents and/or personal injury to a great extent.
Personal safety precautions
The instrument is equipped with the following safety devices: Handwheel
lock and knife guard on the knife holder.

11
Leica CM1860 /CM1860UV – Cryostat
Medium disinfection can be attained through short irradiation for
30 minutes (CM1850UV/CM1860UV/CM1950). This reduces vegeta-
tive bacteria including Mycobacterium tuberculosis and sensitive
viruses such as the influenza A virus (also including the highly
pathogenic avian influenza virus H5N1) and the poliovirus by at
least 5 Log 10 units (99.999%). UVC irradiation within the working
area of the cryostats can provide reliable and efficient disinfection
of surfaces and the air and significantly reduces the risk of infec-
tion.
We recommend removing tools and debris and then wiping off vis-
ible contamination in the cryostat with an alcohol-based disinfec-
tant prior to using the UV lamps. The germicidal effect of the irra-
diation is restricted to the directly irradiated areas, which is why
UVC irradiation cannot be a replacement for regular chemical dis-
infection of the cryostat chamber.
For current information about certificates and recommendations,
visit:
http://www.LeicaBiosystems.com/products/total-histology/cryo-
sectioning/details/product/leica-CM1860-uv/downloads/
Personal safety precautions (continued)
2. Safety

12 Instructions for Use V 1.6 RevI – 10/2016
2.3.2 Knife guard
Prior to manipulating the knife and specimen, changing the speci-
men or knife, or taking a break, always lock the handwheel and
cover the cutting edge with the knife guard.
The CN and CN-Z knife holders feature knife guards; the glass anti-roll plate
of the CE and CE-TC blade holders also serves as a knife guard.
2. Safety
2.3.1 Locking/unlocking the handwheel
Rotate the handwheel only if the refrigeration system is on and the
cryochamber is cold.
Always lock the handwheel prior to making modifications to the
knife or specimen, changing the specimen, or taking a break.
To lock the handwheel, move its handle to the 12 or 6 o'clock position. Press
the lever (1) fully outward; gently rock the handwheel back and forth until
the locking mechanism clicks into place noticeably.
To release the handwheel, press the lever (2) on the handwheel toward the
cryostat housing.
12 o'clock
position
6 o'clock
position
1
2
Fig. 2
Fig. 3

13
Leica CM1860 /CM1860UV – Cryostat
2. Safety
2.4 Operating conditions
Transport and installation
• Aftertransporting,donotturntheinstrumentonforaminimumof4hours.
• Donotoperateinroomswithexplosionhazard!
• Toensureproperfunction,theinstrumentmustbesetupwith
the following minimum clearance to walls and fixtures on all sides:
- rear: 15 cm - 5.9 inch
- right: 30 cm - 11.8 inch
- left: 15 cm - 5.9 inch
Electrical connection
• BeforeconnectingtheinstrumenttoanACpoweroutlet,ensurethatthe
AC power of your laboratory matches the values on the nameplate of the
instrument.
• Duringthe start-up of the refrigeration system, the minimum nominal
voltage must not drop below the values specified in Chapter 3, "Technical
Data".
The compressor draws a starting current between 45 and 50 A.
Therefore, the electric circuit at the place of installation must be inspected
by an electrical engineer to ensure that it meets the requirements for a
smooth operation of the instrument.
A stable power supply in accordance with the instrument's specifications
is essential to its proper functioning.
Failure to comply with the above can damage the instrument.
•This waiting period is necessary to allow the compressor oil, which may
have been displaced during transport, to return to its original position.
Failure to comply with this may cause damage to the instrument.
• Noadditionalextensioncablemaybeused.
Defrosting
• Thequickfreezeshelfcanbecomeveryhotduringthedefrostingprocess.
Therefore, do not touch it!

14 Instructions for Use V 1.6 RevI – 10/2016
2.5 Operating the instrument
2. Safety
2.6 Cleaning and disinfection
• Takecarewhen handlingmicrotomeknives anddisposableblades. Thecuttingedge is
extremely sharp and can cause serious injuries!
We strongly recommend using the safety gloves included with the standard delivery!
• Neverleaveknivesandknife/bladeholderswithaknife/blademountedlyingaround!
• Neverplaceaknifeonatablewiththecuttingedgefacingupward!
• Nevertrytocatchafallingknife!
• Alwaysclampthespecimenfirst,thentheknife.
• Beforehandlingthespecimenortheknife,changingthespecimenortakingabreak,lock
the handwheel and ensure that the knife is covered by the knife guard.
• Extendedskincontactwiththecoldpartsoftheinstrumentmaycausefrostbite!
• Tomakesurethatthecondensationwaterstemmingfromthedefrostcyclesdrainsintothewaste
container and to avoid the risk of possible contamination, ensure that the tap of the waste container
(2, Fig. 54) is open whenever operating the cryostat. Only shut the tap when draining the waste
container!
The use of flammable sprays within the cryostat chamber is permitted only with the Leica
Cryofect tested by us.
At cryochamber temperatures of 0 °C to -35 °C! Spray a MAXIMUM of 10 sprays into the middle
of the cryostat chamber and close the sliding glass door. After each disinfection, the chamber
must be wiped carefully with a cloth and briefly ventilated!
* Cryofect is not sold in all parts of the world
Remove section waste after EVERY change of specimen. Do not start disinfection until you
have done this! Each new specimen is a potential source of contamination.
We strongly recommend defrosting the CM1860/CM1860UV Cryostat completely for 24 hours,
1-2x annually or as needed.
• Itisnotnecessarytoremovethemicrotomeforroutinedisinfection.Theinstrumenthas
been designed for UV disinfection. Spray disinfection with Leica Cryofect* is also possible,
thanks to the special insulation of the microtome.

15
Leica CM1860 /CM1860UV – Cryostat
2.7 Removing the microtome
• Themicrotomeisencapsulatedandthereforedoesnotrequireremoval
by the user.
2.8 Maintenance
Replacing the fuses
• Turntheinstrumentoffanddisconnectthepowerplugbeforereplacing
the fuses!
• Useonly the fuse types specified in Chapter 3, "Technical Data". Failure
to comply with this can cause severe damage to the instrument and its
surroundings!
Replacement of the lamp/UVC lamp
If both disinfection indicator lights are flashing alternately, the UV
tube must be replaced!
• Turntheinstrumentoffanddisconnectthepowerplugbeforereplacing
the lamps. (For more details, refer to Chapter 9, "Cleaning, Disinfection,
Maintenance.)
It is possible to break the UVC lamp during replacement. If this
happens, the lamp change must be completed by Technical Ser-
vice. If any metallic mercury is released, handle it carefully and
dispose of it properly.
2. Safety
• Donotuseorganicsolventsorotheraggressivesubstancesforcleaning.
Use only disinfectants listed in these Instructions for Use, such as Leica
Cryofect (alcohol or other common alcohol-based disinfectants).
Please contact Leica Biosystems for further details on adequate
disinfection measures.

16 Instructions for Use V 1.6 RevI – 10/2016
3. Technical Data
Operating temperature range (ambient temperature): 18 °C to 35 °C. All specifications related to
temperature of the cooling unit are valid only for an ambient temperature of 22 °C and a relative
humidity of no more than 60 %!
Type CM1860/ CM1860/ CM1860/ CM1860/ CM1860/
CM1860 UV CM1860 UV CM1860 UV CM1860 UV CM1860 UV
Test symbol - c_CSA_us - - -
Nominal voltage 100 VAC 120-127 VAC 220-230 VAC 220-230 VAC 240 VAC
±10 % ±10 % ±10 % ±10 % ±10 %
Nominal frequency 50/60 Hz 60 Hz 60 Hz 50 Hz 50 Hz
Power input 1440 VA 1440 VA 1440 VA 1440 VA 1440 VA
Max. start-up current for 5 sec
45 A eff. 45 A eff. 45 A eff. 45 A eff. 45 A eff.
Protective class I I I I I
Pollution degree 2 2 2 2 2
Overvoltage inst. category II II II II II
Heat emission (max.) 1600 J/s 1600 J/s 1600 J/s 1600 J/s 1600 J/s
Refrigeration system 50 Hz/60Hz
Cryochamber
Temperature range 0 °C to -35 °C (+ 3 K/- 3 K)
Cooling time down to -35 °C max. 6 hrs., at 22 °C ambient temperature
Defrost Automatic hot gas defrost
1 automatic defrost cycle/24 hours, time-controlled (duration 12 min.)
Refrigeration capacity690 W
Safety factor 3
Refrigerant 300g ±5g refrigerant R 404A *
Compressor oil 0.6 l EMKARATE RL-22S, ICI *
Quick-freeze shelf
Maximum temperature - 40°C (+ 3 K/- 5 K)
Number of freezing stations 8
Defrost Manual hot gas defrost, time-controlled (duration 12 min.)
Peltier element
Max. temperature difference 17K, at - 35°C chamber temperature
Number of freezing stations 2
Defrost In conjunction with the
quick-freeze shelf
according to IEC-1010, UL 3101
according to CECOMAF Liquid temperature 45 °C, evaporation temperature -25 °C

17
Leica CM1860/CM1860UV – Cryostat
Observe item 4.1, "Installation site
requirements".
3. Technical Data
Microtome
Rotary microtome
Section thickness selection: 1 - 100 µm
Total specimen feed 25 mm
Vertical stroke 59 mm
Maximum specimen size 55 x 55 mm
or 50 x 80 mm
Specimen orientation 8° (x, y, z-axis)
Electric coarse feed
Slow 600 µm/s
Rapid 900 µm/s
Cryocabinet
Dimensions
Width (w/o handwheel) 600 mm
Width (with handwheel) 730 mm
Depth 730 mm
Height 1140 mm
Weight
(incl. microtome,
without specimen cooling) approx. 135 kg
Lamp
50 Hz version: Osram Dulux S 11 W/21
Color: LUMILUX light white
60 Hz version: Osram Dulux S 13 W/21
Color: LUMILUX light white
*) Refrigerant and compressor oil must be replaced by qualified, authorized service personnel
only.
All CM1860/CM1860 UV instrument variants need the following secondary fuses:
F1: T0.25A L250V Type FST 6.3x32 Brand: SCHURTER
F2: T1.6A L250V Type FST 6.3x32 Brand: SCHURTER
F3: T1.0A L250V Type FST 6.3x32 Brand: SCHURTER
F4: T6.25A L250V Type FST 6.3x32 Brand: SCHURTER
F5: T4A L250V Type FST 6.3x32 Brand: SCHURTER
Storage conditions
Temperature: 5 - 50 °C
Humidity: <80 %, non-condensing
Transport temperature: -40 °C to +55 °C

18 Instructions for Use V 1.6 RevI – 10/2016
4.1 Installation site requirements
4. Setting up the Instrument
Do not operate in rooms with explosion hazard! To ensure proper function of the instru-
ment, it must be set up with a minimum distance on all sides from walls and furniture
(see "Transport and installation").
The place of installation must meet the following requirements:
- The instrument requires an installation area of approx. 600 x 730 mm.
- Room volume must be at least 8 m3.
- Room temperature consistently 18 °C - 35°C.
- Temperature range during storage: 5°C - 50 °C
- Relative humidity, maximum 60% (non-condensing),
- Elevation: up to a max. of 2000 m above sea level
Condensation water may form in the instrument if there is an extreme difference in
temperature between the storage location and the installation site and if air humidity is
high at the same time. If this is the case, wait at least two hours before switching on the
instrument.
Failure to comply with this may cause damage to the instrument.
• Theinstrumentisdesignedforindooruseonly.
• Thepowerplug/circuitbreakermustbefreelyandeasilyaccessible.The power socket may
not be located further than 2.5 m from the instrument.
• Powersupplyatadistancenogreaterthanthelengthofthepowercable–anextension
cable must NOT be used.
• Thefloormustbelargelyvibration-freeandhavesufficientloadcapacityandrigidityforthe
weight of the instrument.
• Avoidimpacts,directsunlight,andexcessivetemperaturefluctuations.
• TheinstrumentMUSTbeconnectedtoaproperlygroundedsocket.Useonlythepowercable
provided, which is intended for the local power supply.
• Thechemicalstobeusedareeasilyinflammableandhazardoustohealth.Thereforethe
installation location must be well ventilated, and must contain no sources of ignition of any
kind.
• Furthermore,thisinstrumentmustNOT beoperated directly undertheoutlet ofan air-
conditioning system, since the increased air circulation accelerates icing of the chamber.
• Theinstallationlocationmustbeprotectedagainstelectrostaticcharge.
Noise information: A-weighted noise level: <= 70 dB (A)
Room temperatures and humidity levels in excess of the recommendations above will
affect the cryostat's cooling capacity and the lowest stated temperatures will not be
reached.

19
Leica CM1860 /CM1860UV – Cryostat
4.2 Unpacking instructions for the cryostat CM1860/1860UV
4. Setting up the Instrument
Fig. 4
• Toremovethestrips(1, Fig. 5), suitable shears and protective gloves are
required.
• Standnexttothecrateandcutthestripsatthelocationshown(seear-
rows in Fig. 5).
• Lifttheoutercartonring(2, Fig. 5) upwards and out.
• Carefully remove the adhesive tape (3, Fig. 6) holding the two transport
anchors (4, Fig. 6) on both sides of the instrument and remove them.
• Pullthedustcover(5, Fig. 6) from the instrument.
• Remove the two white and the two blue transport anchors (6, Fig. 6),
which protect the chamber window.
• Removeallaccessories(7, Fig. 6).
Fig. 5 Fig. 6
Caution when re-
moving the strips!
There is a risk of in-
jury when opening
them (the strip has
sharp edges and is
under tension)!
1
2
4
7
8
5
3
4
6
• When the instrument is delivered, check the tilt indicators on the pa-
ckaging.
• If the arrowhead is blue, the shipment was transported laying flat, was
tilted at too great an angle or fell over during transport. Note this on the
shipping documents and check the shipment for possible damage.
• Two persons are required to unpack the instrument!
• Instrument figures and pictures are only to be used as examples to ex-
plain the unpacking procedure.

20 Instructions for Use V 1.6 RevI – 10/2016
4. Setting up the Instrument
6
Fig. 7 Fig. 8
55
7
8
Transport
grip points
• Liftandremovethewoodenedge(6, Fig. 7).
• Removetheramp(5, Fig. 8) on the front side
of the pallet (see Fig. 6) and correctly attach
it to the back (see Fig. 8).
• Properly insert the ramp. Make sure that the
ramp components designated "L" (left) and
"R" (right) click into place in the intended
guide channel (10, Fig. 8a). When correctly
assembled, the guide rails (11, Fig. 8a) are
located inside, while the arrows (12 Fig. 8a)
point toward each other.
• Carefullyrolltheinstrumentbackwardsovertherampfromthepallet.
• Pushtheinstrumenttotheinstallationlocationonthecastors(7, Fig. 8).
Do not push the device by its hood (8, Fig. 8)!
Use the transport grip points ( , Fig. 8).
The rollers (7, Fig. 8) must run over the ramp (5, Fig. 8) at the front and rear. Danger of tipping!
The instrument must be transported in an upright position.
12
11
10
Fig. 8a
Other manuals for CM1860
1
This manual suits for next models
1
Table of contents
Other Leica Medical Equipment manuals

Leica
Leica RM2235 User manual

Leica
Leica M844 User manual

Leica
Leica CM1100 User manual

Leica
Leica CM1950 User manual

Leica
Leica M501 User manual

Leica
Leica M530 OHX User manual

Leica
Leica CM1900 User manual

Leica
Leica SM2000 R User manual

Leica
Leica M620 F18 User manual

Leica
Leica Keratoscope Operating manual
Popular Medical Equipment manuals by other brands

Chiesi
Chiesi Clenil Modulite user guide

BD
BD Vacutainer Pronto Quick reference card

Concentric Medical
Concentric Medical FlowGate2 Instructions for use

ThermaZone
ThermaZone 003-28 Instructions and Safety Guidelines

Lowenstein Medical
Lowenstein Medical prismaLINE manual

EIC
EIC transfusio-therm 2000 Quick reference guide