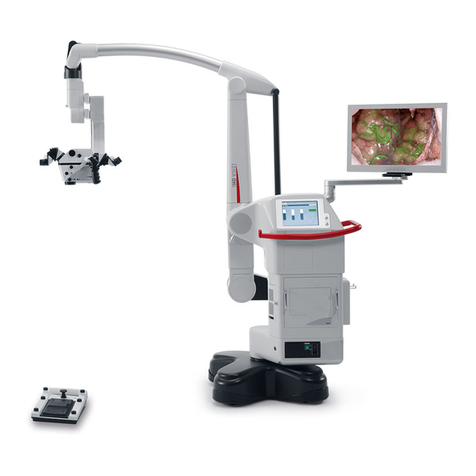
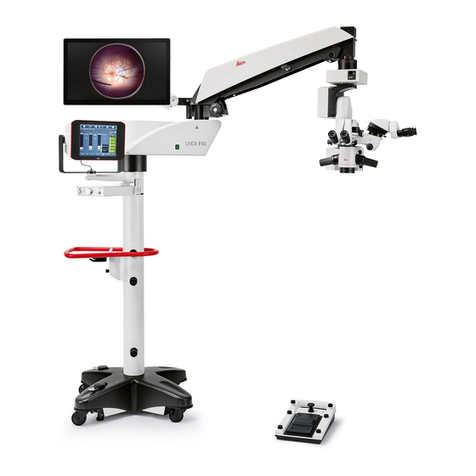
Leica FL800 Manual

Leica FL800
for Leica M720 OH5,
Leica M525 OH4
and Leica M525 F50
User Manual / Installation Instructions
10 716 079 – Version 01
Living up to Life

Leica FL800 for Leica M720 OH5, Leica M525 OH4 and Leica M525 F50 / Ref. 10 716 079 / Version 01
Thank you for purchasing a Leica surgical microscope system.
In developing our systems, we have placed great emphasis
on simple, self-explanatory operation. Nevertheless, we suggest
studying this user manual in detail in order to utilize all the ben-
efits of your new surgical microscope.
For valuable information about Leica Microsystems products and
services and the address of your nearest Leica representative,
please visit our website
www.leica-microsystems.com
Thank you for choosing our products. We hope that you will enjoy
the quality and performance of your Leica Microsystems surgical
microscope.
Leica Microsystems (Schweiz) AG

1Leica FL800 for Leica M720 OH5, Leica M525 OH4 and Leica M525 F50 / Ref. 10 716 079 / Version 01
Chapter overview
Introduction 4
Leica M720 OH5 FL800 5
Controls 8
Assembly 10
Preparation before the operation 19
Use 20
Leica M525 OH4 FL800 23
Controls 26
Assembly 28
Preparation before the operation 37
Use 39
Leica M525 F50 FL800 43
Controls 46
Assembly 48
Preparation before the operation 57
Use 59
General instructions 67
Safety notes 68
Care and maintenance 79
What to do if...? 82
Technical data 83

2Leica FL800 for Leica M720 OH5, Leica M525 OH4 and Leica M525 F50 / Ref. 10 716 079 / Version 01
Contents
Page
Introduction
User manual 4
Product identification 4
Symbols used in this manual 4
Leica M720 OH5 FL800
Controls
Connections on the Leica OH5 with FL800 8
Leica FL800 components 8
Leica NIR dual video adapter 8
Leica CAN handle (left) 8
Leica MDRS system unit (optional) 9
Assembly
Leica FL800 assembly 10
Attaching the Leica NIR dual video adapter and
NIR Sony camera 10
Camera Setting 11
Connecting the Leica FL800 components 12
Installing and connecting the fluorescence
components 13
Adjustments in the control unit for FL800 14
Settings in the Leica MDRS for use with Leica FL800 16
Focussing and calibration of the NIR-data overlay 16
Preparation before the operation
Pre-operation checklist (FL800) 19
Checking the Leica FL800 illumination 19
Use
Using the Leica FL800 20
Controlling the FL800 functions 20
Data display in an optional Leica DI C700 22
Leica M525 OH4 FL800
Controls
Connections on the Leica OH4 with FL800 26
Leica FL800 components 26
Leica NIR dual video adapter 26
Leica CAN handle (left) 26
Leica MDRS system unit (optional) 27
Assembly
Leica FL800 assembly 28
Attaching the Leica NIR dual video adapter and
NIR Sony camera 28
Camera Setting 29
Connecting the Leica FL800 components 30
Installing and connecting the fluorescence
components 31
Adjustments in the control unit for FL800 32
Settings in the Leica MDRS for use with Leica FL800 34
Focussing and calibration of the NIR-data overlay 34
Page
Preparation before the operation
Pre-operation checklist (FL800) 37
Checking the Leica FL800 illumination 38
Setting up the optional Leica DI C500 38
Use
Using the Leica FL800 39
Controlling the FL800 functions 39
Data display in an optional Leica DI C500 41
Leica M525 F50 FL800
Controls
Connections on the Leica F50 with FL800 46
Leica FL800 components 46
Leica NIR dual video adapter 46
Leica CAN handle (left) 46
Leica MDRS system unit (optional) 47
Assembly
Leica FL800 assembly 48
Attaching the Leica NIR dual video adapter and
NIR Sony camera 48
Camera Setting 49
Connecting the Leica FL800 components 50
Adjustments in the control unit for FL800 52
Settings in the Leica MDRS for use with Leica FL800 54
Focussing and calibration of the NIR-data overlay 54
Preparation before the operation
Pre-operation checklist (FL800) 57
Checking the Leica FL800 illumination 58
Setting up the optional Leica DI C500 58
Use
Using the Leica FL800 59
Controlling the FL800 functions 59
Data display in an optional Leica DI C500 61
Cabeling of the Leica FL800 62
General instructions
Safety notes
Intended use of instrument 68
Prohibited uses 68
Information for the person responsible for
the instrument 68
User qualifications 69
Directions for the operator of the instrument 69
Dangers of use 69
Manufacturer’s declaration of electromagnetic
compatibility (EMC) 70
Signs and labels 78

3Leica FL800 for Leica M720 OH5, Leica M525 OH4 and Leica M525 F50 / Ref. 10 716 079 / Version 01
Contents
Page
Care and maintenance
Maintenance instructions 79
Maintenance 79
Notes on reprocessing of resterilizable products 80
Instructions 80
Table: Sterilization 81
What to do, if...
General 82
Leica FL800 82
Leica MDRS fluorescence software 82
Technical data
Leica FL800 83
Electrical data 83
Ambient conditions 83
Standards 84
Limitations of use 84
Weight list, balanceable configurations
Leica M720 OH5 FL800 85
Weight list, balanceable configurations
Leica M525 OH4 FL800 86
Weight list, balanceable configurations
Leica M525 F50 FL800 87

4Leica FL800 for Leica M720 OH5, Leica M525 OH4 and Leica M525 F50 / Ref. 10 716 079 / Version 01
Introduction
User manual
In addition to instructions for use, this user manual
also provides important safety notes (see the chap-
ter entitled, „Safety notes“).
Read this user manual carefully before operating
the product.
Product identification
The model code and serial number of your product are provided
on the nameplate found on the illumination unit. Transfer this
information to your manual and always refer to it when contacting
our representative or service workshop with questions.
Model: Serial No.:
Symbols used in this manual
The symbols used in this manual have the following meaning:
Warning Warning against dangers of use or
improper use that could result in serious
personal injuries or death.
Caution Warning against dangers of use or
improper use that could result in minor per-
sonal injuries only, but could cause signifi-
cant damages to property, fixed assets or
the environment.
Information about use that helps the user
to employ the product technically correct
and efficiently.
éRequest for action; here, you are requested
to take action.

5Leica FL800 for Leica M720 OH5, Leica M525 OH4 and Leica M525 F50 / Ref. 10 716 079 / Version 01
Leica M720 OH5 FL800

6Leica FL800 for Leica M720 OH5, Leica M525 OH4 and Leica M525 F50 / Ref. 10 716 079 / Version 01
Leica M70 OH5 FL800
Leica M720 OH5 FL800
Leica M720 OH5 with Leica FL800
2
5
4
3
1
1 Leica M720 optics carrier with Leica FL800
2 CAN handles
3 Leica OH5 illumination unit
4 Hinged arm monitor
5 MDRS 19“ touchscreen monitor (optional)
6 MDRS system unit (optional)
6

7Leica FL800 for Leica M720 OH5, Leica M525 OH4 and Leica M525 F50 / Ref. 10 716 079 / Version 01
Leica M70 OH5 FL800
Leica M720 optics carrier with Leica FL800
7 White-light camera
8 M720 optics carrier
9 FL800 NIR Sony XC-EI 50 camera
10 Leica NIR Dual Video Adapter
11 Status LED for fluorescence
LED lights up in...
White = achromatic light mode
Blue = Blue light mode (if an optional Leica FL400 is built into the system)
Yellow = NIR mode
Green = playback mode (MDRS)
12 Status LED for MDRS recording
LED lights up in...
Red = recording is on
Brief flashing „Red“ = single-image recording
13 Leica DI C700 (optional)
13
7

8Leica FL800 for Leica M720 OH5, Leica M525 OH4 and Leica M525 F50 / Ref. 10 716 079 / Version 01
Controls
Leica FL800 components
Leica NIR dual video adapter
25 Connection Beam splitter
26 Connection for C mount white-light camera
27 Connection with focus for C mount NIR camera
27a Lockable adjusting ring for NIR-focussing
27b Set screw for singular device adjustment
27c Set screw for often used adjustment
61 Y-CAN cable
Leica CAN handle (left)
28
29
31
32
30
28 Joystick for controlling the FL800 functions
29 Focus
30 Zoom
31 „All-free“ button (all brakes)
32 Selector button (3 brakes for „XYZ Free“ or „Focus Lock“)
Connections on the Leica OH5 with
FL800
Storz
Light-
Source
FL400
Camera
Hitachi
Video
IN
(NIR-Cam)
Video
IN
(FL400-Cam)
Video
OUT
MDRS
S-Video
IN
S-Video
IN
S-Video
OUT
Storz
Foot-
Switch
FL ConnectorboardXGA Switchboard
12V NIR-
Camera
SONY
OUT
XGA
DI C500
IN
XGA
1
IN
XGA
2
IN
XGA
3
MDRS
20
21
22
23
24
13
14
15
16
17
18
19
13 Video input for NIR Sony camera
14 Video input for Microscope camera
15 Video output to MDRS or OR monitor
16 S-video input for NIR Sony camera
17 S-video input for Microscope camera
18 S-video output to MDRS or OR monitor
Use either only BNC (13 to 15) or S-Video (16 to 18)
connections. S-video signals offer a higher quality!
19 12-V NIR Sony camera
20 XGA out to Leica DI C700
21 XGA input 1
22 XGA input 2
23 XGA input 3
24 MDRS control system

9Leica FL800 for Leica M720 OH5, Leica M525 OH4 and Leica M525 F50 / Ref. 10 716 079 / Version 01
Controls
Leica MDRS system unit (optional)
LEICA MDRS4
33
34
35
Front plate
33 CD/DVD drive
34 2x USB connection (e.g. for USB memory stick,
optional touchpad)
35 ON/OFF switch
36
1234
38 39
40
41
42
4344
46
45
37
Rear plate
36 MDRS footswitch (optional)
37 DVI output for monitor*
38 S-video input
39 3x BNC input
40 19-V system supply
41 Audio cable
42 Touch control USB
43 XGA output (for additional monitor or DI C700)*
44 Control cable OH5
45 S-video or BNC output, e.g. for OR monitor*
46 Keyboard (optional)
*Only two of three outputs (37/43/45) can be used at the
same time.

10 Leica FL800 for Leica M720 OH5, Leica M525 OH4 and Leica M525 F50 / Ref. 10 716 079 / Version 01
Assembly
Leica FL800 assembly
Warning 1
Danger of injury to the patient
é Do not install or remove Leica FL800 accessories above the patient.
é After every refitting, rebalance the Leica M720 OH5 FL800.
Attaching the Leica NIR dual video adapter and NIR Sony camera
10
27 9
26
27 Video / Assistant output of the Leica M720
9 Sony FL800 NIR camera
26 (White-light) Microscope camera
10 Leica NIR Dual Video Adapter
Both cameras connected to the NIR dual video adapter
must have the same chip size e.g. 1/3“ NIR and 1/3“ White-light or
1/2“ NIR and 1/2“ White-light!
(see also the chapter Technical Data on page 83)
éDual Video Adapter for simultaneously connecting a C-mount microscope camera and the FL800 Sony NIR camera
with C-mount port
éThe Leica NIR Dual Video Adapter is installed on the documentation output.
éThe Dual Video Adapter offers a motorized fine-focussing for the visible and near infrared light and additionnally
a manual NIR fine-adjustment.
éInsert the Dual Video Adapter into the documentation output of the Leica M720, engage it and fasten it in place.
éScrew cameras onto the C-mount adapter, guide the camera into the right position (determine horizon through the binoculars) and
tighten the clamping screw.
éConnect the CAN-cable of the Dual Video Adapter to the Lemo plug under the cover of the AB sledge. If the CAN bus interface is
already occupied, connect (plug) in-between the enclosed Y-CAN cable.
éPlug in the handswitch on the control unit at the internal CAN bus interface.

11Leica FL800 for Leica M720 OH5, Leica M525 OH4 and Leica M525 F50 / Ref. 10 716 079 / Version 01
Assembly
éScrew FL800 NIR Sony camera (9) on the top (27) camera connection.
Adjust the orientation of the white-light camera. The top of the view in the microscope eyepiece must also be at the top of the
monitor image.
éPlug in the handswitch for the motorized fine focus function on the control unit of the OH5 (internal CAN bus-interface).
Use the NIR test pattern to check the orientation and the NIR-image. (Also see „Checking the Leica FL800 illumination“
on page 17)
éMove the NIR test pattern away from you (toward 12 o’clock position) into the center of the image.
éObserve the camera image on the monitor.
The camera image moves upward écamera orientation OK
downward éturn camera 180°
to right éturn camera 90° to left
to left éturn camera 90° to right
Please ensure that the bottom DIP switch on the Sony NIR camera head is set to the right.
Camera Setting
Adjusting the parfocality of the Leica Dual Video Adapter
éSet the M720 to maximum magnification.
éPlace a flat test specimen with sharp contours under the objective.
éLook through the eyepieces and focus the microscope.
éSet the Leica M720 to minimum magnification.
éBring the monitor image into focus on the Leica Dual Video Adapter.

12 Leica FL800 for Leica M720 OH5, Leica M525 OH4 and Leica M525 F50 / Ref. 10 716 079 / Version 01
Assembly
Connecting the Leica FL800 components
46
958
55
54
48
54
47
48
48
6
48
54
50
57
59
52
51
54
47+3x53
5
56
48
49
FL Connectorboard
active S-video splitter
47 Active S-video splitter 53 BNC to S-video adapter
48 Standard S-video video cable 54 Standard BNC video cable
9 FL800 NIR Sony camera 55 Microscope camera (control unit and camera head)
49 Optional DI C700 6 MDRS system unit (optional)
5 MDRS touchscreen (optional) 56 Optional OR monitor
50 Audio cable 57 Cable for USB touch control (optional)
51 Leica DI C700 XGA cable 58 Y-cable FL800 NIR Sony camera
52 MDRS control cable (optional) 59 DVI monitor cable (optional)
Use either only composite or only S-video signals for your installation. S-video signals feature a better quality than
composite signals.
If you are using S-video signals, connect the Y-cable of the FL800 NIR Sony camera with the BNC to S-video adapter to the FL
connector board.
Use the active video splitter if you also want to display the video image on an optional OR monitor in addition to the internal
MDRS recording system. An optional OR monitor can be connected with the OH5 using the video couplings.
An overview of all components connected to your system has been provided in your delivery documentation by your Leica rep-
resentative.

13Leica FL800 for Leica M720 OH5, Leica M525 OH4 and Leica M525 F50 / Ref. 10 716 079 / Version 01
Assembly
Installing and connecting the
fluorescence components
Installing Leica FL800 fluorescence filters
éLoosen the two Phillips screws (1) and remove the cover (2).
1
2
Fig. 1
éUse a 2.5 mm Allen key to loosen the grub screw (3) retaining
the filter wheel (4).
éSlide the filter wheel (4) from its axis.
3
4
Fig. 2
Overview of filter positions (front view)
A
B
C
D
Fig. 3
A empty
B standard filter (31.3 mm)
C FL400 filter (optional)
D FL800 filter (32.0 mm)
éLoosen the two Phillips screws and remove the filter holder
and aperture.
éInsert the appropriate filters and secure them by replacing the
filter holder and two Phillips screws.
Filterhalter / Filter holder
Blende / Blind
Vorne / Front
Fig. 4

14 Leica FL800 for Leica M720 OH5, Leica M525 OH4 and Leica M525 F50 / Ref. 10 716 079 / Version 01
14
éClick on the „Show Settings“ button.
éSelect the „Handle Left“ tab.
éYou see an overview with which buttons of the left handle the
FL800 functions can be operated.
If you adjusted the settings of the „Fluorescence
Vascular FL800“ user preset do your needs during the
application, you can adopt and save them under a
new user name.
éClick on „Save“ and then on „Save as“.
éSelect an empty position in the user list.
éEnter the desired user name via the keyboard.
éClick on the „Save“ button to save your settings under the user
name entered at the desired location.
These settings can later be edited at any time via the
User Settings menu.
Adjustments in the control unit for FL800
Ensure that the FL800 accessories are enabled in the
accessory list in the service menu of your OH5.
Afterwards, the respective current mode is displayed
on the right of the status line of the control unit and
indicated by the LEDs on the swinging arm.
Use the „Fluorescence Vascular FL800“ user preset
éClick on the „Preset“ button.
éSelect the „Fluorescence Vascular FL800“ user preset.
éClick on the „Select“ button.
Assembly

15Leica FL800 for Leica M720 OH5, Leica M525 OH4 and Leica M525 F50 / Ref. 10 716 079 / Version 01 15
Configuring your own FL800 user
éClick on the „Menu“ quick access button.
éUnder user template, you can create your own FL800 user.
éSelect „New User“.
éOpen the „Handle Left“ or „Handle Right“ tab to assign FL800
functions to the handle.
éIn the left selection window, select the „Fluorescence“
function group by clicking on it.
éAssign the function „FL800 Mode On/Off“ to any button by
selecting the desired function.
éAfterwards, click on the label field of the desired button to
assign the desired function.
Or
éPress the desired button on the handle to be assigned.
éRepeat this process for the functions „ FL800 NIR Zoom Reset“,
„MDRS FL Playback“ and „MDRS FL Step Loop“.
éClick on „Save“.
éSelect an empty position in the user list.
éEnter the desired user name via the keyboard,
e.g. „ICG User“.
éClick on the „Save“ button to save your settings under the user
name entered at the desired location.
In the service menu, you can adjust a value for
the maximum duration of the FL800 mode from
10 to 180 seconds.
Adjustments in the control unit for an optionally connected
Leica DI C700
In the User Settings menu, adjust the settings for the
Leica DI C700 for an FL800 user as follows, e.g. when looking
at the ICG-NIR image in the left eyepiece.
éOpen the „DI C700“ tab.
éSelect the „Non-Overlay (closed)“ setting as the „Manual
Shutter Settings“.
éThe „Display Shutter Settings (Non-Overlay Data)“ setting
allows you to define whether you want to see during the play-
back of the ICG-NIR sequences in both eyepieces (here also
right) the ICG-NIR image. Choose „Display-Shutter Non-Overlay
Data“ = open.
éIf not asked differently by the user, choose „Display-Shutter
Non-Overlay Data“ = closed. This means, you can have the ori-
ginal image in one eyepiece and the NIR-information
in the other one at the same time, allowing you to merge
cognitively both information.
Assembly

16 Leica FL800 for Leica M720 OH5, Leica M525 OH4 and Leica M525 F50 / Ref. 10 716 079 / Version 01
Settings in the Leica MDRS for use with Leica FL800
For the activation of the LEICA FL800 at the LEICA MDRS
(SW 4.7 and higher) press Ctrl + Alt + F3.
This will reboot the LEICA MDRS.
After that you will be asked to enter two Activation Keys:
Picture 1: Main Activation Key
Picture 2: Leica FL800 Activation Key
The two activation codes you will get from:
MedXchange
Office number: 9 am to 5 pm EST USA
+1 941 794 9977
Cell numbers:
Chris Samano +1 941 538 2732
Corey Park +1 941 524 4041
Mike Wise +1 941 704 4030
Email: [email protected]
In combination with the Leica MDRS with fluorescence
software, the Leica DI C700 can be used for the correctly
scaled display of the FL800 video signal for the anatomy
visible in the microscope.
Focussing and calibration of the NIR-data overlay
éThe file „medxrecorderv4.ini“ in
„my Computer\C:\MedXStream“ has got 4 parameters to define
the size and position of the injected NIT-image.
éChange the parameters to match the injected image with
the object.
éThe ICG-settings are the last in the parameters’ list, but a sepa-
rate group of parameters in the file „medxrecorderv4.ini“.
Top
Left
Width
Height
…
Facility=0
[ICG]
Top=205
Left=155
Width=500
Height=376
[Ports]
…
éUse the new ICG-standard sample with the two ICG-objects for
the correct setup.
éThe long distance between both objects allows a very precise
setting of all parameters.
éFocus on the standard sample in white-light mode and magnify
until the standard sample matches the image size on the video
monitor.
éChange to the ICG-mode. Observe the fluorescence signal and
adjust the separate NIR-fine focus of the Dual Video Adapter at
the chosen magnification. Fix the alignment with the enclosed
adjustment screws.
➞
➞
Assembly

17Leica FL800 for Leica M720 OH5, Leica M525 OH4 and Leica M525 F50 / Ref. 10 716 079 / Version 01
éShould the fluorescence signal be too intensive, use the back
side of the standard sample. This back side produces a less
intense luminosity signal with a contrast pattern (cross and
star). This way you can easily focus on the NIR-image.
éRun the MDRS-recording program and start the calibration pro-
cess. Use the following example to make the correct settings.
éOpen the Leica DI C700 „main shutter“ to overlay the NIR-
image and the white-light image (Service setting only for this
calibration). Refer to the user manual Leica M720 OH5.
low
intensity
Example: The size of the NIR-image (light-colored objects) has to
be reduced. The position should be lower and further left in the
ocular. To match the white-light image of the standard sample
(gray objects) reduce proportionally the height and width, then
augment the „Top“ and reduce the „Left“.
a) for a general setting (recommended) use the set screw 27b and
tighten it carefully with the appropriate devise (prevents invo-
luntary loosening and therewith maladjustment).
b) for a variable setting during or in-between surgeries use set
screw 27c (allows optimal focussing even using extreme
magnification settings).
Assembly

18 Leica FL800 for Leica M720 OH5, Leica M525 OH4 and Leica M525 F50 / Ref. 10 716 079 / Version 01
Assembly
…
Facility=0
[ICG]
Top=205
Left=155
Width=500
Height=376
[Ports]
…
Change:
„Top“ ca. „230“=lower
„Left“ ca. „130“=further left
„Width“ ca. „400“=smaller
„Height“ ca. „300“=smaller
éSave the .ini-file and check the settings by closing the MDRS-
recording program and restarting it.
éThe calibration was successful if both fluorescence objects
overlay the injected fluorescence information injected into the
Leica DI C700.
éThis calibration needs to be done once for each installation or
Demo-setup.
Table of contents
Other Leica Medical Equipment manuals

Leica
Leica CM1860 User manual

Leica
Leica SM2000 R User manual

Leica
Leica CM3050 S User manual

Leica
Leica M530 OHX User manual

Leica
Leica RM2235 User manual

Leica
Leica CM1950 User manual

Leica
Leica Keratoscope Operating manual

Leica
Leica CM3050 S User manual

Leica
Leica M822 User manual

Leica
Leica CM1900 User manual
Popular Medical Equipment manuals by other brands

Interacoustics
Interacoustics Titan operating manual

HoMedics
HoMedics Comfort Pro HCM-WRP455H instruction manual

Dräger
Dräger Evita V Series Supplement to the instructions for use

Second Sight
Second Sight Argus II Patient manual

Erbe
Erbe ESM 2 Service manual

Blatchford
Blatchford SmartIP Fitting instructions