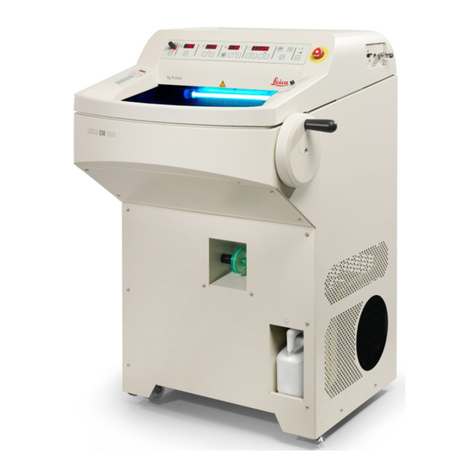
Leica CM1860 User manual

Instructions for Use
English
Order No.: 14 0491 80101 - Revision N
Always keep this manual with the instrument.
Read carefully before working with the instrument.
Version 2.0, Revision N - 10.2019
Leica CM1860/CM1860 UV
Cryostat


3
Leica CM1860/CM1860 UV
The information, numerical data, notes and value judgments contained in this Instructions for Use
represent the current state of scientic knowledge and state-of-the-art technology as we understand it
following thorough investigation in this eld.
We are under no obligation to update the present Instructions for Use periodically and on an ongoing
basis according to the latest technical developments, nor to provide our customers with additional
copies, updates etc. of this Instructions for Use.
To the extent permitted in accordance with the national legal system as applicable in each individual
case, we shall not be held liable for erroneous statements, drawings, technical illustrations etc. contained
in this Instructions for Use. In particular, no liability whatsoever is accepted for any nancial loss or other
consequential damage caused by or related to compliance with statements or other information in this
Instructions for Use.
Statements, drawings, illustrations and other information regarding the contents or technical details of
the present Instructions for Use are not to be considered warranted characteristics of our products.
These are determined only by the contract provisions agreed between ourselves and our customers.
Leica reserves the right to change technical specications as well as manufacturing processes without
prior notice. Only in this way is it possible to continuously improve our technology and manufacturing
techniques used in our products.
This document is protected under copyright laws. All copyrights to this documentation are held by Leica
Biosystems Nussloch GmbH.
Any reproduction of text and illustrations (also of any parts thereof) by means of print, photocopy,
microche, web cam or other methods – including all electronic systems and media – requires express
prior permission in writing by Leica Biosystems Nussloch GmbH.
For the instrument serial number and year of manufacture, please refer to the nameplate on the back of
the instrument.
Note
Leica Biosystems Nussloch GmbH
Heidelberger Str. 17 - 19
69226 Nussloch
Germany
Tel.: +49 - (0) 6224 - 143 0
Fax: +49 - (0) 6224 - 143 268
Web: www.LeicaBiosystems.com

4Version 2.0, Revision N
Table of contents
1. Important Information ..................................................................................................7
1.1 Symbols used in the text and their meaning..................................................................................7
1.2 Qualicationofpersonnel .........................................................................................................10
1.3 Intended use of instrument........................................................................................................11
1.4 Instrument type ........................................................................................................................11
2. Safety...................................................................................................................... 12
2.1 Safety Notes.............................................................................................................................12
2.2 Warnings..................................................................................................................................13
2.3 Safety devices ..........................................................................................................................13
2.3.1 Locking/unlocking the handwheel..............................................................................................14
2.3.2 Safety guard .............................................................................................................................15
2.4 Operating Conditions ................................................................................................................15
2.5 Operating the instrument...........................................................................................................16
2.6 Cleaning and disinfection..........................................................................................................16
2.7 Removing the microtome...........................................................................................................17
2.8 Maintenance.............................................................................................................................17
3. Technical Data .......................................................................................................... 19
4. Installing the Instrument............................................................................................. 22
4.1 Installation site requirements ....................................................................................................22
4.2 Unpacking instructions for the Leica CM1860/CM1860 UV cryostat ............................................23
4.3 Standard delivery - packing list ..................................................................................................26
4.4 Installing the handwheel............................................................................................................27
5. Instrument Setup....................................................................................................... 28
5.1 Electrical connection.................................................................................................................28
5.2 Preparations for starting up the instrument ................................................................................28
5.3 General overview of the Leica CM1860/CM1860 UV....................................................................30
5.4 Power switch and circuit breaker ...............................................................................................32
5.5 Switching on the instrument ......................................................................................................32
6. Operating the Instrument............................................................................................ 33
6.1 Control panel 1 .........................................................................................................................33
6.2 Conguringthedesiredvalues...................................................................................................35
6.2.1 Setting the time ........................................................................................................................35
6.2.2 Setting the automatic defrost time (cryochamber)......................................................................36
6.2.3 Programming the temperature of the cryochamber .....................................................................36
6.2.4 Activating the Peltier element....................................................................................................37
6.2.5 Manual defrosting of the quick freeze shelf................................................................................38
6.2.6 Manual defrosting of the cryochamber.......................................................................................38
6.2.7 Setting the section thickness.....................................................................................................39
6.3 Retraction.................................................................................................................................40
6.4 Display lock..............................................................................................................................40
6.5 Control panel 2 – Electric coarse feed........................................................................................41

5
Leica CM1860/CM1860 UV
Table of contents
7. Daily Use of the Instrument ......................................................................................... 42
7.1 The sectioning process ............................................................................................................42
7.2 Specimen freezing ....................................................................................................................42
7.2.1 Quick-freeze shelf.....................................................................................................................43
7.3 Specimen discs ........................................................................................................................44
7.3.1 Inserting the specimen discs into the specimen head .................................................................44
7.3.2 Specimen orientation ................................................................................................................44
7.4 Sectioning ................................................................................................................................45
7.4.1 Inserting the blade/knife holder base.........................................................................................45
7.4.2 Clearance angle adjustment ......................................................................................................46
7.4.3 Premium blade holder ...............................................................................................................47
7.4.4 Blade holder CE ........................................................................................................................47
7.4.5 Blade holder CE-TC ...................................................................................................................53
7.4.6 Knife holder CN.........................................................................................................................54
7.4.7 Cleaning the blade and knife holders..........................................................................................58
7.5 Temperature selection chart (in minus °C)..................................................................................61
7.6 Defrosting ................................................................................................................................62
7.6.1 Automatic defrosting of the cryochamber ..................................................................................62
7.6.2 Manual defrosting of the cryochamber.......................................................................................62
7.6.3 Manual defrosting of the quick freeze shelf................................................................................63
7.7 Ending work..............................................................................................................................63
7.7.1 Finishing the daily routine..........................................................................................................63
7.7.2 Switching off the instrument for a longer period .........................................................................64
8. Troubleshooting........................................................................................................ 65
8.1 Error messages in the display....................................................................................................65
8.2 Temperature control button .......................................................................................................66
8.3 Possible sources of error, causes and remedies .........................................................................67
8.3.1 Changing the battery.................................................................................................................70
9. Cleaning, Disinfection, Maintenance............................................................................. 71
9.1 Cleaning...................................................................................................................................71
9.2 Disinfection at room temperature...............................................................................................71
9.3 Maintenance.............................................................................................................................72
9.3.1 General maintenance instructions..............................................................................................72
9.3.2 Replacing the fuses ..................................................................................................................74
9.3.3 Replacement of the UVC lamp ...................................................................................................75
9.3.4 Replacing the LED illumination ..................................................................................................78

6Version 2.0, Revision N
Table of contents
10. Ordering Information, Components and Consumables...................................................... 79
10.1 Ordering information.................................................................................................................79
10.2 Mobile heat extractor - application........................................................................................... 102
10.3 Cold extraction - using the Thermal block................................................................................. 103
10.4 Stationary heat extractor (optional) - application ...................................................................... 104
10.5 Installing the shelf (movable) (optional)................................................................................... 104
11. Warranty and Service ............................................................................................... 105
12. DecontaminationCerticate...................................................................................... 106

7
Leica CM1860/CM1860 UV
Important Information 1
1. Important Information
1.1 Symbols used in the text and their meaning
Warning
Leica Biosystems Nussloch GmbH assumes no liability for consequential loss or damage due to failure
to observe the following instructions, particularly in relation to transportation and package handling,
and failure to observe the instructions for handling the instrument carefully.
Symbol: Title of the symbol: Hazard warning
Description: Warningsaredisplayedinawhiteeldwithanorange
title bar and are marked by a warning triangle.
Symbol: Title of the symbol: Note
Description: Notes, i.e. important information for the user,
aredisplayedinawhiteeldwithabluetitlebar
andaremarkedbyanoticationsymbol.
Symbol: Title of the symbol: UV-C
Description: Caution – UVC radiation!
Symbol: Title of the symbol: Item number
→"Fig. 7 - 1"Description: Item numbers for numbering illustrations. Numbers
inredrefertoitemnumbersinillustrations.
Symbol: Title of the symbol: Buttons and switches on the instrument
Power switch Description: Buttons and switches on the instrument that are
supposed to be pressed by the user in various
situations are displayed as bold, gray text.
Symbol: Title of the symbol: Function key
Save Description: Software symbols that have to be pressed on the
display or information that is output on the display are
displayed as bold, gray text.
Symbol: Title of the symbol: Notice
Description: Indicates the need for the user to consult the
Instructions for Use for important cautionary
information such as warnings and precautions that
cannot, for a variety of reasons, be presented on the
medical device itself.
Symbol: Title of the symbol: Manufacturer
Description: Indicates the manufacturer of the medical device.

8Version 2.0, Revision N
Important Information
1
Symbol: Title of the symbol: Date of Manufacture
Description: Indicates the date when the medical device was
manufactured.
Symbol: Title of the symbol: CE Compliance
Description: The CE marking is the manufacturer's declaration that
the medical device meets the requirements of the
applicable EC directives.
Symbol: Title of the symbol: In vitro diagnostic medical device
Description: Indicates a medical device that is intended to be used
as an in vitro diagnostic medical device.
Symbol: Title of the symbol: China RoHS
Description: Environmental protection symbol of the China RoHS
directive. The number in the symbol indicates the
"Environment-friendly Use Period" of the product in
years. The symbol is used if a substance restricted
in China is used in excess of the maximum permitted
limit.
Symbol: Title of the symbol CSA test symbol (USA/Canada)
Description: The CSA test symbol means that a product has
beentestedandfulllstheapplicablesafetyand/
or performance standards, including the relevant
standardsdenedoradministeredbytheAmerican
National Standards Institute (ANSI), Underwriters
Laboratories (UL), the Canadian Standards
Association (CSA), the National Sanitation Foundation
International (NSF) and others.
Symbol: Title of the symbol: WEEE symbol
Description: The WEEE symbol, indicating the separated
collection of electrical and electronic equipment
wastes, consists of the crossed-out wheeled bin
(§7ElektroG).
Symbol: Title of the symbol: Alternating current
Symbol: Title of the symbol: Article number
Description: Indicates the manufacturer's catalog number so that
themedicaldevicecanbeidentied.
Symbol: Title of the symbol: Serial number
Description: Indicates the manufacturer's serial number so that a
specicmedicaldevicecanbeidentied.

9
Leica CM1860/CM1860 UV
Important Information 1
Symbol: Title of the symbol: Consult Instructions for Use
Description: Indicates the need for the user to consult the
Instructions for Use.
Symbol: Title of the symbol: Flammable liquid
Description: Package labeling in accordance with German
Hazardous Freight Ordinance Road and Rail (GGVSE)/
European Agreement concerning the International
Carriage of Dangerous Goods by Road (ADR) for
transporting hazardous goods.
Class 3: FLAMMABLE LIQUID.
Symbol: Title of the symbol: Flammable freezing sprays prohibited
Description: Thissymbolalertstheuserthattheuseofammable
freezing sprays in the cryostat chamber is prohibited
due to explosion hazard.
Symbol: Title of the symbol: IPPC symbol
Description: The IPPC symbol includes:
IPPC symbol
• Country code in accordance with ISO 3166,
e.g. DE for Germany
• Regionalidentier,e.g.HEforHessen
• Producer/treatment provider code, uniquely
assigned number starting with 49
• Treatment method, e.g. HT (heat treatment)
Symbol: Title of the symbol: Stack limit
Description: Stacking of the transport packages is not allowed and
no load should be placed on the transport packages.
Symbol: Title of the symbol: Fragile, handle with care
Description: Indicates a medical device that can be broken or
damaged if not handled carefully.
Symbol: Title of the symbol: Store dry
Description: Indicates a medical device that needs to be protected
from moisture.
Symbol: Title of the symbol: Upper
Description: Indicates the correct upright position of the package.

10 Version 2.0, Revision N
Important Information
1
Symbol: Title of the symbol: Temperature limit for transport
Description: Indicates the temperature limits for transport to which
the medical device can be safely exposed.
Symbol: Title of the symbol: Temperature limit for storage
Description: Indicates the temperature limits for storage to which
the medical device can be safely exposed.
Appearance: Indication: Tilt indicator
Description: Indicator to monitor whether the shipment has been
transported and stored in upright position according
to your requirements. With a pitch of 60° or more,
thebluequartzsandowsintothearrow-shaped
indicator window and sticks there permanently.
Improper handling of the shipment is immediately
detectableandcanbeprovendenitively.
1.2 Qualicationofpersonnel
The Leica CM1860/CM1860 UV may only be operated by trained laboratory personnel. Prior to operating
the instrument, the operator must carefully read and understand these Instructions for Use and must
familiarize him/herself with all technical details of the instrument. The instrument is intended for
professional use only.

11
Leica CM1860/CM1860 UV
Important Information 1
1.3 Intended use of instrument
The Leica CM1860/CM1860 UV is a high-performance cryostat with disinfection system (CM1860 UV
only)forroutineandresearchapplicationsintheeldsofbiology,medicineandindustry.Theinstrument
is used to freeze and section specimen material quickly for diagnosis. The instrument is not designed
for the storage of specimen material. The instrument may only be operated within the scope of its
designated use as described above and as per the instructions given in these Instructions for Use. The
Leica CM1860/CM1860 UV is suitable for in-vitro diagnostics (IVD).
Any other use of the instrument is considered improper.
1.4 Instrument type
All information contained in these Instructions for Use applies exclusively to the instrument type
indicated on the title page. A nameplate bearing the instrument serial number (SN) is attached to the
back of the instrument.
These Instructions for Use include important instructions and information related to the operating safety
and maintenance of the instrument. The Instructions for Use are an important part of the product, and
must be read carefully prior to startup and use and must always be kept near the instrument.
If additional requirements on accident prevention and environmental protection apply in the country
of operation, these Instructions for Use must be supplemented by appropriate instructions to ensure
compliance with such requirements.
Proper and intended use includes the observance of all instructions in the Instructions for Use and
compliance with all inspection and maintenance instructions.

12 Version 2.0, Revision N
Safety
2
2. Safety
2.1 Safety Notes
Warning
The safety and caution notes in this chapter must be observed at all times. Be sure to read these notes
even if you are already familiar with the operation and use of other Leica products.
These Instructions for Use include important instructions and information related to the operating safety
and maintenance of the instrument.
The Instructions for Use are an important part of the product, must be read carefully prior to startup and
use and must always be kept near the instrument.
This instrument has been built and tested in accordance with the safety requirements for electrical
equipment for measurement, control and laboratory use.
Residual risks
The instrument has been designed and constructed with the latest state-of-the-art technology and
according to recognized standards and regulations with regard to safety technology. Operating or
handling the instrument incorrectly can place the user or other personnel at risk of injury or can cause
damage to the instrument or other property. The machine may be used only as intended and only if all
of its safety features are in proper working condition. Malfunctions that impair safety must be remedied
immediately.
To maintain this condition and ensure safe operation, the user must observe all notes and warnings
contained in these Instructions for Use.
Only original spare parts and permitted original accessories may be used.
Note
These Instructions for Use must be appropriately supplemented as required by the existing regulations
on accident prevention and environmental safety in the operator's country.
Theinstrument'sECDeclarationofConformityandup-to-datecerticatesofUVCdisinfectioncanbe
found on the Internet at:
http://www.LeicaBiosystems.com
Warning
• Theprotectivedevicesonbothinstrumentandcomponentsmustneitherberemovednormodied.
OnlyservicepersonnelqualiedbyLeicamayrepairtheinstrumentandaccesstheinstrument's
internal components.
• Duetoexplosionhazard,theuseofammablefreezingspraysinsidethecryostatchamber,while
the instrument is turned on, is prohibited.

13
Leica CM1860/CM1860 UV
Safety 2
2.2 Warnings
The safety devices installed in this instrument by the manufacturer only constitute the basis for accident
prevention. Operating the instrument safely is, above all, the responsibility of the owner, as well as the
designated personnel who operate, service or repair the instrument.
To ensure trouble-free operation of the instrument, make sure to comply with the following instructions
and warnings.
2.3 Safety devices
The instrument is equipped with the following safety devices: Handwheel lock and safety guard on the
knife holder.
Warning
CM1860 UV only: To prevent adverse health effects from UVC radiation, the UVC disinfection cycle can
be started only after the sliding window has been properly closed. Closing the window activates the
corresponding safety features.
The consistent use of these safety features and strict observation of the warnings and cautions in these
Instructions for Use will safeguard the operator by and large from accidents and/or personal injury.
Personal safety precautions
Warning
When working with cryostats, personal safety precautions must always be taken. The wearing of work
safety shoes, safety gloves, laboratory coat, mask and safety goggles is mandatory.
Chemical disinfection and UVC radiation can never be used as a substitute for manual protection in
accordance with laboratory regulations.
UVC disinfection is effective when disinfecting surfaces and air within the irradiated working area of
theLeicaCM1850UV,CM1860UVandCM1950cryostatsat–20 °C(Table1,seeI.Maiercerticate).
For powerful disinfection, we recommend irradiation for three hours (CM1850 UV/CM1860 UV/
CM1950). Vegetative bacteria including Mycobacterium tuberculosis, bacterial endospores (Bacillus
sp.) and fungi are killed during this time. Viruses including such resistant species as hepatitis are also
inactivateduptoatleast4log10units(99.99 %).
Medium disinfection can be attained through short irradiation for 30 minutes (CM1850 UV/CM1860
UV/CM1950). This reduces vegetative bacteria including Mycobacterium tuberculosis and sensitive
virusessuchastheinuenzaAvirus(alsoincludingthehighlypathogenicavianinuenzavirus
H5N1)andpoliovirusbyatleast5log10units(99.999 %).UVCirradiationwithintheworkingareaof
thecryostatscanprovidereliableandecientdisinfectionofsurfacesandtheairandsignicantly
reduces the risk of infection.
We recommend wiping off visible contamination in the cryostat with an alcohol-based disinfectant
prior to using the UVC lamp. The germicidal effect of the irradiation is restricted to the directly
irradiated areas, which is why UVC irradiation cannot be a replacement for regular chemical
disinfection of the cryostat chamber.

14 Version 2.0, Revision N
Safety
2
Note
Forcurrentinformationaboutcerticatesandrecommendations,visit:
http://www.LeicaBiosystems.com
2.3.1 Locking/unlocking the handwheel
Warning
Rotate the handwheel only if the cryostat is cooled and the cryochamber is cold.
Warning
Always lock the handwheel prior to manipulating the knife and specimen, changing the specimen or
taking a break.
To lock the handwheel, move its handle to the 12 o'clock (→Fig. 1-1) or 6 o'clock (→Fig. 1-2) position.
Press the lever (→Fig. 2-1)fully outward; gently rock the handwheel back and forth until the locking
mechanism clicks into place noticeably.
To release the handwheel, press the lever (→Fig. 2-2)on the handwheel towards the cryostat housing.
Fig. 1
1
2
Fig. 2
1
2

15
Leica CM1860/CM1860 UV
Safety 2
2.3.2 Safety guard
Warning
Prior to manipulating the knife and specimen, changing the specimen or taking a break, always lock the
handwheel and cover the cutting edge with the safety guard.
The knife holder CN and the premium blade holder feature safety guards; the glass anti-roll plate of the
CE and CE-TC blade holders also serves as a safety guard.
2.4 Operating Conditions
Transport and installation
• After transporting, do not turn the instrument on for a minimum of 4 hours.
• A waiting period is necessary to allow the compressor oil, which may have been displaced during
transport, to return to its original position. Failure to comply with this may cause damage to the
instrument.
• The instrument may not be operated in hazardous locations!
• To ensure proper functioning of the instrument, it must be set up while maintaining a minimum
distance on all sides from walls and furniture:
- rear: 15 cm
- right: 30 cm
- left: 15 cm.
Electrical connection
• Before connecting the instrument to an AC power outlet, ensure that the AC power of your laboratory
matches the values on the nameplate of the instrument!
• The minimum rated voltage must be maintained during the startup phase of the cooling system - (→
P.19–3.TechnicalData)! The compressor draws a starting current between 45 and 50 A. Therefore,
the electric circuit at the installation site must be inspected by an electrician to ensure that it meets
the requirements for a smooth operation of the instrument. A stable power supply in accordance with
theinstrument'sspecicationsisessentialtoitsproperfunctioning.Failuretocomplywiththeabove
can damage the instrument.
• No additional extension cord may be used.
Defrosting
Warning
The quick freeze shelf can become very hot during the defrosting process! Therefore, do not touch it!

16 Version 2.0, Revision N
Safety
2
2.5 Operating the instrument
• Take care when handling microtome knives and disposable blades. The cutting edge is extremely sharp
and can cause serious injuries!
Warning
We strongly recommend using the safety gloves included in (→P.26–4.3Standarddelivery-
packing list)!
• Before leaving the instrument or taking it out of operation, always remove the knife/blade from the
knife/blade holder and do not leave open knives/blades lying around after removal!
• Never place a knife on a table with the cutting edge facing upward!
• Never try to catch a falling knife/blade!
• Alwaysclampthespecimenrst,thentheknife/blade!
• Before handling the specimen or the knife/blade, changing the specimen or taking a break, lock the
handwheel and ensure that the knife/blade is covered by the safety guard.
• Extended skin contact with the cold parts of the instrument may cause freezer burns!
• To make sure that the condensation water stemming from the defrost cycles drains into the waste
container and to avoid the risk of possible contamination, ensure that the tap of the waste container
(→Fig. 55-1)is open whenever operating the cryostat. Only shut the tap when draining the waste
container!
2.6 Cleaning and disinfection
We strongly recommend defrosting the Leica CM1860/CM1860 UV cryostat completely for approx.
24 hours, 1-2x annually or as needed.
• It is not necessary to remove the microtome for routine disinfection. The CM1860 UV has been
designed for UVC disinfection.
Note
Remove section waste after EVERY change of specimen! Do not start disinfection until you have done
this! Each new specimen is a potential source of contamination. When disinfecting the instrument, take
appropriate protective measures (gloves, mask, protective clothing, etc.).

17
Leica CM1860/CM1860 UV
Safety 2
Warning
• Use only alcohol-based disinfectants for disinfecting the cryochamber.
• Do not use any solvents (xylene, acetone, etc.) for cleaning or disinfection.
• Prior to disinfection with alcohol-based disinfectants, switch off the instrument and unplug the
power plug.
• Whenusingdetergentsanddisinfectants,observethespecicationsoftherespective
manufacturer.
• Risk of explosion when using alcohol: Provide proper ventilation and ensure the instrument is
switched off.
• Risk of icing – Disinfected accessories must be fully dry before reinserting them in the chamber. Do
not switch the instrument back on before the cryochamber is fully dry.
• Dispose of waste liquids from disinfection/cleaning as well as of section waste according to
applicable regulations on disposal of special category waste!
• Refer to (→P.71–9.2Disinfectionatroomtemperature) for information on disinfection at room
temperature.
Aftereachdisinfection,thechambermustbewipedcarefullywithaclothandbrieyventilated!Before
switching on the instrument again, proper ventilation of the chamber shall be ensured.
Note
Please contact Leica Biosystems for further details on adequate disinfection measures.
2.7 Removing the microtome
• The microtome is encapsulated and therefore does not require removal by the user.
2.8 Maintenance
Replacing the fuses
• Turn the instrument off and disconnect the power plug before replacing the fuses.
• Useonlythefusetypesspeciedin(→P.19–3.TechnicalData). Failure to comply with this can
cause severe damage to the instrument and its surroundings!
Replacement of the UVC lamp
Note
Ifbothdisinfectionindicatorlightsareashingalternately,theUVClampmustbereplaced!(→
P.75–9.3.3ReplacementoftheUVClamp)

18 Version 2.0, Revision N
Safety
2
• Turn the instrument off and disconnect the power plug before replacing the
lamp. For further information, refer to (→P.71–9.Cleaning,Disinfection,
Maintenance).
Warning
It is possible to break the UVC lamp during replacement. If this happens, the lamp change must be
completed by Technical Service. If any metallic mercury is released, handle it carefully and dispose of
it properly.

19
Leica CM1860/CM1860 UV
Technical Data 3
3. Technical Data
Note
Operatingtemperaturerange(ambienttemperature):18 °Cto35 °C.Allspecicationsrelatedto
temperatureofthecoolingunitarevalidonlyforanambienttemperatureof22 °Candarelative
humidityofnotmorethan60 %.
Equipmentidentication
Instrument type Model numbers
CM1860 14049146883 14049146884 14049146881,
14049146891
14049146882
CM1860UV 14049146887 14049146888 14049146885,
14049146892
14049146886
Electricalspeciations
Nominal voltage (+10 %) 100 VAC 120 VAC 230 VAC 240 VAC
Nominal frequency 50/60 Hz 60 Hz 50/60 Hz 50/60 Hz
Power consumption 1440 VA 1440 VA 1440 VA 1440 VA
Power supply IEC 60320-1 C-20
Max. start-up current for 5 sec. 45 Aeff. 45 Aeff. 45 Aeff. 45 Aeff.
Mains input fuse (automatic circuit
breaker)
T15A M3 T12A M3 T10A T1 T10A T1
Secondary fuses F2:T1,6AL250 VAC(6.3x32)
F3:T1,0AL250 VAC(6.3x32)
F4:T6.25AL250 VAC(6.3x32)
F5:T4AL250 VAC(6.3x32)
Dimensionsandweightspecication
Overall size of device, without
handwheel (width x depth x
height)
600 x 722 x 1206 mm
Overall size of device, with
handwheel (width x depth x
height)
730 x 722 x 1206 mm
Working height (armrest) 1025 mm
Overall size of packaging (width
x depth x height)
960 x 820 x 1400 mm
Empty weight (without
accessories)
135 kg

20 Version 2.0, Revision N
Technical Data
3
Environmentalspecication
Operating altitude Max. 2000 m above sea level
Operating temperature +18 °Cto+35 °C
Relative humidity (operation) 20to60 %RHnon-condensing
Transport temperature -29 °Cto+55 °C
Storage temperature +5 °Cto+50 °C
Relative humidity
(transport / storage)
10to85 %RHnon-condensing
Minimum distance to walls Back:150 mm
Right:300 mm
Left:150 mm
Emmisions and boundary conditions
Overvoltage category
accordingtoIEC 61010-1
II
Pollution degree
accordingtoIEC 61010-1
2
Means of protection
accordingtoIEC 61010-1
Class 1
Degree of protection
accordingtoIEC 60529
IP20
Heat emission 1440 J/s
A-weighted noise level, measured at
1 mdistance
< 70 dB (A)
EMC class B (FCC Rules part 15)
B (CISPR 11, IEC 61326, CAN ICES-3 (A)/NMB)
Warning
Observe (→P.22–4.1Installationsiterequirements)!
Chamber cooling
Temperature range 0 °Cto-35 °C ±3K,adjustablein 1Kincrements,atambient
temperatureof22 °C
Coolingtimeto-35 °C Max.6 h,atstartingpointandambienttemperatureof22 °Cand
60 %relativehumitity
Max. operating pressure 25 bar
Refrigerant* 315 g,refrigerantR-452A*
Defrosting Hot gas defrosting
Manual defrosting Yes
Automatic defrosting Yes
Programmable Yes (hot gas defrost), selectable time
Defrosting intervals 1 defrost in 24 h or manual hot gas defrost
Defrost duration 12 minutes
Automatic turn-off defrost Atchambertemperatureofmorethan-5 °C
Atevaporatortemperatureofmorethan+38 °C
Other manuals for CM1860
1
This manual suits for next models
1
Table of contents
Other Leica Medical Equipment manuals