Liko Liko HygieneVest 50 Manual

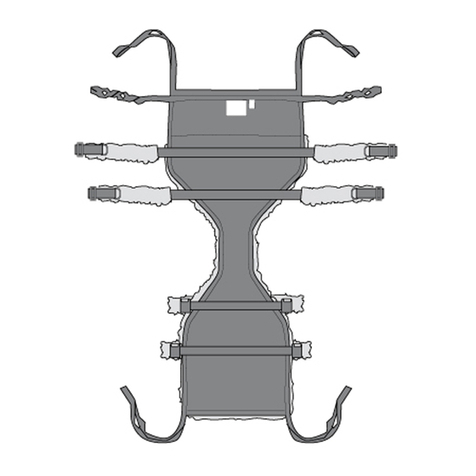
This instruction guide is valid for Liko HygieneVest
and Teddy HygieneVest, but in the following text we
will only use the name Liko HygieneVest.
Liko HygieneVest is designed for safe lifting and
transfer to and from the toilet.
In terms of function and safety, the HygieneVest
offers unique advantages and works well in compli-
cated problem situations where no other alternatives
are appropriate. The HygieneVest has an outer vest
section that surrounds and rmly supports the upper
body during lifting. A generous opening around the
seat leaves much of the lower body free for dressing
and undressing during the actual lifting operation in
connection with visits to the toilet.
Liko HygieneVest is the preferred choice of many
patients because it enables a stable, upright sitting
posture. HygieneVest can also be the best choice for
severely functionally disabled amputees or those who
have problems with spasticity (best choice, Mod. 55).
Even patients with limited torso stability and poor
muscle tone can usually manage lifts with the
HygieneVest, and they nd it secure and comfortable.
The HygieneVest is intended for sit-to-sit lifting.
The sitting posture is almost fully upright, which facili-
tates lifts to the toilet and positioning in a wheelchair.
Since the HygieneVest is not placed over the hips, it
is ideal for lifting to and from custom-moulded seats
and close-tting wheelchairs.
Liko HygieneVest in sizes XXS and XS are made of a
Teddy bear patterned polyester fabric and this is why
these slings are called Teddy HygieneVest. In these
sizes, the leg supports are reinforced and padded
with a teddy bear patterned polyester fabric. Slings
in sizes S to XXXL are made of green polyester and
the leg supports are reinforced and padded with a
curduroy fabric.
These material combinations apply to the same sizes
in model 55.
Liko HygieneVest HighBack, Mod 55/
Teddy HygieneVest HighBack, Mod. 55
Liko HygieneVest with HighBack is the right choice
for those who need support to prevent the head from
tilting back. For patients who have problems with
spasticity, try Model 55.
Mod. 50 Mod. 55
Product Description
Liko HygieneVest™, Mod. 50, 55
Teddy HygieneVest™, Mod. 50, 55
Instruction Guide
English
7EN160167-03
”Caution!” triangles are used to warn of situations that demand extra care and attention.
In this document, the person being lifted is referred to as the ”patient” and the person helping them is referred to
as the ”caregiver”.
Before using lifts and lifting accessories, read the instructions for both the sling and the lift that will
be used. Instruction guides can be downloaded, free of charge, at www.liko.com.

2 w w w . l i k o . comLiko HygieneVest • 7EN160167-02
Transfer from wheelchair to toilet
Place the vest around the patient, with
the product label facing out. Put the
arms through the shoulder straps.
Draw the right loop strap through
the left D-ring. Draw the left loop
strap through the right D-ring.
Position the leg supports under
the patient’s thighs and cross
the leg support loops.
Connect the loop straps to the
sling bar at the appropriate loop;
see page 4.
Finally, connect the shoulder
straps to the sling bar.
Connect the crossed leg support
loops to the sling bar. There are two
alternatives, see page 4.
Prepare to undress the patient by undoing buttons and zippers.
Before lifting, remember the following!
• The need for one or more caregivers must be determined
from case to case.
• For safety and hygiene reasons, use individual slings.
• Plan the lift carefully to ensure that it is performed as safely
and conveniently as possible.
• Before lifting, check that the lifting accessory hangs vertically
and can move freely.
• Although Liko’s sling bars are equipped with latches,
particular care must be taken. Before the patient is lifted from
the underlying surface, but after the straps have been fully
extended, make sure the straps are properly hooked to the
sling bar.
• Never lift a patient higher above the underlying surface than
is necessary for the lifting and transfer procedure.
• Check to ensure that the patient is sitting securely in the sling
before starting the transfer.
• Never leave a patient unattended during a lifting situation.
• Make sure the wheels on the wheelchair, bed, gurney, etc.
are locked during the lifting/transfer operation.
• Always work ergonomically.
Important!
The HygieneVest is intended for sit-to-sit transfers. If it is used for lifting from a horizontal position, the
shoulder straps will wear out faster.
The shoulder straps should always be connected last to the sling bar.
Liko HygieneVest
1. Laths
2. Head support
3. Product label
4. Serial number
5. Label: Periodic inspection
6. Label: Individual marking
(Belongs to)
7. Size marking
8. Shoulder strap
9. Metal D-rings
10. Leg support
11. Lower edge
12. Loop strap
13. Leg support loop
mod. 55
mod. 50
2
1
4
6 7
8
9
10
5
3
11
12
13
4
678
9
10
5
3
11
12
13

3 w w w . l i k o . comLiko HygieneVest • 7EN160167-02
Return transfer from toilet to wheelchair
Described below are two ways of dressing the patient after a toilet visit. The most appropriate alternative depends
on the patient’s condition and type of clothing.
Draw the pants up as close to
the crotch as possible.
Position the leg supports under
the thighs but outside the pants.
Connect all loop straps (see
page 2). Lift.
If needed, place an incontinence
pad inside the pants before you
draw them over the hips. Transfer
the patient and lower him/her into
the wheelchair.
Connect all loop straps (see
page 2). Lift. An incontinence
pad can be placed inside the
crossed leg supports.
Pull the pants up over the hips
and leg supports while the patient
is sitting in the sling. Transfer the
patient to the wheelchair.
Disconnect the strap loops.
Carefully work the leg supports
out of the pants and remove the
HygieneVest.
Carefully raise the lift. Make sure the pressure is
comfortably distributed around the upper body.
If not, lower the sling and make the appropriate
adjustments. See page 4.
Pull the clothing down as far as possible and lower
the patient to the toilet. Disconnect the leg supports
and lower the clothing further. The vest section can
remain around the upper body for support.
In some cases, it may be easiest to leave the leg
supports connected during visits to the toilet (applies
mainly to female patients).
Alternative 1: Leg supports outside the garments. Appropriate for patients with non-elastic pants.
Alternative 2: Leg supports inside – pants outside. This method is appropriate for patients with elastic pants.

4 w w w . l i k o . comLiko HygieneVest • 7EN160167-02
Adjusting the loop straps
The tension of the vest around the chest is determined by which loop you attach to the sling bar. By test lifting
using different loops together with the shoulder straps, you can determine which position gives the right degree of
tension.
If the vest slides up - try an inner loop or a smaller sized vest.
If the vest is too tight around the chest - try an outer loop or a larger sized vest.
For a slender person, you would need to use an inner loop and for a heavier person, you would need to use an
outer loop if both were using the same size of vest.
When loop straps are properly adjusted, the shoulder straps and loop straps are equally taut during lifting.
Testing loop strap adjustments
Stand behind the patient and hang the shoulder
straps and loop straps on your thumbs. Lift until the
straps are fully suspended. If properly adjusted, the
shoulder straps and loop straps will be equally taut.
Too small. The gap is too wide and the loop straps are
shorter than the shoulder straps when suspended.
Too large. The metal D-rings meet and the vest
cannot be tightened enough with the loop straps.
Adjusting the leg supports
Generally, the leg supports are adjusted according to
the height of the patient. For a shorter person, attach
the leg supports’ inner loops to the sling bar. This
usually enables a more reclined sitting position.
Try different alternatives until you nd the best one.
Helpful hint: Instead of connecting the inner loop,
try knotting the leg support loops.
Gives an upright sitting
position. Suitable for
most patients.
Suitable for shorter
patients.
Selecting the right size
Check the size of the gap between the front edges of the vest when it is closed. The gap varies depending on the
size of the vest, but it should be between 5 and 30 cm (2-12 inch.). The larger the size, the wider the gap can be.
It is essential that the HygieneVest’s width is correct in relation to the girth of the patient’s upper body. Distribution
of pressure around the chest varies according to sling bar width. Try different variations.
Loop Clips
This practical accessory is used to mark the loops
that have been tried out for a certain person.
It makes it easier for the caregivers to choose the
right loop to attach to the sling bar.
Fitting instructions

5 w w w . l i k o . comLiko HygieneVest • 7EN160167-02
Correct positioning of leg
supports for most patients.
For patients with good muscle tone,
it may be better to place the leg
supports closest to the knee.
If the patient sinks down in the
sling and is uncomfortable, the
leg supports should be placed
closer to the crotch.
Positioning the leg supports
Padded case Prod. No. 3666021
If you have test tted a HygieneVest on a relatively
slender patient according to the instructions on
page 4, but nd the vest is still too loose, try cros-
sing the loop straps once (above the D-rings), as
illustrated, before attaching the loop straps to
the sling bar.
For some patients, e.g. amputees, it may be helpful
to pull the leg support loops inside the crossed loop
straps, or through the metal D-rings, before attaching
them to the sling bar. This prevents the leg supports
from sliding forward on the legs.
Helpful hints:
How well the patient sits in the sling is determined by where you place the leg supports under the thighs.
For a patient with weak muscles, place the leg supports as close to the crotch as possible so he/she does not
sink down in the sling.
Padded cases are available as an accessory to help
relieve pressure on the front shoulder straps.
Padded cases are equipped with a velcro strip along
one side for easy application.
Accessories
Teddy HygieneVest 3550812 3555812 XXS < 20 kg (< 44 lbs.) 200 kg (440 Ibs.)
Teddy HygieneVest 3550813 3555813 XS 20-40 kg (44-88 lbs.) 200 kg (440 Ibs.)
Liko HygieneVest 3550113 XS 20-40 kg (44-88 lbs.) 200 kg (440 Ibs.)
Liko HygieneVest 3550114 3555114 S 30-60 kg (66-132 lbs.) 200 kg (440 Ibs.)
Liko HygieneVest 3550115 3555115 M 50-80 kg (110-176 lbs.) 200 kg (440 Ibs.)
Liko HygieneVest 3550116 3555116 L 70-100 kg (154-220 lbs.) 200 kg (440 Ibs.)
Liko HygieneVest 3550117 3555117 XL 90-130 kg (198-286 lbs.) 300 kg (660 Ibs.)
Liko HygieneVest 3550118 3555118³ XXL 130- kg (286- lbs.) 300 kg (660 Ibs.)
Liko HygieneVest 3550119 XXXL 150- kg (330- lbs.) 300 kg (660 Ibs.)
¹ Indicated weights are just guidelines. Deviations may occur.
² For retained maximum load, lift/accessories intended for the same load or more are required.
³ Made to order Sling
Product Prod. No. Prod. No. Size Body weight¹ Maximum load²
Overview, Liko HygieneVest, Mod. 50, 55

Laundering: See the sling´s product label.
Medical technical Class I product
© Copyright Liko AB 2010-09
Code:
1 Recommended
2 Possible
3 Not advisable
4 Inappropriate
Liko HygieneVest has been tested by an accredited test institute and complies with all requirements for MDD Class-I products
and the harmonized standard EN ISO 10535.
Liko's products are constantly being updated and rened. Liko reserve the right to change aspects of the products without
prior notice. Contact your local Liko representative for updated information and advice.
Important!
Lifting and transferring a patient always involves a degree
of risk. Study the instruction guides for both lift systems
and accessories carefully. A complete understanding of the
contents of instruction guides is essential.
Only trained personnel should use the equipment.
Make certain that the lift accessories are appropriate for the
lift you are using and for the lifting situation. Exercise caution
and care when using lift equipment and accessories.
As a caregiver, you are responsible for the patient’s safety.
You must be well informed of the patient’s condition and
ability to manage the lifting situation.
Inspect the sling regularly, especially after laundering.
Check carefully for wear and damage to seams, fabric,
straps and strap loops. Never use damaged accessories!
When in doubt, contact the manufacturer or supplier.
Mini 220
Slim 350
Standard 450
Wide 670
Recommended combinations of Liko
HygieneVest and Liko’s sling bars:
Universal 350
Universal 450
Twinbar 670
Teddy HygieneVest, XXS 50, 55 1 1 1 1 1 3 3 4
HygieneVest/Teddy HygieneVest, XS 50, 55 1 1 1 1 1 3 3 4
HygieneVest, S 50, 55 1 1 1 1 1 3 3 3
HygieneVest, M 50 2 1 1 1 1 3 2 2
HygieneVest, L 50 2 1 1 1 1 3 2 2
HygieneVest, XL 50 3 2 2 1 1 2 2 2
HygieneVest, XXL 50 4 2 2 1 1 2 1 1
HygieneVest, XXXL 50 4 3 3 1 1 2 1 1
HygieneVest High Back, M 55 2 1 1 1 1 3 3 3
HygieneVest High Back, L 55 2 1 1 1 1 3 2 3
HygieneVest High Back, XL 55 2 1 1 1 1 2 2 3
The above table summarizes the recommendations for each size. Different sling bar sizes will result in different
degrees of pressure around the chest. Test various sizes until you nd the most appropriate one.
Combinations with Liko HygieneVest and Cross-bar, Cross-bar 450/670 or Side bars is not appropriate.
www.liko.com
Manufacturer:
Liko AB
SE-975 92 Luleå
Sweden
Expected Life Time
The product has an expected life time of 1-5 years during normal use. Life time varies depending on fabric, use frequency,
washing procedure, and weight carried.
Periodic Inspection
The product must be inspected at least once every 6 months. More frequent inspections might be required if the products are
used or washed more often than normal. See Liko’s protocol Periodic Inspection for the respective product.
Care and Maintenance
Combinations
Combinations of accessories/products other than those recommended by Liko can result in risks for the safety of the patient.
In those cases where another manufacturer recommends Liko’s accessories/products in combination with their or others’
accessories/products, and the combinations are not approved by Liko, that manufacturer assumes the responsibility for that
combination. Liko then refers to the responsible manufacturer’s instruction guides and recommendations concerning usage,
maintenance, cleaning, checking and inspection of the combination in order to full the EN ISO 10535 requirements.
Other Combinations
Universal 600
This manual suits for next models
3
Table of contents
Other Liko Lifting System manuals

Liko
Liko LikoGuard L User manual

Liko
Liko Vest for StandingShell Manual

Liko
Liko Likorall 200 Manual

Liko
Liko Viking M Manual

Liko
Liko Viking S Manual

Liko
Liko Golvo 7000 Series User manual

Liko
Liko Mod 600 IC User manual

Liko
Liko Viking XL 2040003 User manual

Liko
Liko SlingGuard 450 User manual

Liko
Liko Likorall 242 ES User manual
Popular Lifting System manuals by other brands

probst
probst FTZ-I Translation of original operating instructions

EAE
EAE EE-6435V2.B.PD Installation, operation, and parts manual

Palfinger
Palfinger P 370KS DIAGRAMS

Pro-Lift
Pro-Lift F-798 Operating instructions & parts manual

CRH
CRH Leviat Halfen DEHA KKT-E Assembly instructions

Terex
Terex Genie S-80 XC Series Operator's manual